
These sweet apple magnets are the perfect gift for teachers, and you can personalize them with anything from the teacher’s name to teacher-related quotes and more. This project is great for using up those scraps of cardstock and vinyl too!
Supplies Needed:
- Silhouette CAMEO®, Silhouette Portrait®, or Silhouette Curio®
- Silhouette Cutting Mat
- Silhouette Cutting Blade
- Silhouette Studio®
- Glossy Vinyl, White
- Transfer Tape
- Hook Tool
- Scraper Tool
- Magnet Paper, Adhesive
- Cardstock in Various Colors
- Craft Glue
- Design ID #65105
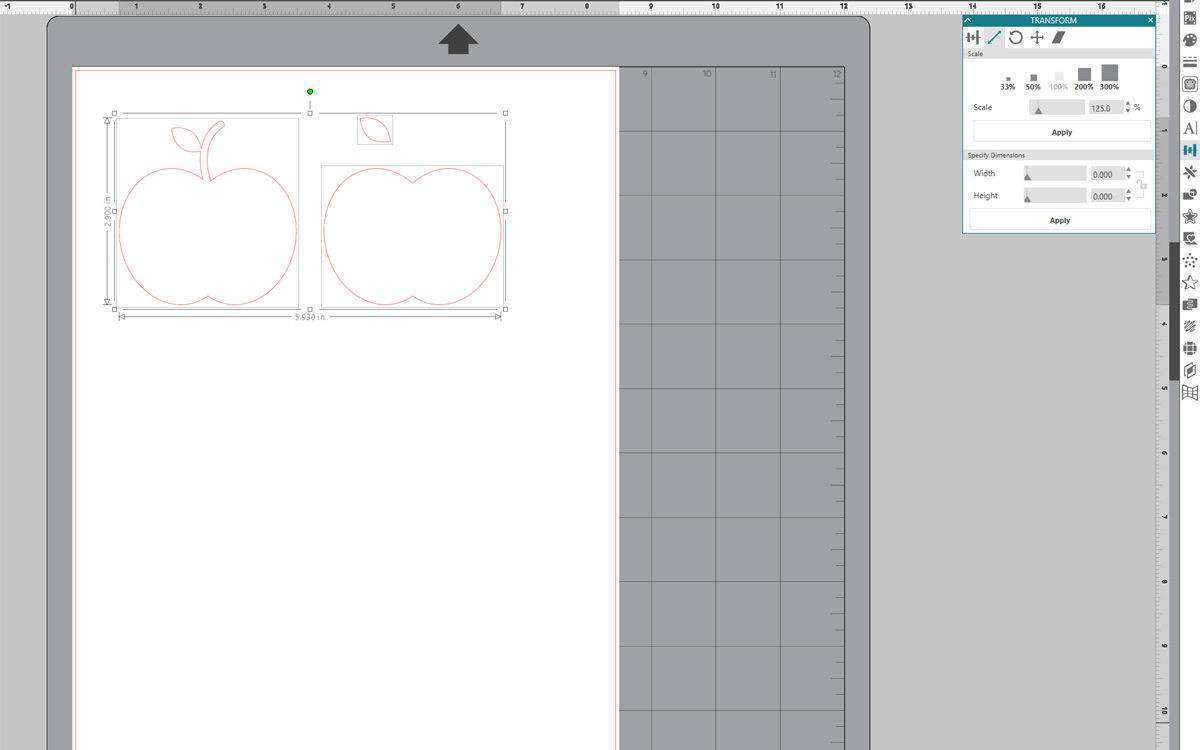
Step One: Open the Cut File and Resize It
- Open the apple cut file and ungroup it (Control or Command + U). Then, open the Transform panel, click on the Resize tab (the diagonal, double-sided arrow icon) and, in the Scale box, type in 125% and press the Apply button.
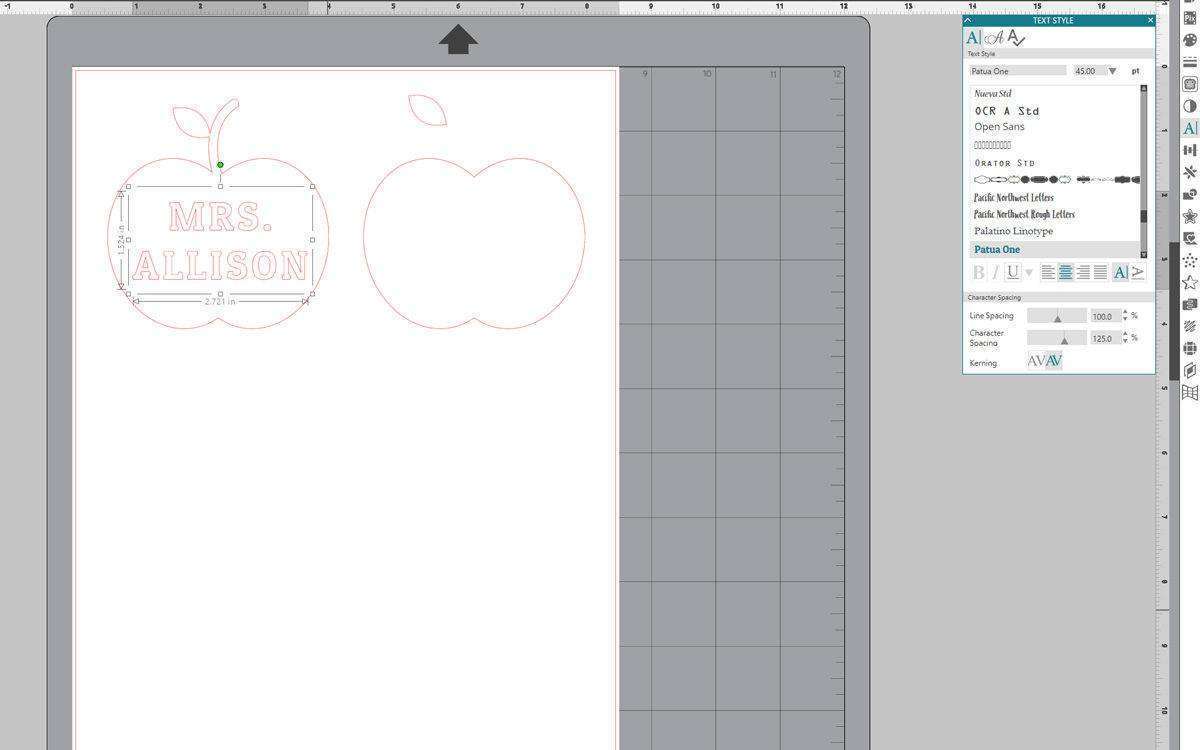
Step Two: Personalize the Designs with Text
- Open the Text Style panel and choose the font that you’d like to use. I’m using a free font called Patua One. The default size of 72 points is a little too large for the design, so I’ll size it down in the Text Style panel for a better fit. I also center aligned the text and changed the Character Spacing to 125%.
- Adjust the font as necessary until it looks how you’d like it to look, and then type out the name(s) or custom messages that you’d like to add to the magnets. Drag the text shapes over the base of the apple to make sure that they’re a good fit and resize, if necessary.
Step Three: Get Ready to Cut
- Copy the apple base piece to a new file. You’ll cut this piece from both cardstock and from adhesive magnet paper. Copy the shape (Control or Command + C) and paste it (Control or Command + V) for as many magnets as you’d like to make.
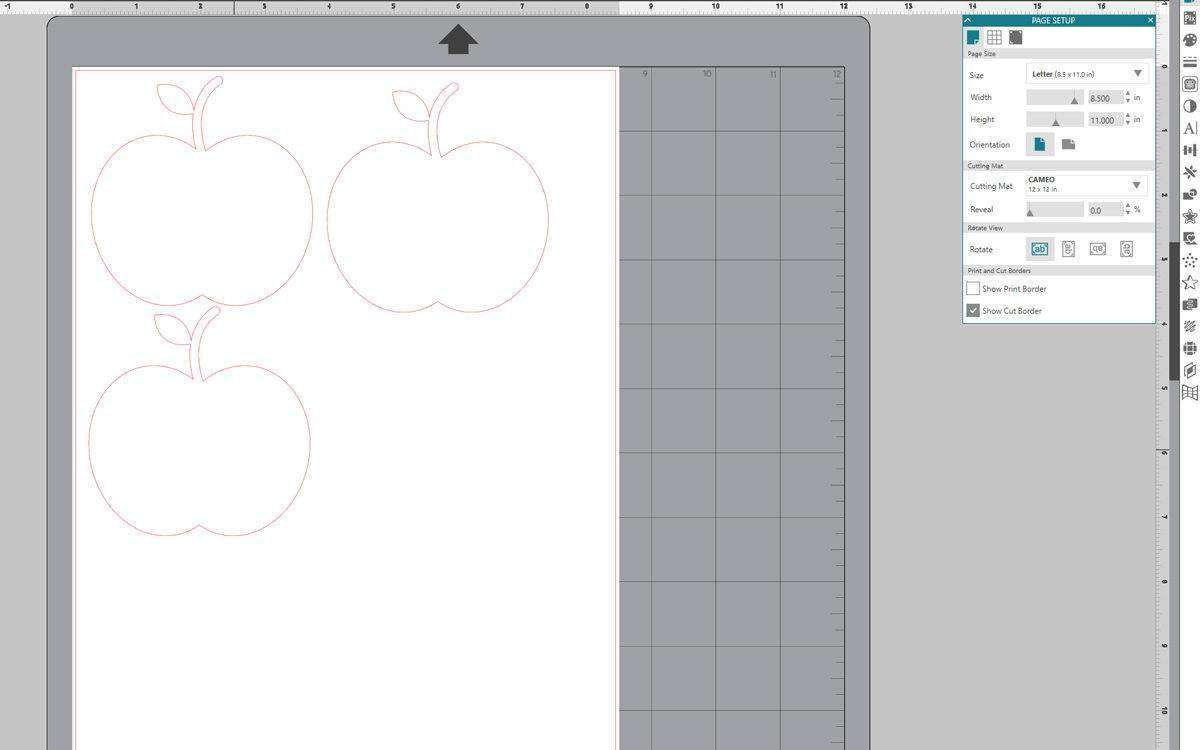
- Copy and paste the other apple pieces for as many magnets as you’d like to make, too.
- Cut the apple pieces from cardstock. Cut the custom names, quotes, and messages from glossy white vinyl, and cut the base pieces a second time from adhesive magnet paper.
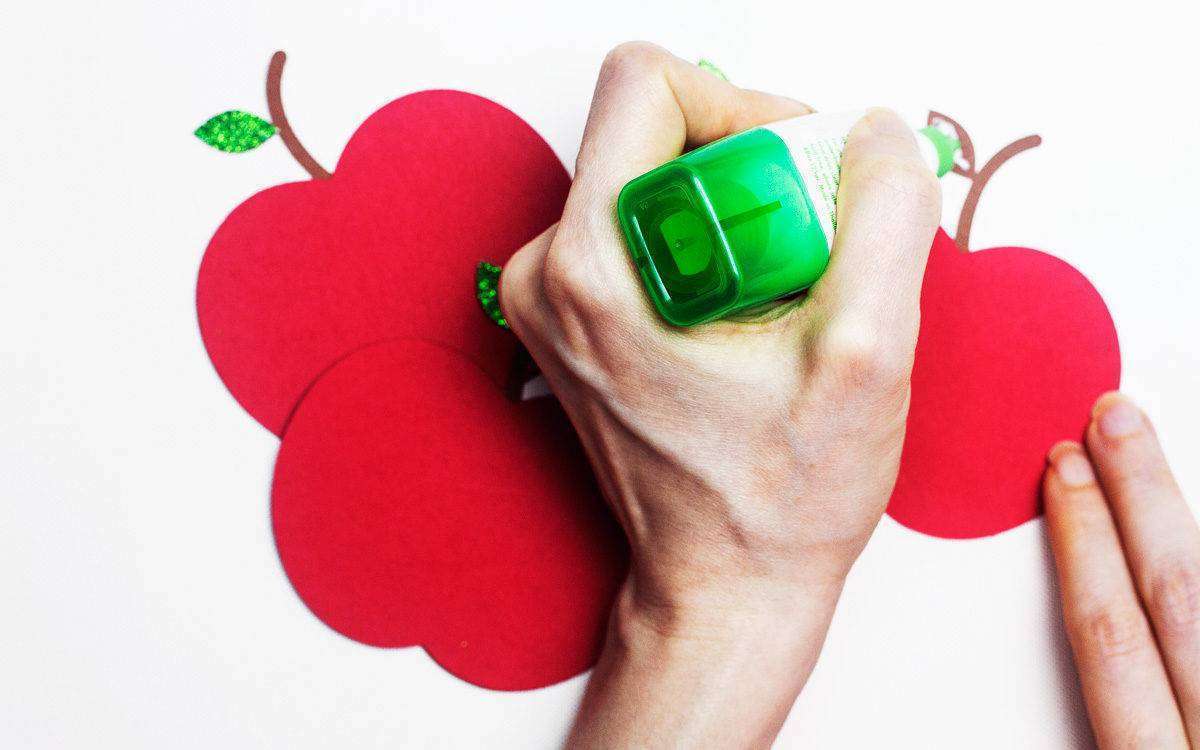
Step Four: Assemble the Apples
- Glue the cardstock apple pieces together using craft glue. I cut the little leaves from green glitter cardstock to add a little bit of sparkle.
Step Five: Apply the Vinyl Text
- Weed the vinyl. Use the hook tool to weed out small pieces, if necessary. Pick up the vinyl text with transfer tape, then center the text over the cardstock apple and press in place to adhere. Use the scraper tool to help adhere the vinyl to the cardstock, if necessary. Remove the transfer tape.

Step Six: Adhere the Apples to the Magnet Paper
- Remove the protective sheet from the Adhesive Magnet Paper, line the cardstock apple up over it, and press in place to adhere the cardstock to the Magnet Paper. And your magnet is finished!