My love for the CAMEO runs deep y’all. The machine is a powerhouse and there isn’t a project out there that wouldn’t benefit from a little CAMEO love. That being said, now that I have the Mint one of my favorite things to do is use the two together to create one of a kind projects. Today I’m going to show you how to quickly throw together cute Halloween party favors for all of those upcoming class parties.
If you’ve never used the Mint before, first check out this post to familiarize yourself with its magic.
What you’ll need:
- Silhouette Mint™
- Silhouette CAMEO®
- Black Mint Ink
- Mint Stamp Sheet Sets (30×30 & 45×90)
- Adhesive Card Stock
- Paper Bags
Designs I used:
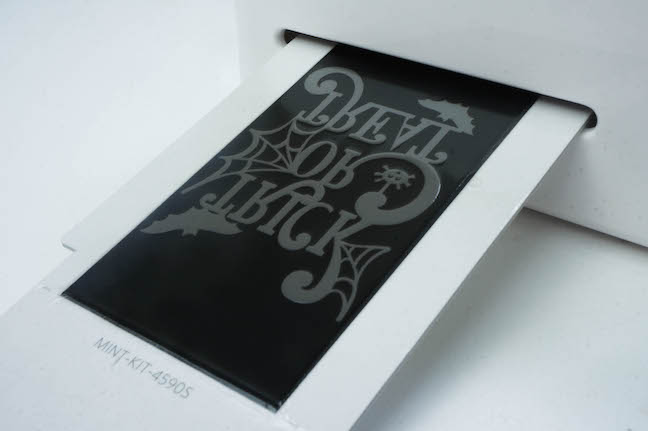
Step One: Mint and ink your stamps
I always make my stamps and ink them first because the longer the ink has to soak in, the more crisp your lines will be. For this project we’ll be making two different stamps. For the trick or treat stamp I used the 45×90 stamp set and for the pumpkin face I used the 30×30. Follow the directions in Mint Studio to create the stamps, if you have any questions you can refer to this post.
While the ink is being fully absorbed, let’s move on to the next step.
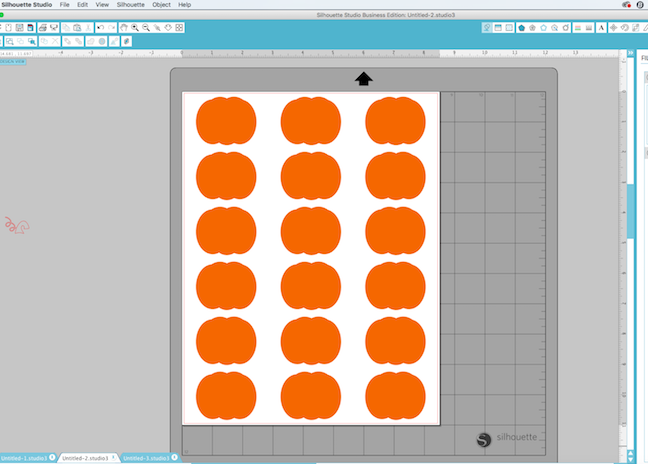
Step Two: Cut Shapes from card stock
The next thing I did was cut my pumpkin shapes out of a sheet of orange adhesive backed card stock. I love this stuff! I rarely ever use regular card stock anymore because it is just SO convenient to have the adhesive already in place.
I measured the width of my stamp with a ruler then adjusted the size of my pumpkin shape in Silhouette Studio so that the face would be centered. For the 30×30 stamp the right size was around 2 inches wide.
Step Three: Stamp Images
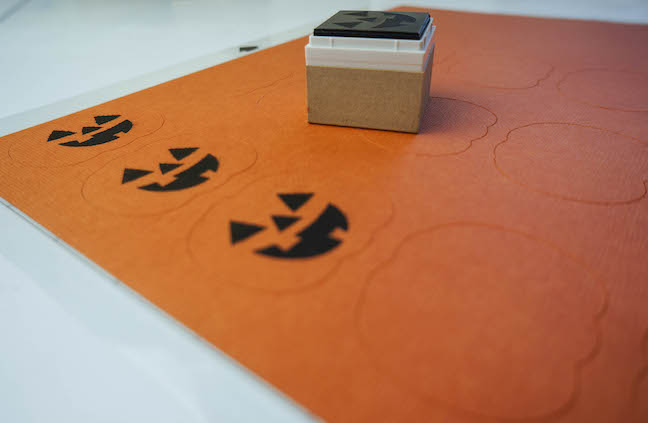
After my pumpkin shapes finished cutting I left them on the cutting mat and stamped the jack-o-lantern face on each one. Another nice feature of the adhesive backed card stock is that the blade doesn’t cut through the backing, it only cuts through the actual card stock so you can easily peel away the negative space and you’re left with nice, cleanly cut stickers.
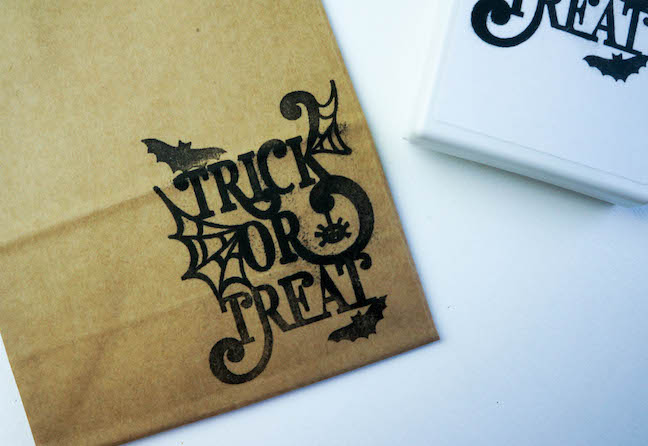
Next I stamped my paper bags with the larger “trick-or-treat” stamp. This is pretty self explanatory.
You can see in my photo that I didn’t stamp my images on my scrap paper enough times to get all of the excess ink off. Since this is a halloween related post, I figured a little extra black ink was fine. Also, kids are going to tear into these so fast, they’ll never notice!
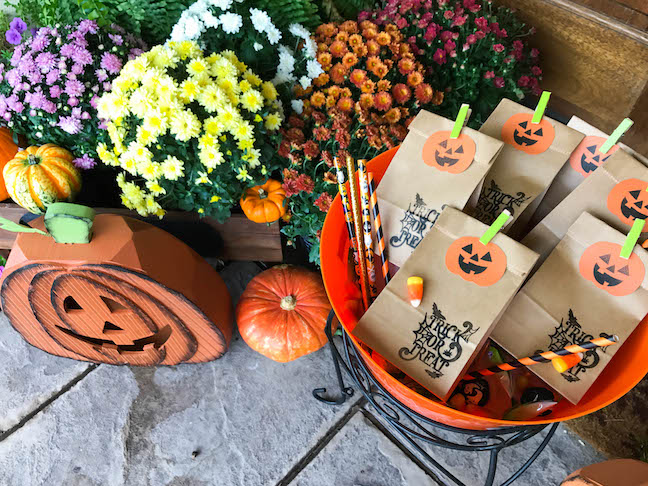
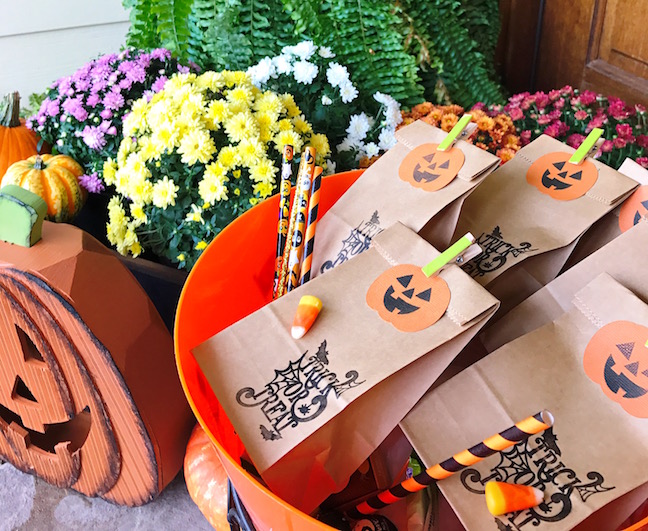
Step Four: Assemble the bags
Now you’re ready to fill up your little bags with candy, stickers, pencils, and whatever else you can find! This may be my favorite part. I love crafting but I also have a mean sweet tooth, so any time I get to play around with the two together, well let’s just say its a good day.

Once you’ve stuffed them to the brim you can fold over the top edge and use your hand stamped pumpkin sticker to seal the bag shut. I added a pop of color by attaching a tiny green clothespin to the top of each bag. It also acts as the stem of the pumpkin and it’s just super cute! If you don’t have green clothespins you can wrap plain ones in green washi tape or simply paint them green.
Whatever you decide to do, these little bags will be adored by kids and parents alike. You’re officially the coolest house on the block. 🙂
Happy Crafting!