
Have you ever used Silhouette’s stencil material before? It’s the perfect pairing with your Silhouette cutting machine because it cuts precisely to give you a perfectly cut template. We made this adorable Christmas sign using the stencil material. If you’d like to see how you can make your own, keep reading!
Supplies Needed:
- Silhouette CAMEO®
- Silhouette Cutting Mat
- Silhouette Cutting Blade
- Silhouette Stencil Material
- Silhouette Transfer Tape
- Metallic Acrylic Paint
- Silhouette Hook Tool
- Wood Frame
- Paint Brush or Sponge
- Mixing Tray
- Design ID #282151
Step One: Cutting Out the Stencil Vinyl
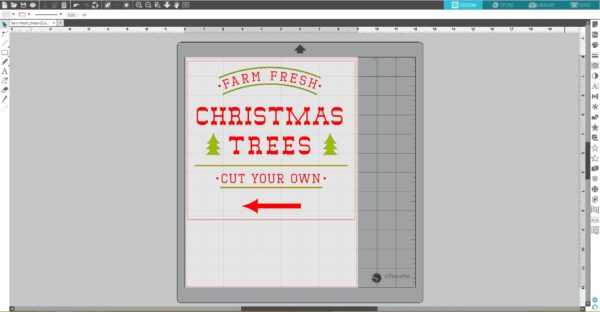
1. Open the Farm Fresh Christmas Trees design (Design ID #282151) in Silhouette Studio®. Resize it so that it will fit on your sign and your size of stencil material. Remember that you are using the stencil material as a template, so you might want to draw a rectangle or a square around your design to make it easier to weed out the design and leave the negative space.
2. Place a piece of the stencil material on the cutting mat in the same spots you placed the designs on the working space in Silhouette Studio®. Make sure the pieces of stencil vinyl are not smaller than your designs. Adjust the rollers if needed and feed the cutting mat into the machine.

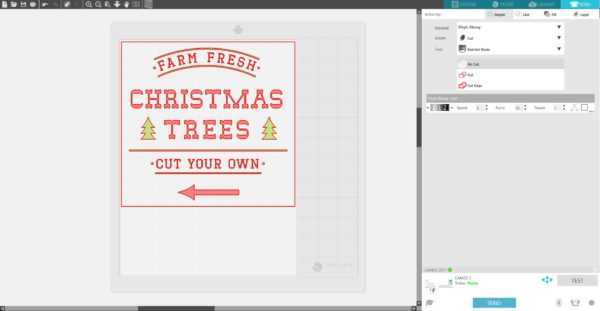
3. Under the Send panel, select “Vinyl, Glossy” as your material type. Adjust the blade if necessary, and click Send.
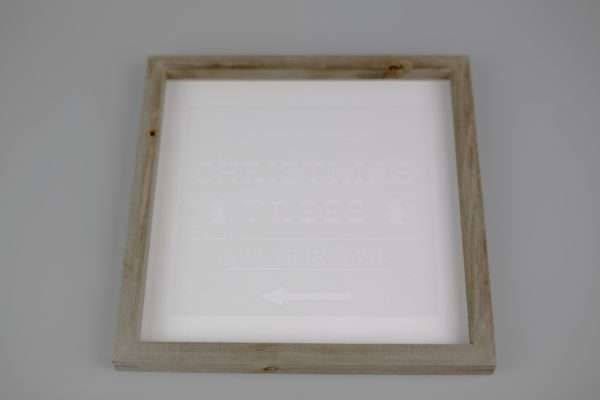
4. Weed the design, but don’t weed the negative space like you normally would. Remember, you are making a stencil to apply your design, so you need to weed away the actual design. Also, keep the centers of the letters.

5. Apply transfer tape on the weeded stencil material and remove it from its backing.

6. Place the vinyl on your project.
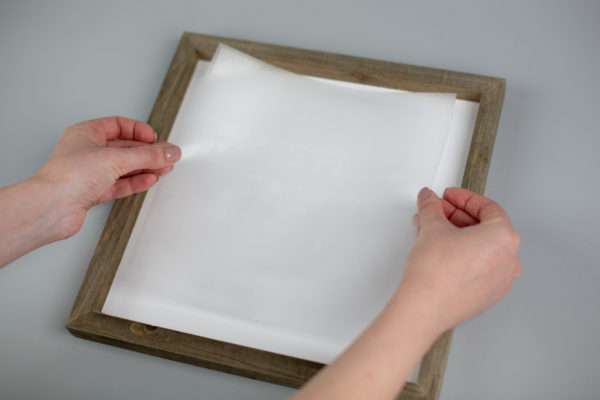
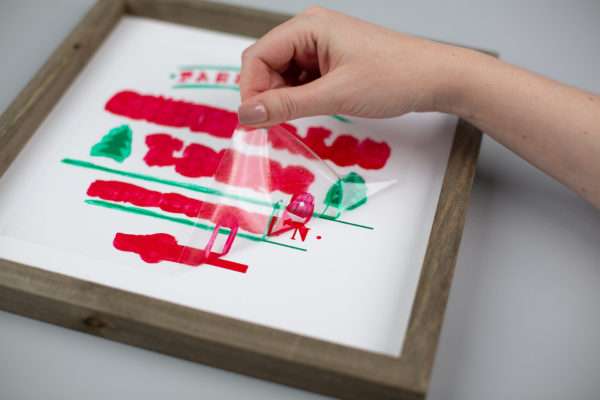
7. Press down firmly and carefully remove the transfer tape.
Step Two: Applying the Paint
1. Use a paint brush or sponge to apply the paint. When you are applying paint, be careful and not go over the stencil borders. Let the paint dry.

2. Remove the stencil vinyl.
Now our Christmas sign is ready!
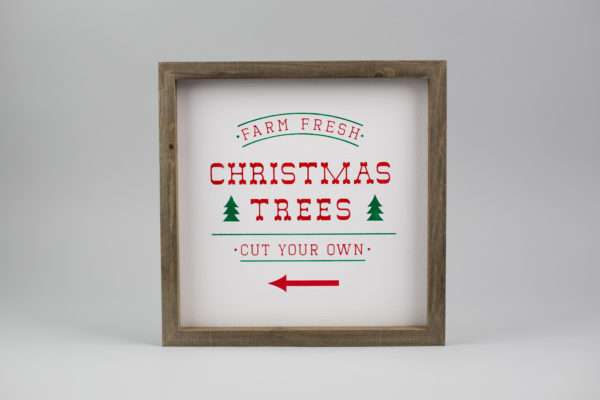
This is such a great piece to display in your home, and your friends and family members will all be wanting one of their own!
Mose Mackins
December 18, 2018
very good submit, i definitely love this web site, keep on it