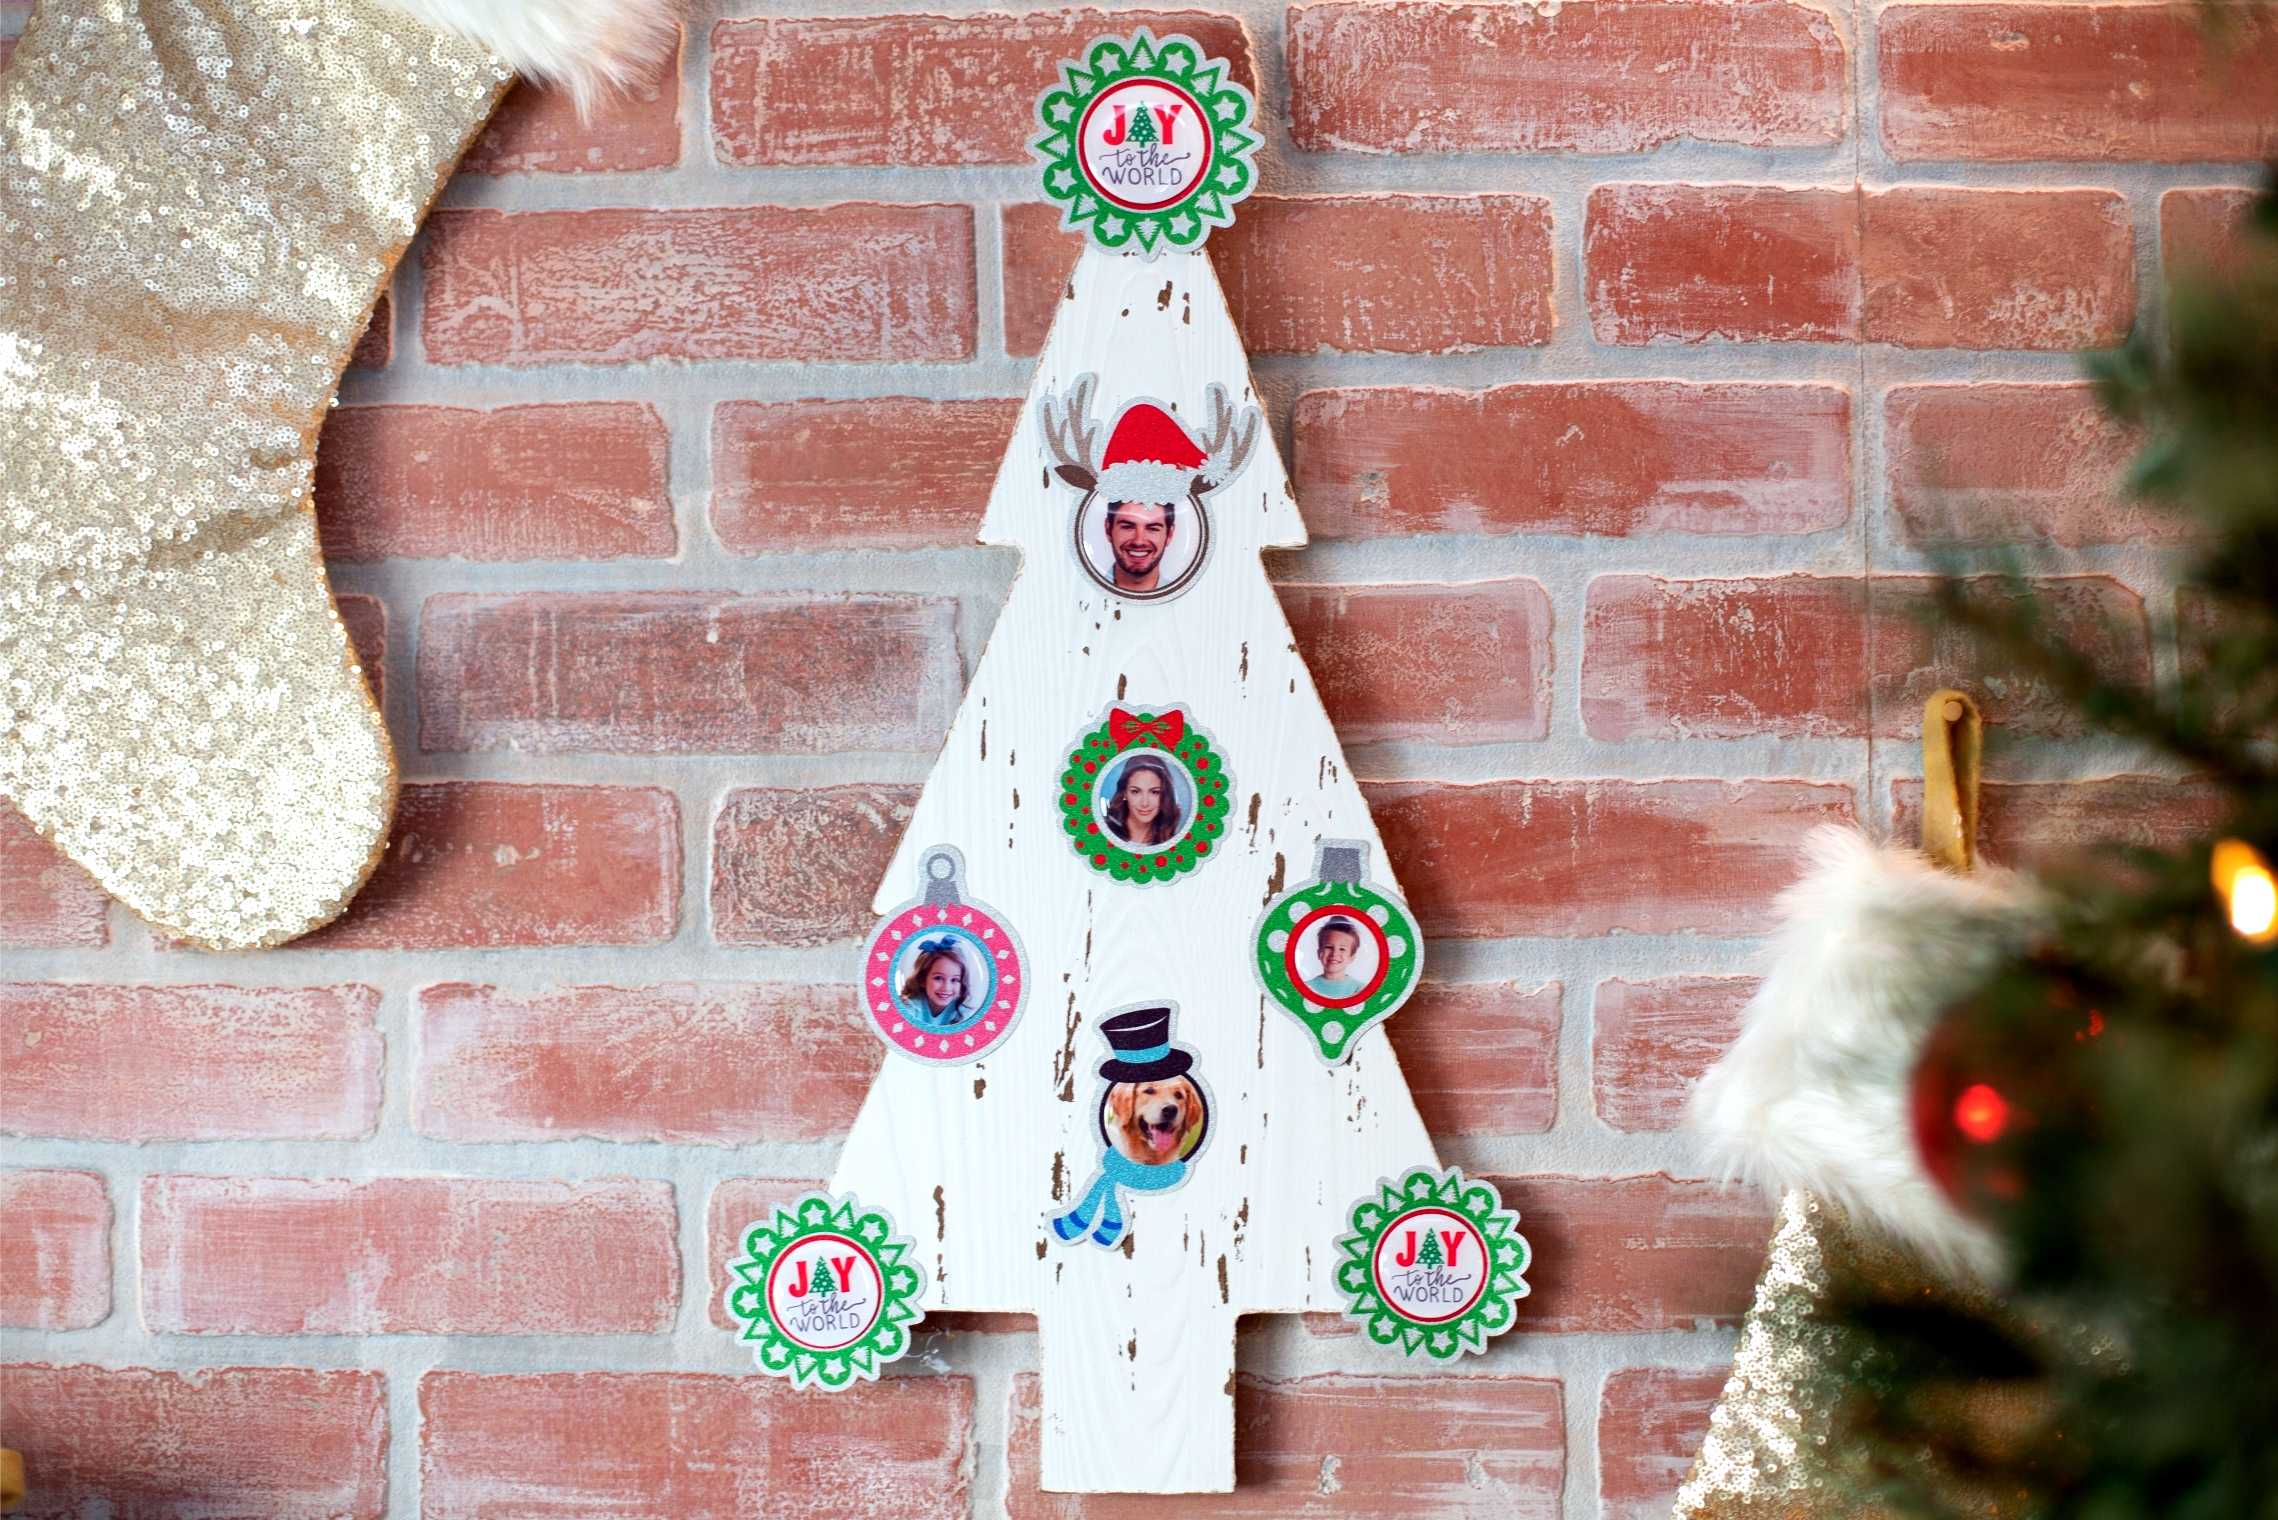
O Christmas tree, o Christmas tree, how lovely are thy doming sticker ornaments! Have you had a chance to use doming starter kit yet? It’s pretty awesome because it helps you create stickers with a really cool glossy and 3D effect. For this project, we’re going to be making ornament stickers using faces of family members to give it a more personal touch. If you’d like to see how simple it is, follow along with the tutorial below.
Supplies Needed:
- Silhouette CAMEO® or Silhouette Portrait®
- Silhouette Studio®
- Silhouette Cutting Mat
- Silhouette Cutting Blade
- Silhouette Doming Starter Kit
- Silhouette Glitter Sticker Paper
- Printer
- Wood Tree Plaque
- Design ID #280737
- Design ID #162541
- Design ID #235342
- Design ID #104428
- Design ID #108271
- Design ID #165889
- Design ID #109225
Step One: Prepare the Designs
1. Open the Joy to the World design (Design ID #280737) by locating it in your library. Resize it (in order to resize your design, you will select it and then drag in the outer corners), ungroup it, and fill “to the world” words with a gray color (using the Fill panel on the right-hand side of the screen). Open the Christmas Tree and Star Circle Frame design (Design ID #162541). Resize it, ungroup it, and fill it with green and red color. Then place the Joy to the World design in the middle of the frame.
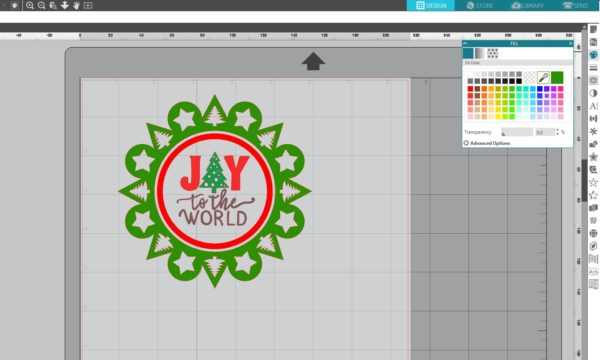
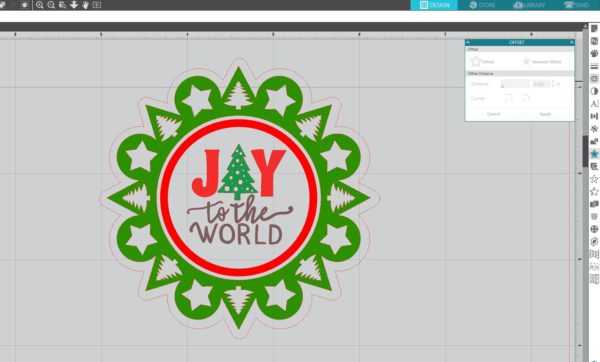
2. Now let’s add an offset line to our design. To do that, open the Offset panel, select the outer line, click the Offset tab, and then select Apply. Group everything and place to the holding area.
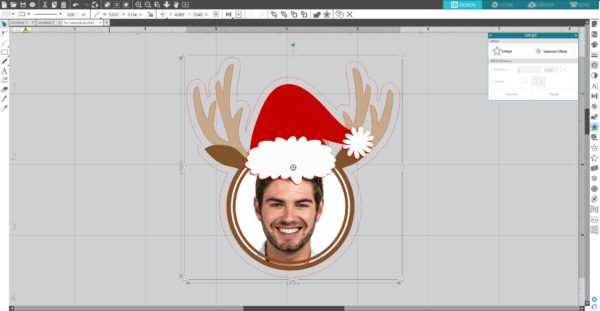
3. Open the Reindeer Santa Hat Frame design (Design ID #235342). Ungroup the design, assemble it, and resize it. Open one of your photos in Silhouette Studio® (File > Open > locate photo on your computer). Draw a circle using the Ellipse tool, which is located on the tool panel on the left side of your screen. Hold down the Shift key to draw an even circle. Place a circle near the person’s face and open the Modify panel. Select the image and the circle, and click Crop.
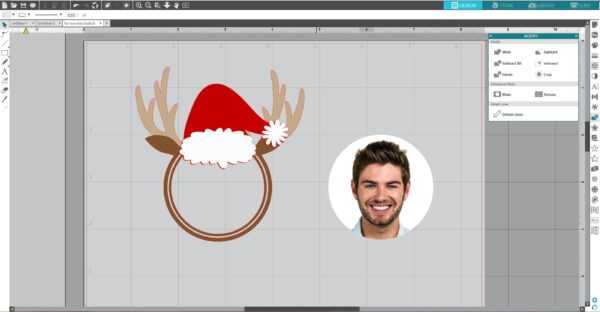
4. Place the person’s image in the middle of the frame and add an offset line as described above.
5. Repeat the same steps for the rest of designs.
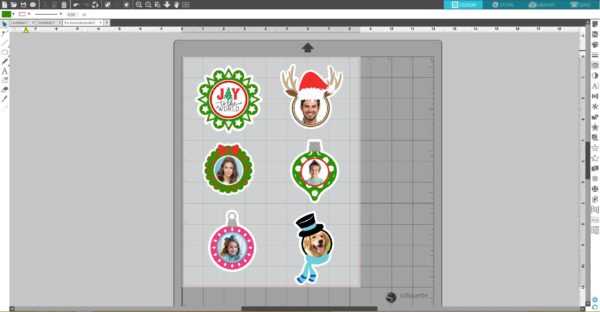
6. Separate the inner parts of the ornaments from the frames and place them separately as we will print the frames on glitter sticker paper and the inner parts on white sticker paper. Go to the Registration Marks tab (located in the Page Setup panel) and turn on registration marks by setting the style to Type 1. Make sure that designs do not overlap the registration marks borders. Also don’t place your designs too close to the corners with the registration marks. Glitter sticker paper has gray corners for the printed registration marks, and part of your design may be printed on the not glittery surface if you put the designs too close to the corners.

Step Two: Print & Cut Designs
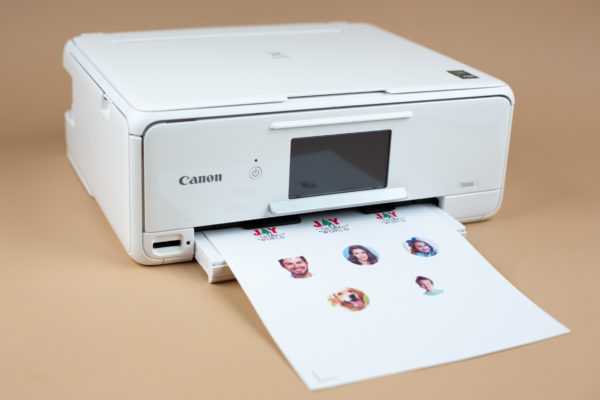
1. Once your frame designs are ready to go, print them to your inkjet or laser printer by clicking on the Print icon in Silhouette Studio®.
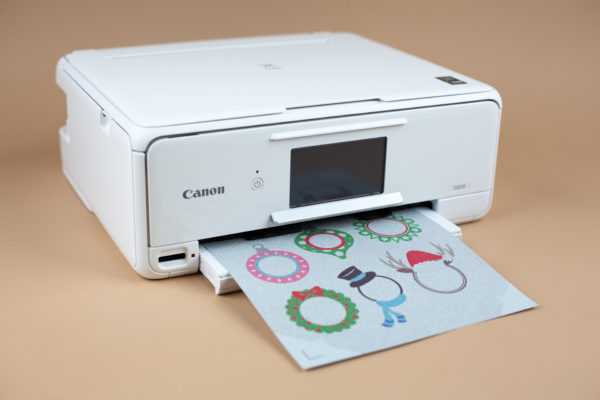
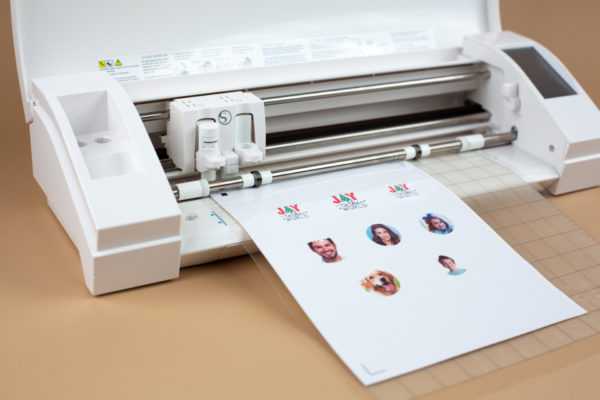
2. Place the printed sheet on your cutting mat and feed it into your Silhouette machine.
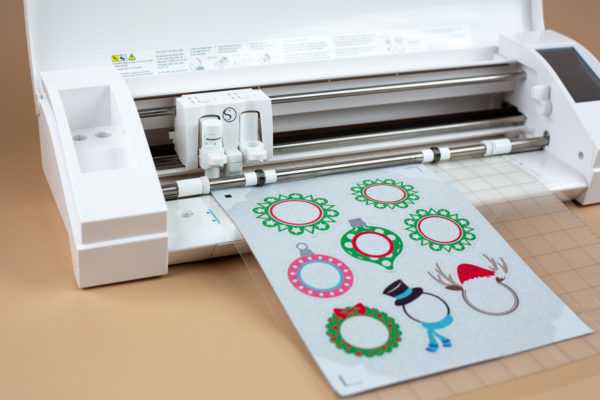
3. Go to the Send panel. Choose “Sticker Paper, Glitter” as your material type. Make sure your Silhouette machine will just cut out the outline of your shapes by selecting the Cut Edge option. You might want to increase blade settings by 2 and keep the speed at 5, force at 10, and passes at 1. Adjust your blade if necessary and send your cut job to your Silhouette machine.

4. In the Doming Starter Kit, you will find two types of sticker paper—white and clear. Print the inner parts of the ornaments on white sticker paper. Allow the ink to dry before proceeding.
5. APPLY A LAMINATE SHEET OVER THE PRINTED PAGE WHEN USING WHITE STICKER PAPER. Use a scraper tool to carefully smooth the laminate sheet as it is applied to prevent bubbles or creases.
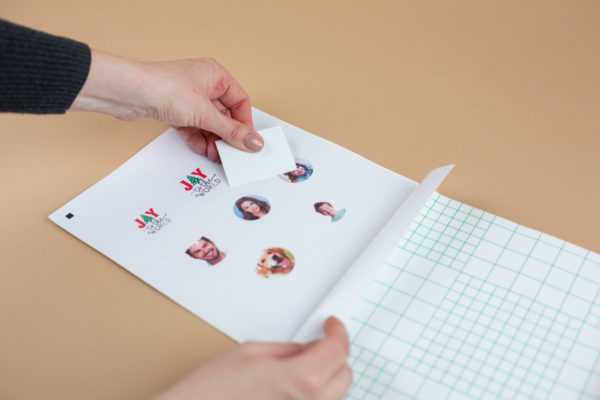
6. Place a sheet of the printed white sticker paper with the applied laminate sheet on the cutting mat. Load cutting mat in the Silhouette cutting machine. Select “Sticker Paper, White” from the media list in the Send tab and adjust the cut settings to Blade – 3, Speed – 8, Force – 18, Passes – 1 and click Send.
7. Weed away the excess material from around your designs, leaving just your cutout stickers on the sticker backing.

8. Set your sticker sheet on a flat surface.

Step Three: Apply the Epoxy Resin
1. Fill the A and B syringe chambers with equal amounts of the corresponding A and B epoxy resin solutions.

2. Attach the syringe tip and prime your syringe by squirting out a small amount of epoxy resin (about 1 inch in diameter) onto a scrap piece of paper. This ensures that your syringe will apply an equal mixture of the A and B solutions.
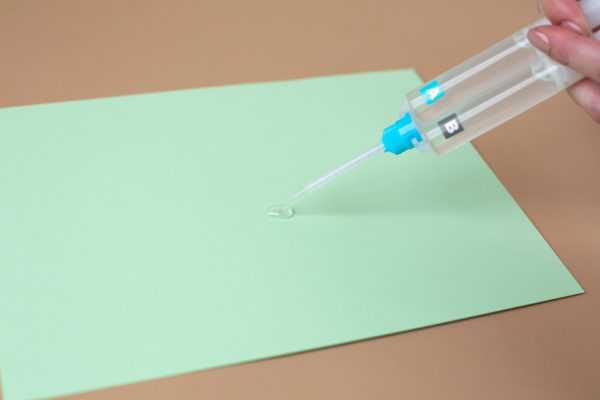
3. Slowly apply the epoxy resin onto the surface of your cutout design, starting from the outer edge and moving toward the inside of the design. Be careful not to over-apply the resin as the resin may overflow off the edge of your cutout design.
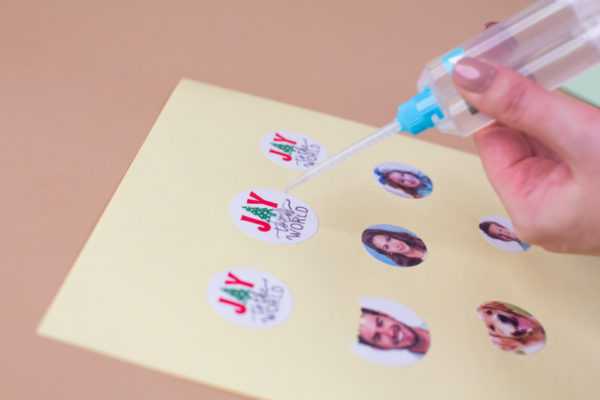
4. Use the provided toothpicks to spread the resin for more complicated designs and also to remove excess air bubbles.

5. Allow the resin to set for 12 hours to fully cure and harden.

Step Four: Assemble and Arrange the Ornaments
1. Arrange the ornament frames on the Christmas tree. Tip: Depending on the surface you want to place your glitter stickers onto, you might want first cut bases of the ornament frames from cardstock and place glitter stickers on cardstock bases and then adhere them on the Christmas tree using double-sided tape.
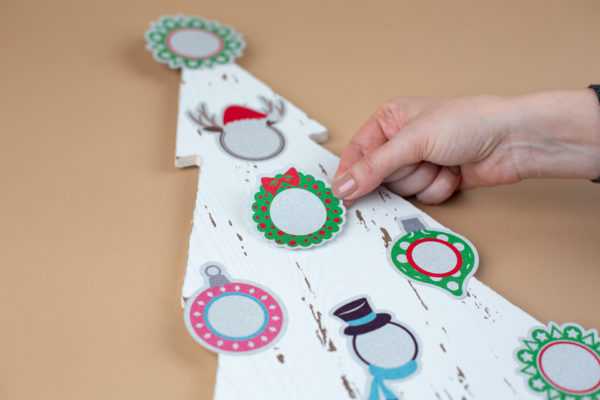
2. Glue the doming stickers on the glitter ornament frames.
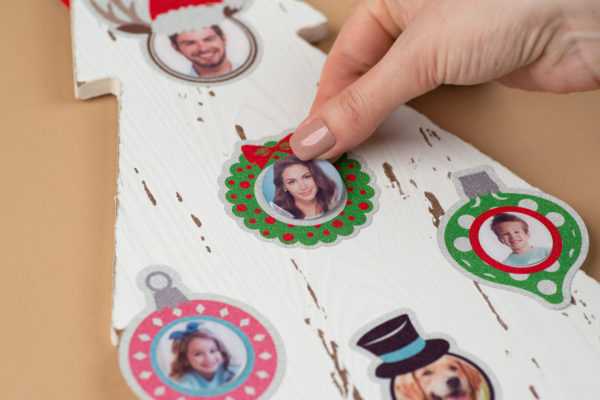
Now our project is ready!

This is such a fun tree to display in your home! Everyone will love it and will want to start making their own! And now that you’re a pro, you can show them how it’s done.