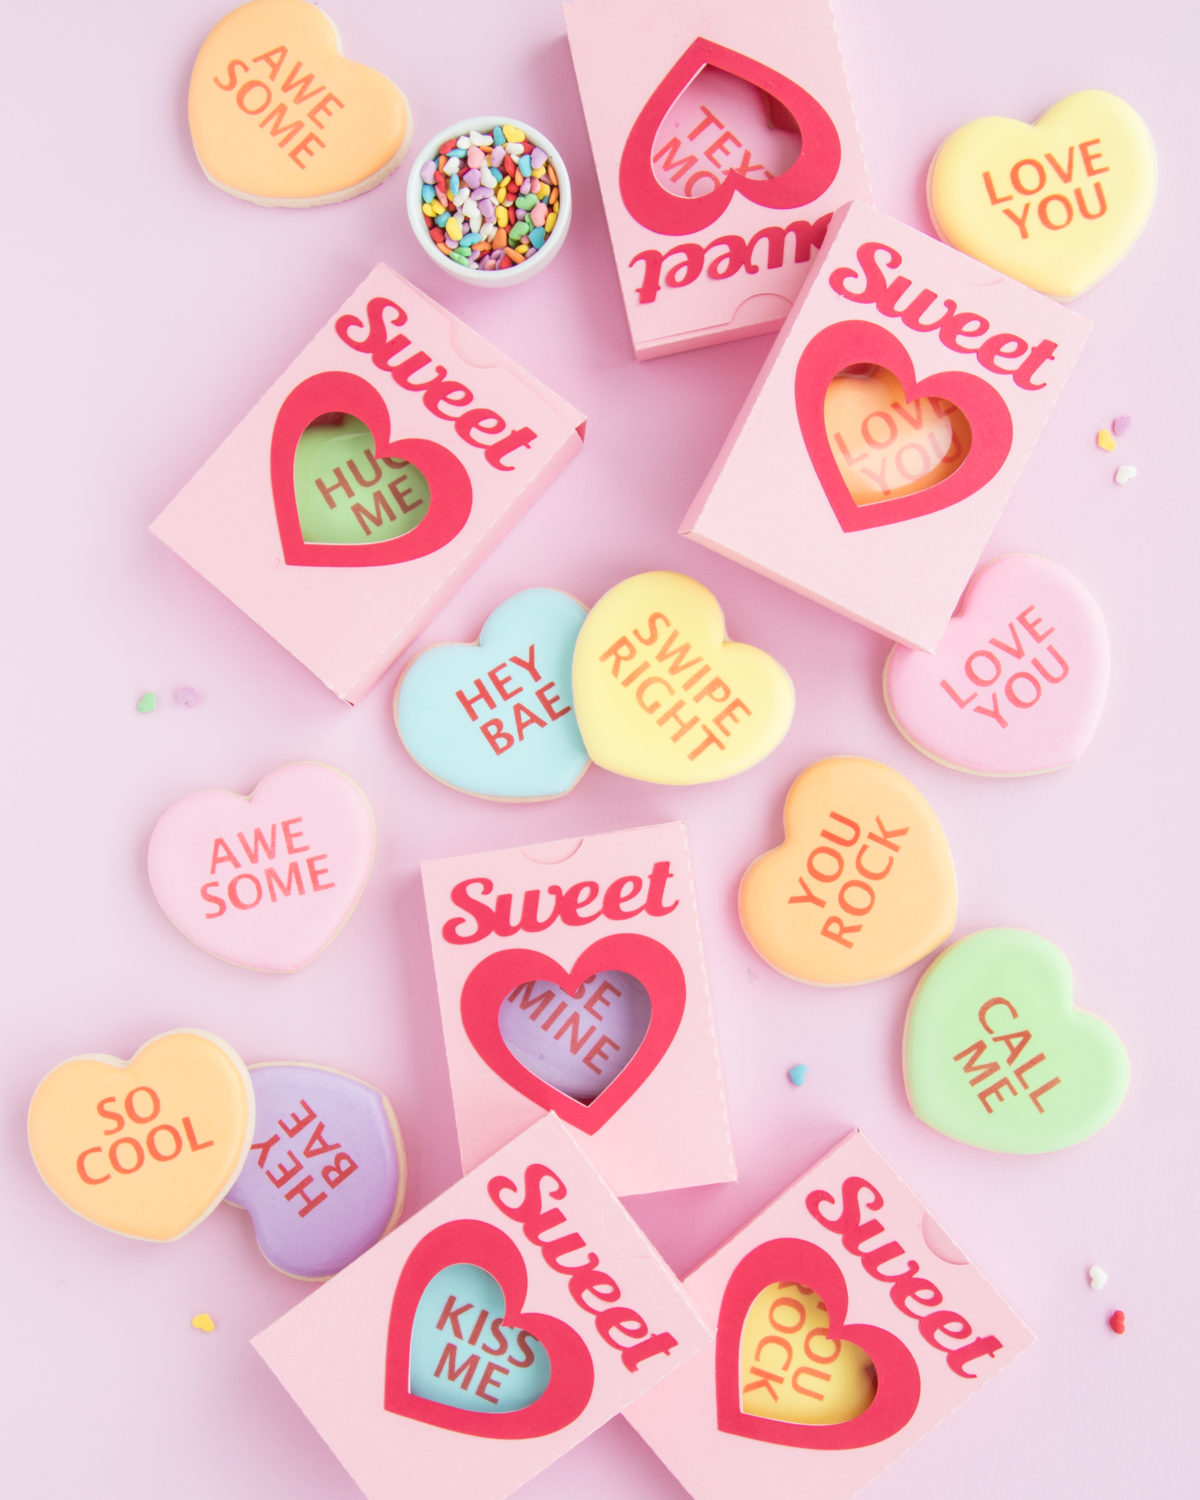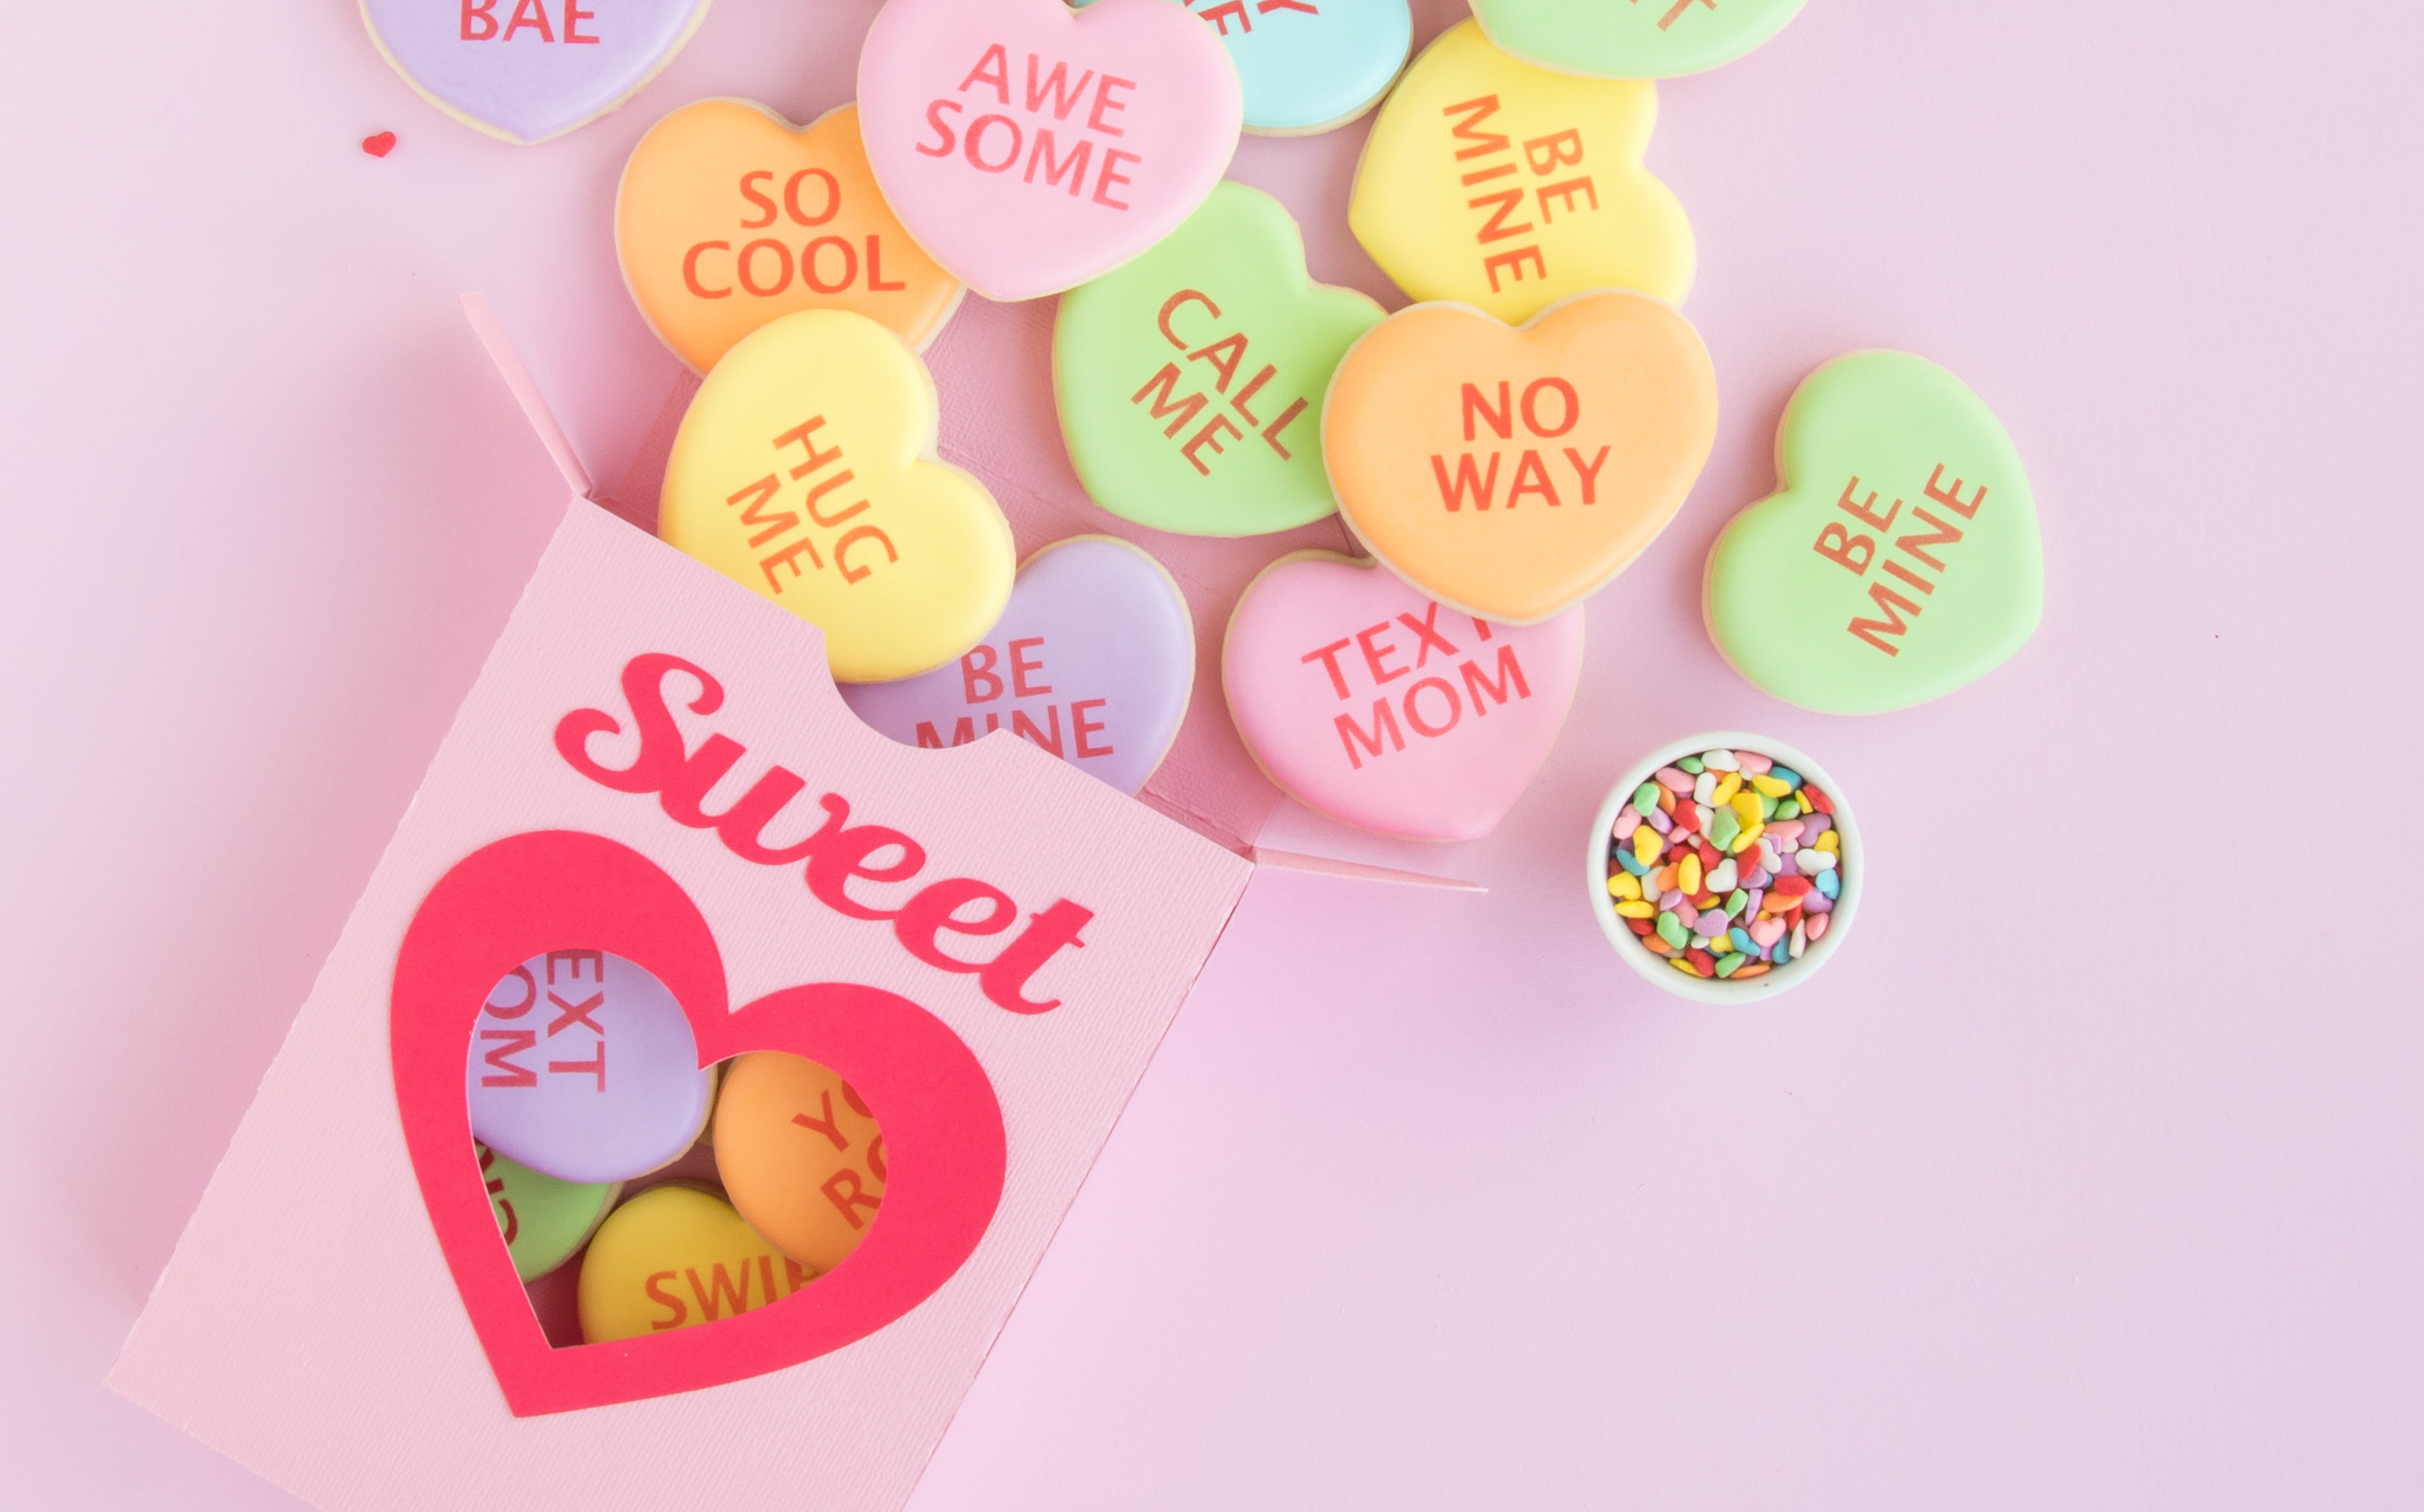
Conversation hearts are so much fun to craft every year when Valentine’s Day rolls around. They’re cute, they’re sweet, and they’re a little bit sassy! Sure the little candies themselves are a classic, but we really love all the DIY conversation heart treats we see around the web. Today we though it would be fun to share how to make your very own jumbo conversation heart treat box to package up those Valentine’s treat! Although there are lots of things you could fill these sweet boxes up with, we love these mini conversation heart inspired cookies.
The default size for this 3D Conversation Heart Box (Design ID #37194) results in a 3-inch-by-4-inch treat box, which is perfect for holding 1–2 small cookies (shown just below). This size makes the perfect Valentine option for class parties. However, we want to share how to enlarge this design with just a few extra steps to make a jumbo 3D Candy Heart Treat Box perfect for gifting 6–12 small cookies or treats, and that makes it great for teachers! Either way, you’re sure to have the more adorable treats on the block.

Supplies Needed
- Silhouette CAMEO® or Silhouette Portrait®
- Silhouette Studio®
- Silhouette Cutting Mat
- Silhouette Cutting Blade
- Cardstock – Pink and Red
- Small Piece Of Clear Craft Film
- Clear Glue
- Washi Tape (optional)
- Design ID #37194
- Design ID #72626
Step One: Preparing the Design
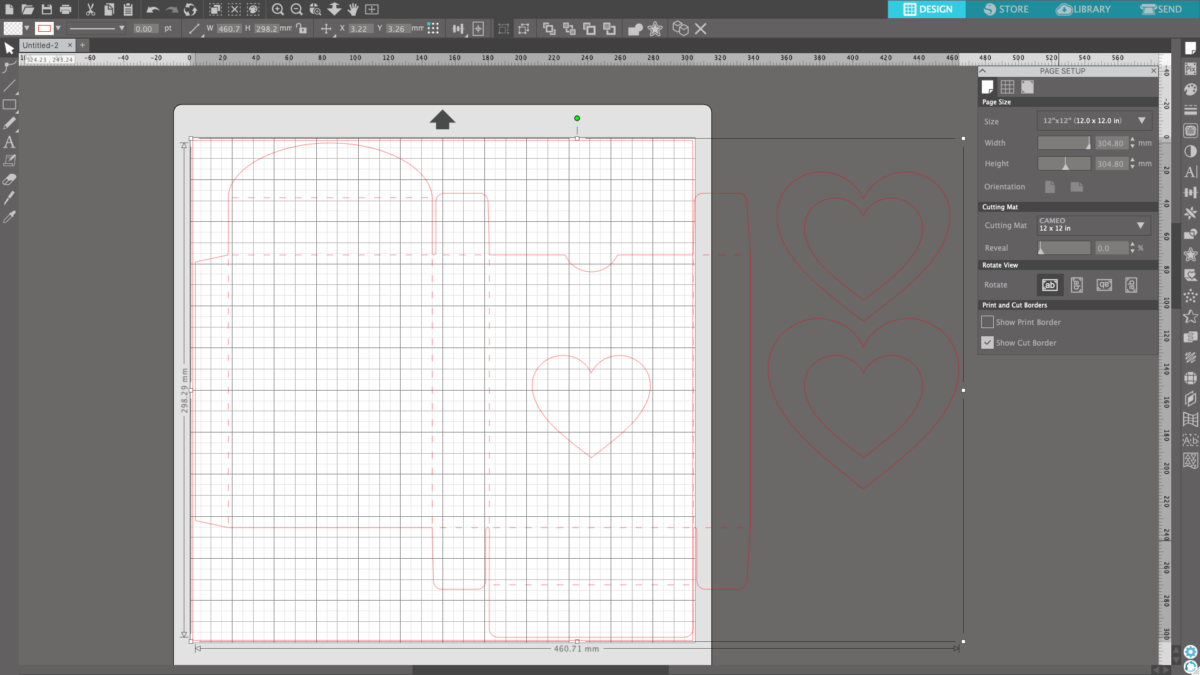
1. Open the 3D Conversation Heart Box design (Design ID #37194) in Silhouette Studio®. Resize the design according to the final box size you would like. We scaled the design as large as possible to fit a 12-inch cardstock height. Ungroup the design. Copy and paste the hearts to a new file for now so they’re out of the way. Don’t worry about the side of the box design hanging off the mat just yet.
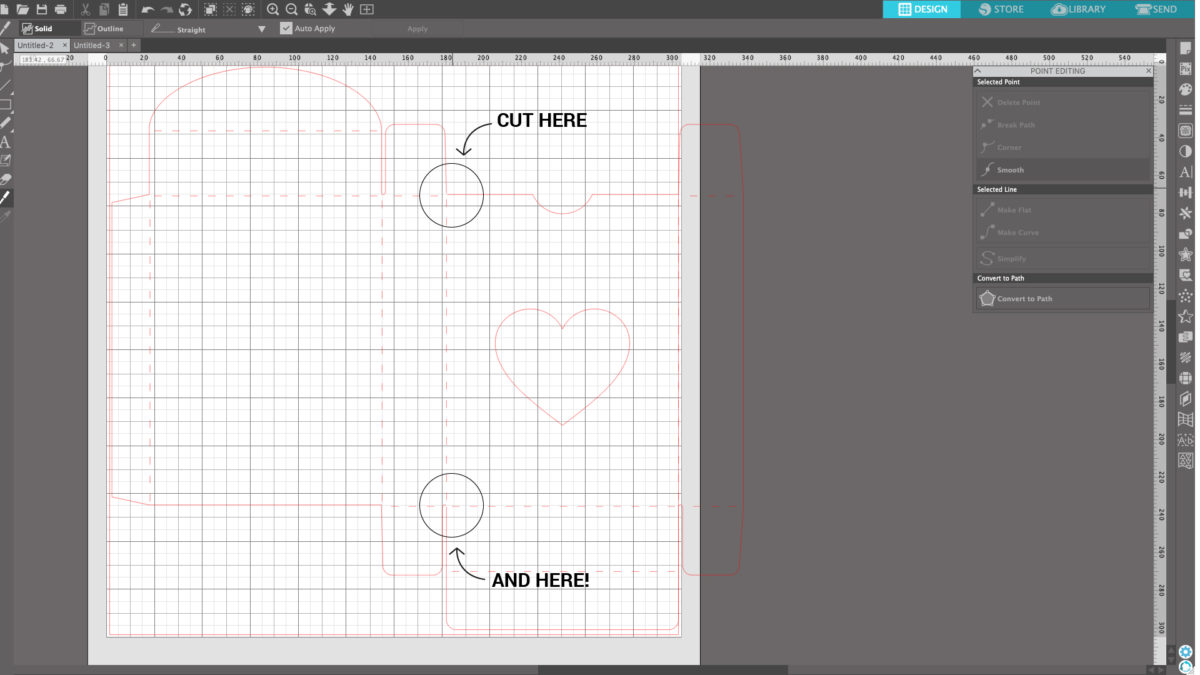
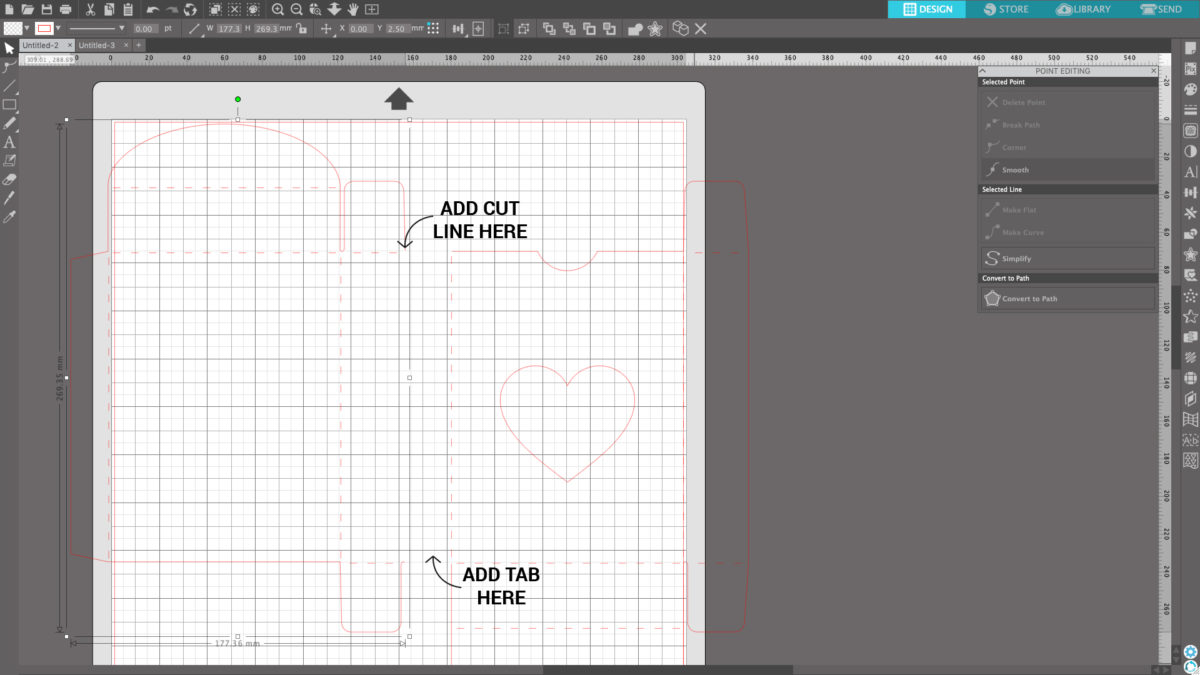
2. Next, we’re going to slightly alter the design to create the jumbo box allowing us to still use standard 12-inch-by-12-inch cardstock. To do, this we will first split the box in two and add an additional tab to the front of the box design. Using the Knife tool, create two small cuts to separate the design. One just above the dashed line connecting the front of the box to the middle and one just below it as shown in the image above.
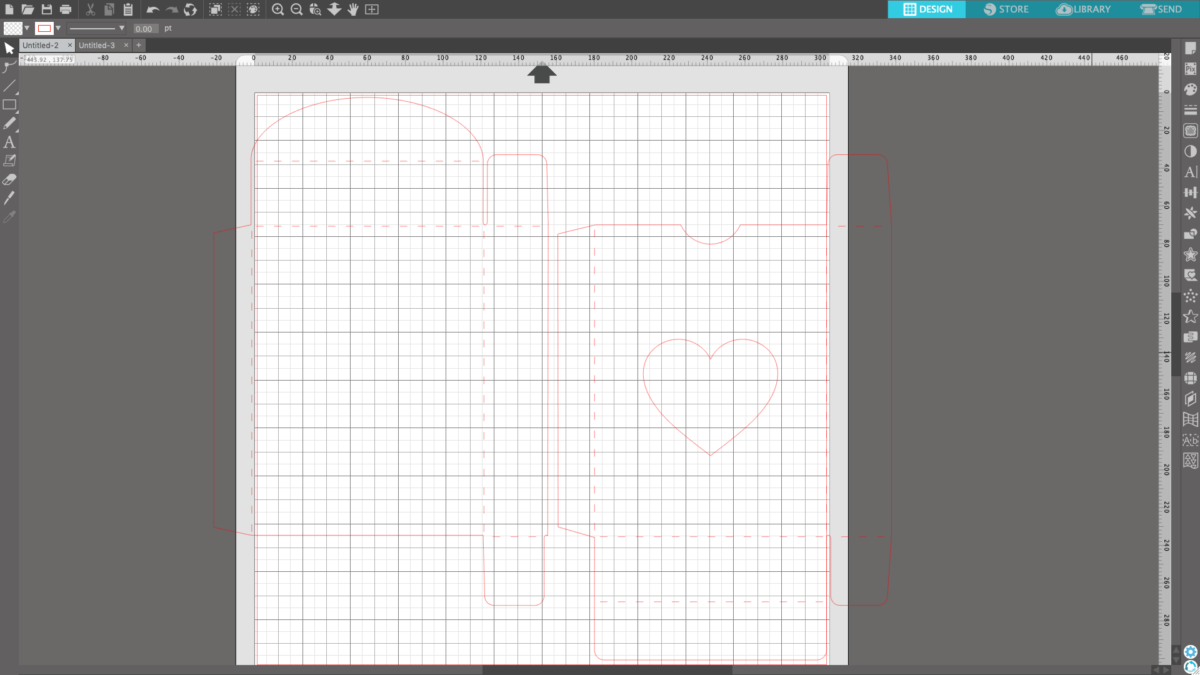
3. Drag and select the left half of the design, group together, and move to the side just a bit. You now have two pieces! To complete your box you will need to do two simple things. Close the left side of the design with a simple line using the Line tool. Add an additional tab to the right side by creating three lines replicating the tab on the far left. Remember to group each new piece of the 3D Conversation Heart Box together. Copy and paste one side in a new document.

4. Before cutting the design, let’s revisit those hearts that you moved to a new file. Since you already resized them with the 3D box, in the beginning, they are good to go! I chose to only cut the smaller heart. Add the text SWEET above the heart design. We chose to use the “sweet” from another conversation heart design file (Design ID #72626). If you’re creating more than one box, duplicate the heart and sweet designs and make as many copies as you need.
Step Two: Cutting The Design
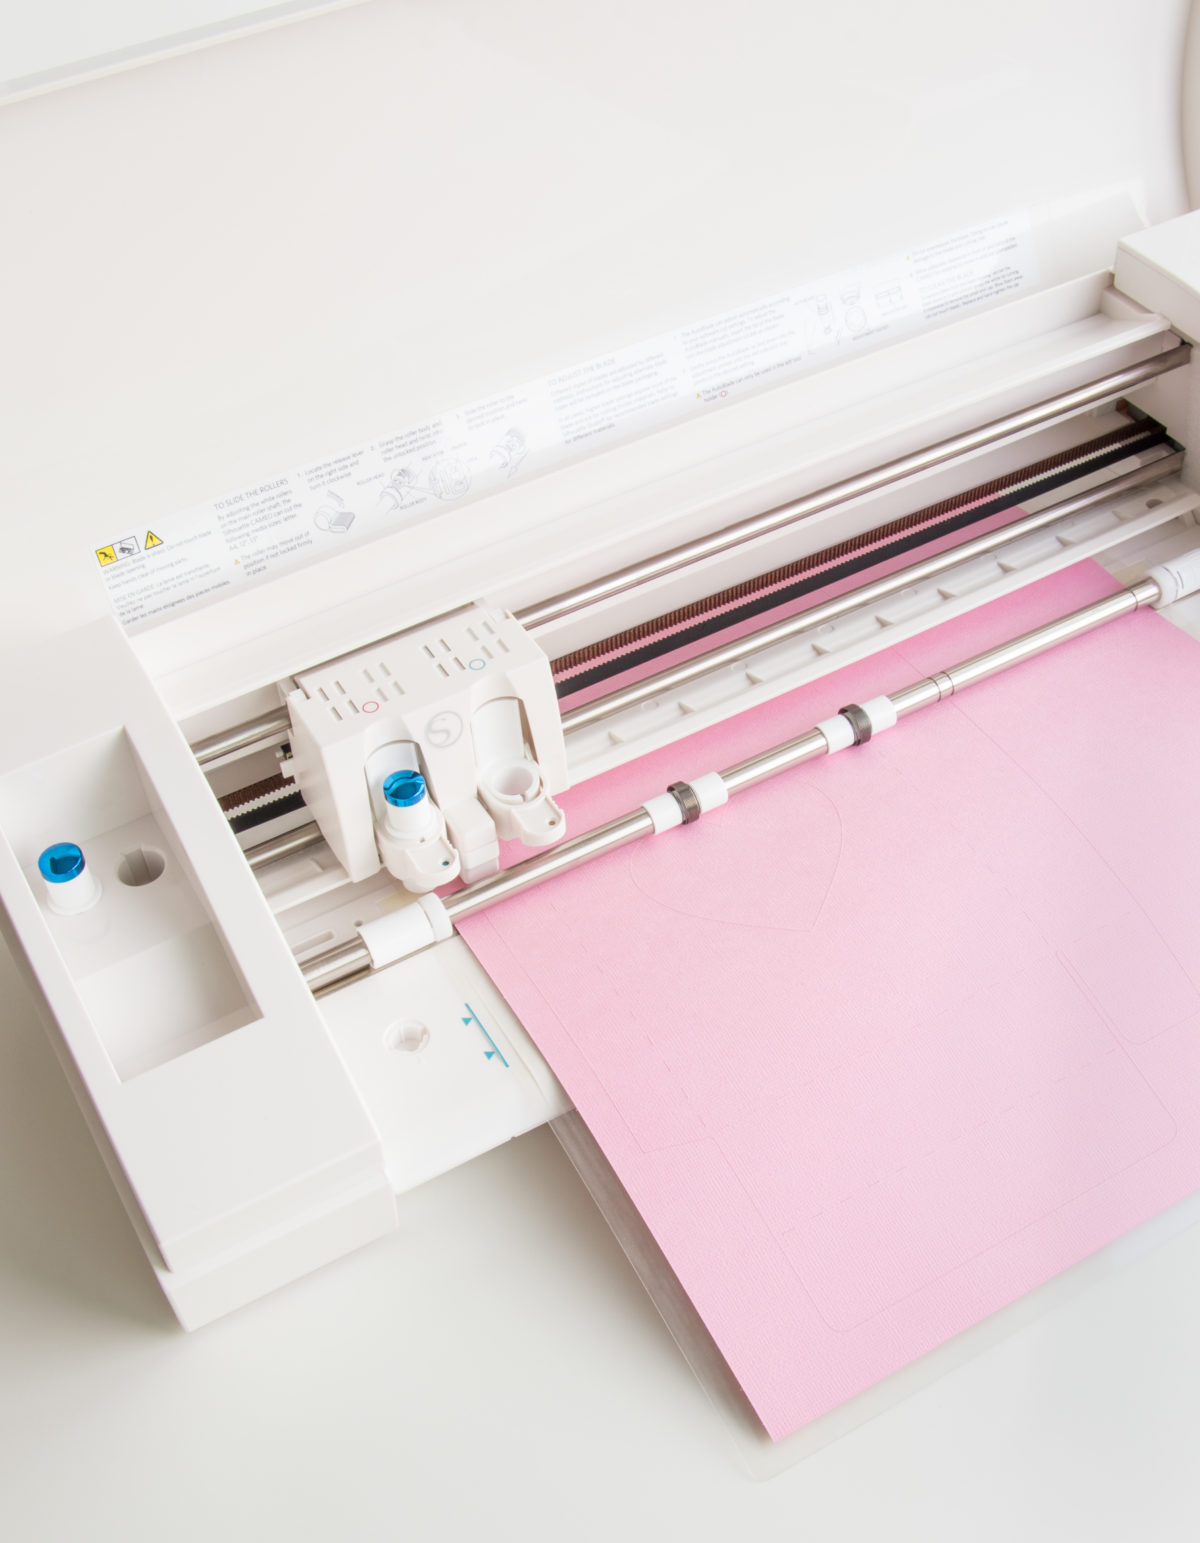
1. Place a pink piece of cardstock on the cutting mat and load it into your Silhouette machine. 8.5 by 11 inches OR 12 by 12 inches will work. Just make sure your design and paper are aligned correctly on the mat. With Part 1 of the box pulled up, under the Send panel, select “Cardstock” as your material and adjust the blade if needed. Click Send. After the first cut is complete, select Unload on your machine, remove the design from the mat, reload with an additional pink cardstock and repeat the process to cut part 2 of the 3D conversation heart box.
2. Place a red piece of cardstock on the cutting mat and load it into your Silhouette machine. Repeat the cutting process to cut out the last part of the design, the heart design and “sweet” text.
Step Three: Assembling The Design
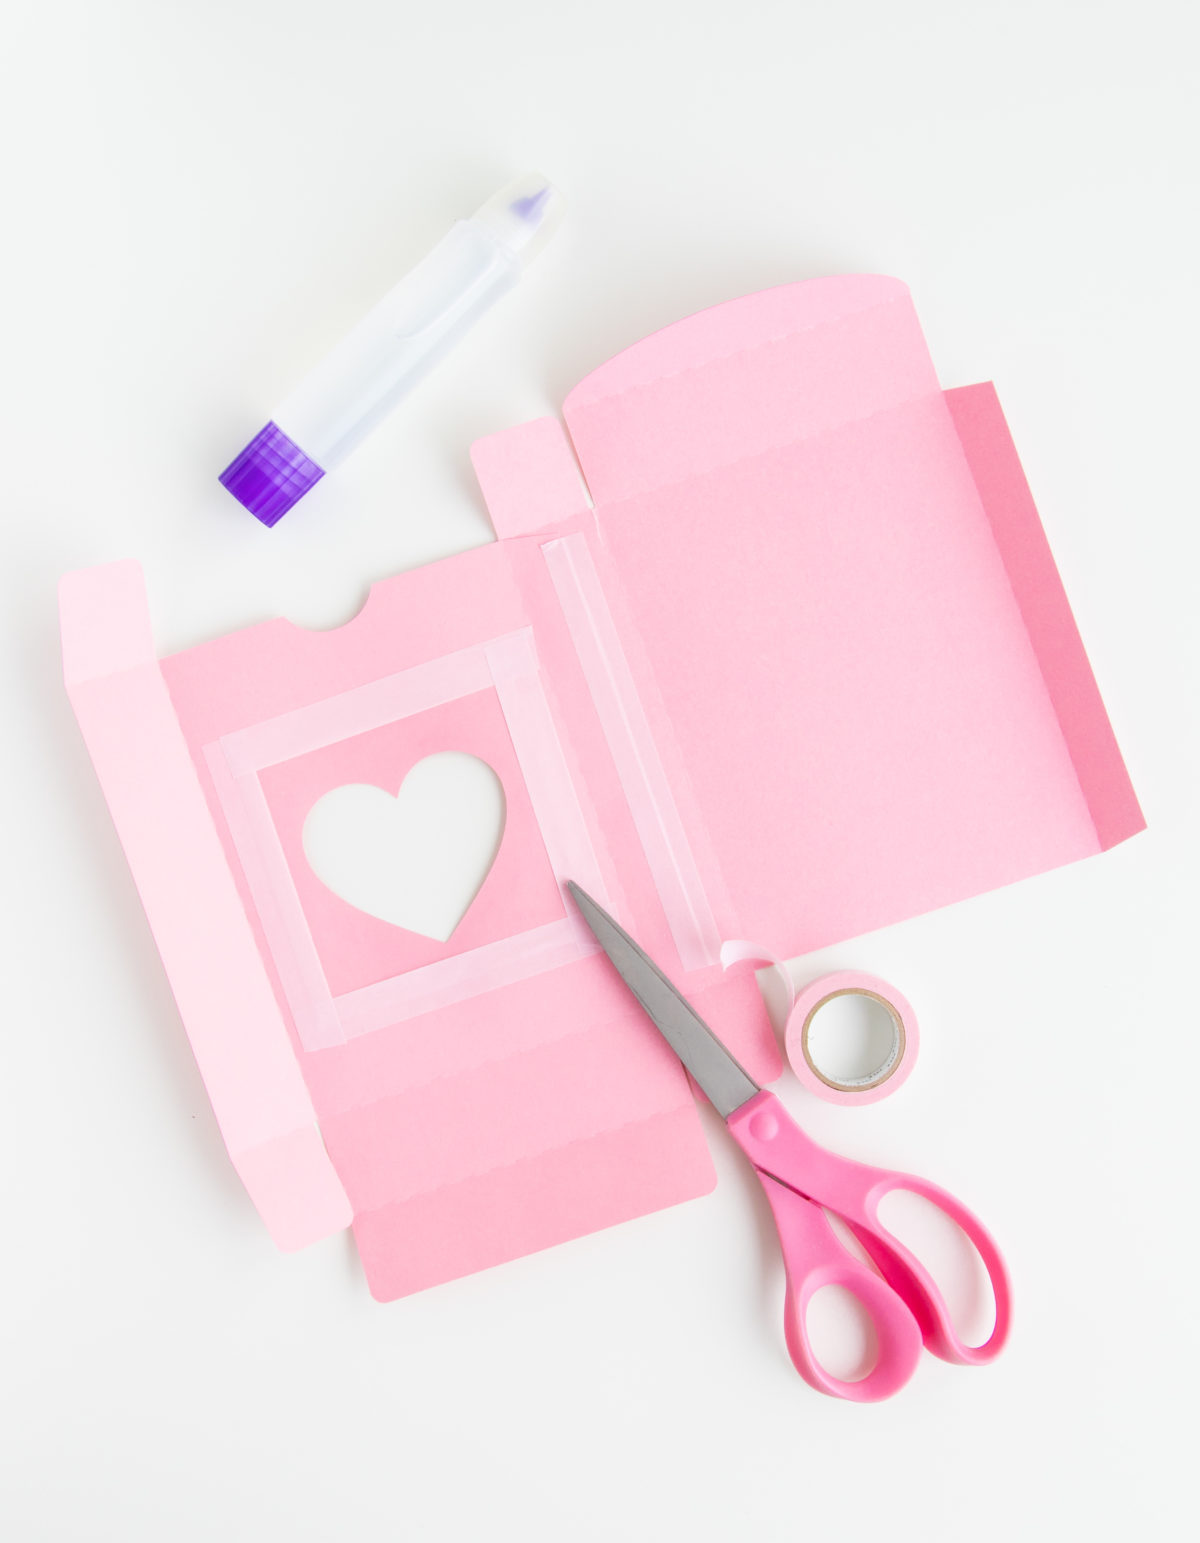
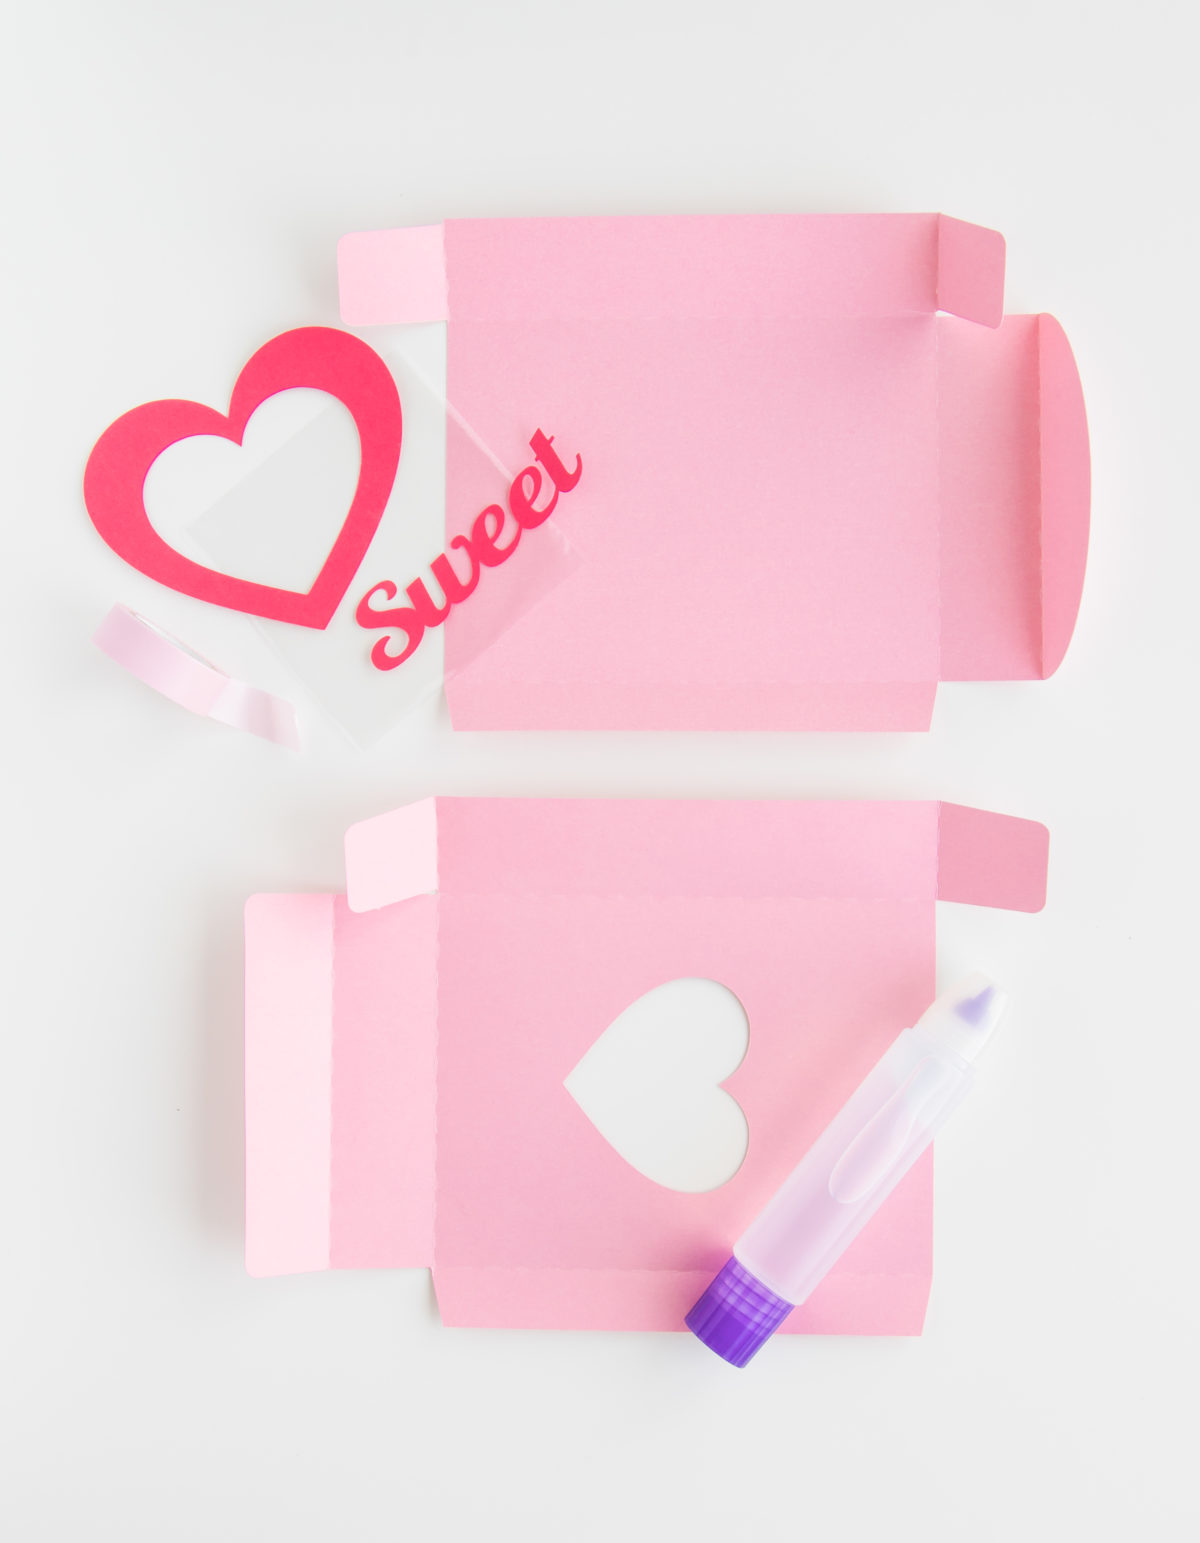
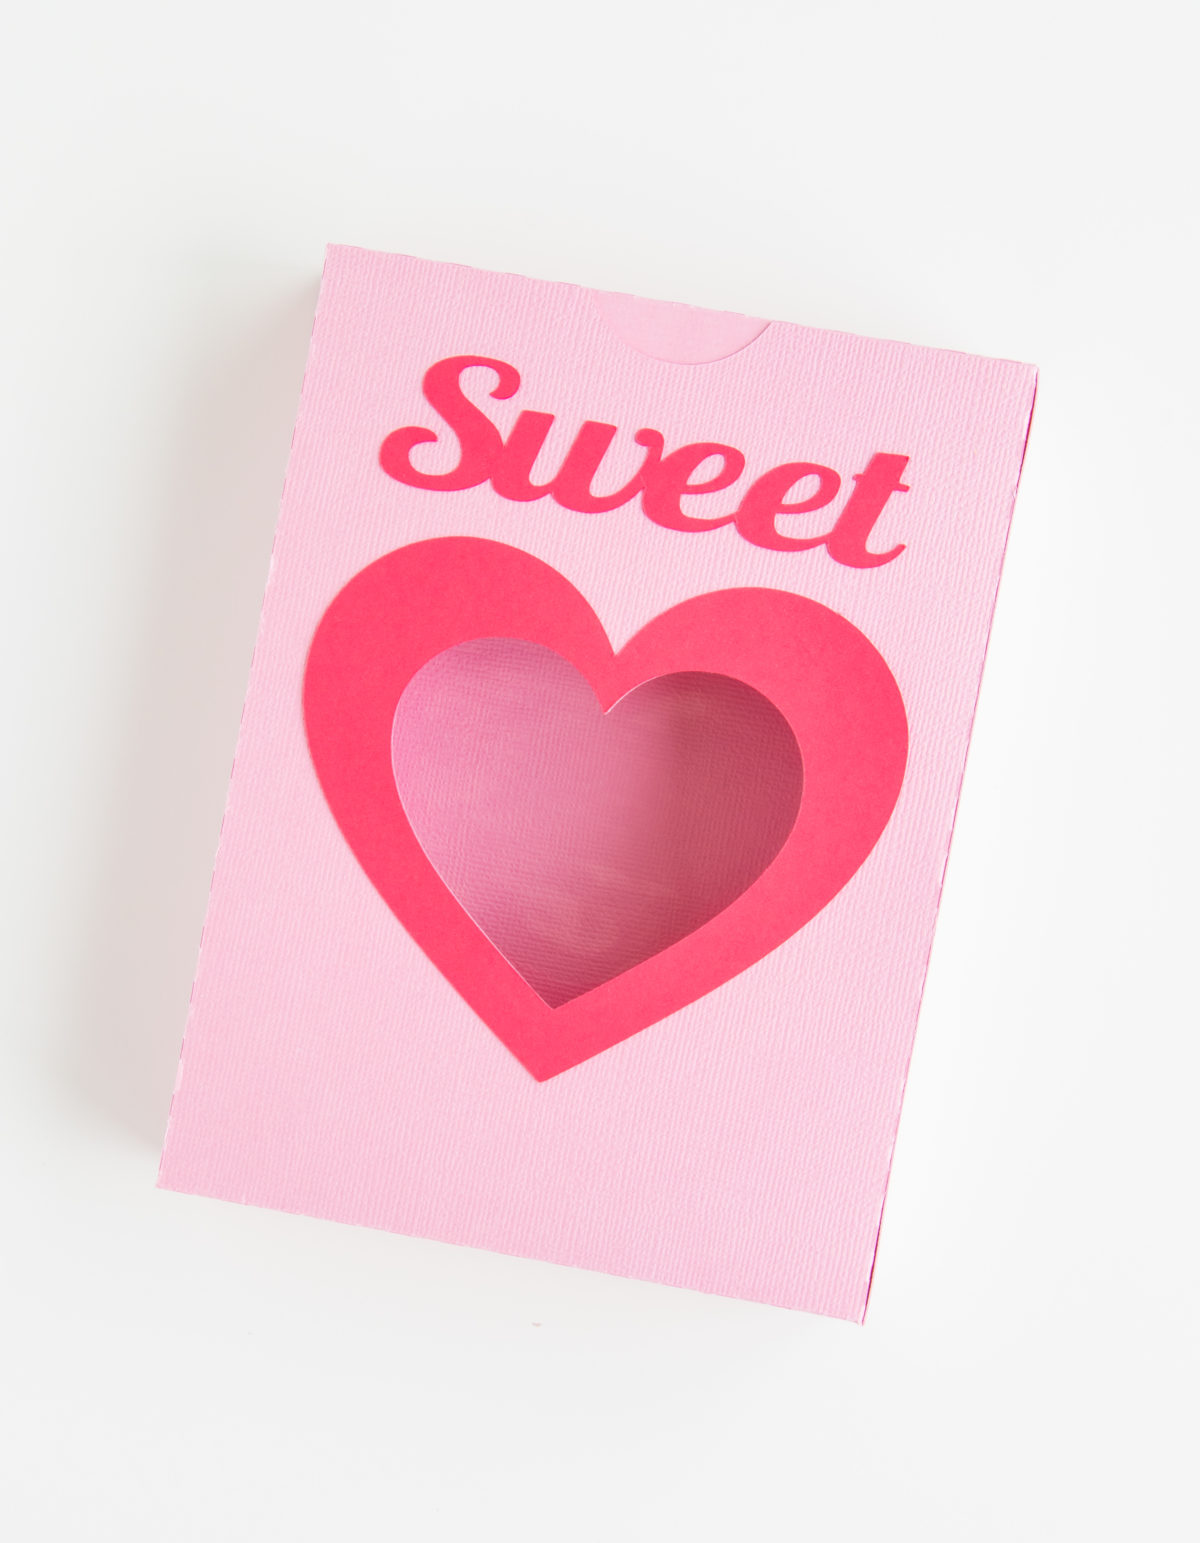
1. Start assembling your 3D conversation heart box by gluing the red heart and the “sweet” text to the front of the box. Flip over the design to the inside and glue and tape a piece of clear craft film where the heart window is. (Note: The clear film is optional!)
2. Next glue together the two pieces of the box as shown above where the tape line is. Adding a piece of tape to the seam is helpful to make sure treats don’t snag on the seam and to give the box extra support. This is optional but helpful! Lastly, glue the final seam of the box using the remaining tab.
Step Four: Add Your Treats
1. Fold in the top and bottom tabs of the box. Your jumbo 3D conversation heart box is complete. Now simply fill with treats! If you would like to learn how you can make these conversation hearts cookies using a Silhouette-made stencil, you can find the instructions here.