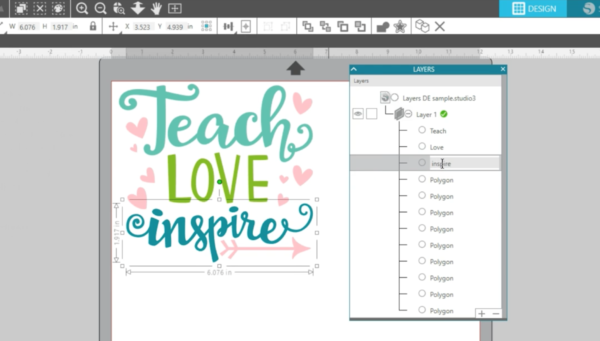
Silhouette Studio® Designer Edition and higher supports the cut by layers capability. To access the layers panel, click on the Layers panel along the right side of your screen toward the bottom.
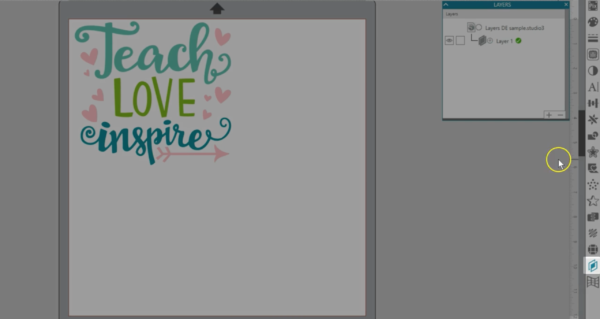
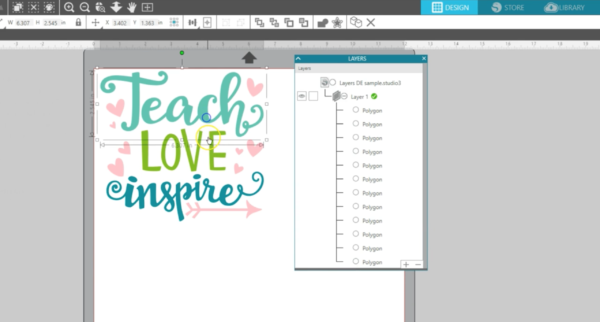
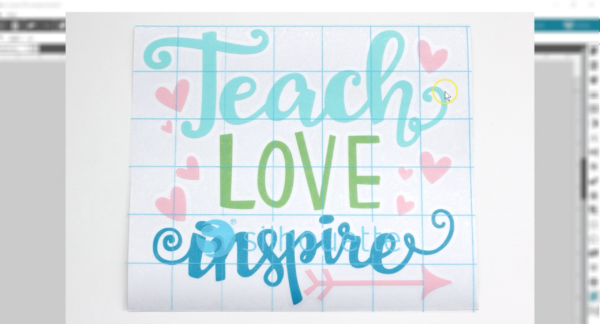
We’ve got this design opened and recolored the way we want, so let’s look at it in terms of Layers. Expand by clicking on the + next to Layer 1. Each one of these pieces on the design is an object on Layer 1.
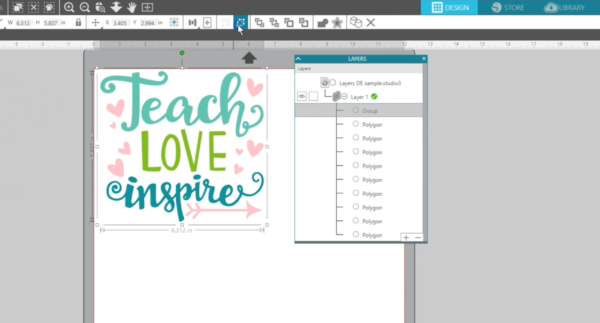
Grouped objects show up as “Group” unless you ungroup them.
Most objects will be called something generic like Polygon or Text, but you can rename the pieces with a double click. You can rename each layer too.
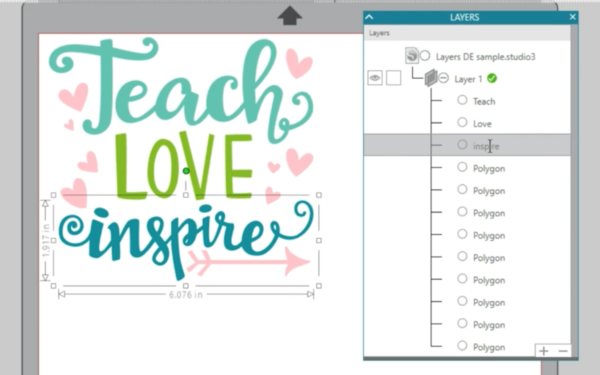
You can see which object is selected in your Layers panel by either clicking on an object in the Panel to see which on your page becomes selected, or you can click on an object on the page and see what becomes selected in the panel.
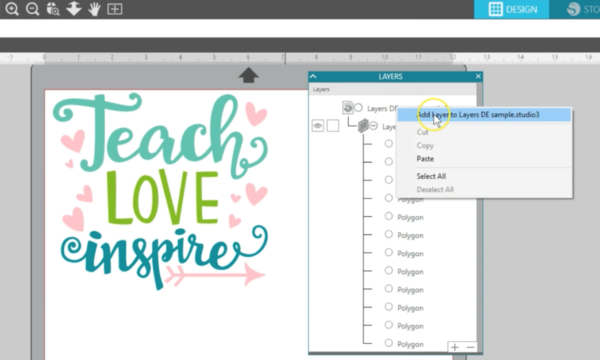
To create new layers, you can either right-click and select to add a layer, or you can click on the “+” icon in the bottom right-hand corner of the panel.
Objects can be sorted into a layer by selecting the desired object and then dragging and dropping it into the desired layer. We are going to put each colored word on its own layer.

There are two icon options next to each layer: an eye and a lock symbol, which you’ll see if you click in the box.

You can click on either of these boxes to toggle the option on or off. The eye icon will toggle the layer from being viewable or invisible.
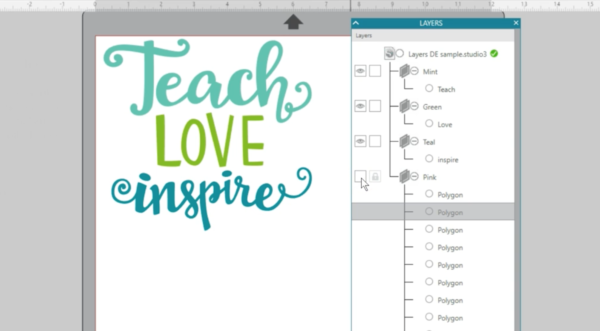
The lock icon will toggle the layer from being locked or unlocked. Locking a layer will prevent it from being moved or adjusted. If we lock the “Pink” layer, we can’t move its objects in the panel or on the page.

Be aware that if you make a layer invisible on your work page, it will still cut unless you turn it off in the Send panel.

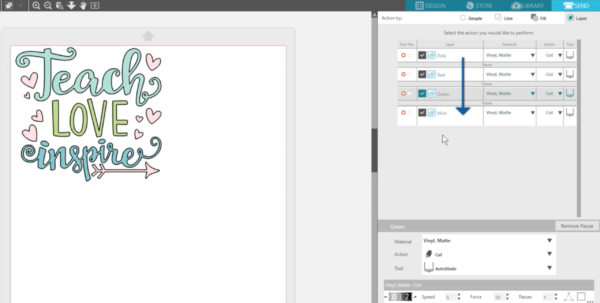
Now let’s talk about Cut by Layer. Once you have your layers the way you want, you can go to the Send panel to cut your document according to the layers.
We want to choose Action by: Layer, and you’ll see that those layers we renamed are all there.

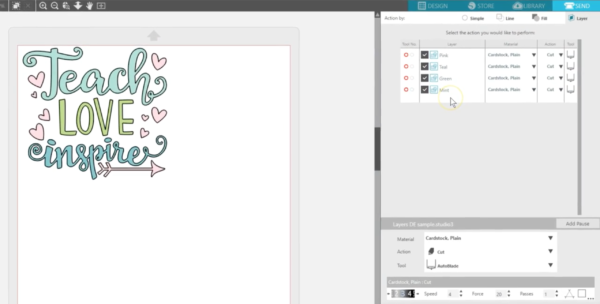
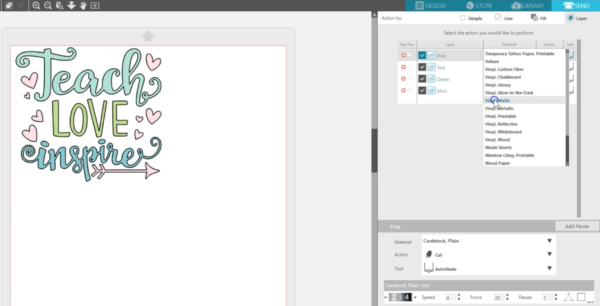
You can select the material type and blade, if necessary, for each layer by clicking on the appropriate selection.
A note for AutoBlade users: Your AutoBlade will adjust between cutting each layer because each layer can have its own material type. That’s normal.
Now you have a couple of choices for actually cutting.
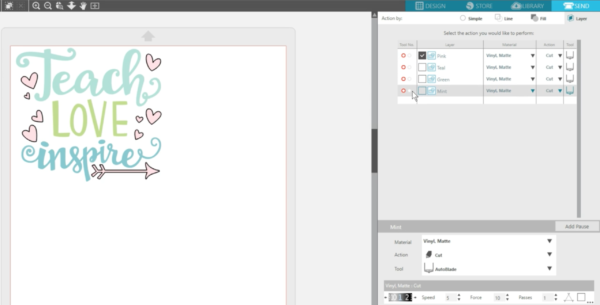
If you want to turn a layer off so it doesn’t cut at all, you can uncheck the box to the left of the layer name, and you’ll see those bold cut preview lines turn off. This way lets you cut one material at a time, so you only check the box for the layers you want to cut at that moment.
Or as another choice, you can leave all the boxes checked and have the Silhouette pause between layers. Right-click on the layer and choose “Add Pause.” This will add a pause after the selected material so the Silhouette pauses before going on to the next layer.
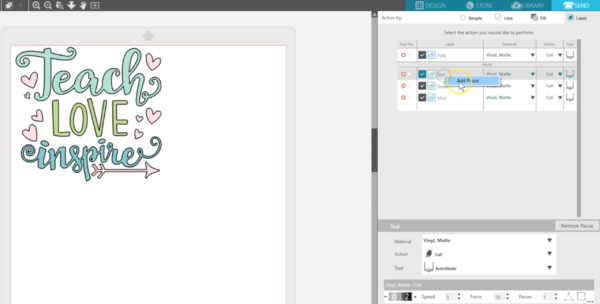
You’ll be able to unload, switch materials, and reload before clicking “Resume” to move on to the next layer. The Silhouette will cut in order from the top down.
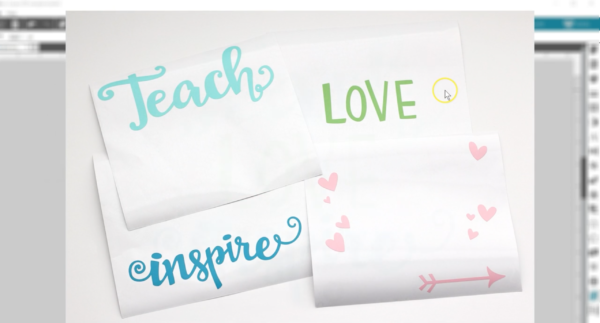
One reason you might choose to cut this way in layers is if you don’t want to move those designs around on the work page when everything is in place. We’ve set everything up from the beginning so the cutting part is easy.
In this example, we can trim each piece of vinyl color to the same size and they will be really easy to line up when adding the cut designs to the transfer tape, one layer at a time. Then we can apply it all at once to the surface.

And that’s how you can use the layers in the Designer Edition of Silhouette Studio®.
LeeAnn Forrester
January 8, 2019
I don’t have any of tool t along the right hand side of my designer edition package. I’m not sure what to do.
Kelly Wayment
January 10, 2019
LeeAnn, it sounds like you need to update to the current version of the software here: https://www.silhouetteamerica.com/software#silhouette-studio
Here’s a video to help you through the process: https://www.youtube.com/watch?v=OYo7iVLwhNM
Be sure to reach out to Silhouette Support if you still have trouble and they can help you out. https://www.silhouetteamerica.com/contact