When you’re ready to cut a design, you have several options in the way it cuts. This tutorial will cover cutting by Line Color and by Fill Color. In the Send panel, you’ll see several choices across the top for “Action by:”, which are Simple, Line, and Fill. Designer Edition and higher users will also see Layer as a choice.

Simple basically means all the lines are scheduled to cut at the same time, which is what you would use if you are cutting the entire design at once out of a single material. To break up your project into multiple cutting stages, you can use Action by Line Color or by Fill Color. You might use these advanced cutting choices if you are cutting from multiple types of material on the same mat, or if you want to use a combination of tools, such as sketch then cut.
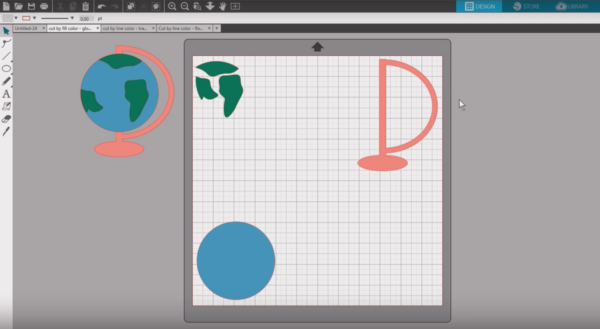
Let’s look at cutting by Fill Color first. We’ve got this globe filled with color to represent the different papers we have, but they are not all the same type of paper. We can cut them all at once on the mat in the same cut job.
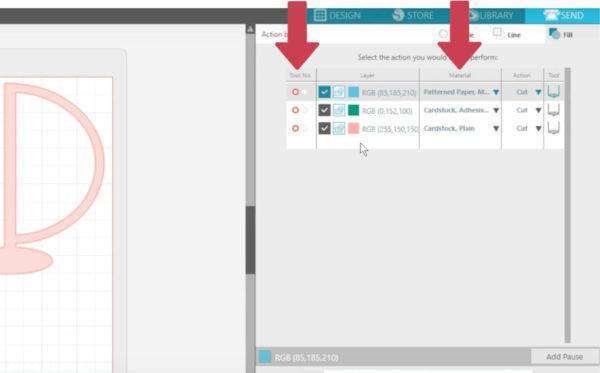
Let’s go to the Send panel, and you’ll see each fill color on the page is represented on its own line.
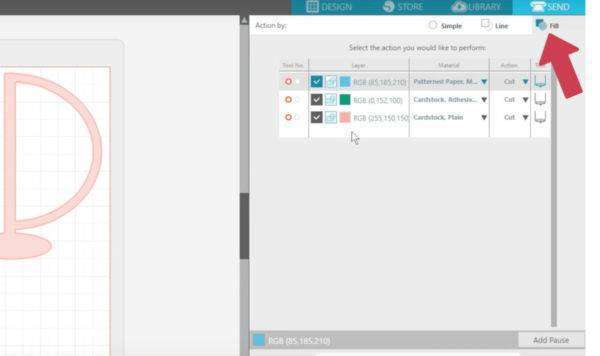
We’ve chosen a different material type for each fill color and will just make sure that portion of the mat is covered with the correct paper for each shape. We are using a CAMEO 3, so we have two tool choices available for each line. We are just going to use the AutoBlade in the left tool holder, and it will adjust itself in between each line.
You can use the check boxes to turn off or on each fill color. You even have choices of Cut and Cut Edge for each line here in the advanced settings if you have overlapping shapes.

The machine will cut from the top down on this list, so simply drag a box color up or down if you want to move its position in the queue. We’ve already selected the material type for each color, which can be verified or adjusted in this area below. We want these all to cut, and we are using the AutoBlade for the whole job.
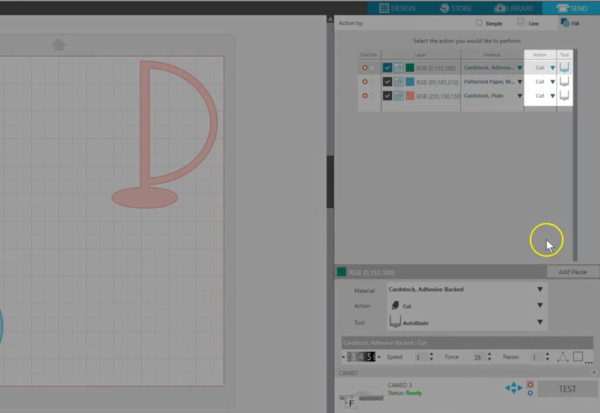
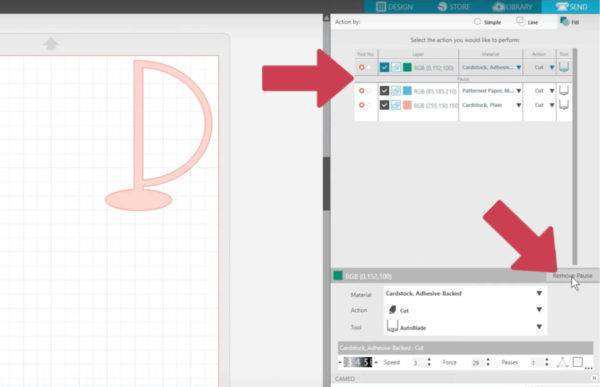
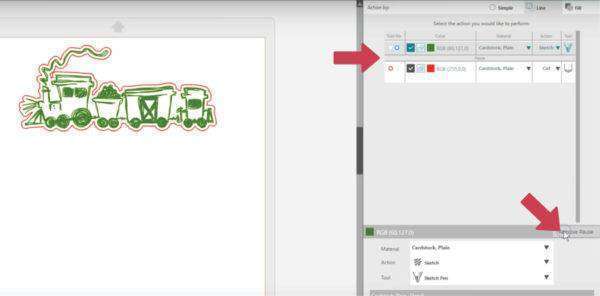
If we were using a ratchet blade, we would need to add a Pause between each line so that we could manually adjust the blade between each material before clicking “Resume.”
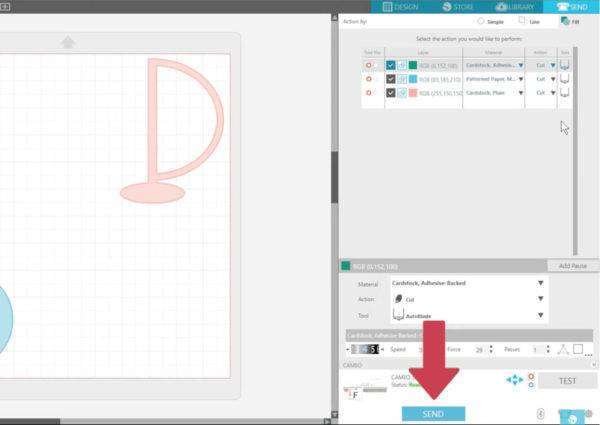
Now we are ready to send the project to the Silhouette to cut.
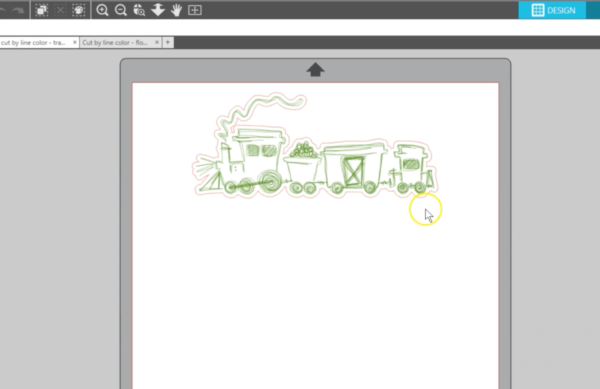
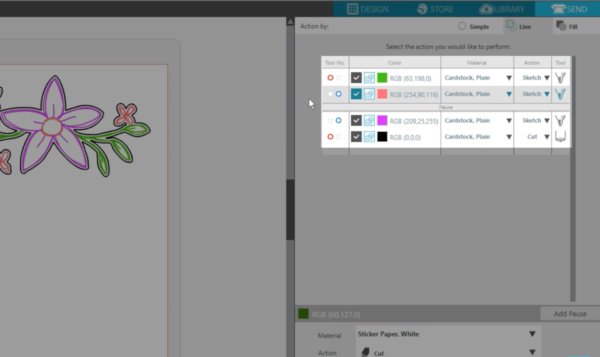
Next let’s look at cutting by Line Color. It’s basically the same as cutting by Fill Color, but you will use the line colors to designate the cuts instead of fill colors. We will show you a different example where we want to sketch, then cut around the sketched design. With this train design, what we want to sketch has a green line color and what we the offset line we want to cut has a red line color.
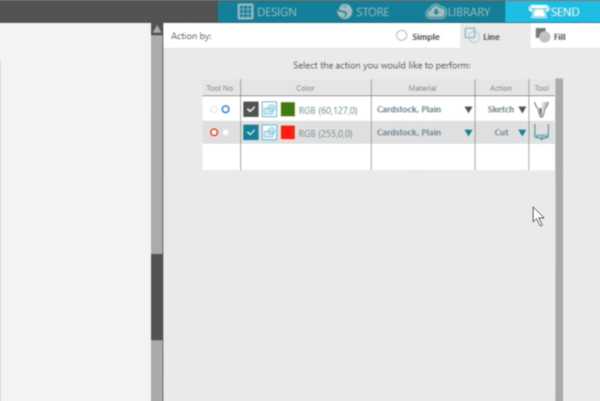
Let’s go to the Send panel again. This time we will choose the Line action. You can see each line color is represented here. We want to sketch first with the Right Tool Holder of the CAMEO 3, so we’ll drag the green color to the top and choose the blue tool.
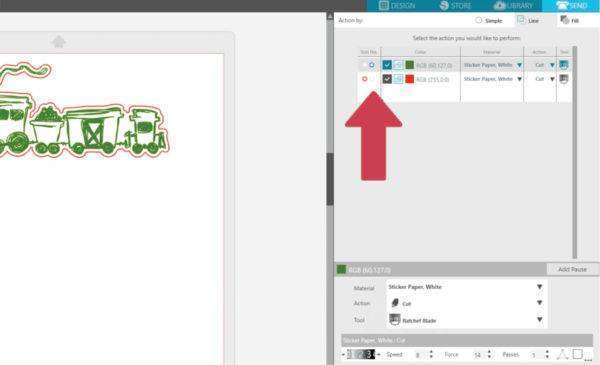
For the material, we will choose “Cardstock, Plain.” For the Action, we want to choose Sketch, and the tool will automatically change to a sketch pen. The red line color is for cutting, so we’ll leave it with the red (or left) tool holder and change the Material to “Cardstock, Plain.” We want this to Cut with the AutoBlade. Now this design is ready to sketch with the right tool holder and then cut with the left tool holder.
If your Silhouette doesn’t have dual tool holders, remember you can add a Pause between lines to manually change your tool.
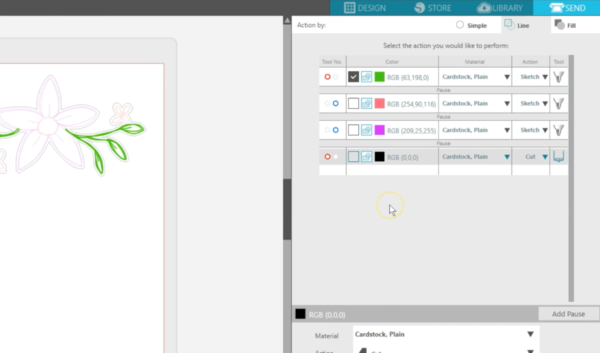
That was a simple example, but you can get pretty complex with multiple sketch colors on these advanced cut settings.
We’ve got three sketch colors here, so we are sketching with the left holder then the right holder, and then we are going to swap out for a third color and a cutting blade during a pause. If you have a single blade carriage, you simply add more pauses and ignore the red and blue tool choices you see here.
Or you can uncheck the cut boxes and send one color at a time without unloading your mat in between.
We hope you can see what great choices you have when cutting by Line Color or by Fill Color!