
Did y’all jump up and down like little kids when Silhouette revealed a bunch of cool new products back in July?! Don’t lie, you know you did. I for sure did and knew I had to get my hands on the metallic temporary tattoo paper! Even though I’m not a tattoo junkie, the out-of-the-box thinker in me wondered what else could this neat specialty material be applied to other than skin? After seeing how the regular temporary tattoo paper can be used on a variety of other objects like Easter eggs, I thought I would try it on a craft pumpkin. My favorite holiday, Halloween, is around the corner after all!
Supplies Needed:
- Silhouette CAMEO® or Silhouette Portrait®
- Silhouette Studio®
- Silhouette Metallic Temporary Tattoo Paper
- Silhouette Hook
- Silhouette Cutting Mat
- Craft Pumpkin
- Paper Towels
- Design ID #99072
Step One: Create Spiderweb Design in Silhouette Studio®
- Start with a blank file with page size of 8.5 in. x 11 in.
- Open Design ID #99072 on an 8.5 in. x 11 in. blank file.
- Right-click and select Ungroup. You should see three separate spiderweb designs.
- Depending on the size of your craft pumpkin, you may want to create thinner spiderwebs. That is what I did for my little craft pumpkin. To create thinner spiderwebs, do the following:
- Click on one spiderweb design and choose Internal Offset in the Offset panel.
- Change the internal offset distance as you desire. For this project, I used 0.03 in. internal offset distance.
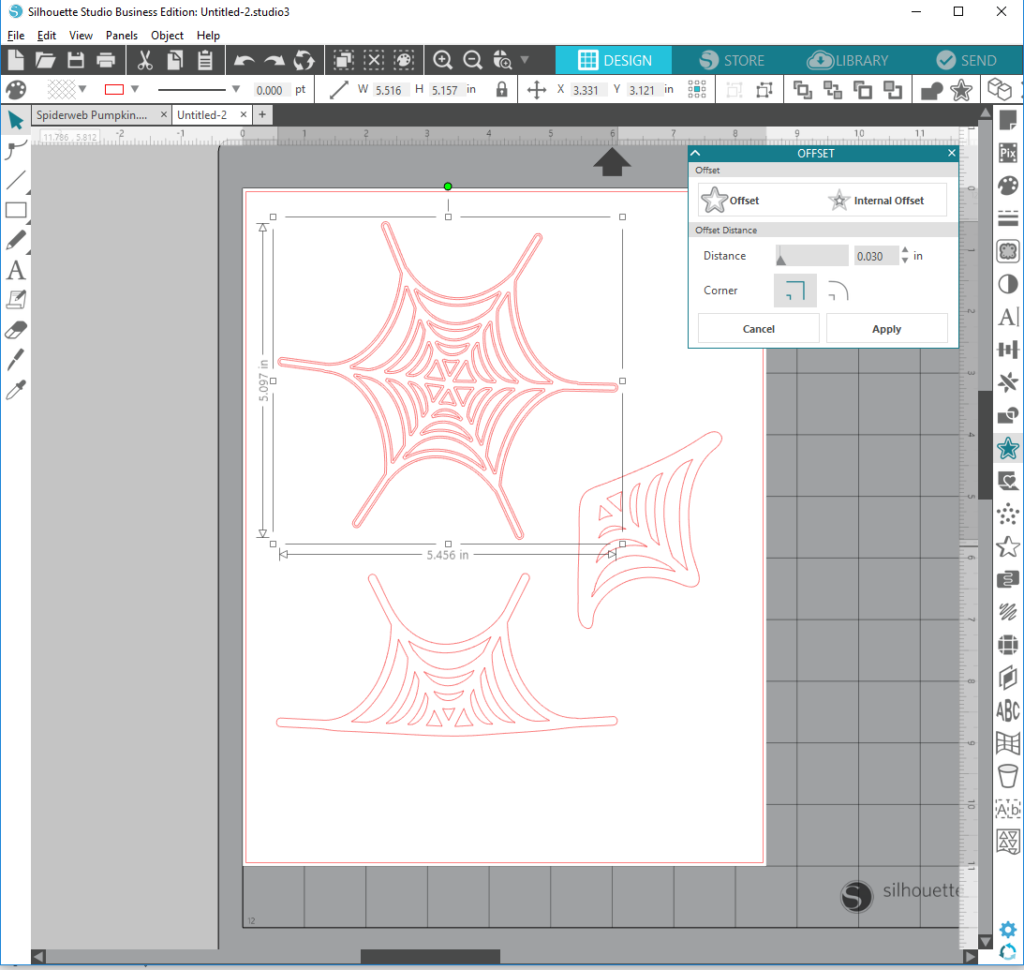
- Keep corners round and click Apply.
- Remove the original (wider) spiderweb piece
- Repeat the steps above for the remaining two spiderweb designs.
- Replicate and resize the spiderweb pieces as needed to fit your craft pumpkin.
Step Two: Send to Silhouette
- Once you are ready to cut your spiderwebs, place metallic temporary tattoo sheet onto cutting mat with metallic color side up.
- (NOTE: For this particular project, we will use the cutting mat with specific cut settings so that the blade cuts through the tattoo paper material. For regular metallic temporary tattoo projects, you do not need to use the cutting mat.)
- (NOTE: If using a different design, especially with text, you will need to mirror your design.)
- Send to Silhouette with the following cut settings: Blade 5, Speed 3, Force 33.
Step Three: Assemble Project
- Carefully peel metallic spiderwebs from the cutting mat while removing the inside web pieces.
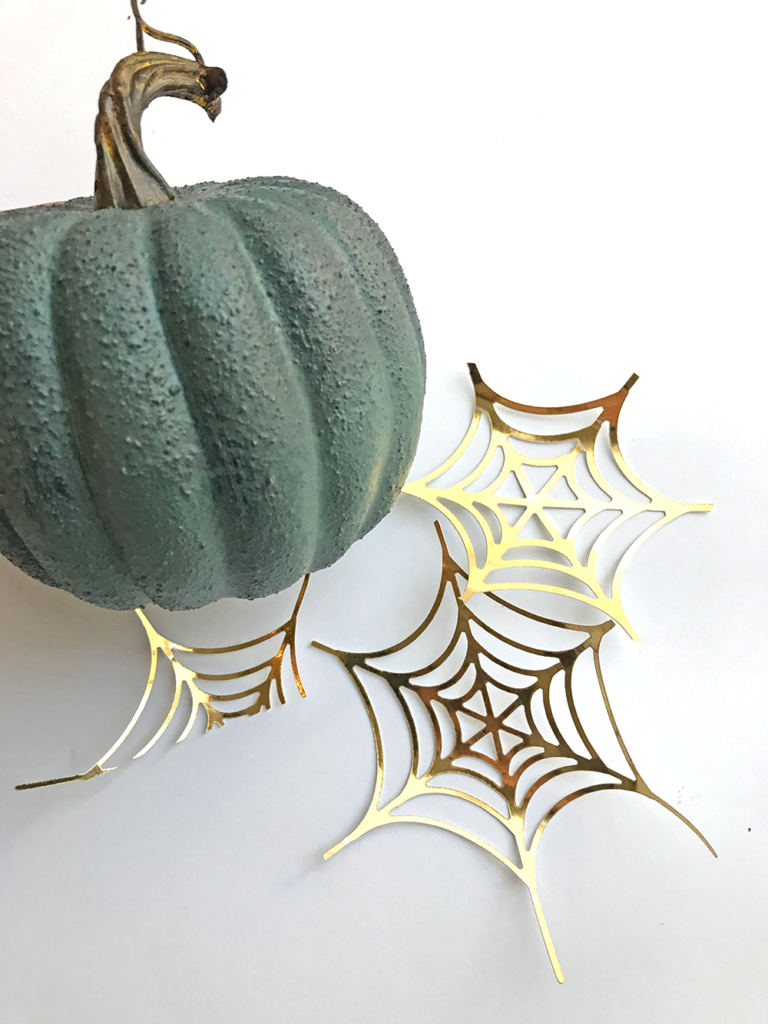
- Next, again carefully peel away only the transparent plastic layer on top of the metallic tattoo paper.
- Apply the tattoo sheet (metallic color side down) onto the pumpkin and starting from either the left or right side of your spiderweb, dab with a wet paper towel for about 10 seconds and make your way across the entire spiderweb (going right or left, depending on what side you started on).
- NOTE: The paper backing of the tattoo paper should easily peel away, leaving the metallic tattoo paper adhered to the craft pumpkin.
- With a dry paper towel, gently dab to soak up any wet spots.
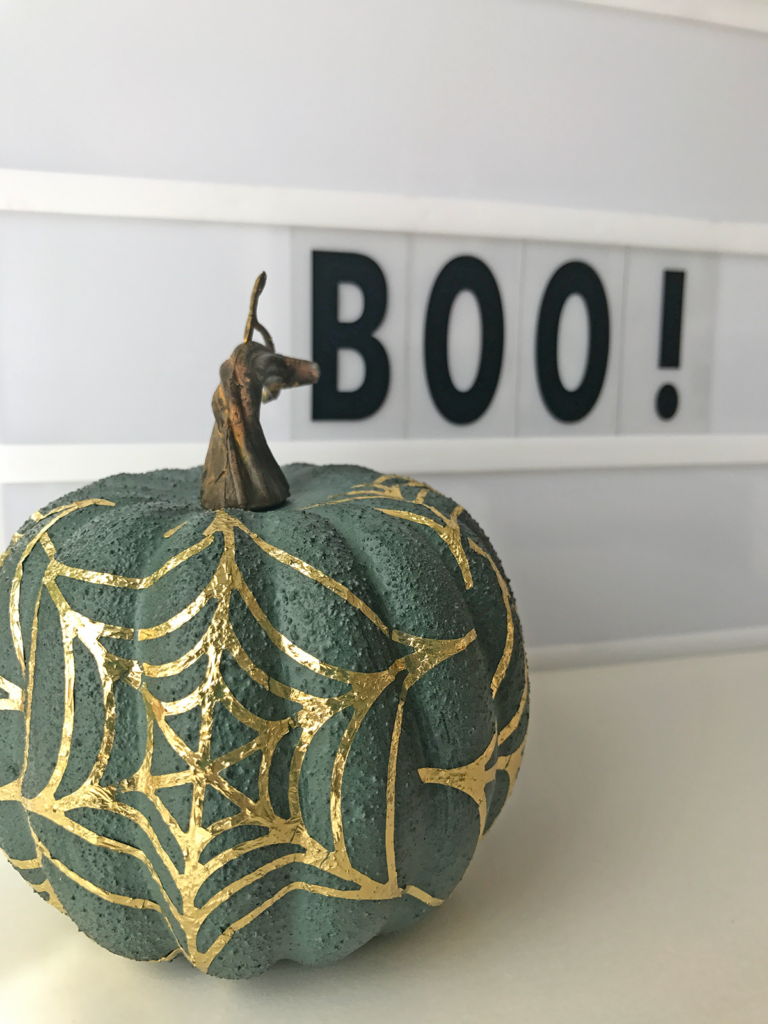
So, who’s ready for Halloween?! While there are other materials you can use for this project like adhesive vinyl, the temporary tattoo paper is truly the way to go! It is thin enough to neatly stick to textured surfaces, giving off a very natural and finished look on the pumpkin.
What fun designs will you make with the new Silhouette metallic temporary tattoo paper?
Dolly (scrapthat)
September 25, 2017
Fun!!