
Hello friends! Cheers, to whatever it is you’re celebrating right now. And cheers to trying out different materials on my Curio. Brittany here. Today I will be taking you through a tutorial using Silhouette’s Deep-cut Blade to cut these wooden-faced coasters, and explain a little more about the guessing game of blade-settings when using a material not listed in the Silhouette Studio® cut settings window. Let’s get to it!
What You’ll Need
- Silhouette Curio™
- Silhouette Mint™ (or other stamps you have on hand)
- Deep-Cut Blade
- Silhouette Chipboard
- Adhesive-backed Wood Roll
- To begin, I laid out 6 circle shapes about 3.75 inches in diameter in Silhouette Studio® using the ellipse tool.
(Tip: Holding down the shift key while using the ellipse tool will keep the shape a perfect circle while sizing it.)
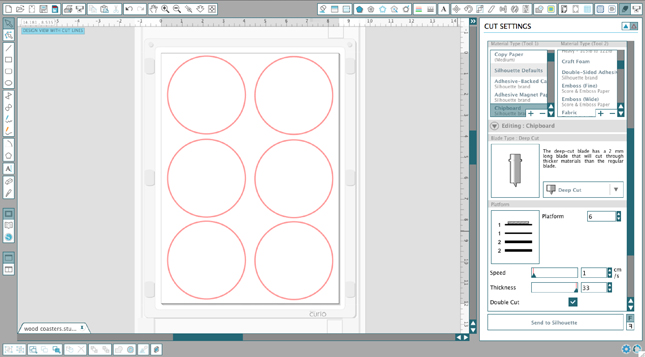
- I prepped my “coasters” by adhering part of an adhesive-wood roll I found at a local craft store to a piece of Silhouette’s chipboard. Once adhered, I placed that on my Curio cutting mat, using the 6 platform setting.
- When you’re using a new material, or a material not found in the Silhouette suggest cut settings window, it can be a little scary cutting it without knowing if you’ve guessed the right settings or not. The truth is, it’s going to be a bit of a guessing game every time. My biggest suggestion if you NEED to get it right is to always buy an extra piece of whatever it is you want to cut until you know it’s do-able, but there is a tip to help avoid wasting little that you have. Trust me when I say, we’ve all been there. In the cut settings window, if you scroll down to the bottom you will see an option that says Test Cut (Tool 1). Selecting this will do a small test cut on your material, allowing you to see if you need to adjust your settings or not before sending your design to cut.
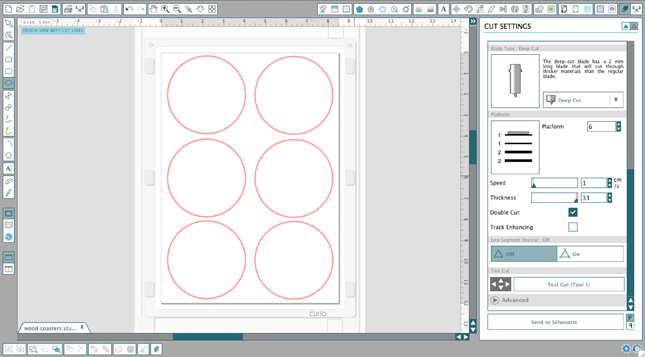
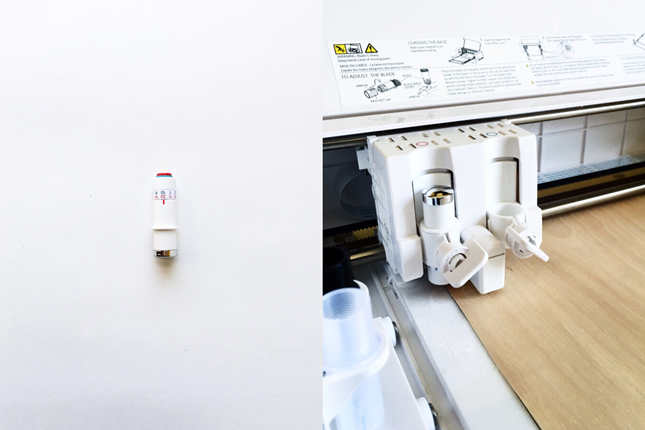
- For this project, since I already knew I had combined my wood material with the chipboard, that it was going to be rather thick to get through. I started by selecting chipboard in the Tool 1 window and manually switched the blade choice from ratchet blade to deep cut blade in the cut settings window. I also left the double cut option selected.
- I assumed with the doubled-material that I’d most likely need my blade setting to be at the maximum 20, so I adjusted the rotating blade dial and placed the deep cut blade into the tool 1 spot on my Curio, before sending it to cut. Even at the highest setting, and most likely because I layered two rather dense materials atop each other, it actually took running the cut twice (essentially cutting 4 times) to cut all the way through. I wish I could say there is a magic way to know exact settings, but the truth is, sometimes I get it right, and sometimes I have to play around a little more.
- Once my coasters were cut out, I used a stamp I had previously made with my Silhouette Mint™ to stamp the “cheers” design right on to the wood. For a more in-depth tutorial on making a stamp with the Mint to stamp wood, you can reference my Stamped Wooden Spoons tutorial here.
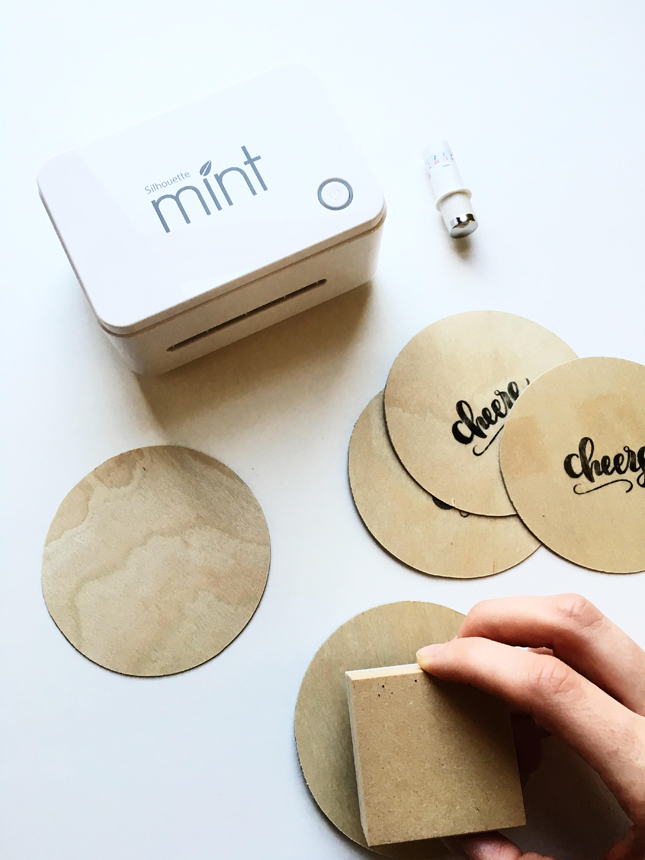
Voila! Cute, custom coasters sure to step up your next celebration.

Happy crafting!
Kelly Wayment
March 10, 2016
Excellent! I love the idea of the look of thicker wood, but attached to the softer chipboard for cut-ability.
Cari
March 10, 2016
Love this. And attaching it to chipboard – brilliant!
Pamela Peach
March 10, 2016
Need to learn how to use silhouette machine brought one two years ago.
Dennis Chidi
March 11, 2016
Thanks for the tip Kelly, I’ld like to throw a question please…Can the Curio deep cut blade pierce a leather, i mean cutting through a leather material please?