If you’ve every wanted to create your own epoxy stickers, then the Doming Starter Kit is for you. Create your own designs or use one of free designs included with the Doming Starter Kit. To learn all the steps you need to take to create your very own domed stickers, just follow the tutorial below.
Supplies Needed:
- Silhouette CAMEO®, Silhouette Portrait®
- Silhouette Studio®
- Silhouette Cutting Mat
- Silhouette Cutting Blade
- Doming Starter Kit
- Printer
- Doming Starter Kit Free Designs
Step One: Preparing Designs
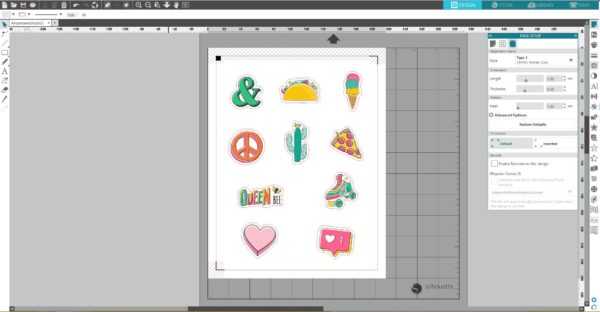
1. With your Doming Starer Kit, you will get 10 free exclusive designs. To download them, follow the instructions on the back of your free designs card that is included in the Doming Starter Kit. Open and download the free designs in Silhouette Studio®. Add registration marks by clicking on the Page Setup icon located along the right-hand toolbar and selecting the style of registration marks. Type 1 is standard (which is what you will most likely use), and Type 2 is for older machine models. Resize the designs, if needed, and place them within the registration marks borders.
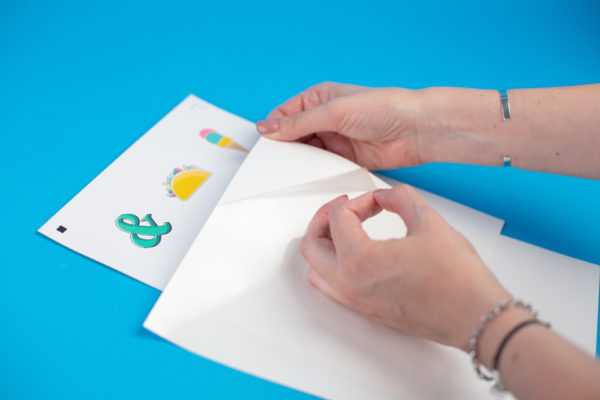
2. Once your design is ready to go, print your designs to your inkjet printer by clicking on the Print icon in Silhouette Studio®. In the Doming Starter Kit, you will find two types of sticker paper—white and clear. Make sure you have loaded your material into your home printer correctly. For this blog post, we used both clear and white sticker paper. Allow the ink to dry before proceeding.

3. APPLY A LAMINATE SHEET OVER THE PRINTED PAGE WHEN USING WHITE STICKER PAPER. Use a scraper tool to carefully smooth the laminate sheet as it is applied to prevent bubbles or creases.
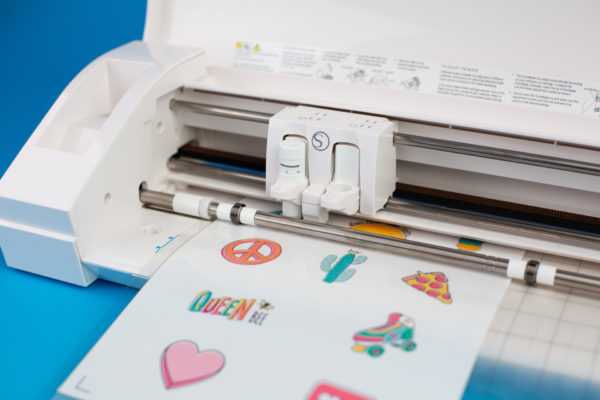
Step Two: Cutting Designs
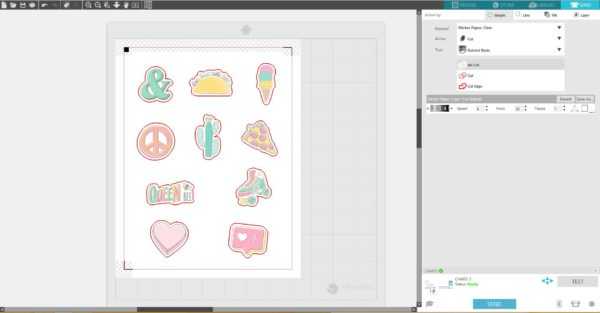
1. Place a sheet of the printed clear sticker paper on the cutting mat. Load cutting mat in the Silhouette cutting machine. Select the “Sticker Paper, Clear” from media list in the Send tab, and adjust the cut settings to Blade – 3, Speed – 4, Force – 30, Passes – 1. Adjust your blade accordingly and click Send.
2. After the cutting process is over, unload the cutting mat and remove the sticker paper from the cutting mat.
3. Place a sheet of the printed white sticker paper with the applied laminate sheet on the cutting mat. Load cutting mat in the Silhouette cutting machine. Select “Sticker Paper, White” from the media list in the Send tab and adjust the cut settings to Blade – 3, Speed – 8, Force – 18, Passes – 1. Keep in mind that you need to increase your blade depth by one if you applied a laminate sheet to your page, so our final blade depth will be 4. Adjust your blade accordingly and click Send.
4. Weed away the excess material from around your designs, leaving just your cutout stickers on the sticker backing.
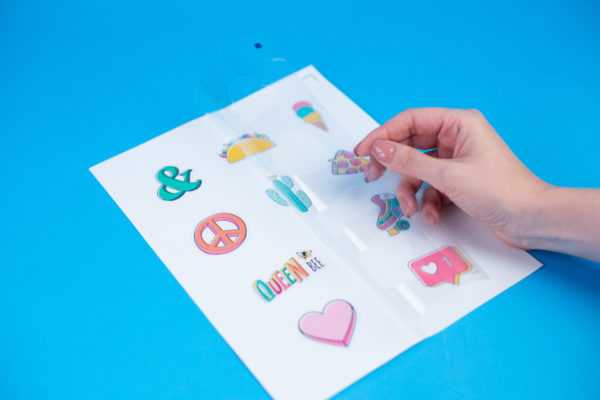

5. Set your sticker sheet on a flat surface.


Step Three: Applying Epoxy Resin
1. Fill the A and B syringe chambers with equal amounts of the corresponding A and B epoxy resin solutions.
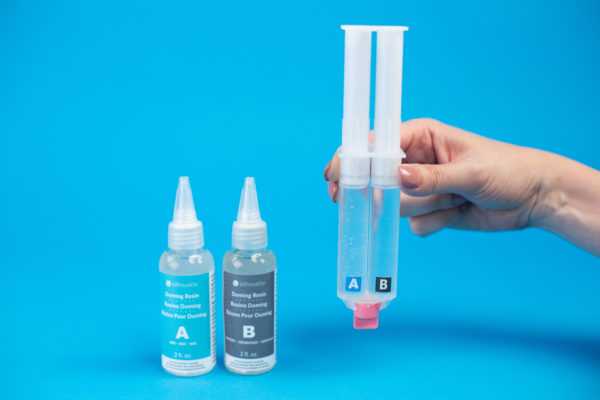
2. Attach the syringe tip and prime your syringe by squirting out a small amount of epoxy resin (about 1 inch in diameter) onto a scrap piece of paper. This ensures that your syringe will apply an equal mixture of the A and B solutions.

3. Slowly apply the epoxy resin onto the surface of your cutout design, starting from the outer edge and moving toward the inside of the design. Be careful not to over-apply the resin as the resin may overflow off the edge of your cutout design.
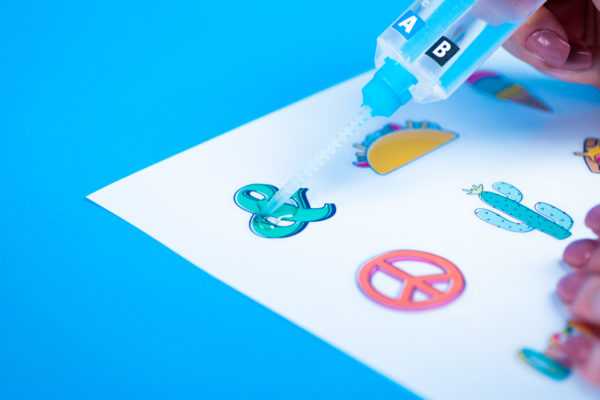
4. Use the provided toothpicks to spread the resin for more complicated designs and also to remove excess air bubbles.
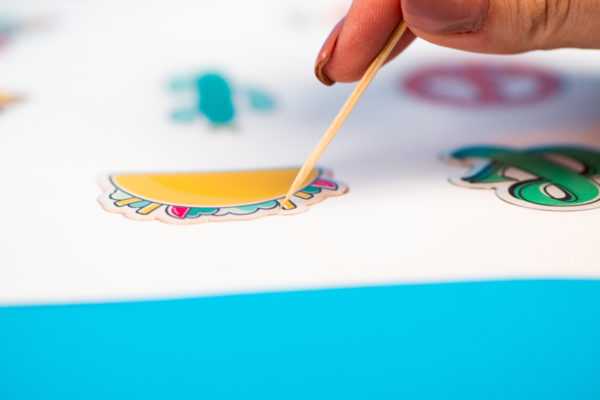
5. Allow the resin to set for 12 hours to fully cure and harden.

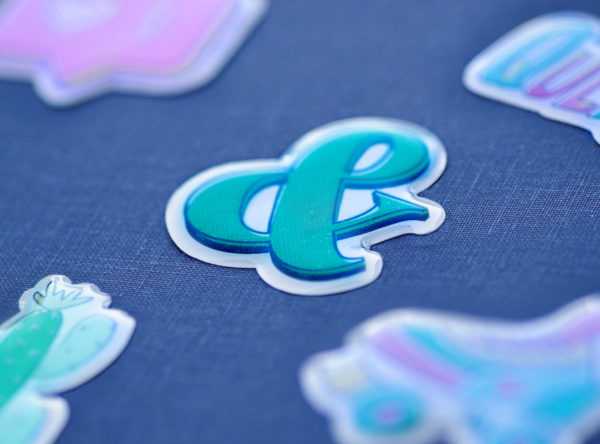
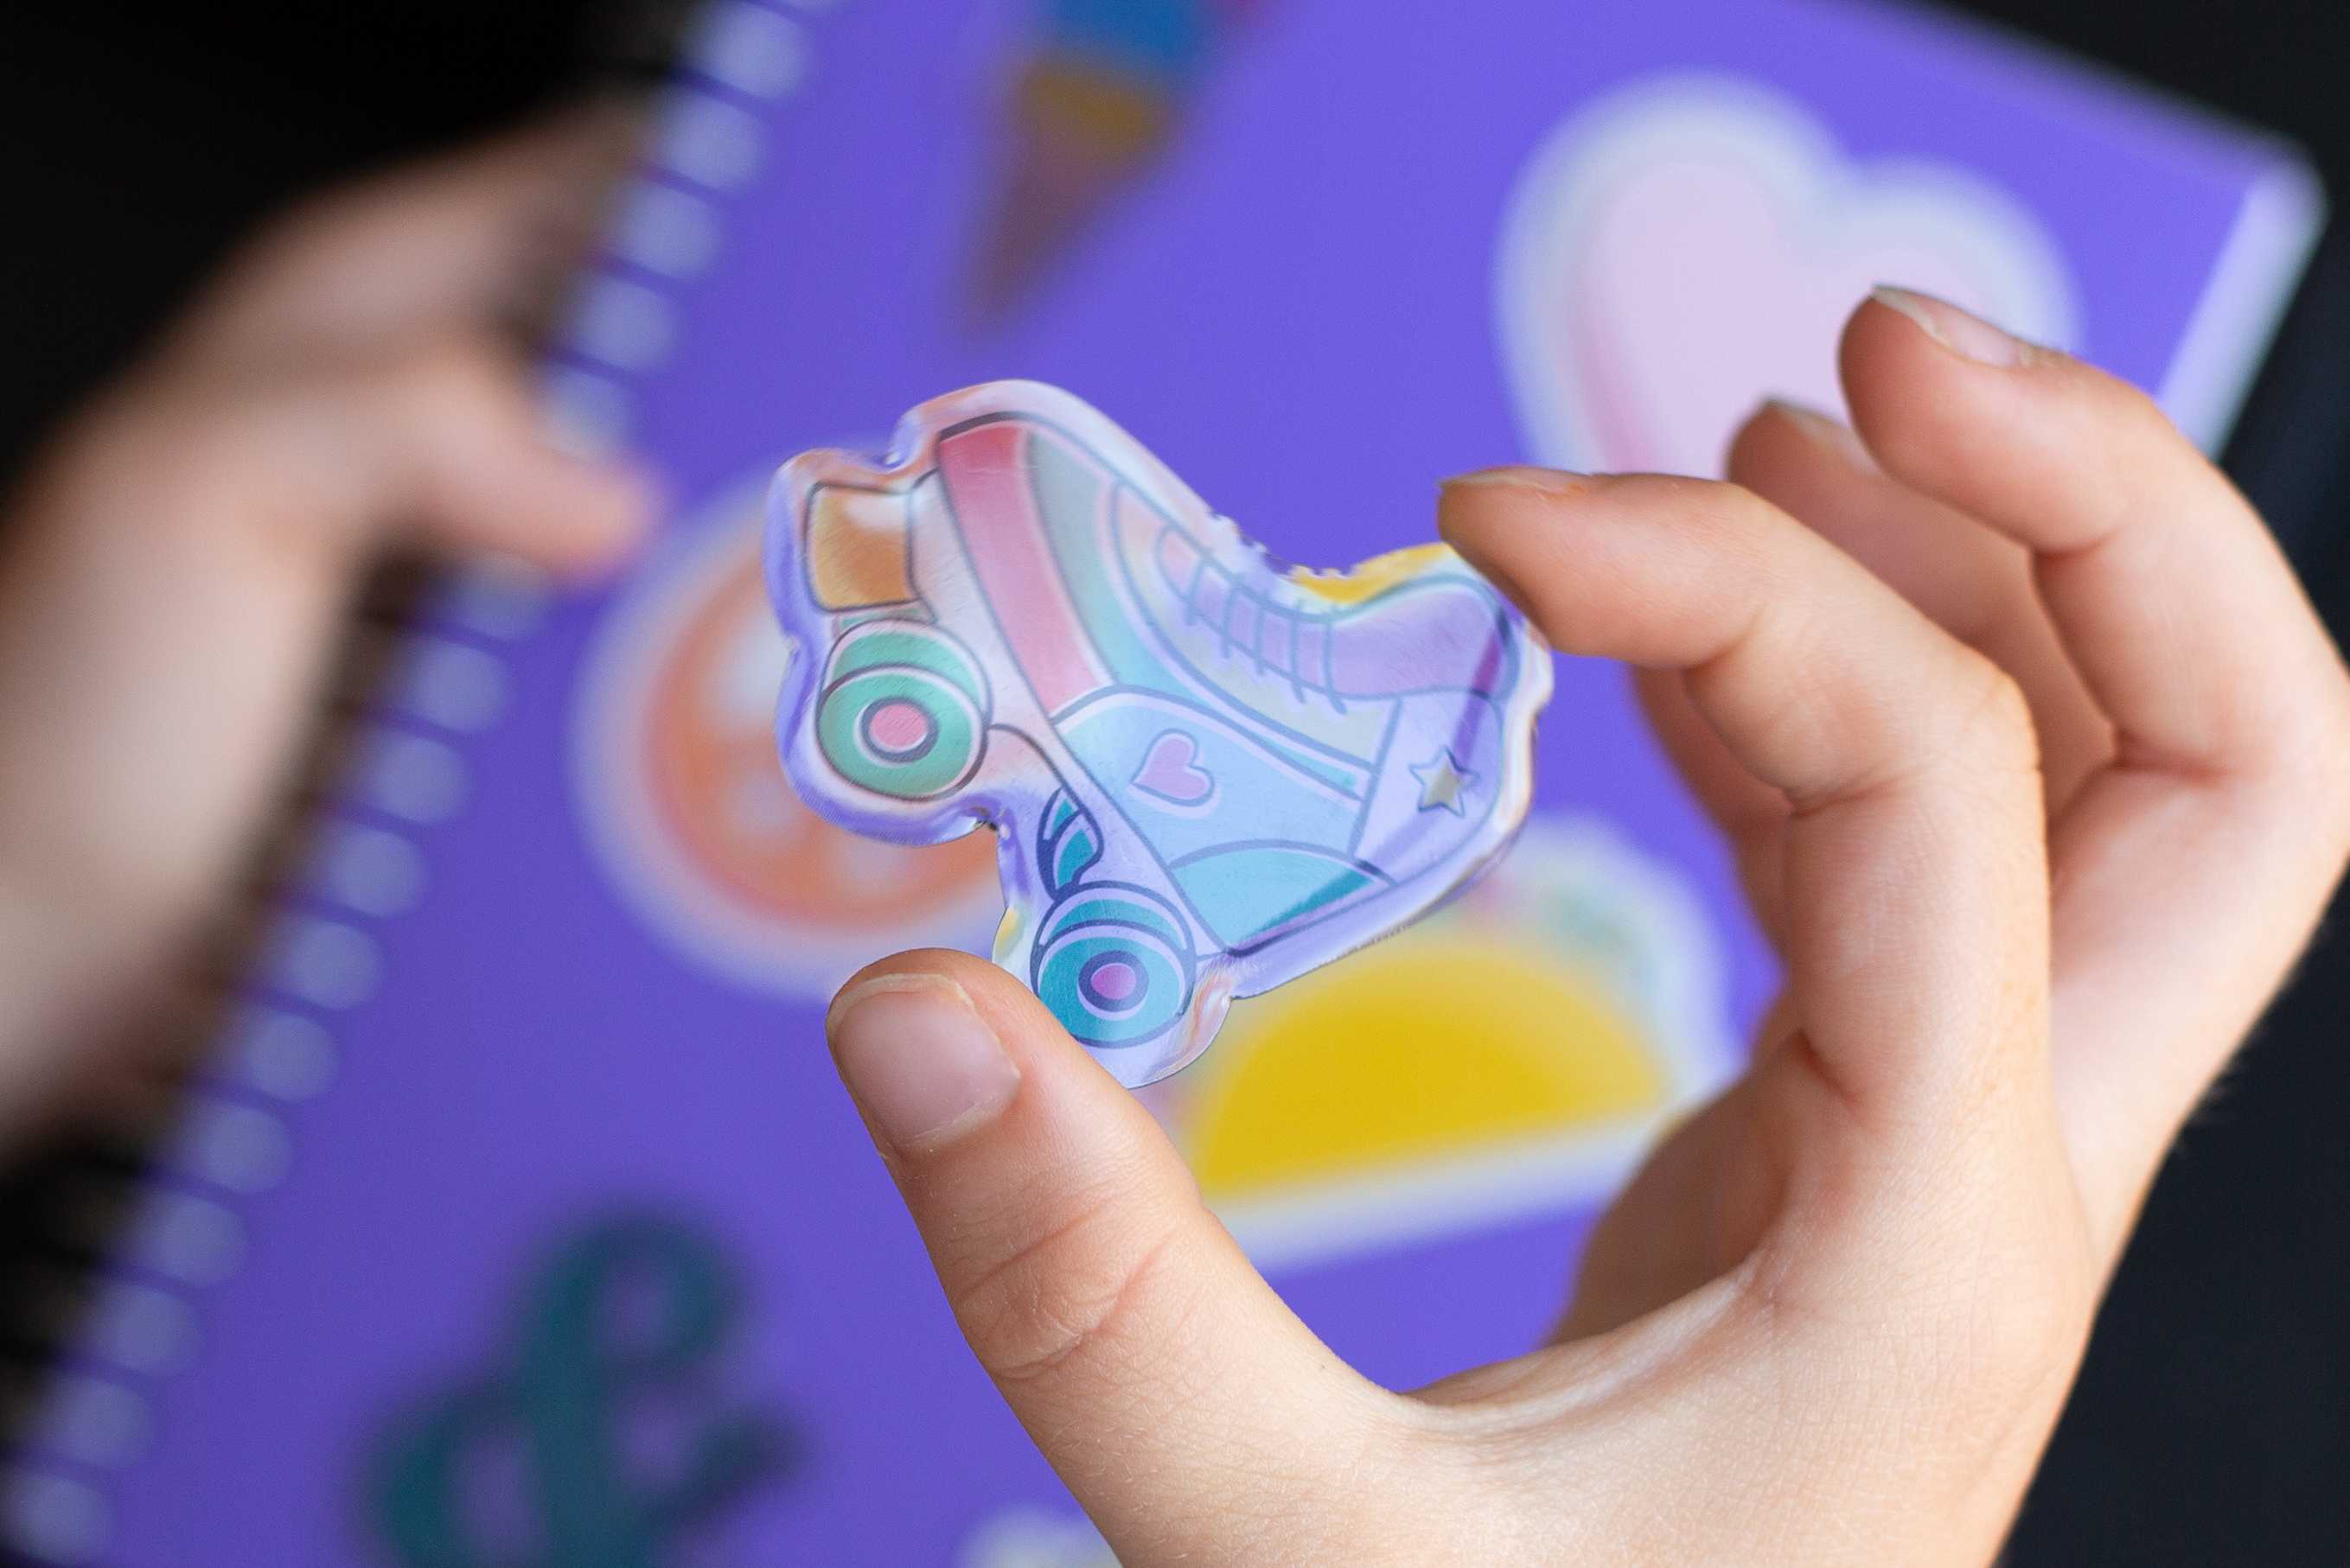
And now you have your epoxy stickers! The doming supplies are a fantastic option if you’re looking for something to help you create customized and unique sticker projects you can add to notebooks, scrapbook pages, letters, and many other things.
Graham Bridget
December 19, 2018
Just wanna comment that you have a very decent site, I enjoy the design and style it really stands out.