Hi everyone, It’s Marni here today. I’m happy to be sharing a simple Memorial Day tutorial.
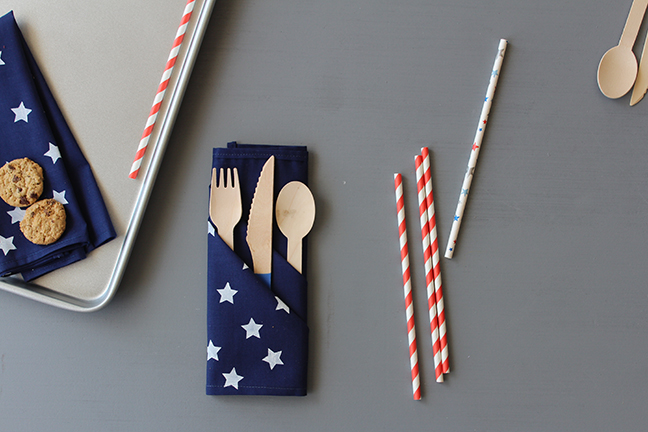
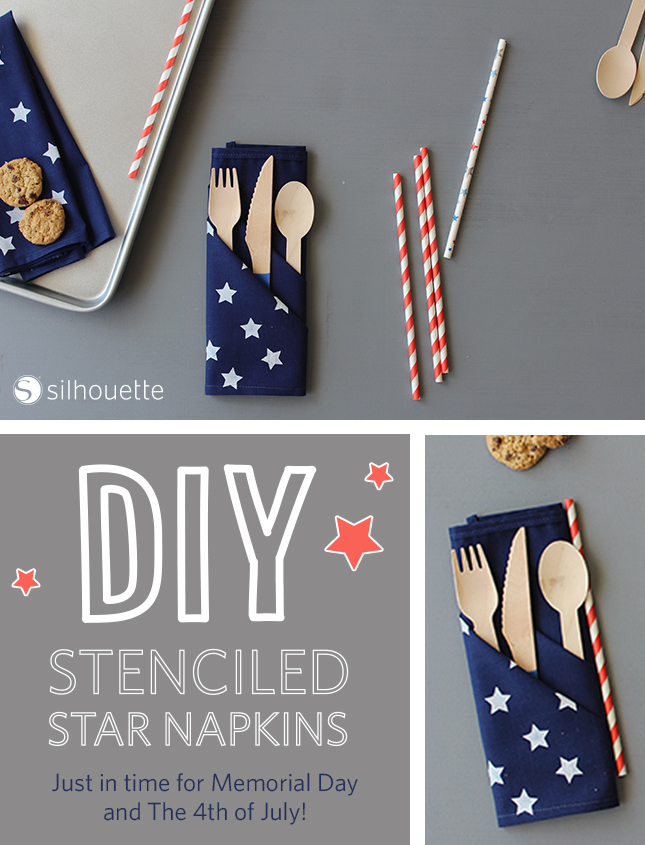
Are you hosting a party for Memorial Day? Do you have the guest list finalized and food ideas ready, but can’t figure out your table decorations? Well, why not print your own flag inspired star napkins? Just add red & white straws plus a few other items and you are ready to go.
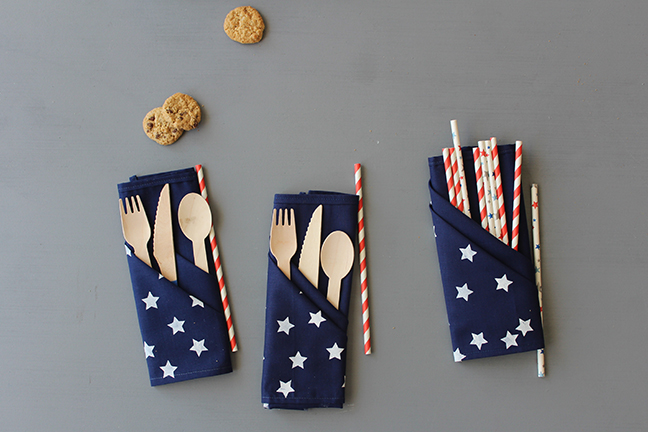
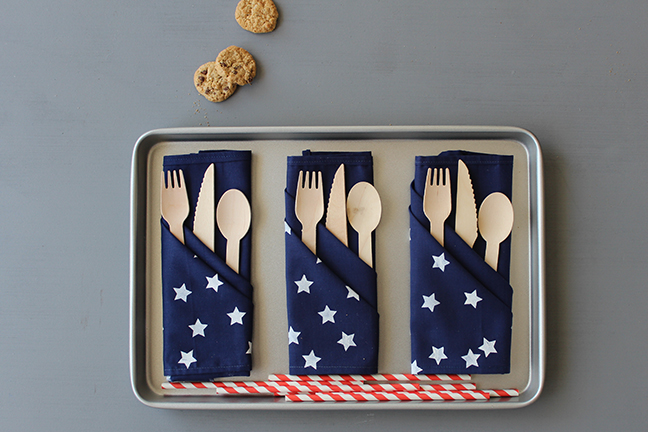
I love how the napkins can be folded into little cutlery pouches. Adorable, right?
To make these napkins you will need:
- Silhouette CAMEO or Portrait
- Silhouette Stencil Vinyl
- Silhouette Fabric Ink – color white
- Silhouette cutting mat – optional
- Silhouette tools – scraper, hook and foam brush
- Store-bought napkins – color navy
- Shooting Stars Design (ID #17221)
- Craft paper
A few things to consider..
- Having trouble finding the right color napkin? Buy fabric, cut and sew 22 in. x 22 in. squares
- You don’t have to use a cutting mat when using stencil vinyl on your CAMEO or Portrait
- 2 rolls come in each Stencil Vinyl package – One roll is stencil vinyl and the other roll is transfer tape
Let’s go!
Step One: Create The Star Design
Open your library and double click on a the desired design. It will open in Silhouette Studio.
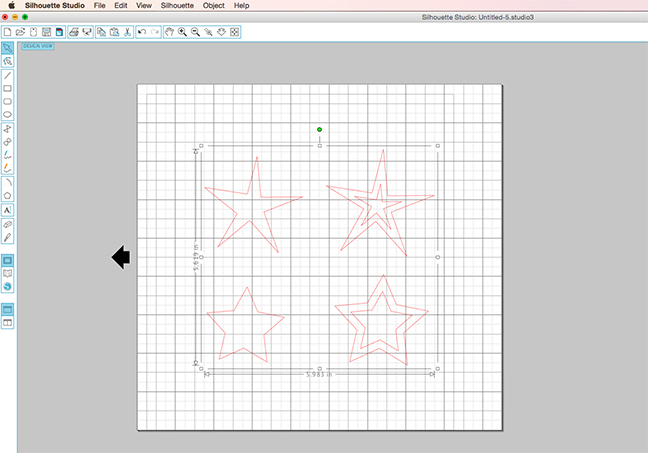
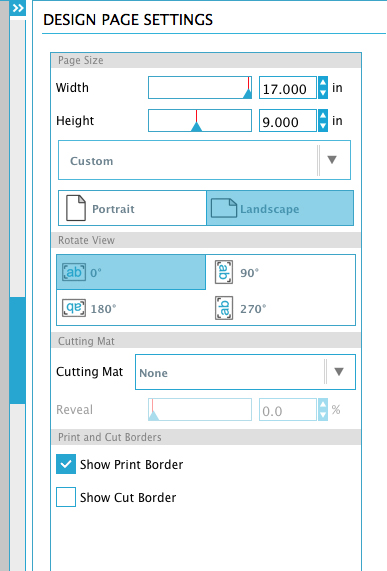
Change your page dimensions in the Design Page Setting, which is located in the upper right hand corner. Change the setting to 9-inch for the height and also select “Landscape”. Napkins vary in length, so measure your napkin length and use this for the vinyl width. For instance, my napkin measured 17 in. x 17 in.

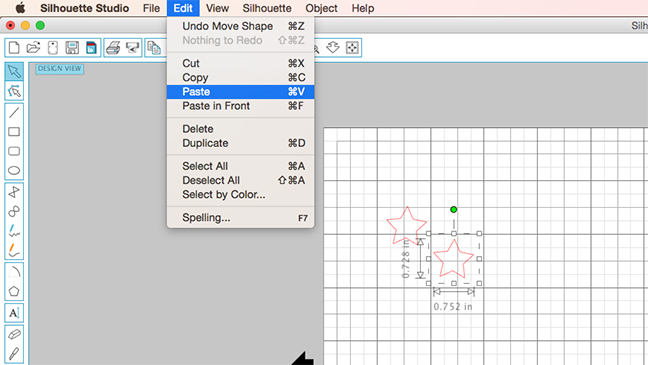
Ungroup the stars and delete three stars leaving the one star. Re-size the star [optional and will depend on the star size you want]. Click on the star and a rectangular box should form around it. Using your mouse, pull the little square box that appears at the corner. Pull inwards to make smaller and pull outwards to make larger. For these napkins you will want to change the star size to be approx 0.75-inches wide. Now have fun and create the star layout. Click on the design and the rectangular box will form again. Click on “Edit > Copy” and then “Edit > Paste”. You should now have 2 little star designs.
Repeat, repeat and repeat and fill the entire page with stars. Create a random, all over pattern. Also make sure there are no empty spots in the overall design.

Step Two: Cut The Stencil
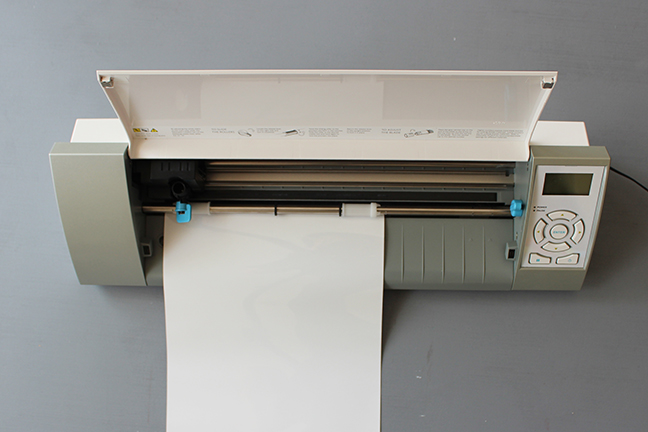
On your Silhouette machine, pull the lever towards you. This moves the bar upwards so you can adjust the white rollers. Wiggle and move the white rollers to the 9″ position [ the levers can be tricky, I use pliers to move mine]. After adjusting the rollers, move the lever back into the original position. Place the Stencil Vinyl under the white rollers.
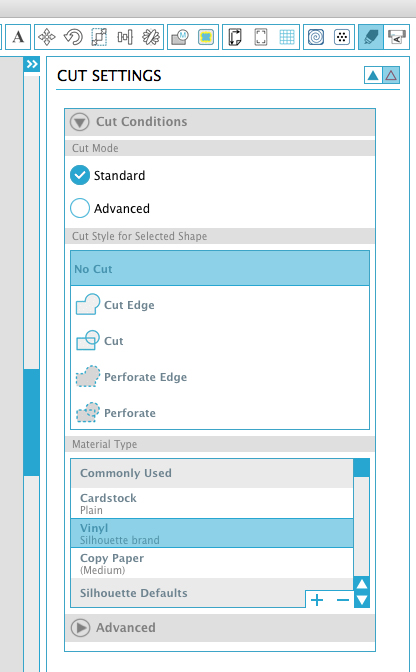
In the Design Page Setting, choose “None” for cutting mat. Then in the Cut Setting, choose “Vinyl”. Very important – try a few test cuts to see what settings work best for your machine. The last thing you want is to waste an entire sheet of vinyl because your settings were off! I’ve done this and it stinks, so trust me, this is an important step.
Hit “Enter” to load the vinyl into your machine and then click “Send To Silhouette”. The machine will start cutting. Once the stencil has been cut, unload from your machine. Carefully remove / “weed” away the vinyl portion of the stars. You are now ready for the fabric ink! This is my favorite part.
Step Three: Prepare The Stencil With Transfer Tape
Cut a piece of the transfer tape the same length as the Stencil Vinyl. Place it on top of the stencil vinyl, align the sides and start to pull the top edge down. Use the “Scraper Tool” to eliminate the bubbles.
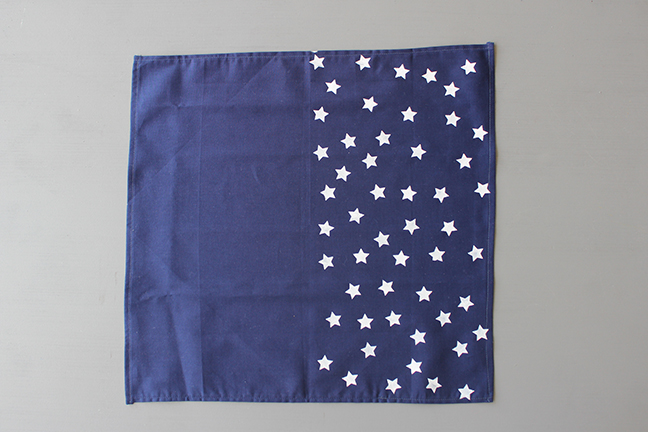
Next, peel off the stencil vinyl backing [white color]. Apply both layers to the napkin using the “Scraper Tool” again. Make sure to adhere these firmly to the napkin and eliminate all bubbles again. Finally, pull off just the transfer tape. You want the stencil vinyl to be set FIRMLY to the fabric so that no fabric ink leaks through. Also, to make the cutlery pouch and have the stars appear only in ONE corner, place the stencil vinyl along one side, no more than half-way.

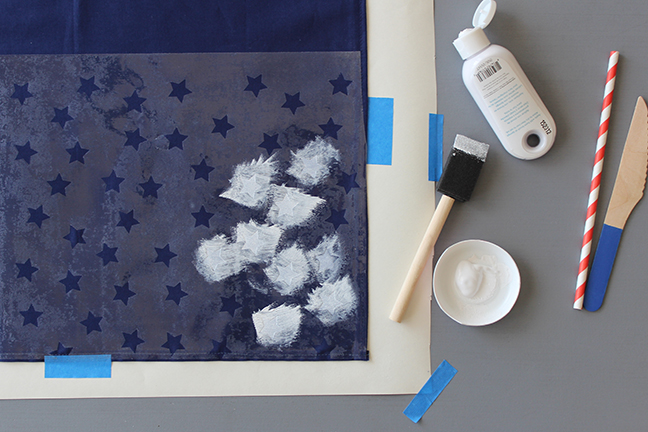
Step Four: Apply The Fabric Ink
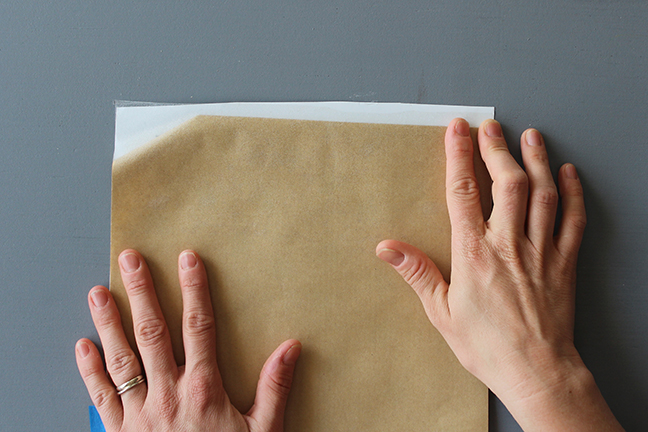
Lay the napkins on craft paper. The fabric ink can seep through and damage what is underneath. Tape to hold in place. Squirt the fabric ink onto a craft plate. Use the foam brush and gently dab the fabric ink onto the little stars. Gently dab the fabric ink in place and do not pull the foam brush around. Pulling the foam brush can dislodge the vinyl and the fabric ink will run. Apply a thin player and repeat if necessary. Keep the fabric ink consistent and not too goopy. Set aside to dry.
Once dry, gently peel the vinyl from the fabric.
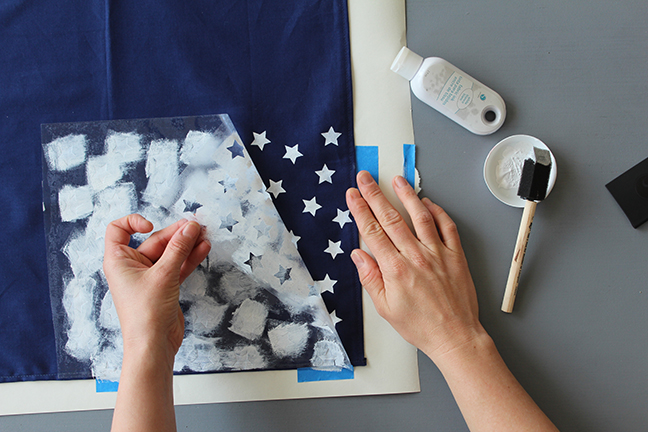
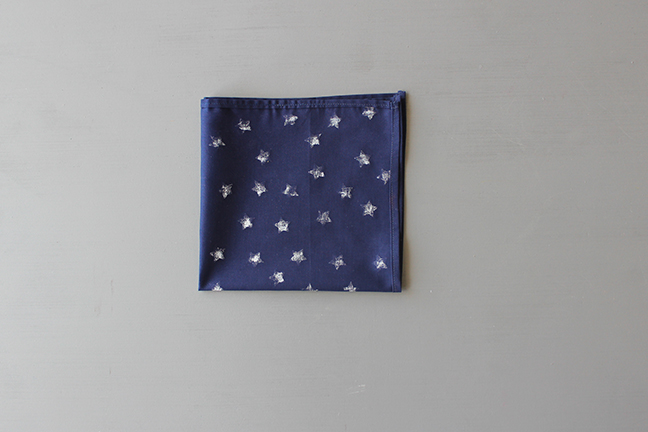
That’s it. Now admire your awesome work. Looks great, right? I love how the white stars stand out on the navy fabric.
MAY
Step Five: Fold The Napkins Into Cutlery Pouches
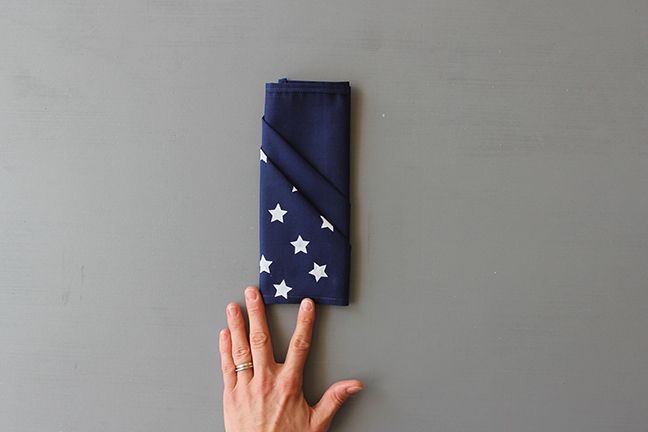
Now for the folding part.. There are a ton of napkin folding tutorials online, but I love this one best. Start with the napkin laying face up, the stars on the right hand side. Fold in half.
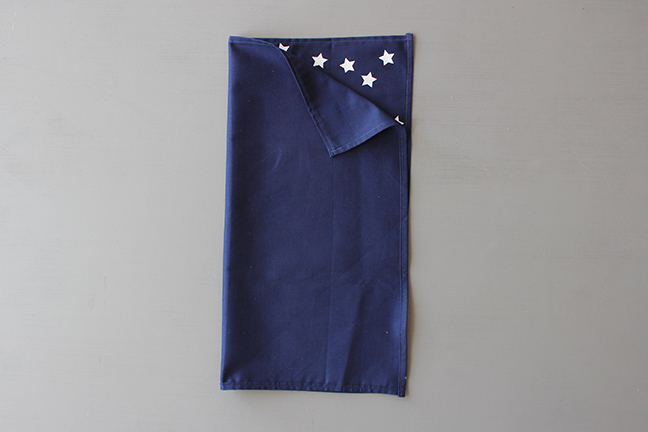
Fold in half, upwards towards the top.
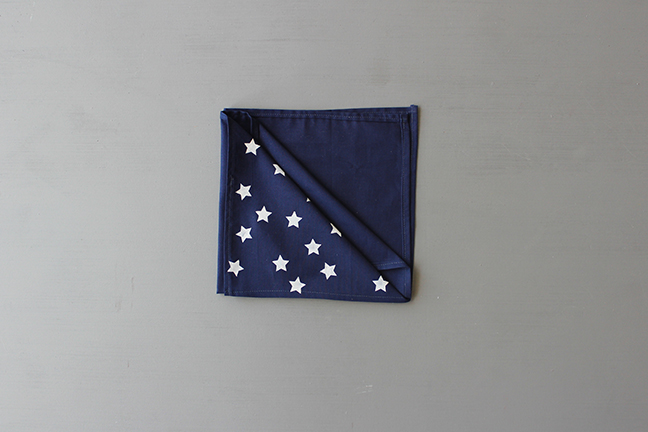
Turn down the top right corner, fold at an angle. The stars will appear. Turn down the second layer, fold at an angle and tuck under.
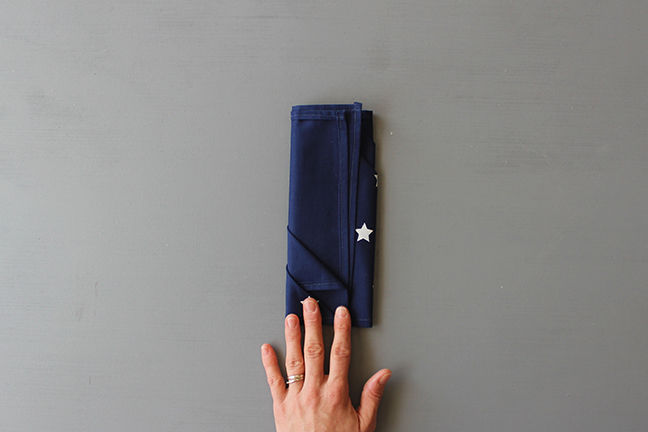
Flip over and fold the sides in. Using your finger, crease a fold at each side. Turn over and place items into pouch. Enjoy!
Kayla Brasher
May 29, 2016
I LOVE how the white pops against the navy! So cute!!
Kelly Wayment
May 29, 2016
So festive, Marni! Thanks for sharing how to fold the clever napkin, too. This is great!