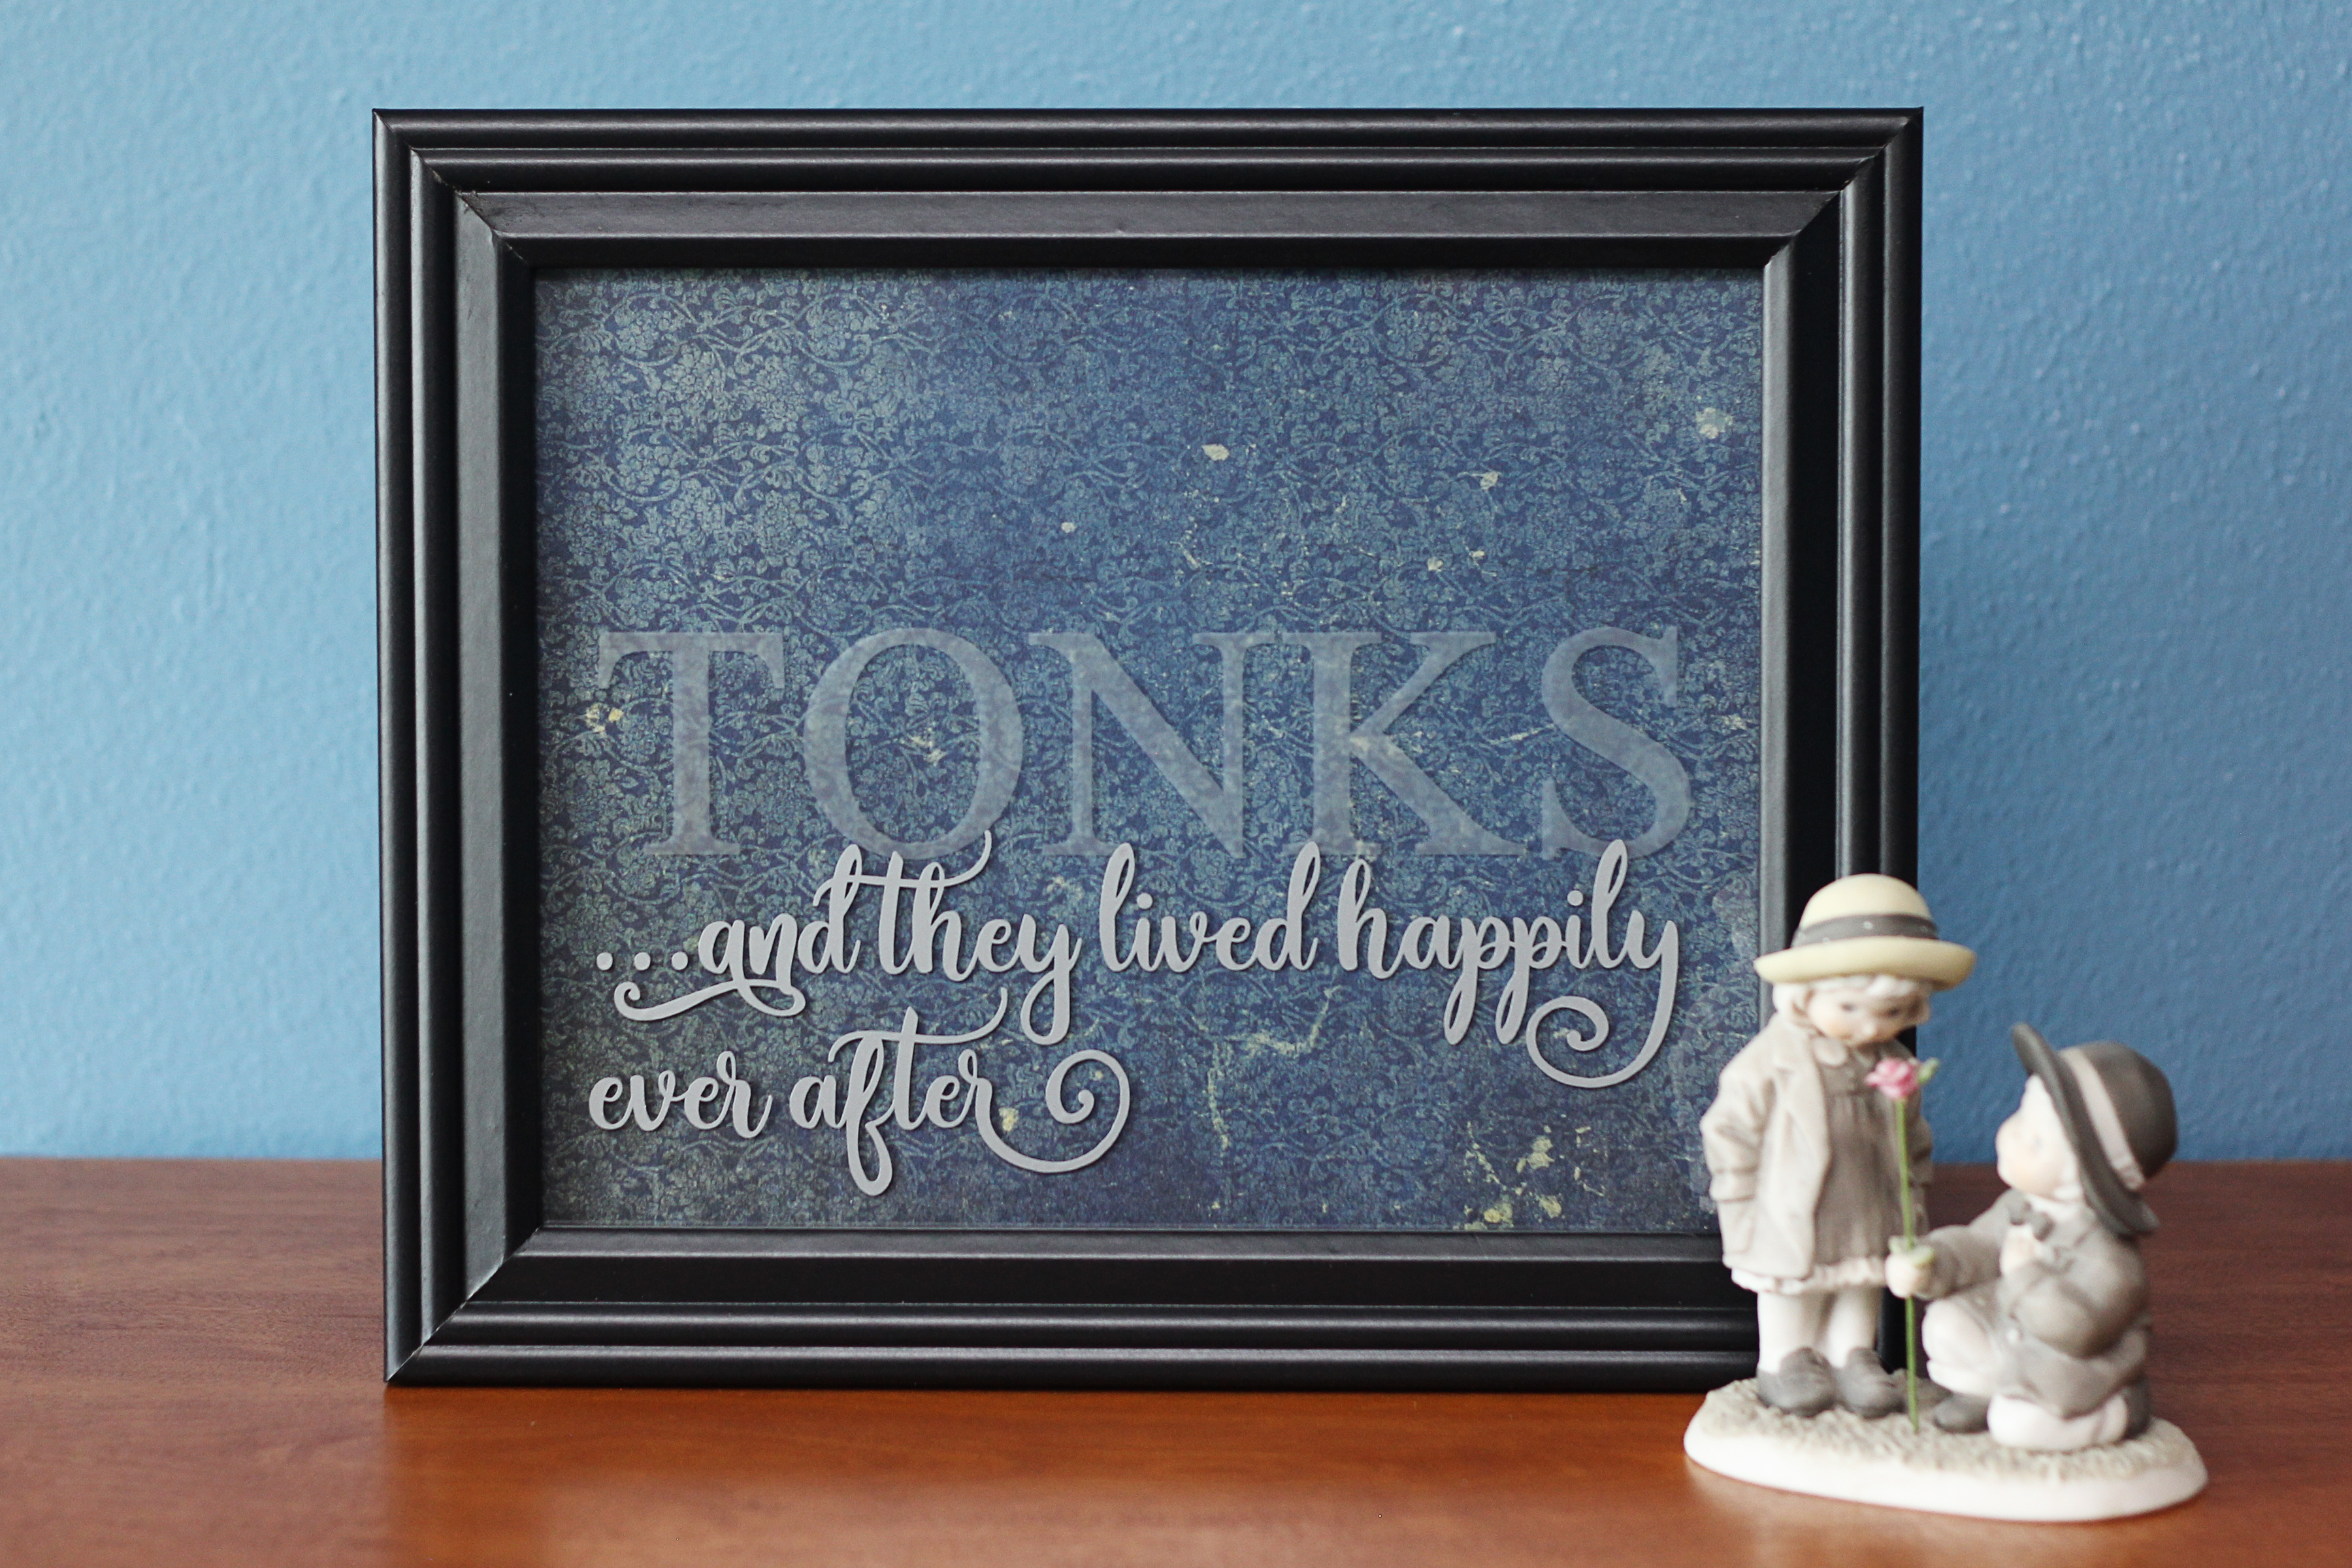
Wedding season is upon us, and I love making handmade gifts with the help of my Silhouette machine. Personalized gifts are the best, so this etched-glass wedding frame has become my go-to gift for newlyweds.
In this tutorial, I’ll show you how to create a design and etch the glass to make a customized frame like this on your own. (Warning: this gift may evoke tears or happy exclamations from the bride.)
Supplies/Tools Needed:
- Silhouette CAMEO® or Portrait®
- Stencil vinyl
- Colored vinyl – glossy or matte (I used matte silver)
- Scraper tool
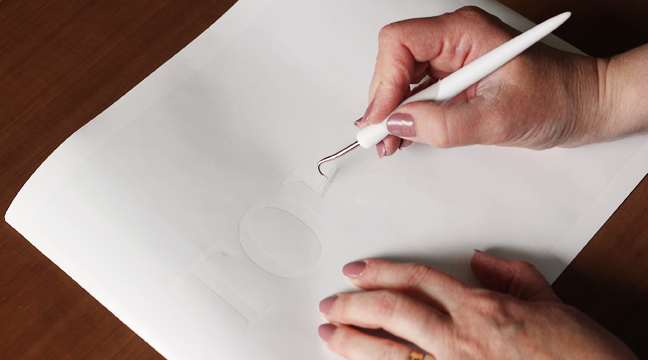
- Hook tool
- Transfer tape
- Glass etching cream
- Applicator for etching cream (such as a foam brush)
- 8 x 10 photo frame with glass removed and cleaned
- Protective gloves
- Design ID #123893
- Design ID #243652
This design simply uses text, so choose two fonts you like that complement each other. I always use a standard serif font for the main name and a script font for the phrase.
You’ll use some basic design and text tools, which you can learn more about in this video. You’ll also use some manipulation tools such as scale, align, and rotate, which you can learn about in this video.
Let’s get started!
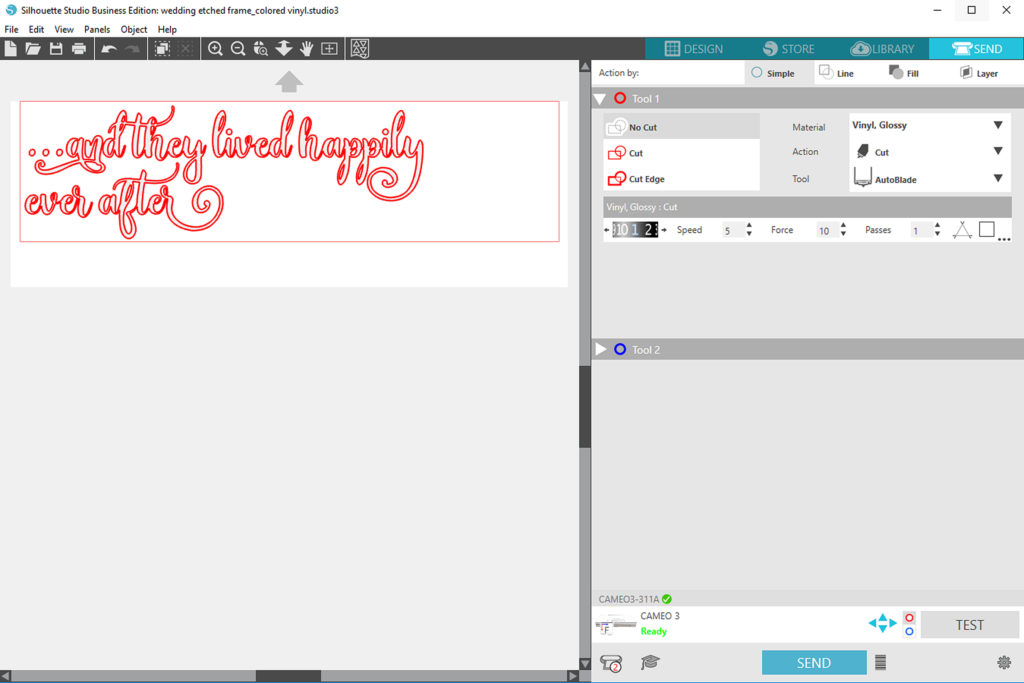
Step One: Create Design in Silhouette Studio®
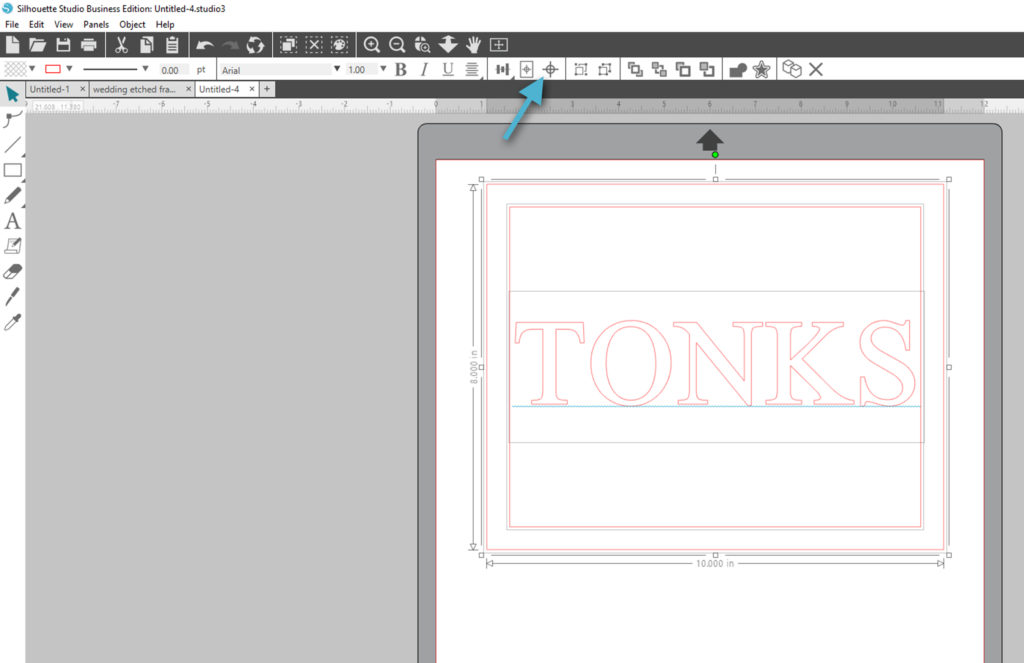
- Draw a rectangle the size of the stated frame size (10 in. x 8 in. for my example).
- Type the couple’s last name with the Text tool, using a font like PN Zutterfly Monogram (with no caps on this particular font).
- Resize the text and center it within the drawn rectangle.
Tip: The design should fit completely within the opening of the frame, plus a small border. If it helps, draw a second temporary rectangle that is approximately one inch shorter on each side than the frame glass (9 in. x 7 in. for my example).
- Type “and they lived happily ever after”. Choose an elegant font like Amastery Script, resize the text, and center it horizontally just below the last name.
Tip: I included a few fancy flourishes from the glyphs available in this premium Amastery Script font. To see how to work with premium fonts and glyphs, watch the Silhouette video here.
- Weld the phrase so any overlapping script will not cut into overlapping areas.
Tip: Remember to keep the design within the temporary rectangle you’re using as a guide.
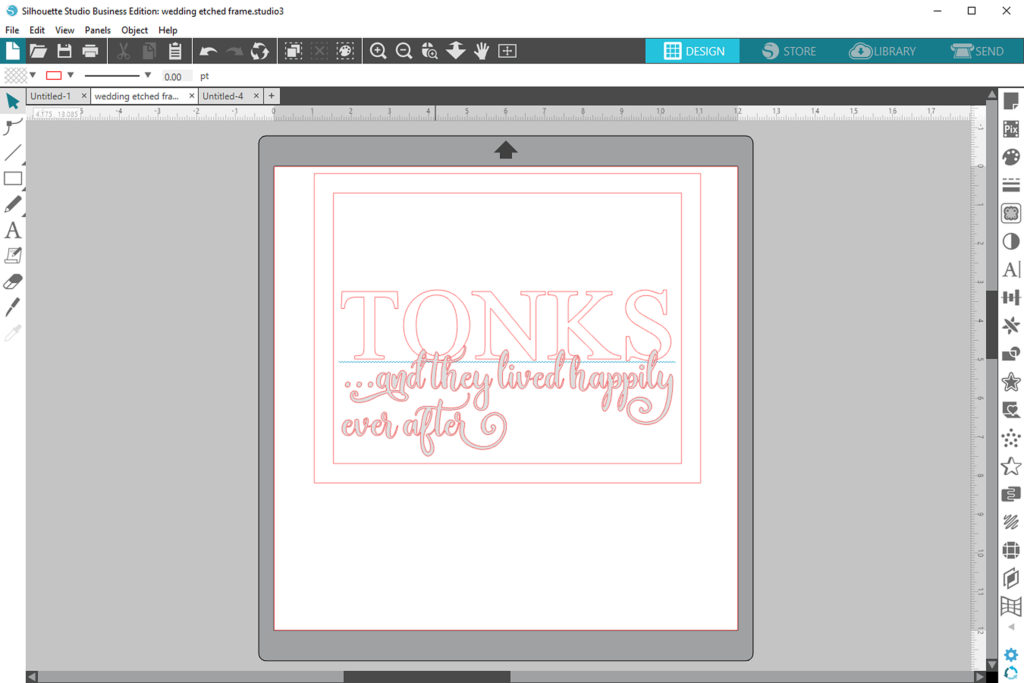
- This completed design is your guide to applying the vinyl saying after etching.
Step Two: Cut Stencil for Etching
- Make a copy of the original rectangle (10 x 8 in.) and the last name, and paste it onto a new document for cutting so that you can leave your original design in place for reference. You can delete the temporary 9 x 7 in. rectangle.
- Rotate the design horizontally so that it will fit on a 9-inch wide piece of stencil vinyl.
Tip: Make sure your vinyl size and cutting mat in the Page Setup panel match what you’ll actually be using, whether you’re using a mat or not.
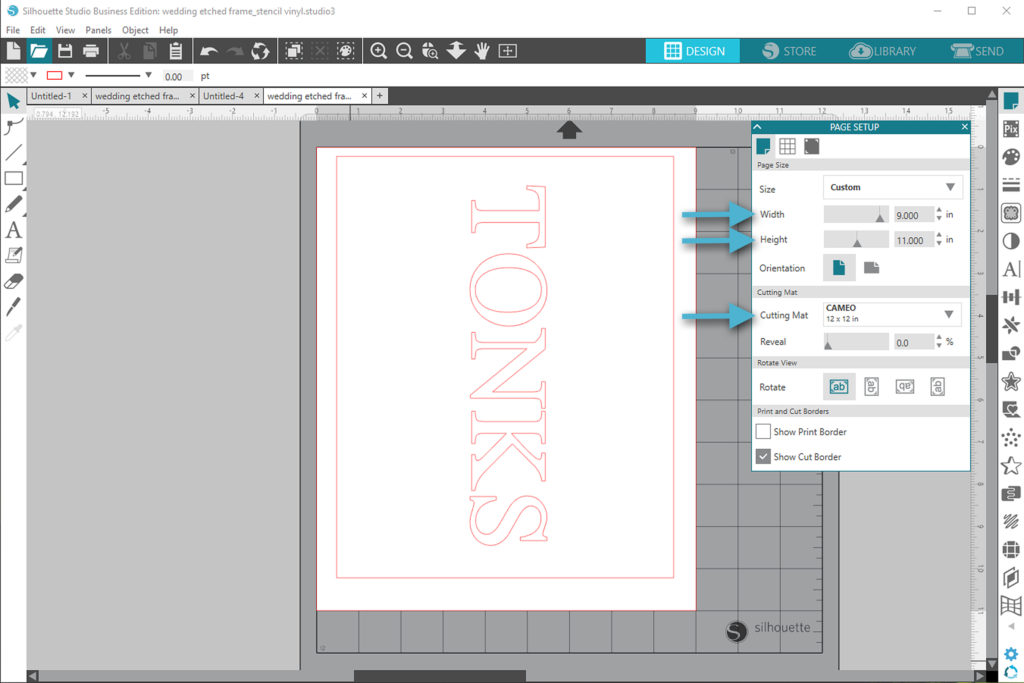
- Go to the Send tab and cut the name and outer rectangle from stencil vinyl.
Tip: Use the Vinyl (glossy or matte) settings in the Send panel for stencil vinyl.
- Weed the stencil vinyl’s outer edge and inner letter pieces from the cutout of the last name. The rectangle but not the letters should remain on the backing. This is your stencil for etching.
Step Three: Cut Vinyl Phrase Overlay
- Copy and paste the “happily ever after” phrase onto a new page.
- In the Send tab, cut the phrase from your choice of vinyl color.
- Weed away the background and letter centers, so that only the phrase remains on the backing.
Step Four: Etch the Glass
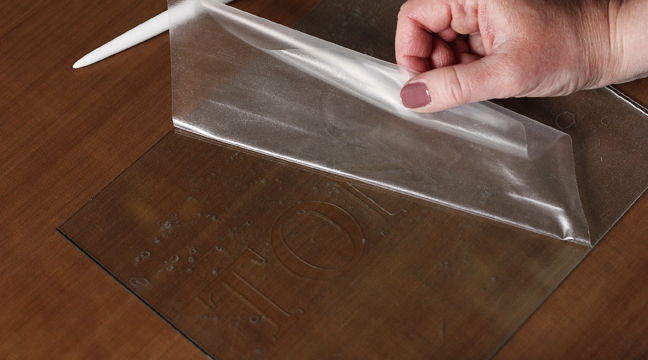
- Use transfer tape on top of the stencil vinyl so that the entire design lifts up at once, and place it on top of the frame’s glass (remove the glass from the frame first).
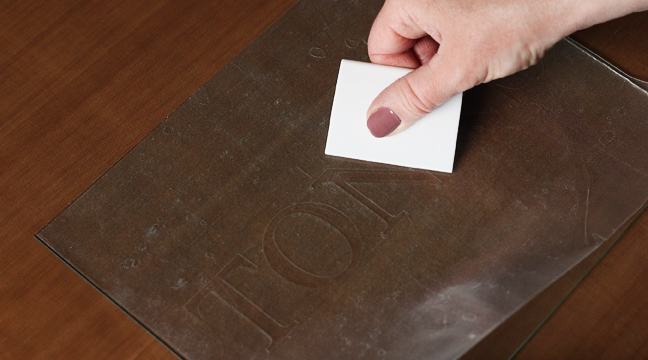
- Rub with scraper tool for a firm application.
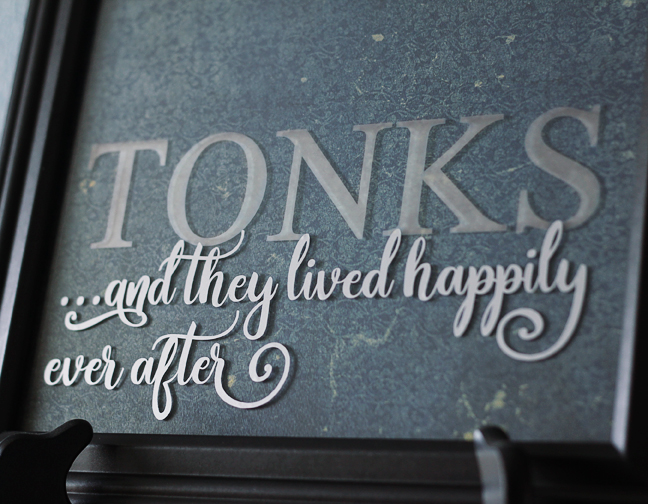
- Remove the transfer tape. The only glass that should be exposed is the glass with the letters of the couple’s name.
- Make sure the vinyl is pressed firmly against the glass along all the letters’ edges so that no etching cream will seep underneath the vinyl.
Tip: Bubbles in the vinyl are fine while etching, as long as there are no bubbles along the edges where the glass is exposed.
- While you are wearing protective gloves, apply the etching cream to the letters with a foam brush and let it sit for the time listed on the instructions.
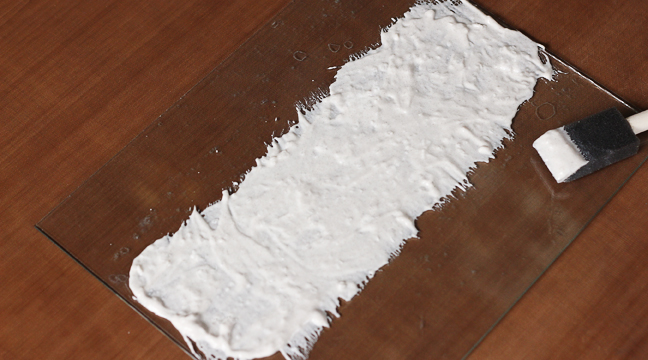
- Scrape off the etching cream after allotted time and carefully rinse the glass under running water.
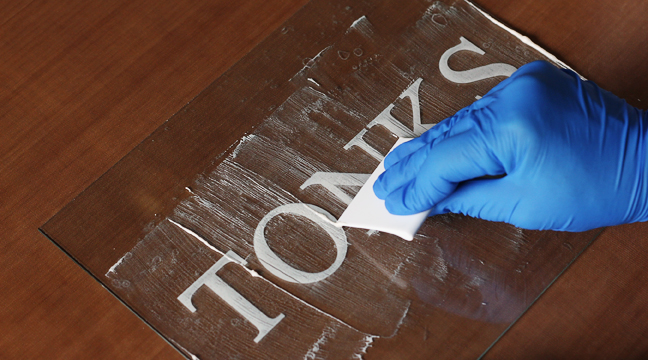
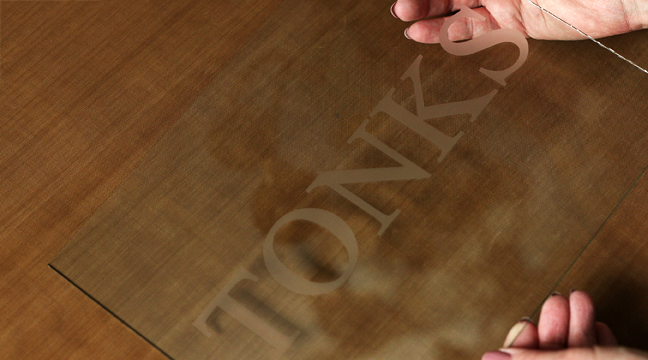
- Remove the remaining stencil vinyl and rinse the glass under water again.
- The etching will appear once the glass is dry.
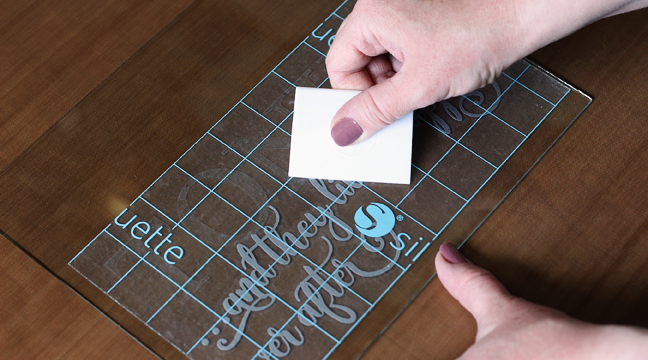
Step Five: Apply the Vinyl Overlay
- Use transfer tape on the vinyl phrase you cut out to lift it off the backing.
- Use the original design in Silhouette Studio® as a guide and place the vinyl phrase on to the etched glass.
- Use a scraper tool to press the vinyl design firmly against the glass, and remove the transfer tape.
- Place the glass back into its frame.
- You can back it with paper to match the couple’s décor or use the frame’s tabs or hot glue to hold the glass in place and leave it open so the frame will show the wall color behind it.
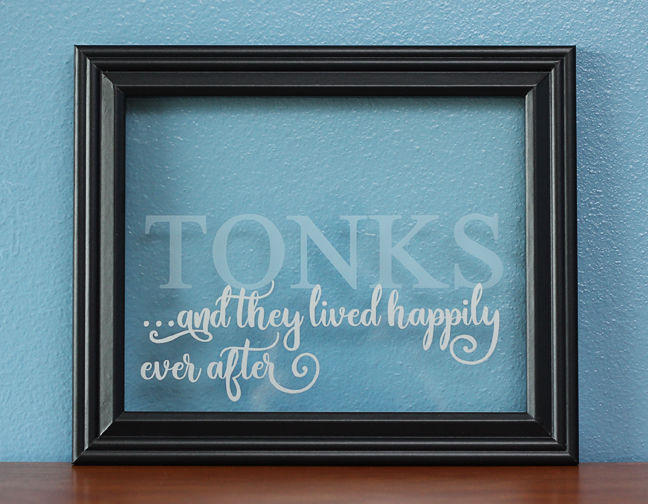
I hope this project inspires you to try glass etching. I think you may be surprised how easy it is.
Marilyn E
April 24, 2018
I love your project! I’ve had the etching kit for a couple of years and not used it. Thank you for sharing such creativity!
Kelly Wayment
April 24, 2018
I’m glad you like it! Go grab a frame and try it! 🙂
cheryl Wood
April 24, 2018
Thank you for the tutorial.
Kelly Wayment
May 2, 2018
You’re welcome!
Kathy Kohner
April 26, 2018
Kelly,
This is beautiful. Do you think a wedding photo would be too busy to add to the frame? I thought the last name and even the Vinyl words are pretty subtle so maybe a picture could be added by the happy couple. What do you think since you’ve seen it in person!
Kelly Wayment
May 2, 2018
Yes, you could absolutely make it so the couple can add a photo. You may want to make the design smaller and offset from the center so the design wouldn’t cover any faces. Great idea, Kathy!