
Did you know that Silhouette sells a fabric ink? It’s a soft-drying ink, so it will better resist cracking and peeling once dried. The dried paint has a soft feel that blends with the feel of the fabric, so you get the visual appeal of a custom design on your fabric but keep the original feel of the fabric surface. In this tutorial, we’ll teach you how to use it and apply it to make a totally custom project. Today is the day for you to Say Yes to New adventures!
Supplies Needed:
- Silhouette CAMEO® or Silhouette Portrait® or Silhouette Curio™
- Silhouette Cutting Mat
- Silhouette Stencil Vinyl
- Silhouette Fabric Ink – Black
- Canvas Pennant Banner
- Wooden Dowel
- String or Ribbon
- Design ID #214936

Step One: Prep And Cut The Design
- Select the Page Setup Window (this icon can be found on the tool bar on the right-hand side of your page) and adjust your width to 9 inches. That is the width of the Stencil Vinyl. You will then adjust your height of the page to fit within the dimensions of your pendant banner.
- Open Design ID #214936 in Silhouette Studio® by locating the design in your library. (This design comes with 2 options, select which ever one you’d like to use. We used the design on the left that is not filled in).
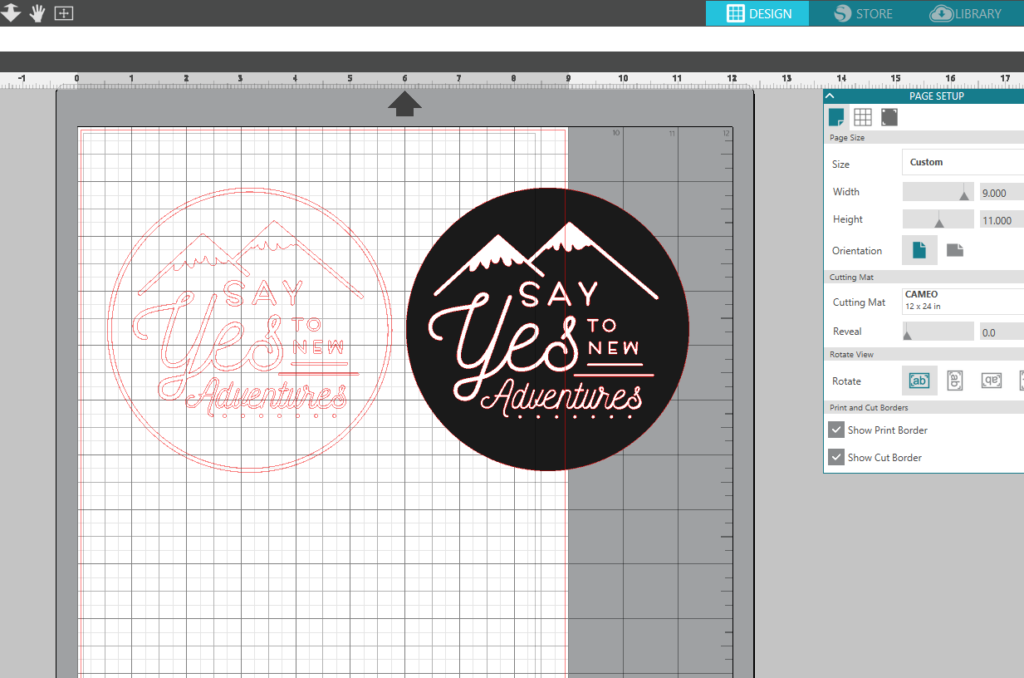
- Adjust the size of the design by selecting it and dragging the outer corner to make it larger or smaller (We adjusted ours to 7.70 x 7.70)
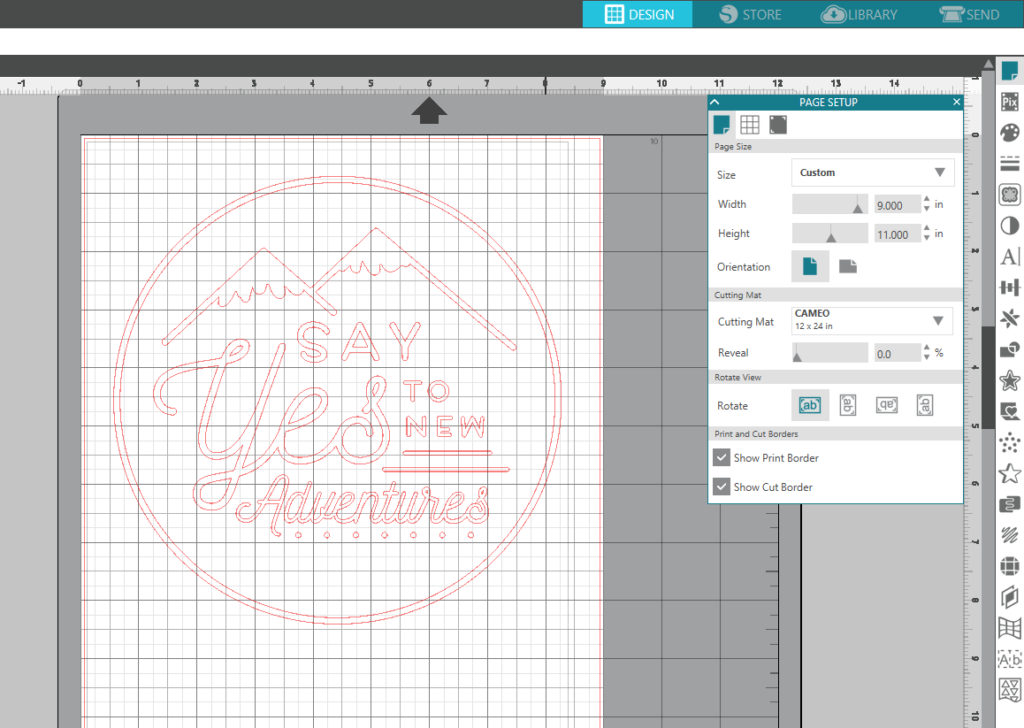
- Load your Stencil Vinyl into your machine. (Tip: The Stencil Vinyl is the one with white backing and the Transfer Tape is the one with brown backing).
- In Silhouette Studio®, select the Send window in the top right-hand corner. Select the Glossy Vinyl cut setting and select Send (remember that if you don’t have an Autoblade, you will need to adjust your blade settings).
Step Two: Paint On The Design
- After your machine is done cutting, unload the Stencil Vinyl from your machine and weed away unnecessary parts of the design. With this design, there are small pieces so work slowly.
- Place the transfer tape, which is included with your Stencil Vinyl, over your design to help move your design with all your little parts, to the canvas. (Tip: We made our pennant banner by cutting a piece of canvas to 10″ x 15″, folded it in half and cut the angle we wanted for the tip. We applied some fray check to the edges to keep them from fraying, and sewed a hem 1″ from the top to create a pocket for the dowel.)
- Center your cut vinyl and transfer tape on your design.

- Carefully remove your transfer tape, making sure that all the little pieces are left behind on your design.
- Using your Scraper Tool, carefully go around all the edges and make sure they have adhered to your canvas. This will help prevent the Fabric Ink from bleeding.
- Begin applying the ink, make sure to not have too much ink on your brush and to apply it to your design with a dabbing motion.
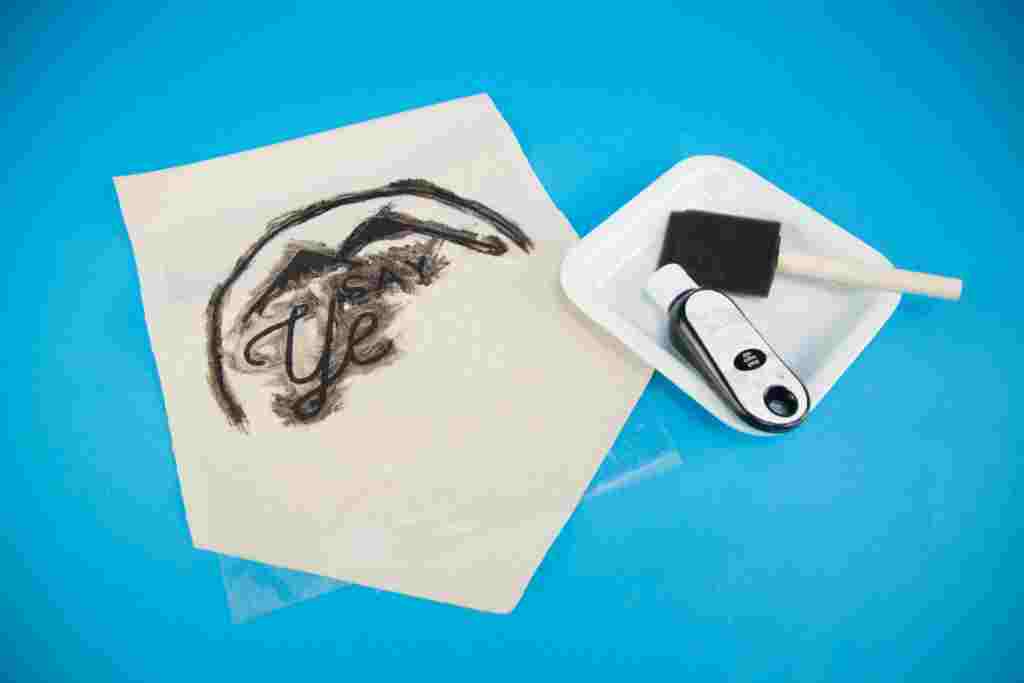
- Once the Fabric Ink is dry remove the vinyl from your canvas.
- As the finishing touch, iron over the design to set the ink.
- Place the dowel through the pocket and tie your string on either side to be able to hang it.