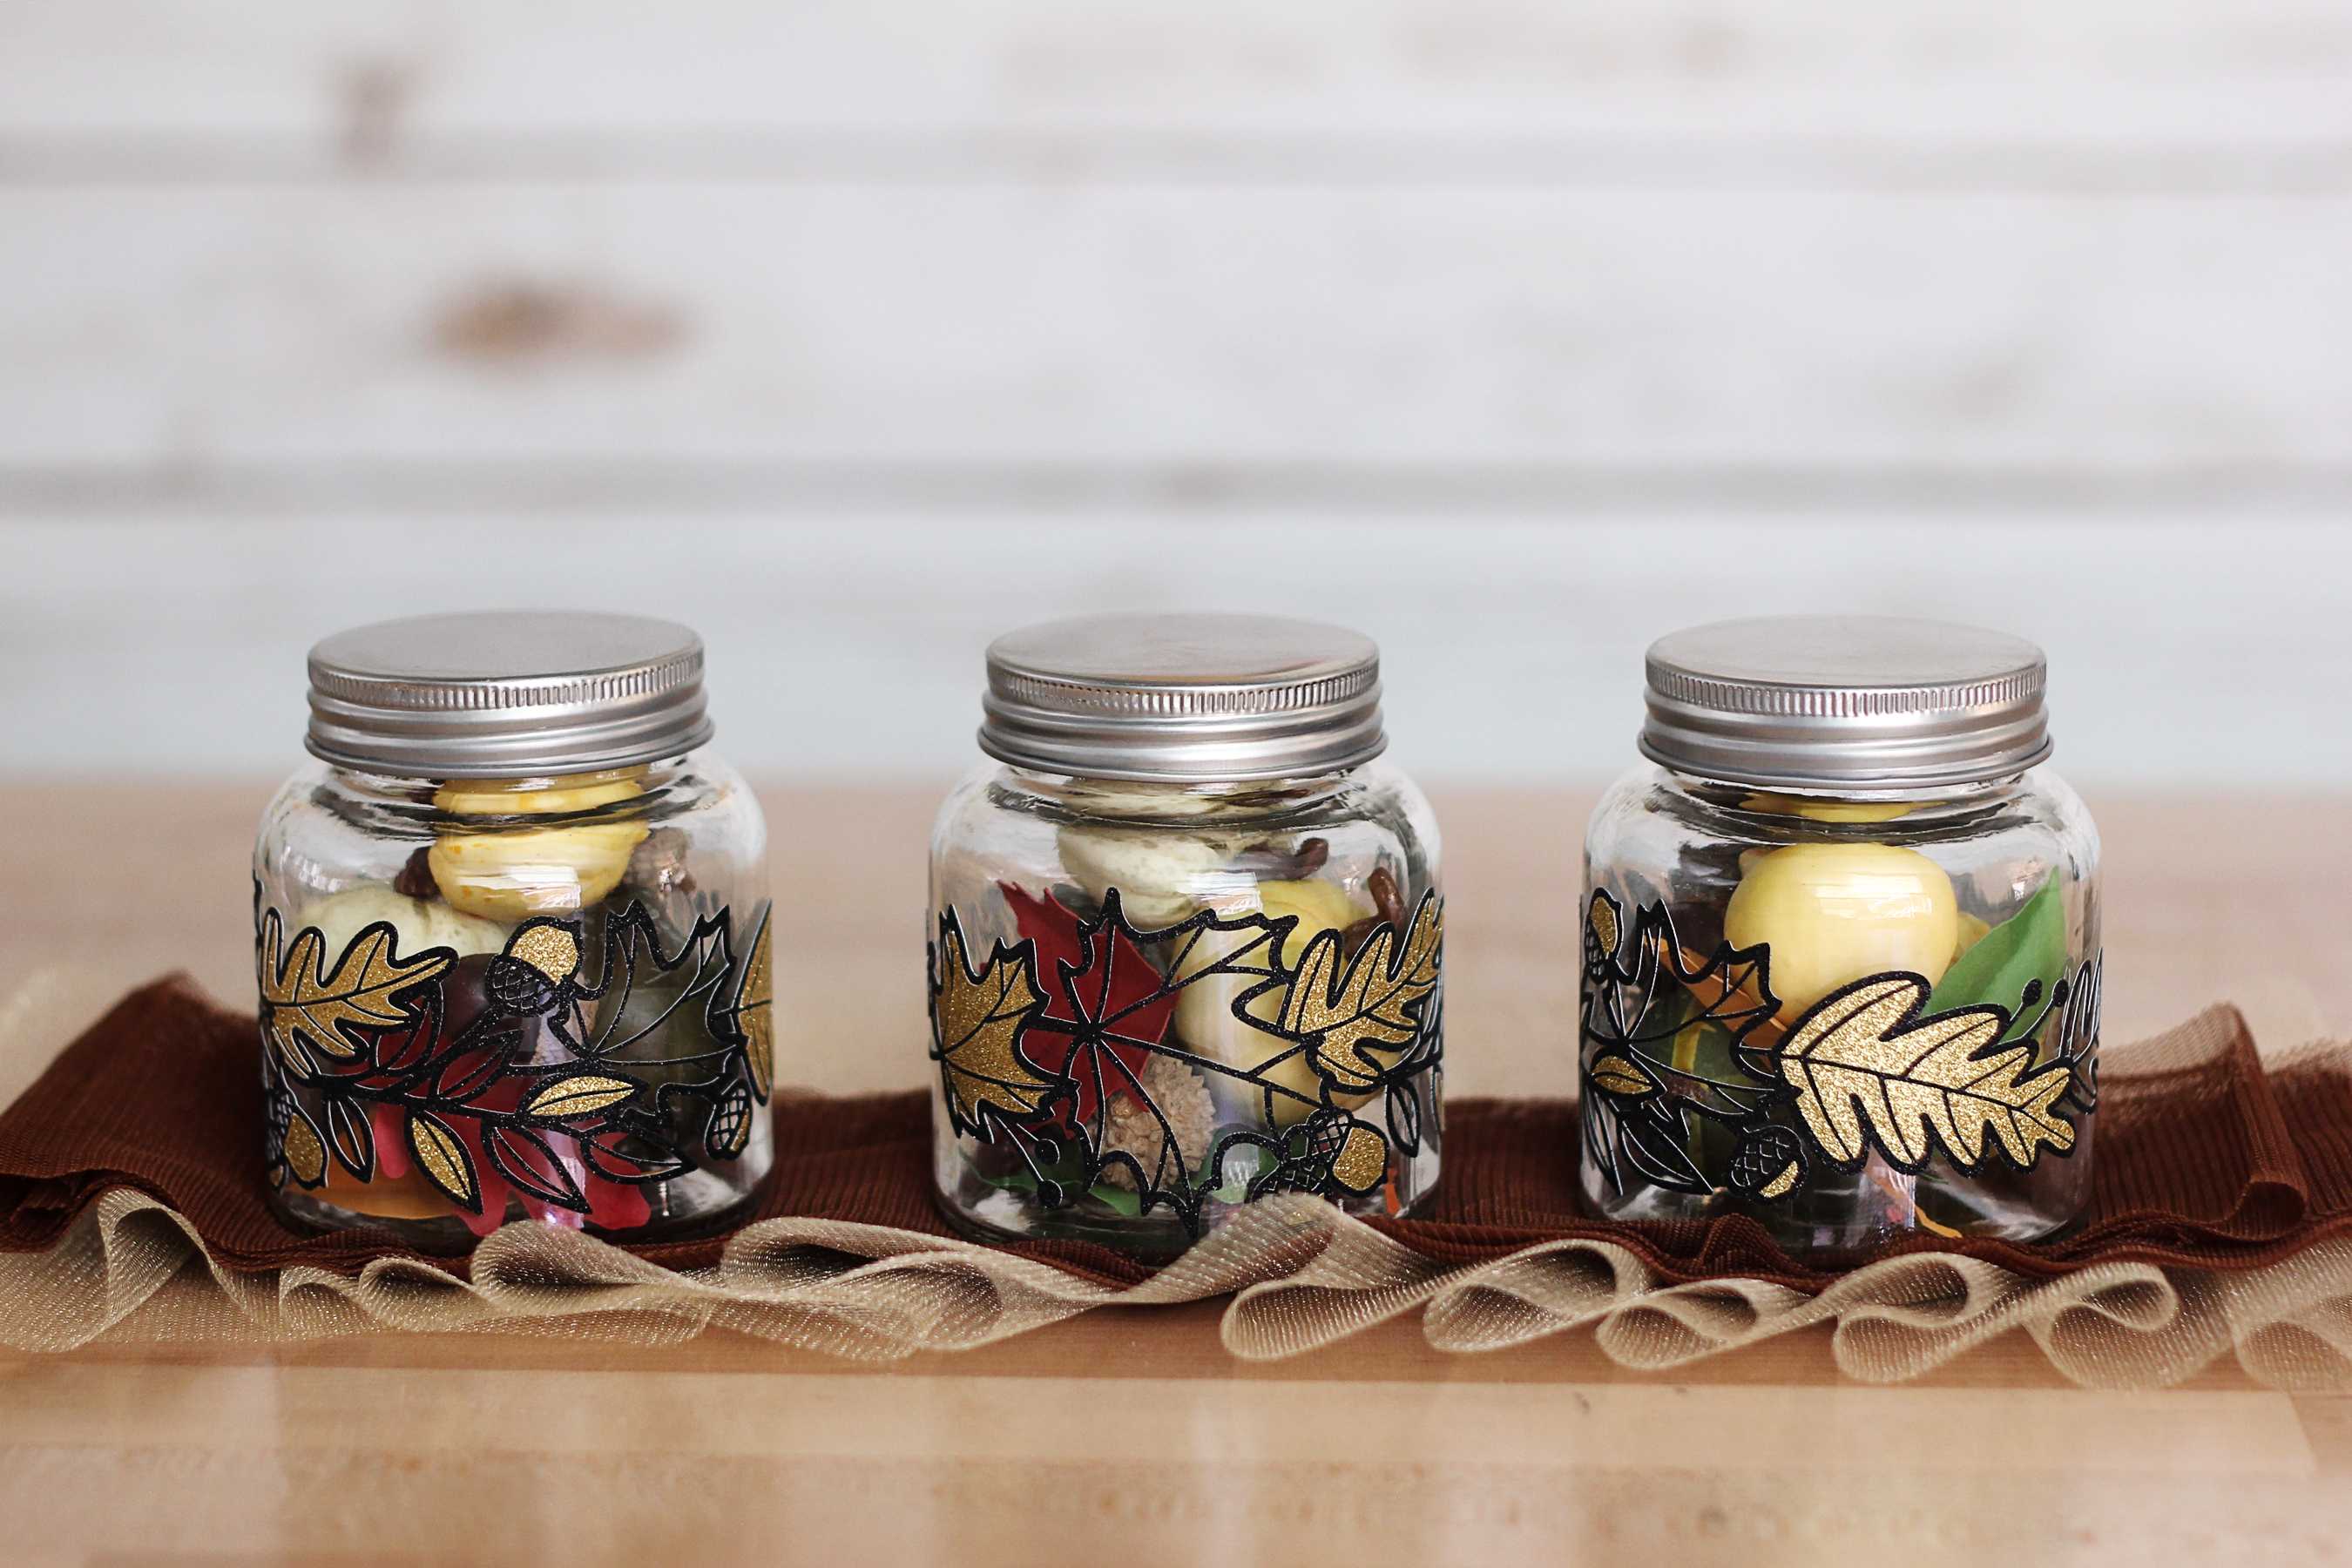
Fall is one of my favorite seasons, and adding glitter to projects is one of my favorite crafting techniques, so these fall jars with glitter vinyl were a treat to make! Silhouette’s glitter vinyl comes in a variety of colors, but I stuck with black and gold so that the colorful contents of my jars could show through. Follow along to see how I made them!
Supplies Needed:
- Silhouette CAMEO® or Silhouette Portrait®
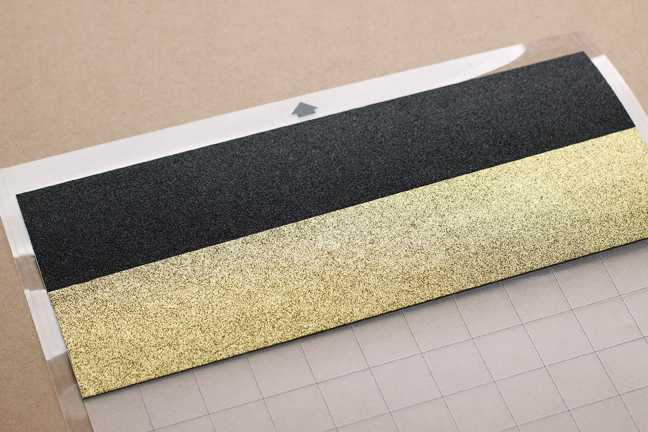
- Glitter Vinyl—black and gold
- Strong tack transfer tape
- Jars with flat sides (no taper)
- Fall fillers (leaves, mini gourds, acorns, seeds, etc.)
- Hook tool
- Design ID #162001
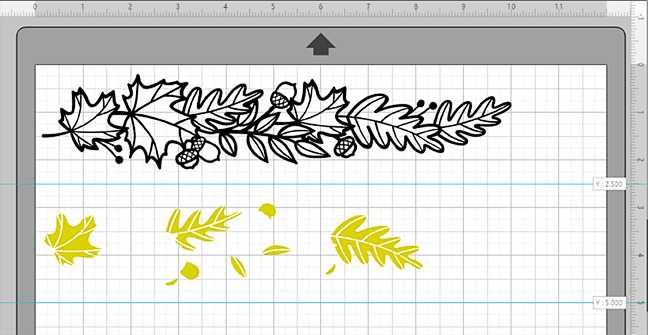
Step One: Prepare Design
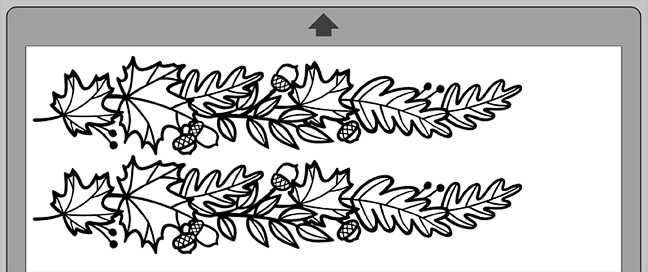
- Open the Fall Foliage Border design (Design ID #162001) in Silhouette Studio®.
- Select and resize it to fit around the flat area of your jar. (Avoid any kind of taper or curve in the area of the jar you’ll apply the vinyl to.)
- Make a copy of the design.
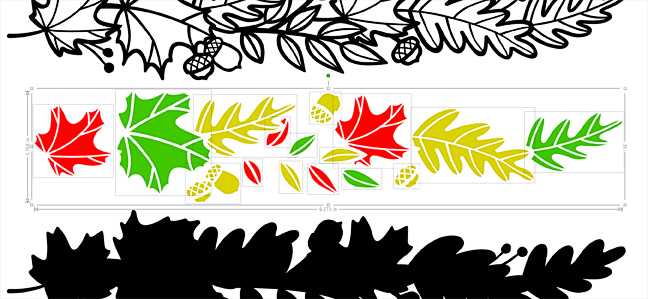
- Ungroup or release the compound path (right-click > release compound path) to release all the inner pieces from the outline. In this design with a black fill color, the holes will disappear and everything will turn black. (You may still see a red line color.)

- Carefully select and drag away only the outer edge to leave the inner pieces behind.

- Delete unnecessary pieces (e.g. spaces between leaves) and group the pieces that belong to each other, such as all of a single leaf’s pieces with itself.
Tip: Hold your Shift key while clicking on pieces to select or deselect individual parts when making a group that’s not easily selected with a drag box. You’ll know if you’ve got all the right pieces together when you recolor the group with the Fill Color options.
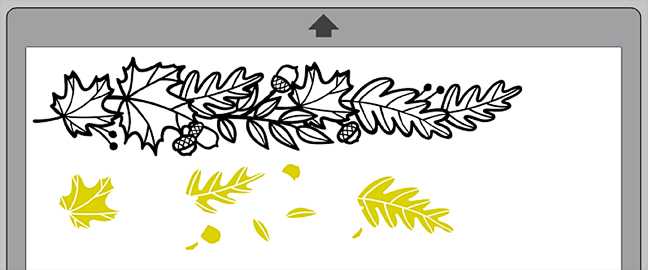
- Choose which pieces will be cut with which color of vinyl, and separate those groups to be cut. I decided I wanted just the black outline with a few elements filled with gold. I deleted everything else.
Step Two: Send to Cut
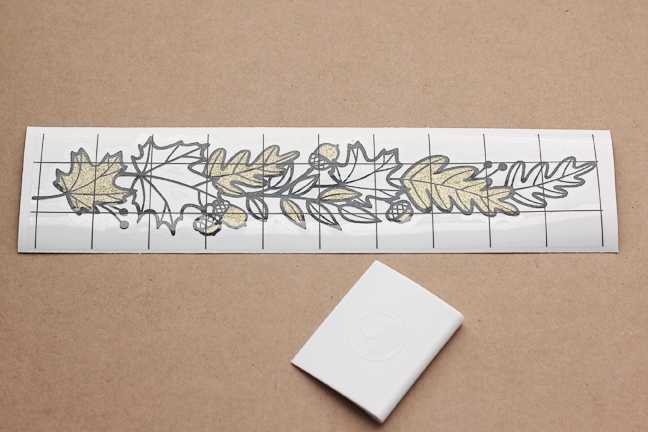
- Now that the colors are separated on the page, you can cut the vinyl a few ways. I chose to use my cutting mat and trim vinyl strips to fit what’s on the page.
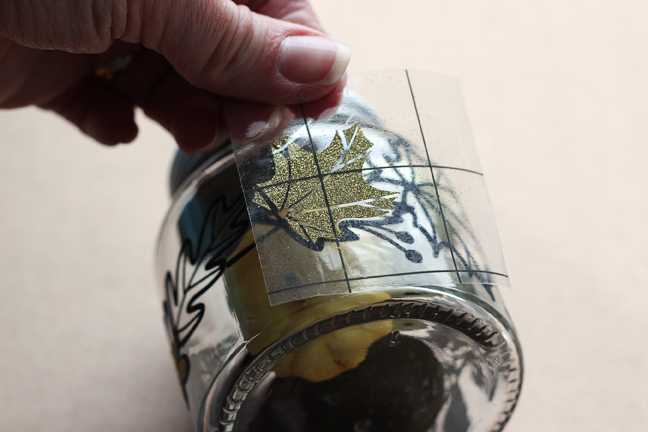
- With my Grid enabled (shortcut letter G on the keyboard), I can see that strips that are 2.5 inches wide will contain my cutouts. (With Designer Edition or higher, you can also use guide lines for help with placement.)
- Make sure your page size and the correct cutting mat are selected in the Page Setup panel before moving on to the Send panel. It’s OK to leave it on a full 12 x 12 page size when using the grid for placement.
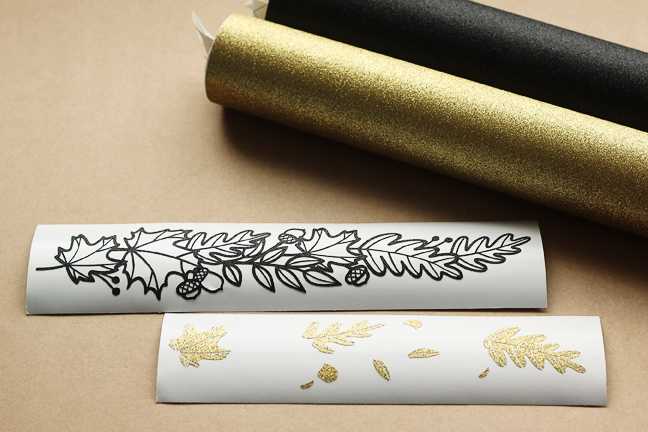
- Trim the vinyl to 2.5-inch strips and place the colors on the mat to correspond with the design you are cutting out, and then load the mat into your machine.
- Adjust the cut settings and click Send to cut. At the time of this writing, Silhouette glitter vinyl had not yet been added to the default cut settings. I was successful with Blade 3, Speed 5, Force 28 (single pass).
Step Three: Weed and Combine Color Layers
I tried a few ways to pick up the layers with transfer tape, so let me tell you what worked best for me.
- Once the designs are finished cutting, weed away the unneeded vinyl with a hook tool.
- With this thicker glitter vinyl on this intricate design, I found that the easiest way to achieve the perfect placement of layers to pick up each piece of gold vinyl and hand place it within its correct outline spot on the black layer’s backing. (This may seem a little tedious, but I found it relaxing. It’s like putting together a jigsaw puzzle—except you know exactly where each piece goes!)
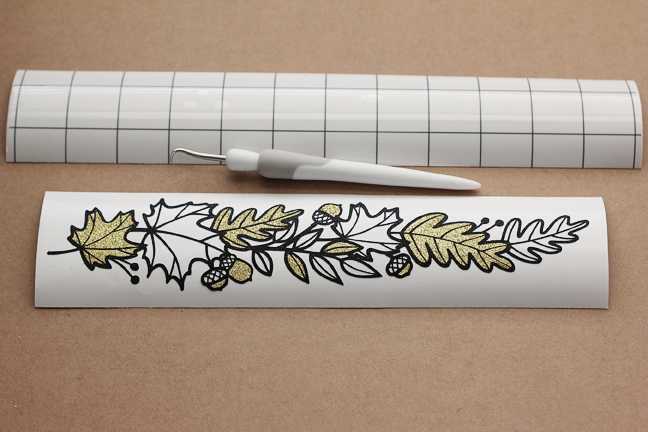
- When all the layers of the design are in place, pick up the entire design with a piece of strong tack transfer tape, which is made specifically for this glitter vinyl.
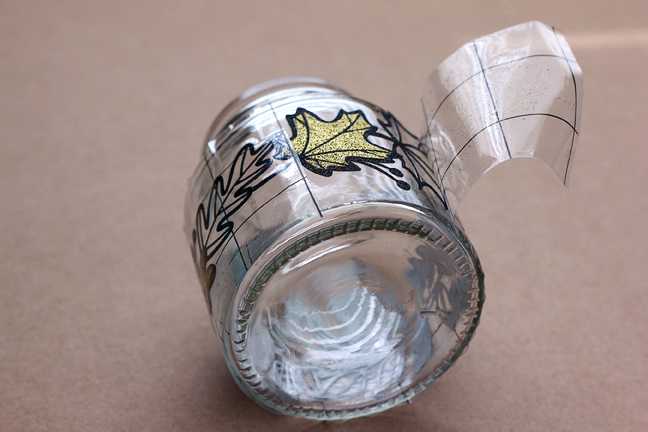
- Lift the transfer tape with the design intact against it and place it against the jar.

- Press it down in the middle, and then press from that point towards each end so no bubbles or warps form.
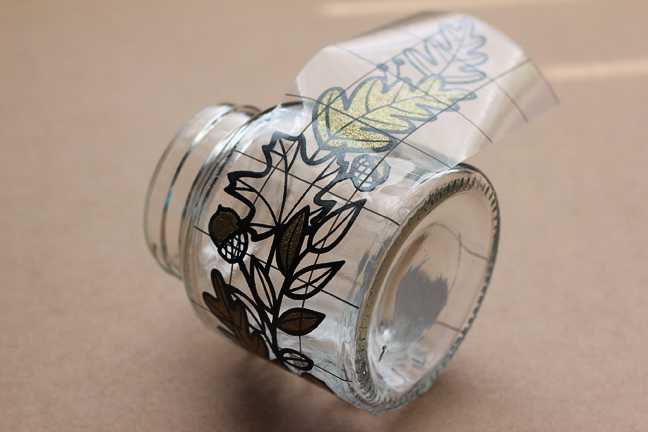
- Peel away the transfer tape, leaving the vinyl design in place.
Step Four: Fill Jars with Fall Elements
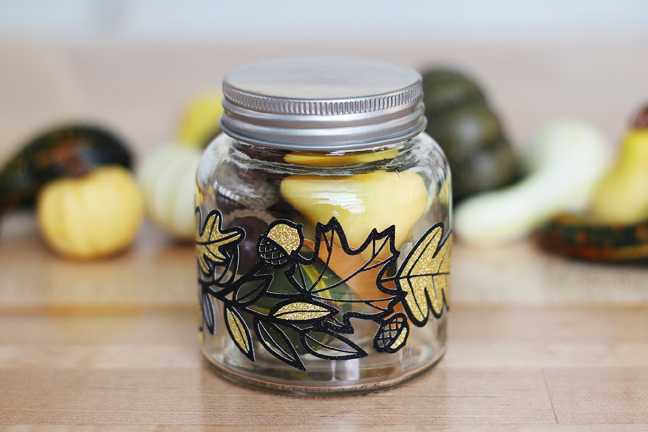
- I filled my jars with acorns and mini gourds from the craft store and with small paper leaves cut with my CAMEO and shaped by hand.
- You could also use real or silk leaves, nuts, seeds, berries, etc. Use anything with fall colors and textures that will show through the glass.
Alternative Applications:
- As a simplified alternative, you can just use one color of glitter vinyl for the original design without using other colors to fill it in. This keeps it simple while allowing more of the jar’s contents to show through.
- As an alternative to hand-placing the extra colors inside the outline before picking it all up at once with transfer tape:
- Place the outline design against your jar first, using strong tack transfer tape.
- Then pick up individual sections of the colored leaves with a small piece of transfer tape and place them where they belong on the jar.

- I found this to be slightly faster but also slightly less precise. I do not recommend picking up the entire strip of gold fills with transfer tape at once and trying to match the full length of the outline design.
- A third alternative I played with was using multiple colors to fill in the outlines. This took the most time by far, but it’s pretty!

Just go with the look you like best and how much time you want to spend on it. The glitter vinyl makes it all look awesome!

Jesen u gliter nijansama – Silhouette blog – Difol d.o.o.
November 17, 2018
[…] Jesen može biti jedno od najinspirativnijih godišnjih doba. Napravili smo zimnicu, hajde da ukrasimo tegle. Silhouette blog nam nudi neke ideje sa gliter folijom u bajama jeseni. Odaberite izgled koji vama najviše odgovara i korak po korak napravite svetlucave nalepnice, sa Cameo 3 uređajem. Postupak izrade ispratite u blogu – ovde. […]