

Are you all slowly getting back into the daily routine again? I think we are around here. This time of year is always a great time to re-organize life, home, work, etc. but it’s also a great time to enjoy the winter season and all that is has to offer.
Today I’m sharing a layout using the FREE Shape of the Week. An adorable snowflake design with a base to create a card. Instead I chose to use part of the design for a stamp and create a layout.
You will need:
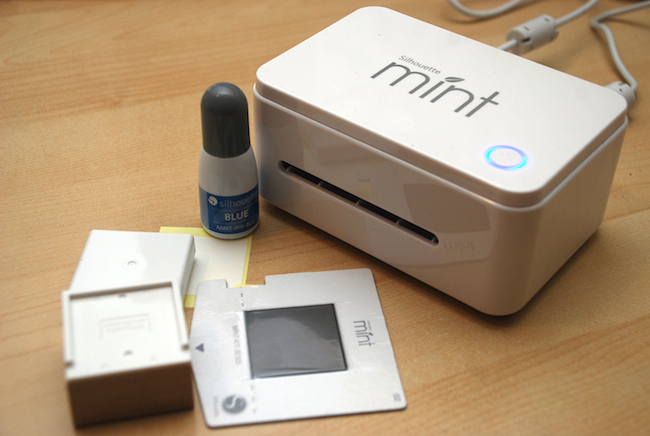
- Silhouette Mint™ Machine
- 45 mm x 45 mm Stamp Kit
- Mint Ink
- Silhouette CAMEO®
- 12″ x 12″ cutting mat
- Adhesive Backed Cardstock
- PixScan™ mat
- Rhinestone setter & rhinestones
Step One: Creating a Stamp
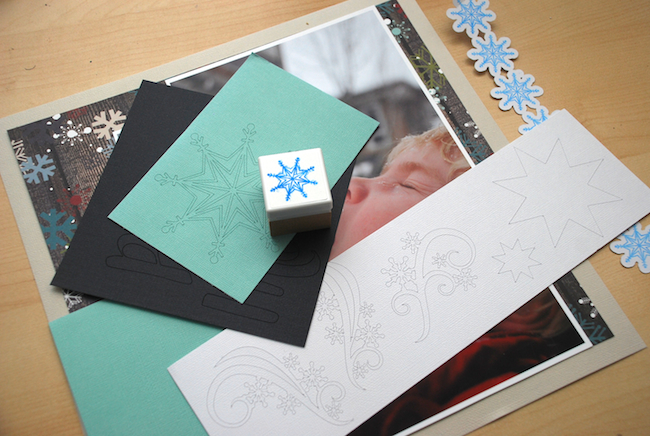
To begin, I gathered all of my stamping supplies.
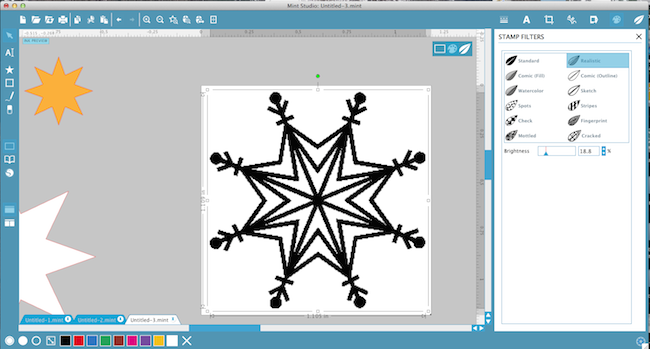
I opened up the Silhouette Mint™ software, uploaded the FREE SHAPE and created my stamp using the image of the middle layer from the FREE design. (The image that was most delicate). In Mint Studio™, open up your design and, if desired, change the Fill Types. Here is where you can play with the thickness, brightness, etc. using the sliding bar on the right side menu.
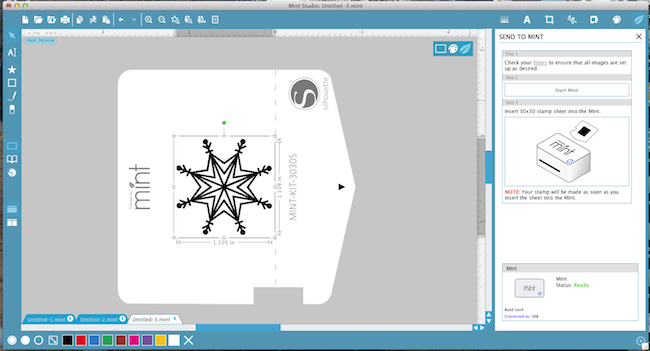
Once the design is set, you then send it to Mint (the leaf icon at top right). Click SEND TO MINT and then insert the stamp card through the back of the machine.
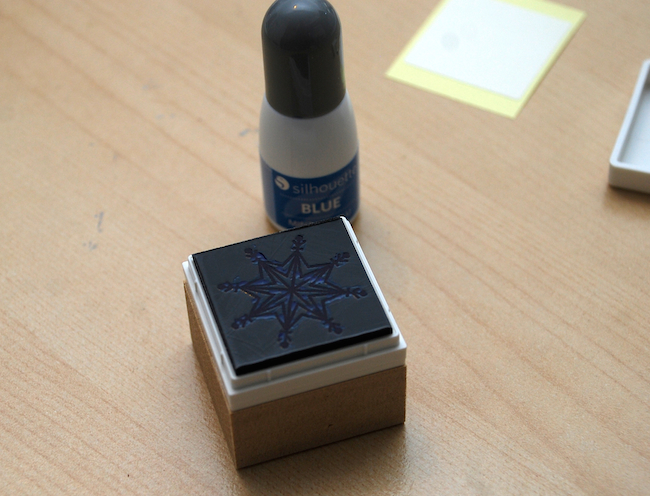
You will then add ink to the stamp and let sit for about five minutes until the ink has soaked in.
Once it’s soaked in, you can do a few ‘test’ stamp images on a scrap piece of paper.
Step Two: Using PixScan™ to Cut the Stamped Image
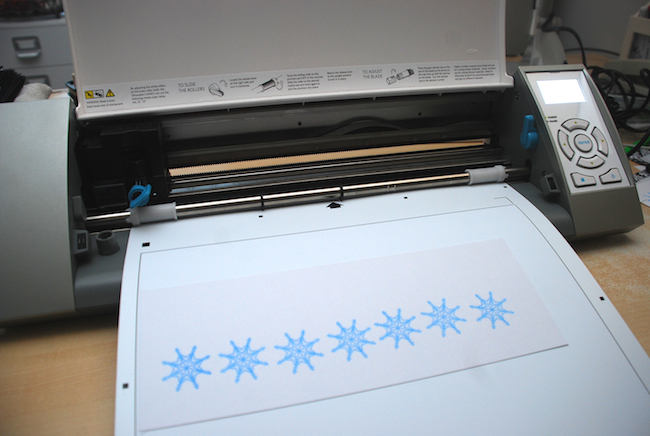
I wanted to create a long border to place down one side of my photo, so I stamped several images of the snowflake in a row. I then took a picture of the mat (with the piece of paper on it) using my iPhone. I uploaded the image to my computer.
In Silhouette Studio® I opened up the PixScan™ screen and clicked on open up file and searched for my photo. Click on the photo and upload the image.
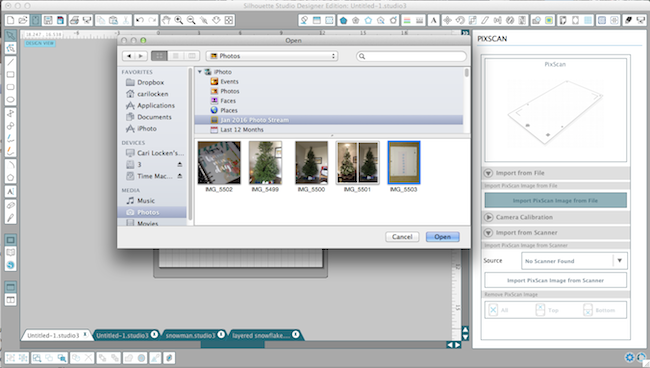
As you see from this screen, it will take a bit of time to upload your image.
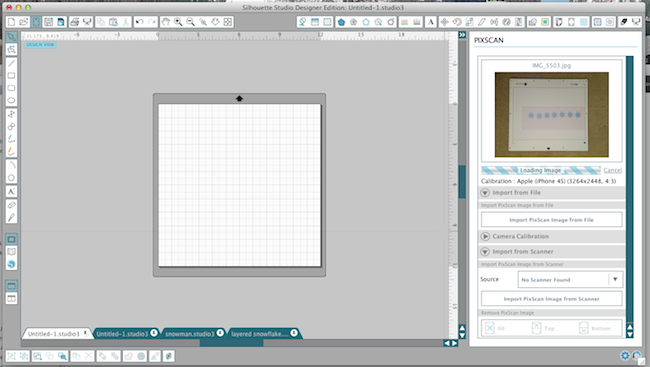
When my image appeared, the grid was showing so I removed that in order to see the image better.

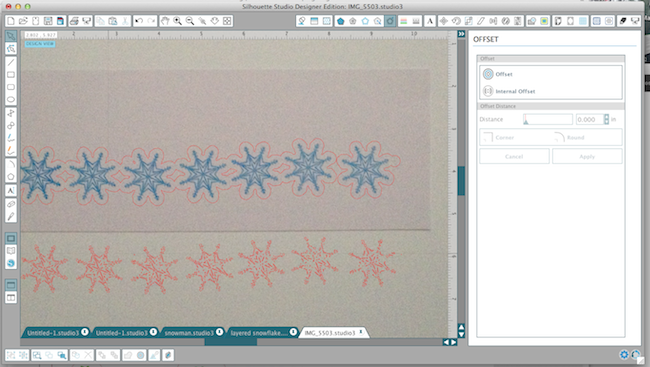
You now need to trace the image in order to cut out the stamped design.

I didn’t want to cut out each snowflake individually because I wanted to have them in a border. So, once the image has been traced I moved away the ‘traced’ part (the red snowflakes—I just deleted them because I didn’t need them).
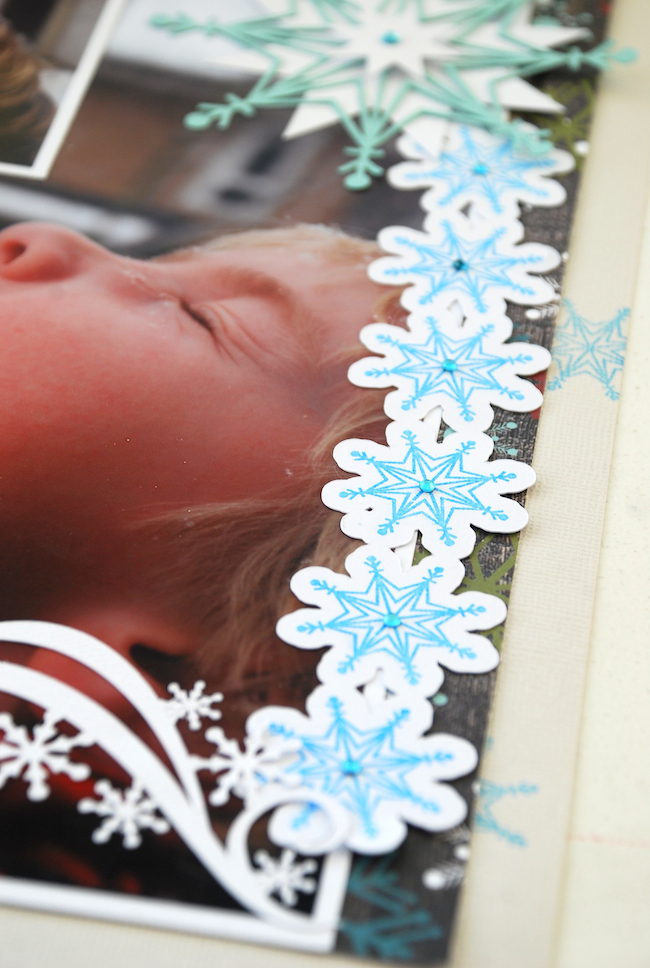
I then created an offset (cut line around the image) that would allow my stamped snowflakes to be connected. You will notice that last snowflake on the right isn’t connected. I was okay with that because I was going to use it elsewhere on my layout.
Once the image has the offset created, you can now place the PixScan™ mat and your image through the Silhouette CAMEO® and cut it out.
Here’s the finished cut border design.

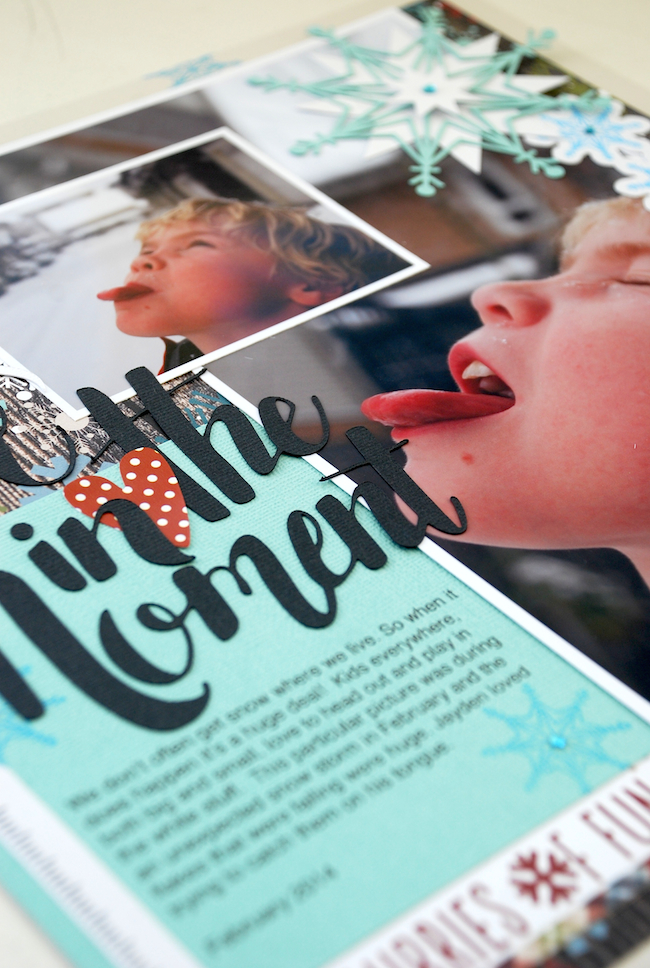
Here’s what it looks like on my layout. I also added some teal rhinestones to the center of the snowflakes.
Step Three: Cut Designs
I then created the rest of the designs for my layout. I used the original FREE SHAPE OF THE WEEK but resized it a bit smaller and cut it from Silhouette Adhesive Backed card stock along with a few other shapes (Snowflake swirls and title).
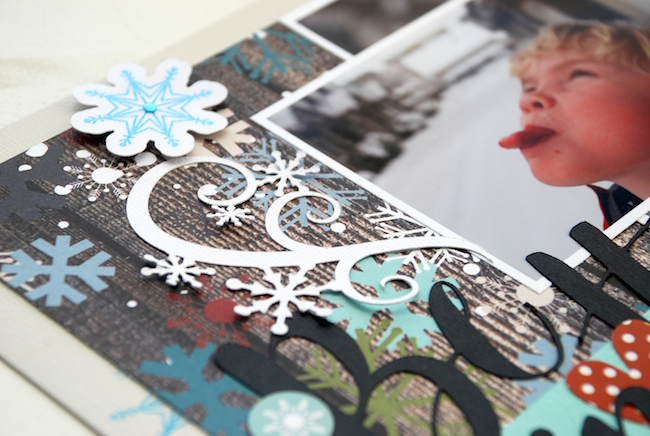
I then began assembling all the pieces onto my layout. Here’s a look at the FREE SHAPE with an added rhinestone in the center.

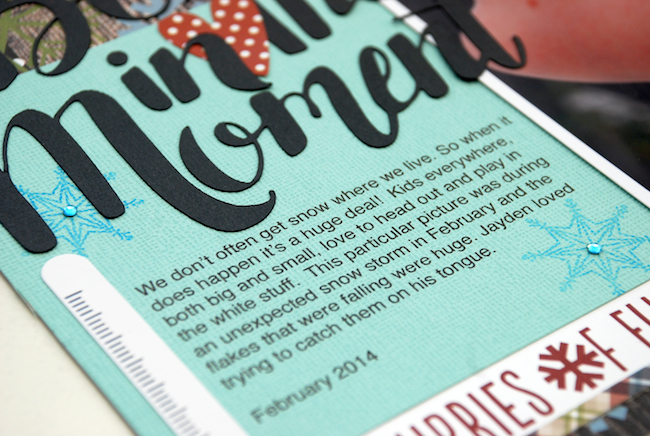
I used the stamp that I created earlier and stamped in various places on my layout. I used the card base (from the FREE SHAPE) to print my journaling on.
Here’s a look at the ‘extra’ snowflake that was cut out on the PixScan™ mat. I used some foam adhesive to adhere to my page for added dimension.
I hope I’ve encouraged you to use the FREE SHAPE OF THE WEEK and try out the Silhouette Mint™ Machine. You won’t be disappointed.
Kelly Wayment
January 14, 2016
I adore this layout, Cari! And I love the repetition of the snowflake in several layers on the page. Gorgeous! Which Mint ink color is the blue you used?
Cari
January 24, 2016
Thanks Kelly. I used the BLUE.
Lydia Kooijman
January 15, 2016
ILove it:-)