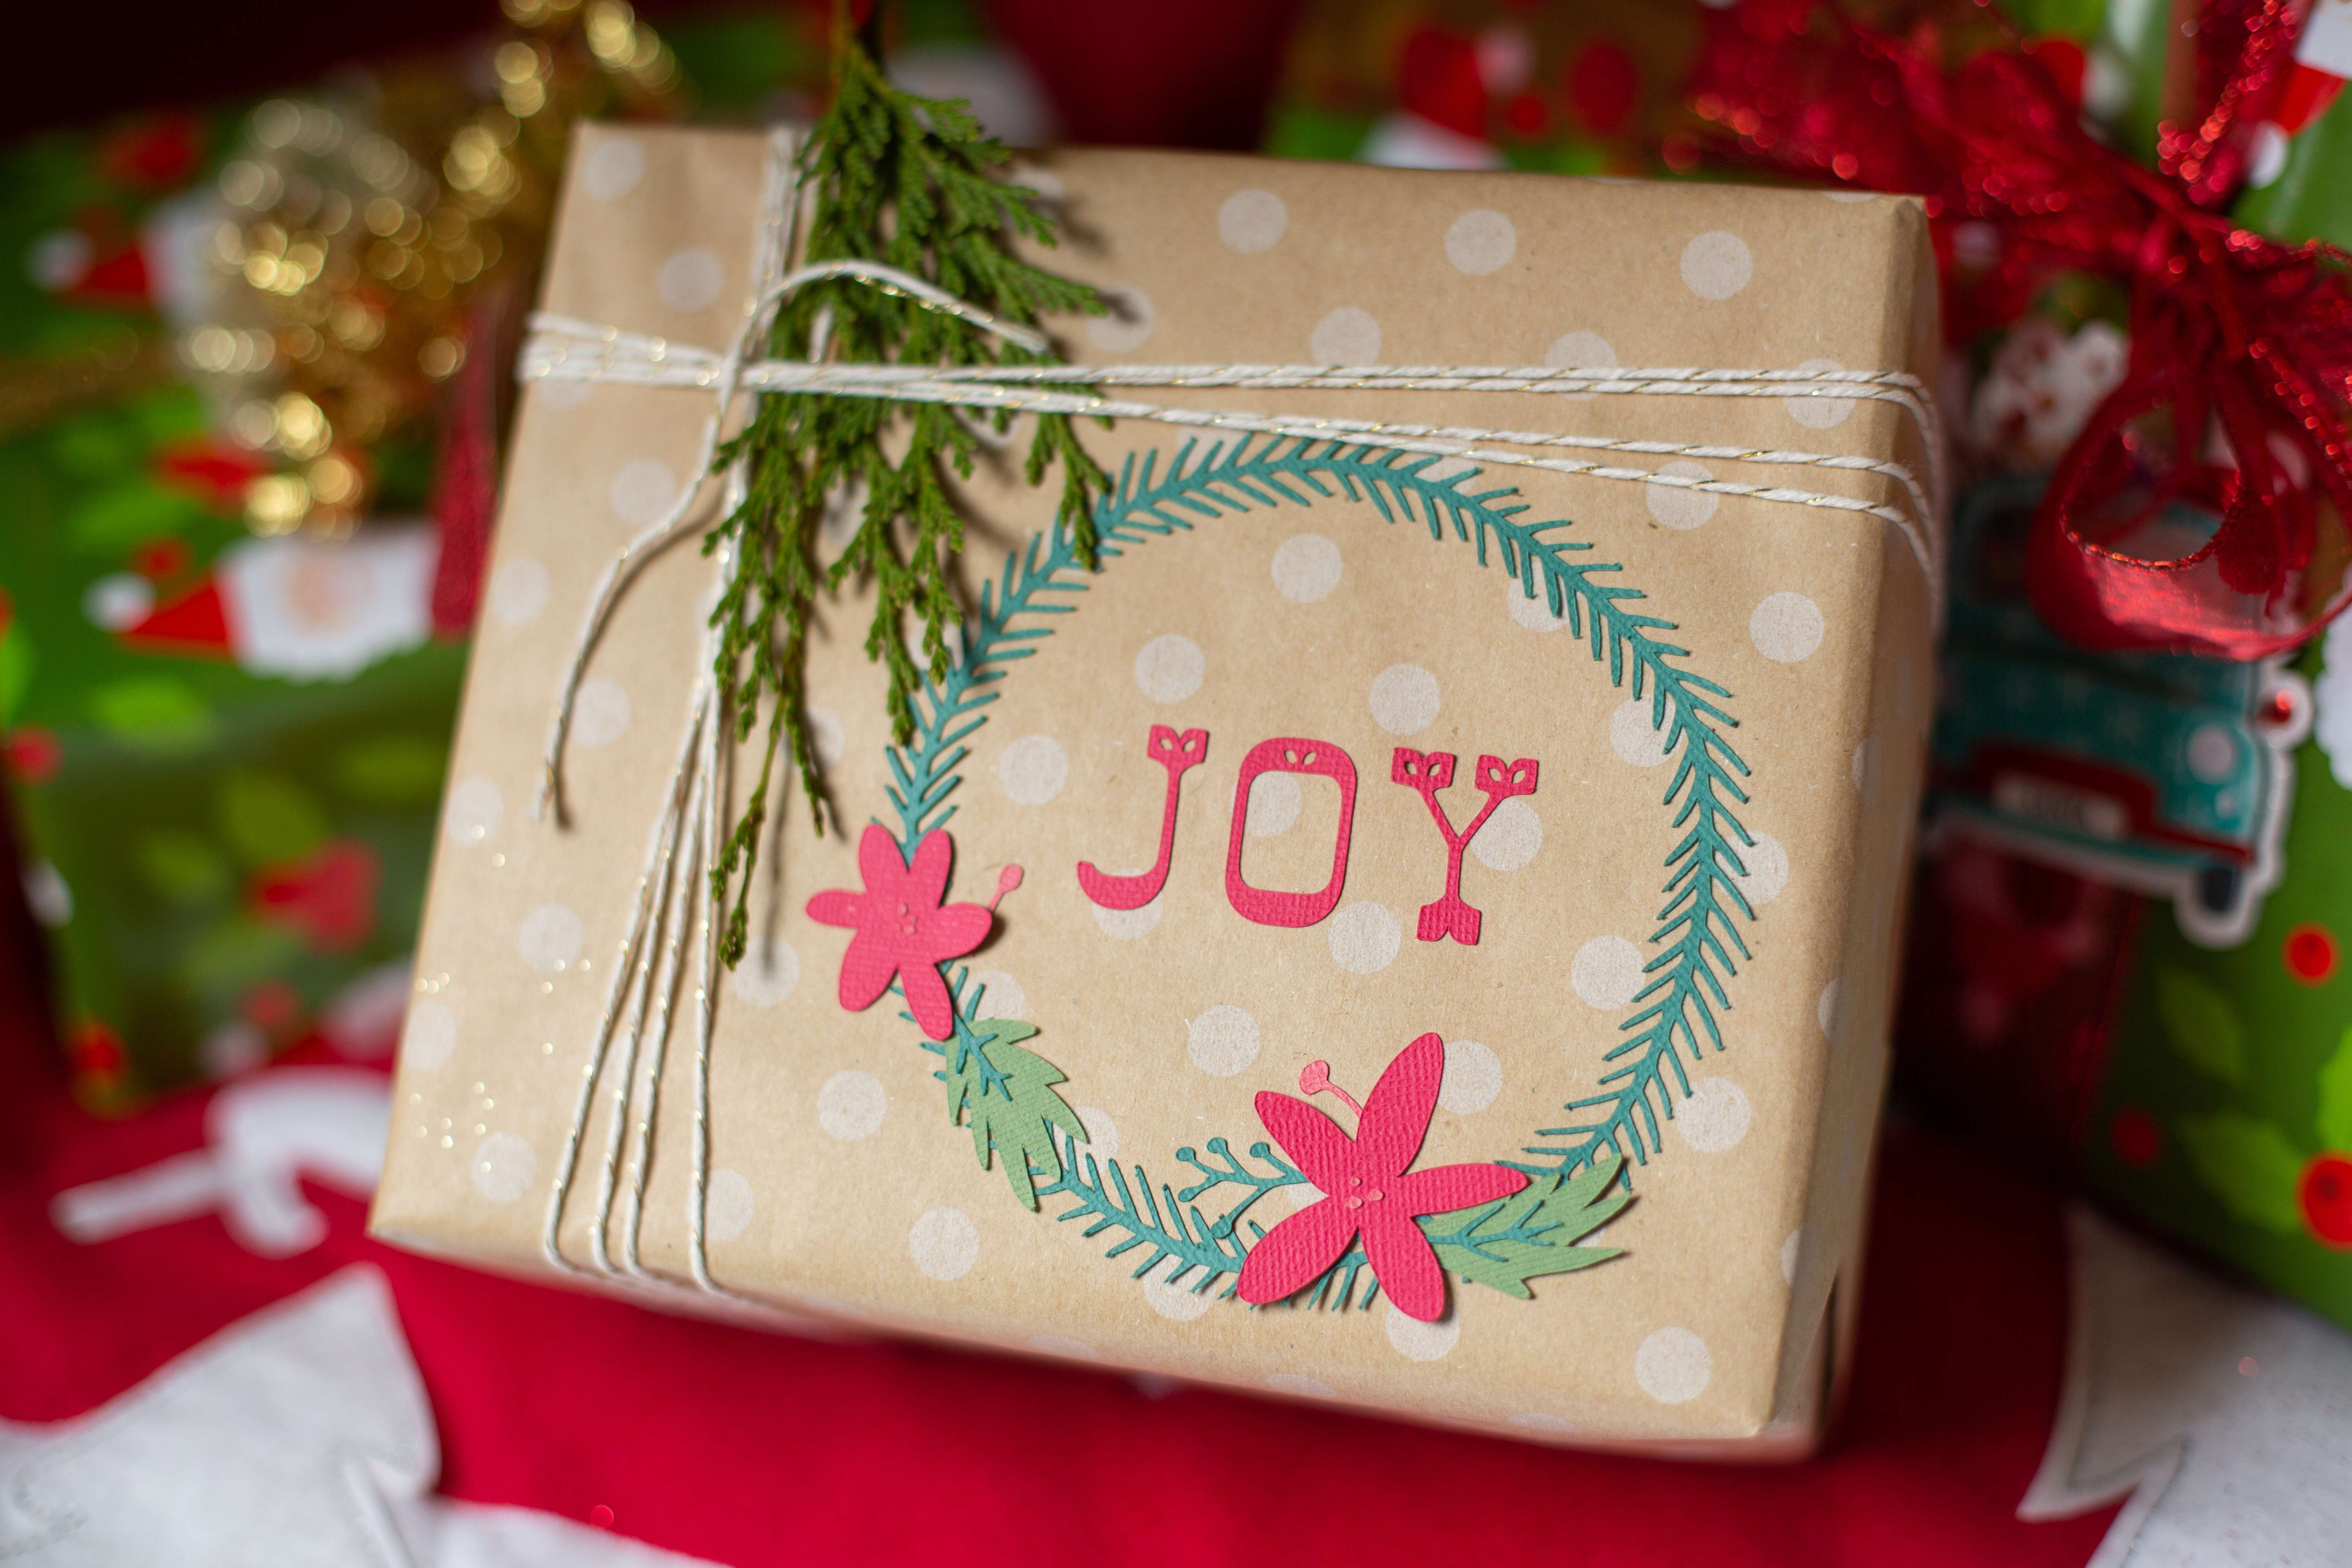
Now that the holidays here, we are elbow-deep in gift wrap, along with adhesive cardstock. We have fallen in love with adhesive cardstock as a way to add and embellish gift boxes. Today we’re going to show you how you can dress up a gift box with a fun design from the Design Store.
Supplies Needed:
- Silhouette CAMEO® or Silhouette Portrait®
- Silhouette Studio®
- Silhouette Cutting Mat
- Silhouette Cutting Blade
- Adhesive Cardstock – Multiple Colors
- Gift Wrap
- Silhouette Hook Tool
- Silhouette Spatula
- Twine
- Design ID #282056
Step One: Preparing the Design
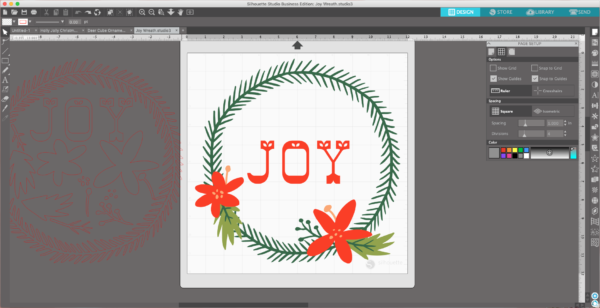
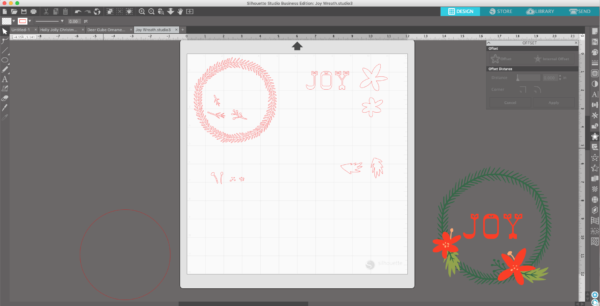
- Open the Joy wreath (Design ID #282056) in Silhouette Studio® and resize it according the size of the gift box you are wanting to embellish.
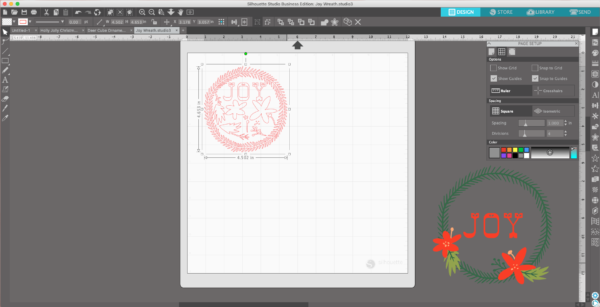
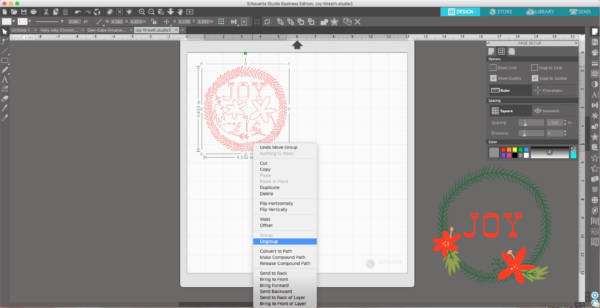
- Drag the red cut lines into the cut window, right-click, and select “Ungroup.” Move the color-filled design to the gray holding area. You won’t be cutting the colored design, but you will want to reference it when you are deciding the color of the cut pieces or assembling your embellishment.
- Sort the ungrouped cut pieces in the cut window by the color of cardstock you will cut from.
Step Two: Cutting the Design
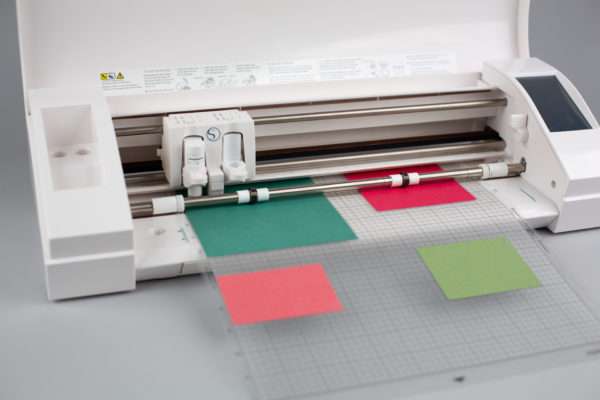
- Send to your Silhouette machine and adjust the cut settings according to material. In this case we are using “Cardstock, Adhesive-Backed.”
- Place your material on your cut mat lining up the colors based on where they are placed in your cut window.
Step Three: Applying the Adhesive Cardstock
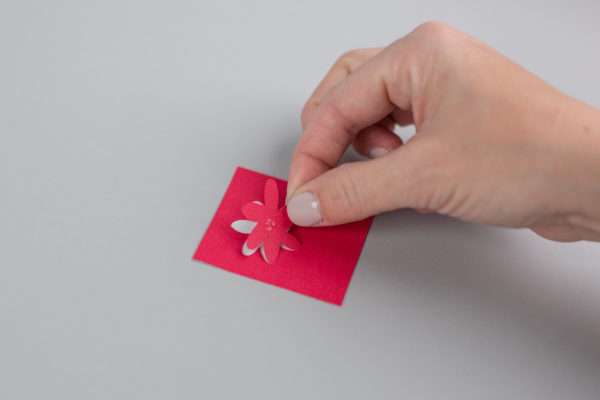
- When the Silhouette is finished cutting the designs, press unload and remove the cardstock from the cutting mat.
- Carefully remove the pieces from the backing like a sticker. The tricky parts with this design arere the wreath and the pollen dots on the flower because they are smaller and more delicate pieces. The rest are really straight forward and pop right off.
- Simply stick the adhesive backed cardstock right onto your gift!
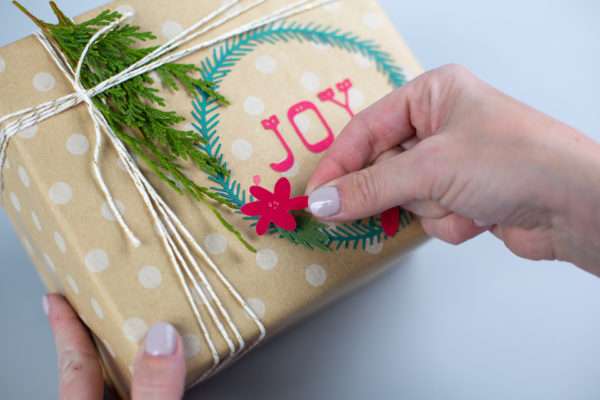
 Does it get much simpler then peel and stick?! Now you have darling custom gift wrap! How else do you like to use adhesive-backed cardstock? Let us know in the comments.