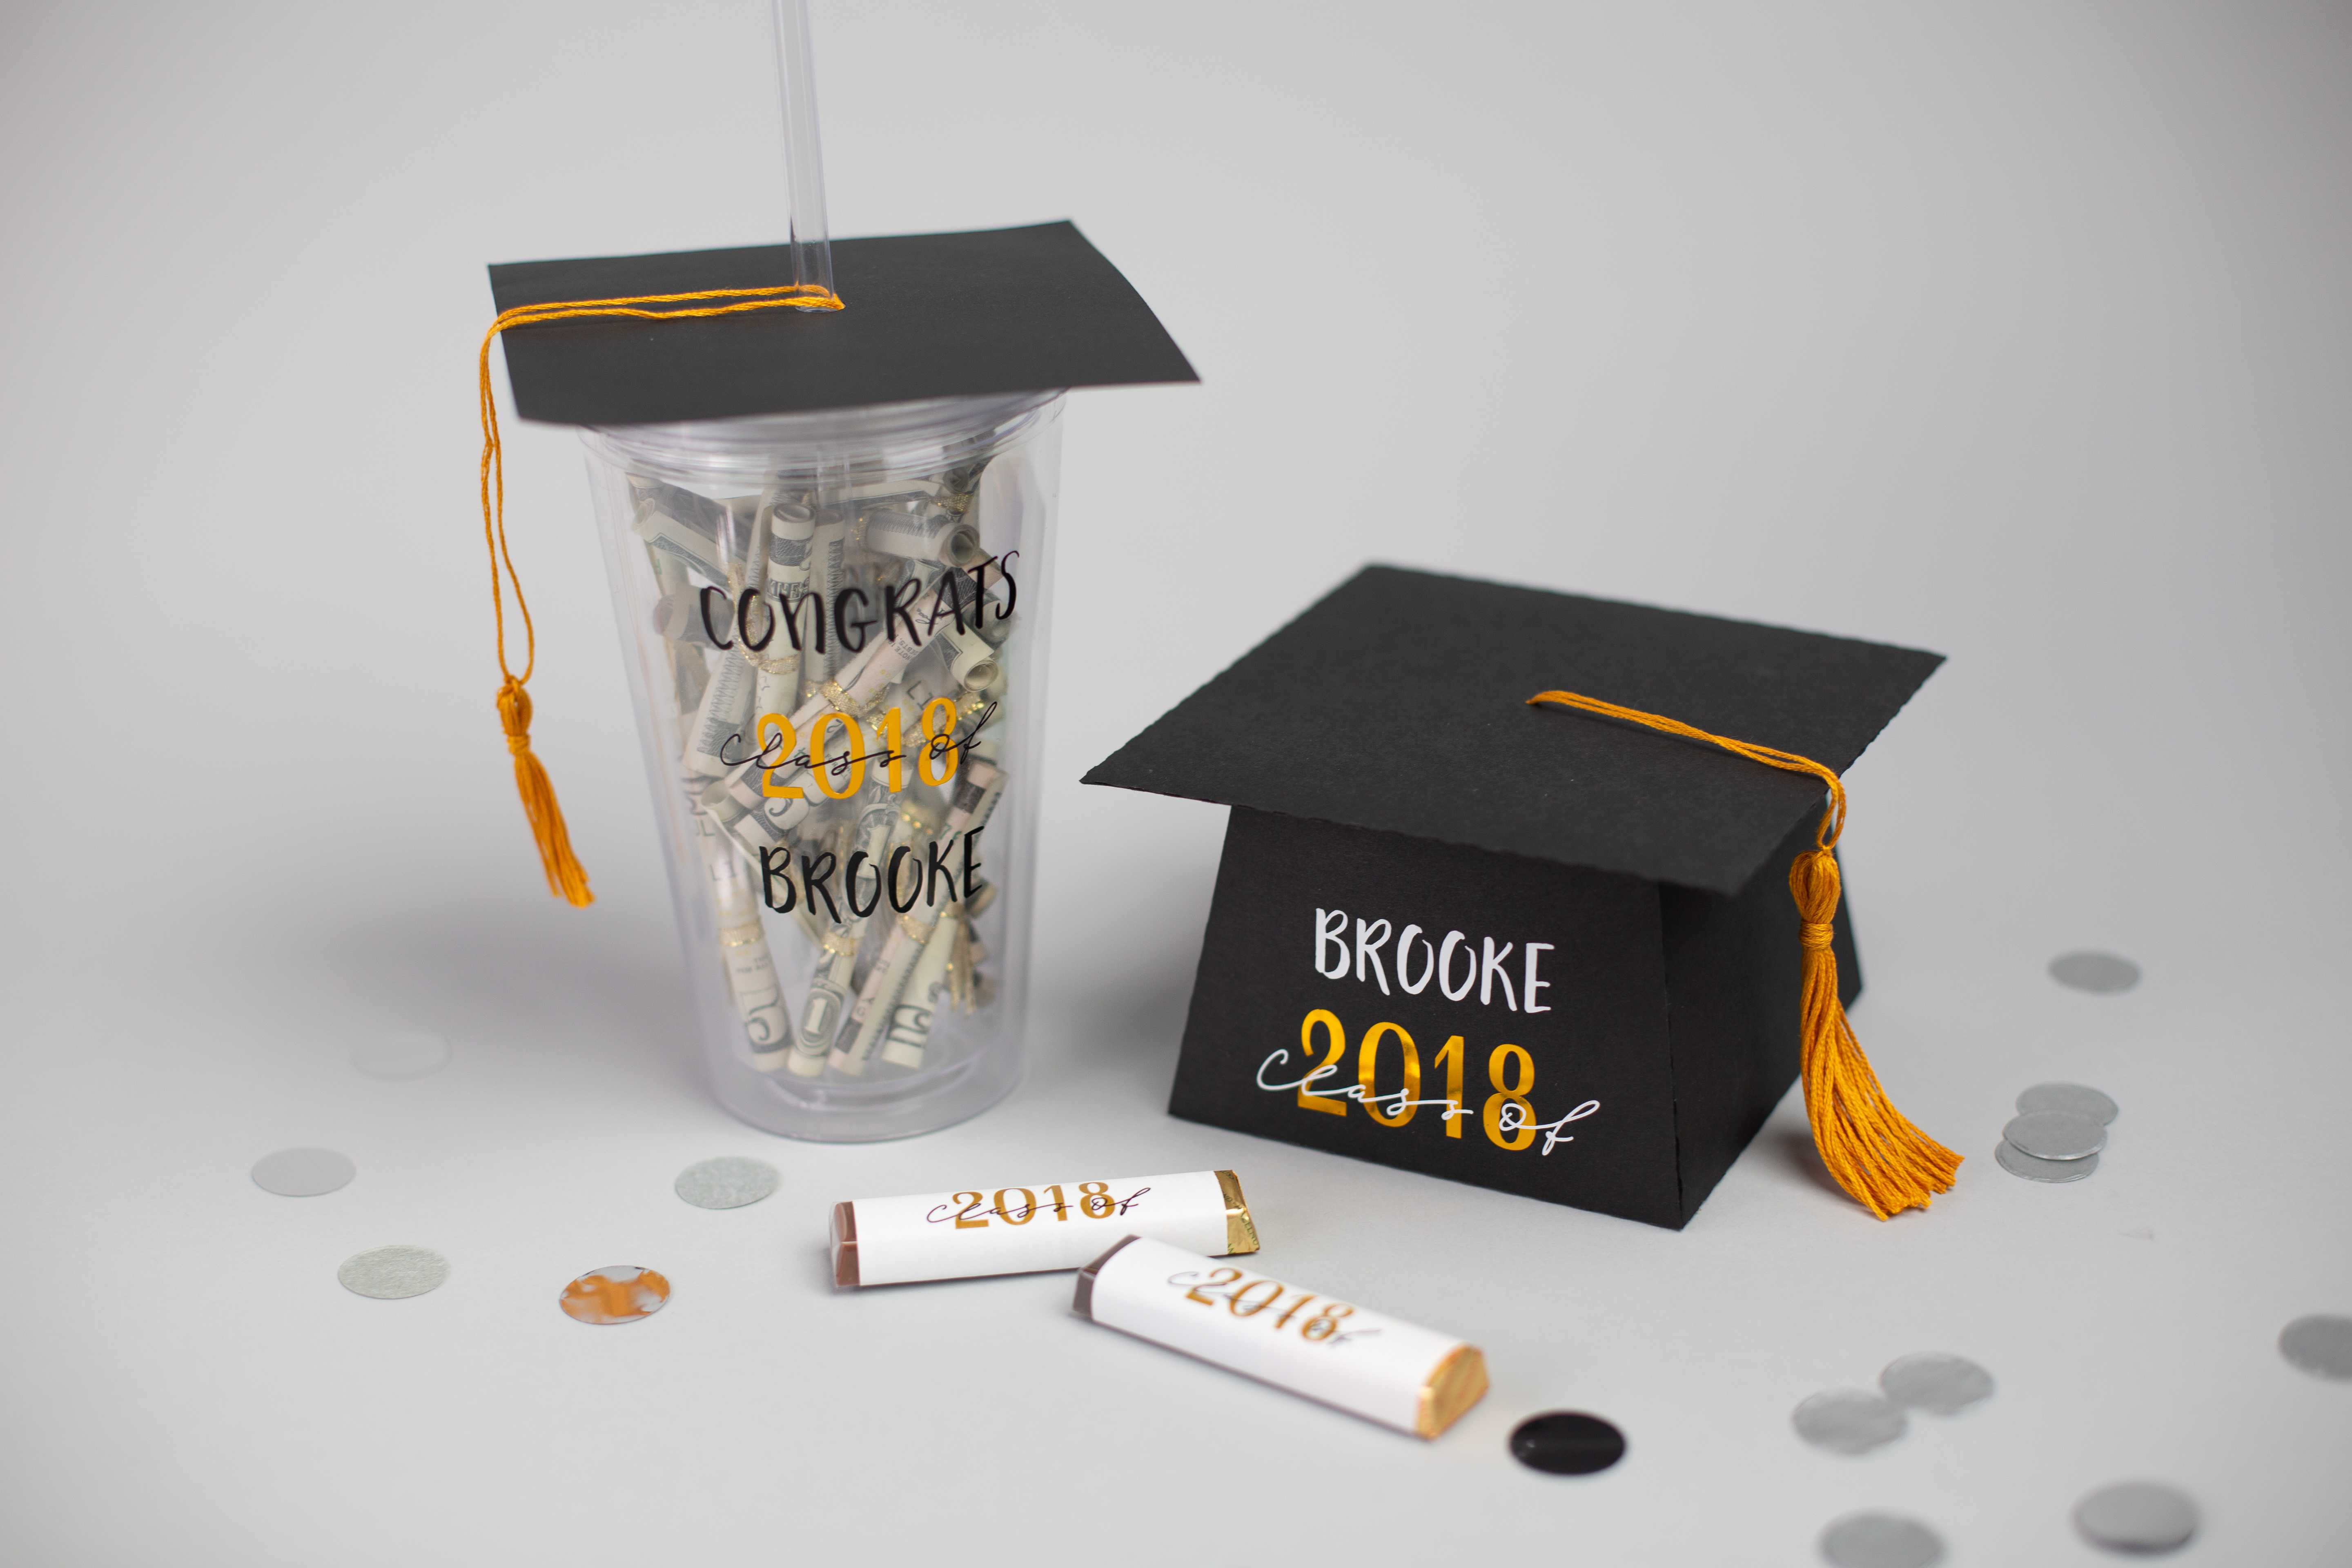
School is almost out, and graduation is just around the corner for some lucky young people. But instead of giving away yet another copy of “Oh, the Places You’ll Go” by Dr. Suess, why don’t you make your own personalized vinyl decals instead? These decals will help you turn lots of different things into the perfect graduation gifts. Follow the instructions below to see how you can create these decals.
Supplies Needed:
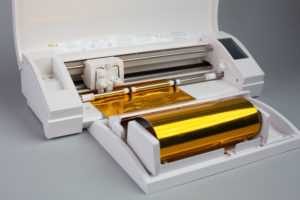
- Silhouette CAMEO® or Silhouette Portrait®
- Silhouette Cameo Cutting Mat
- Silhouette Cutting Blade
- Silhouette Studio®
- Silhouette Metallic Vinyl — Gold
- Silhouette Glossy Vinyl — White
- Silhouette Glossy Vinyl — Black
- Silhouette Spatula
- Cardstock — black
- Tumbler
- Tassel (we made ours out of embroidery floss)
- Chocolates
- Ribbon
- Double-sided Tape
- Printer
- Design ID #267811
- Design ID #263729
- Design ID #178468
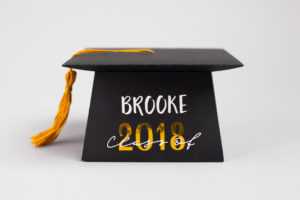
Step One: Making the Graduation Hat Box
1. Download the Graduation Cap Favor Box design (Design ID #263729) from the Silhouette Design Store. Open it in Silhouette Studio® by locating it in your Library. Resize it if needed. Ungroup the design. Place one of the box parts on the working space.
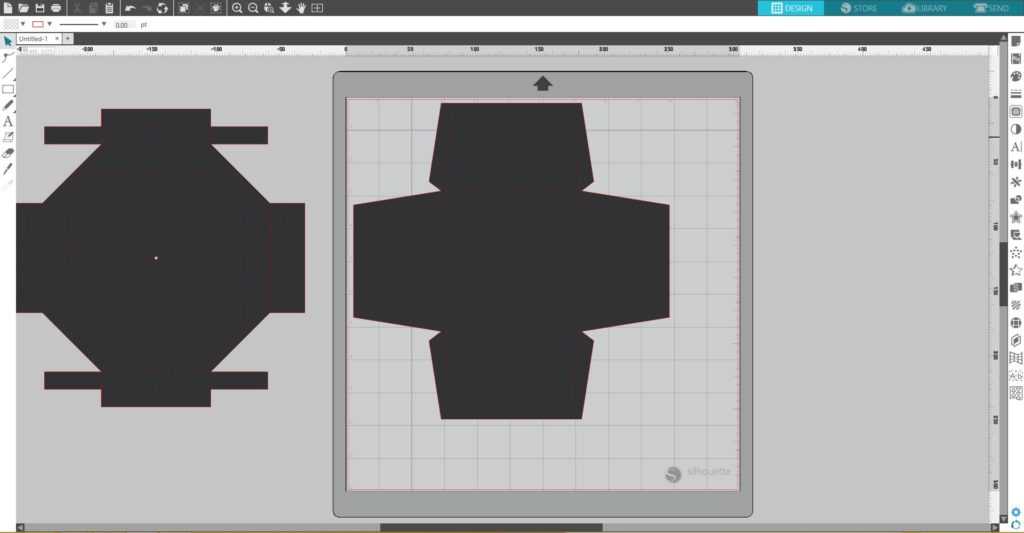
2. Place the sheet of black cardstock on your cutting mat and feed it into your Silhouette machine. In Silhouette Studio®, go to the Send tab, choose “Cardstock, Plain” as the material, adjust the blade as indicated (unless you use a machine with an AutoBlade) and click “Send.” Remove the cut designs from the cutting mat. Repeat the same steps with other part of the box.
Step Two: Making the Vinyl Decal for the Box
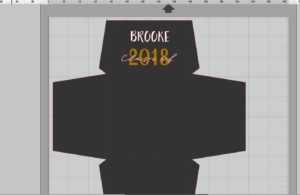
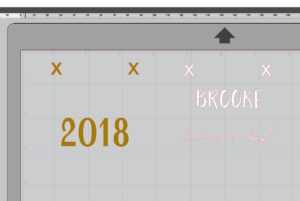
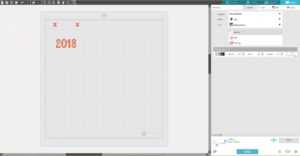
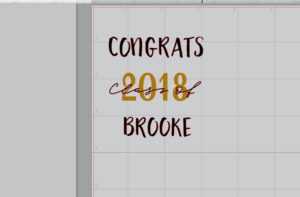
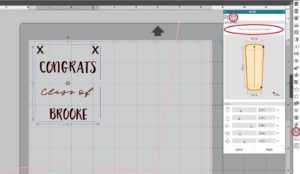
1. Type the graduate’s name with the Helsinki font (Design ID #178468), add the Class of 2018 design, and resize them so that they fit on the side of the graduation hat box.
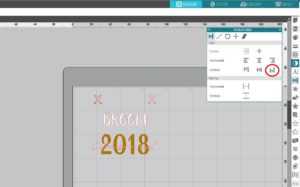
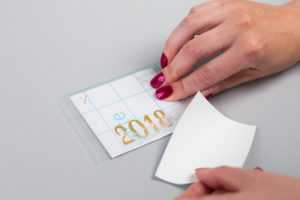
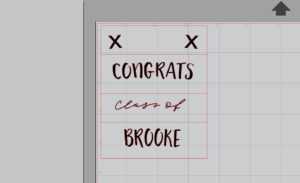
2. Our design has two colors of vinyl, and we need to make sure you can line everything up after cutting the vinyl. To do this, we’ll create registration marks. Registration marks for a vinyl cut design are simply a couple of shapes that we’ll put above the design to be cut with every layer. We will type a lowercase x and make a duplicate by holding the Alt key while clicking and dragging a copy of the x over to the other side. Select both of the x letters and line them up by going to the Transform panel and clicking on the Vertical alignment option.
3. Group both of the x letters together and make a copy of them. Place copied x letters on top of the original ones. Holding Shift, select the copies of the x letters, “Brooke,” and “Class of” and then place all those pieces aside the “2018” text. Group each set.
4. Keep 2018 set on the working space, and load metallic gold vinyl into your Silhouette machine. If you use a small piece of vinyl, place it on the cutting mat, if you use roll of vinyl, the Silhouette Roll Feeder will help to hold the vinyl roll in place.
5. In Silhouette Studio®, go to the Send tab, choose “Vinyl, metallic” as the material, adjust the blade as indicated (unless you use a machine with an AutoBlade) and click “Send.”
6. Repeat the same steps for “Brooke and class of” set using glossy white vinyl.
7. Weed (peel away) the negative space, so all that remains on the vinyl backing is your design.

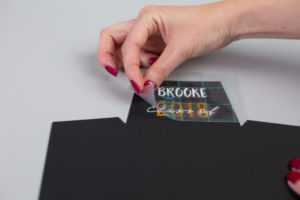
8. We’ll use transfer tape to pick up the top layer first, including the registration marks. Now place it back on the vinyl backing to cover everything but the registration marks, and this lets us place our design on the next layer without accidentally touching it to the layer below it before we’re ready.
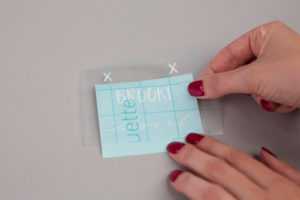
9. Line up the registration marks, and then peel the backing away.
10. Now our design is ready to apply to the graduation hat box. You can remove the registration mark cutouts before applying it since we don’t need them any more.
11. Assemble the box by creasing the perforated edges, folding all the tabs inward, and gluing the tabs to create the box with lid. Add the tassel to the box lid.
Step Three: Making the Chocolates Wraps
1. Download the Class of 2018 design (Design ID #267811) from the Silhouette Design Store. Open it in Silhouette Studio® by locating it in your Library. Resize design according the size of the chocolate bars you will use. Measure your chocolate bar and draw the rectangle around Class of 2018 design according to the chocolate bar dimensions.
2. Resize the page size to the letter size (8.5 in. x 11 in.) In the Page Setup window, turn on the registration marks by setting the style to Type 1. Make as many copies of your design as needed.
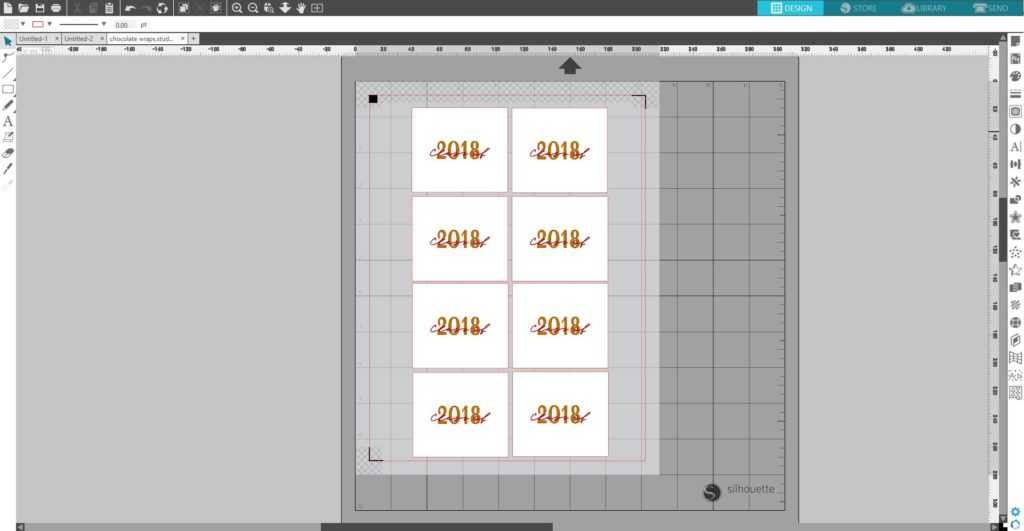
3. Print the wraps on white paper. Place the printed sheet on your cutting mat and feed it into your Silhouette machine. In Silhouette Studio®, go to the Send tab, choose “Copy Paper” as the material, adjust the blade as indicated (unless you use a machine with an AutoBlade) and click “Send.” Remove the cut designs from the cutting mat.
4. Wrap the chocolate bars with wraps and secure the wraps with double-sided tape on the back.

5. Fill the box with chocolates.

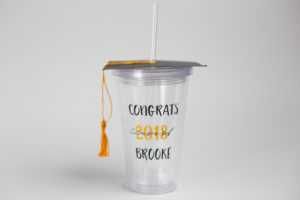
Step Four: Making the Vinyl Decal for the Tumbler
1. Place “Brooke” and “Class of 2018” designs on the working space. Type “Congrats” using the same font we used for the “Brooke” text. Place “Congrats” first. Put “Class of 2018” under it, and place “Brooke” on the next line. Resize the design according the size of your tumbler.
2. Add registration marks and separate the design into two colors, as was described in the Step Two of this blog post.
3. Because our tumbler has a conical shape, we will use the Conical Warp Tool (Warp Panel on the right-hand side of the screen, Conical Warp tab), which will help us to warp our design specifically for conical surface. The Conical Warp Tool is available in Designer Edition + and Business Edition of Silhouette Studio. Select the parts of your design you are going to cut from black vinyl, and click “Conical Warp Selected Shapes.”
4. Input the top, bottom, and height measurements for our tumbler, and adjust the vertical placement.

5. To make a weeding process easier, we will add weed lines to our design. To do so, draw a rectangle around your design and using the Draw a Line Tool draw lines as shown below.
 6. Do the same steps for the part of your design you are going to cut from metallic gold vinyl.
7. Cut and weed your design.

8. Apply vinyl on the tumbler using multicolored layering method described in the Step Two of this blog post.

Step Five: Creating the Top Part for the Tumbler
1. Holding down the Shift key, draw a square that is a little bit bigger than the top of your tumbler using the Rectangle tool, which can be found on the left-hand side of the screen. Draw a small circle in the middle of the square.
2. Place the sheet of black cardstock on your cutting mat and feed it into your Silhouette machine. In Silhouette Studio®, go to the Send tab, choose “Cardstock, Plain” as the material, adjust the blade as indicated (unless you use a machine with an AutoBlade) and click “Send.” Remove the cut designs from the cutting mat. Using double-sided tape, secure it to the tumbler top. Add the tassel.
3. Fill the tumble with the rolled dollar bills, and your graduation gift set is ready!


Don’t you think these designs make better graduation gifts than a book or a card with money in it? Vinyl decals are a great way to dress up and personalize anything you want, and I think any recent graduate would agree with that!
What kinds of things would you add this vinyl decal to?
Maria Iris Damge
May 31, 2018
Thank you for this awesome tutorial! I always struggle when I use vinyl in tumblers, cups, etc. I was totally unaware of the incredible help the warp tool could give me! I did not know how how or what to use it for. I love the clarity of your instructions, and the fact that you also provided pictures in each step! Thank you very much!!
Silhouette
June 4, 2018
Thank you so much for your feedback!