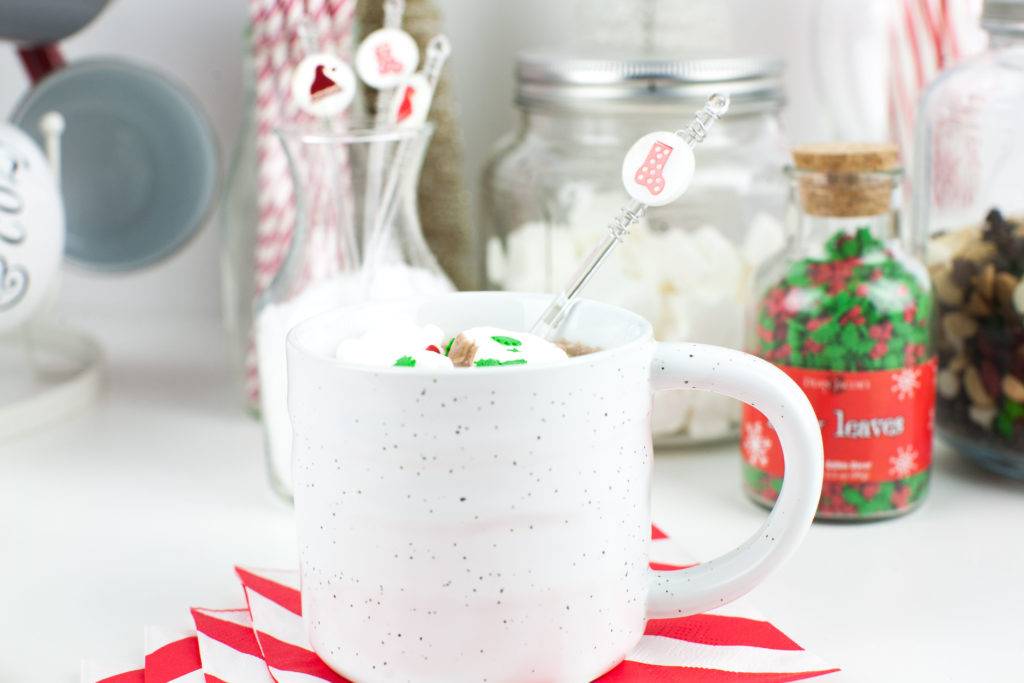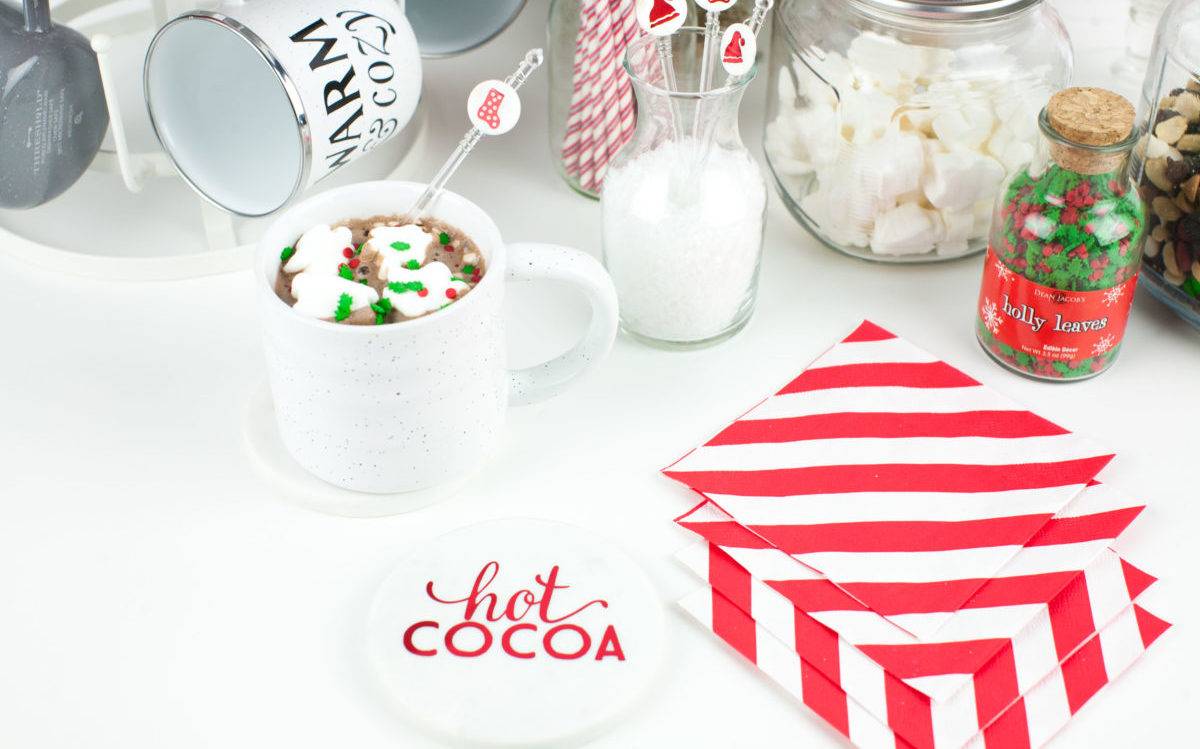
The holidays are here, and that means it’s time to bring on the party accessories. We have a hot cocoa station in our household, and pulling that out has quickly become a tradition for us. My girls love to curl up with a warm blanket and a good book by the Christmas tree. It’s our favorite place to enjoy a cup of hot cocoa with all the trimmings!
That’s what inspired me with the idea to decorate stir sticks and coasters. I wanted something festive but also useful, so these two items were just the ticket! They would make a great gift set, which I might end up doing (I have a friend who has been eyeing mine)! Once I decided on the theme I wanted, I headed over to look at all the wonderful designs in the Silhouette Design Store.
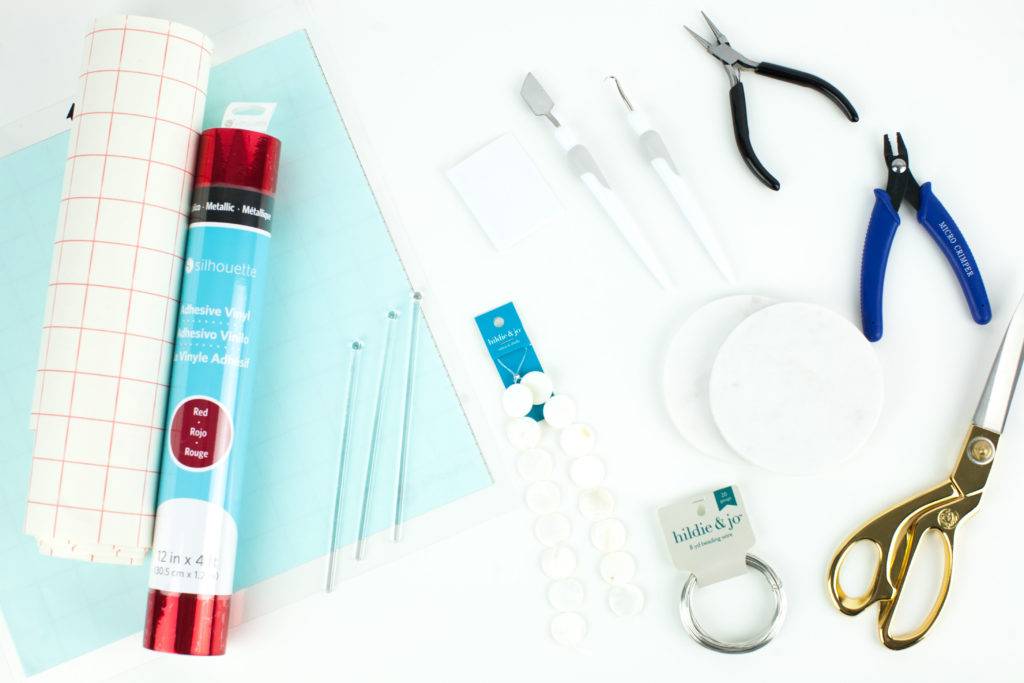
Supplies Needed:
- Silhouette CAMEO® or Silhouette Portrait® or Silhouette Curio™
- Silhouette Cutting Mat
- Silhouette Cutting Blade
- Silhouette Studio®
- Silhouette Metallic Vinyl – Red
- Silhouette Transfer Tape
- Acrylic Stir Sticks
- Round Marble Coasters
- Flat Pearl Beads
- Silver Wire 20g
- Wire Cutters
- Wire Clamper
- Scissors
- Design ID #14084
- Design ID #35983
- Design ID #110200
- Design ID #14084
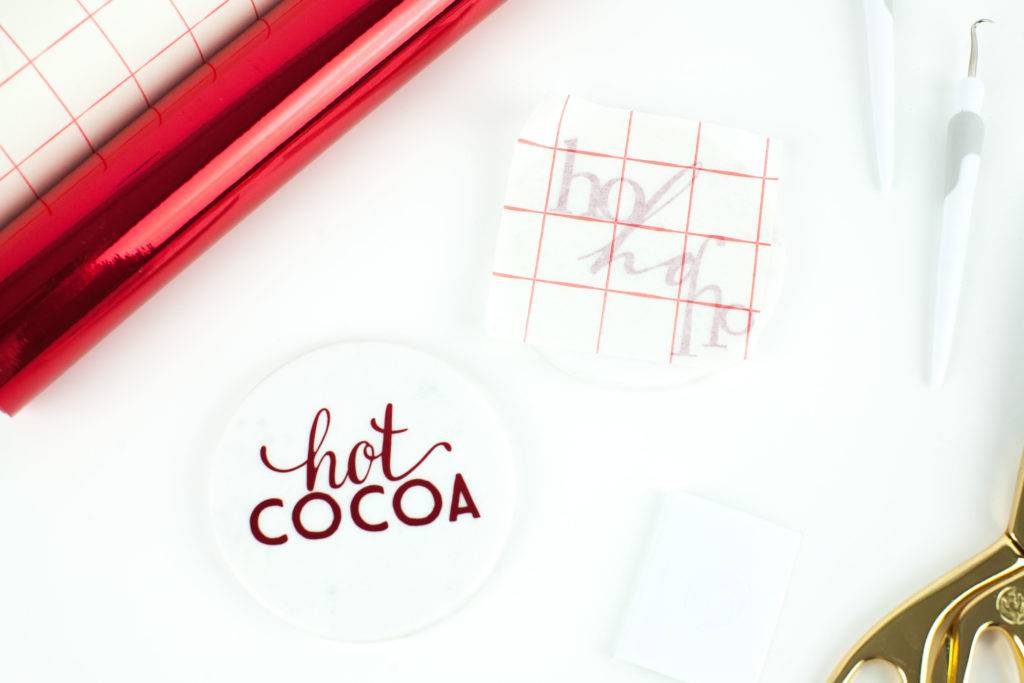
Step One: Create the Custom Coaster
- Once you have picked out the coasters you want to use, measure the diameter of the coaster so that you know how big you can cut your vinyl design. Tip: If your coasters are still in the packaging, you might be able to see the dimensions on the package.
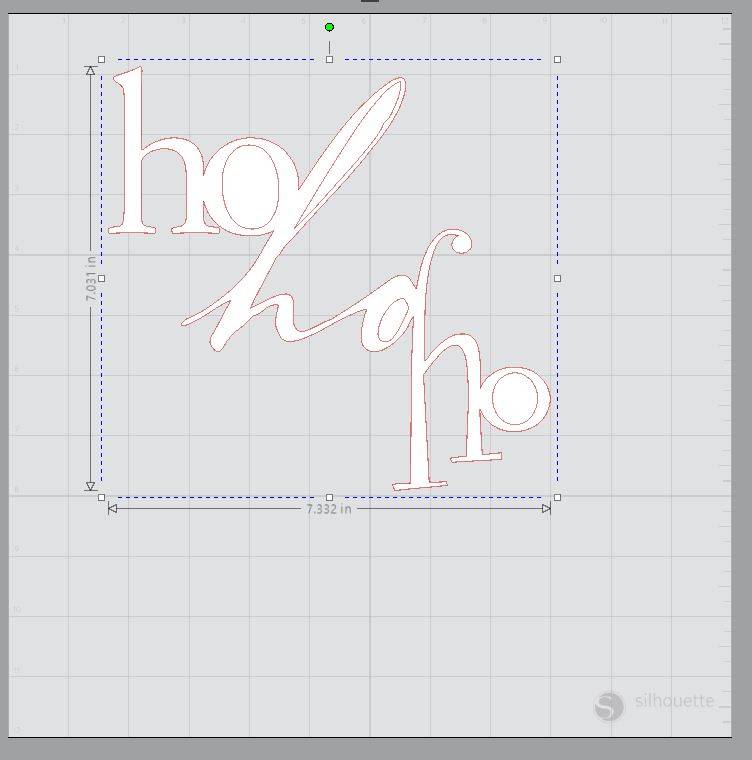
- Now that we know how big we can make the design, we will want to first locate Design ID #14084 in our library and bring it into our work space.
- Select the Page Setup window (this icon can be found on the toolbar on the right-hand side of your page) and adjust your page width and height to the dimensions your machine can cut.
- Now adjust the size of the design by selecting it and dragging the outer corner to make it larger or smaller. You will want it small enough to fit entirely on your coaster.
- With the design size to your liking, it’s now time to cut. In the Send window, set your material to “Vinyl, Metallic.” Also, now would be the time to adjust your blade if you are not using an AutoBlade.
- Load your vinyl into your machine and cut out your design. Once cut, weed away the excess vinyl to leave only the design.
- Apply transfer tape to the top of your cut design. This will make it easy to transfer your design onto your coaster without anything in your design moving. Rub the design on your coaster and peel back the transfer tape to reveal your beautiful design.
Step Two: Create the Stir Sticks
- Gather your stir sticks, wire, and beads. Begin stringing your pearl bead with the silver wire and start to wind the wire around the top part of your acrylic stir stick.
- Once you have wound it around your stir stick as many times as you’d like, use your wire cutters to cut the rest of the wire away.
- At this point, you will use the wire clampers to curl under the ends of the wire at the top and bottom to ensure that they are not sharp.
- Decorate your beads with more metallic vinyl to pull in the color scheme. For the stir sticks, I cut stockings and Santa hats. (To cut the vinyl, follow the same instructions that are in Step One.)
- Now you are ready to serve your hot cocoa in style!