Did you celebrate Christmas? If you did and you’re stopping by the blog today, the chances are that you received a great Silhouette gift from someone special (or maybe yourself) this morning. 🙂
What better way to show your gratitude than to put together some handmade holiday thank you notes? Don’t let your gift sit in the box—you’re going to love what you can make with your new DIY machine. Set it up and let’s get going!
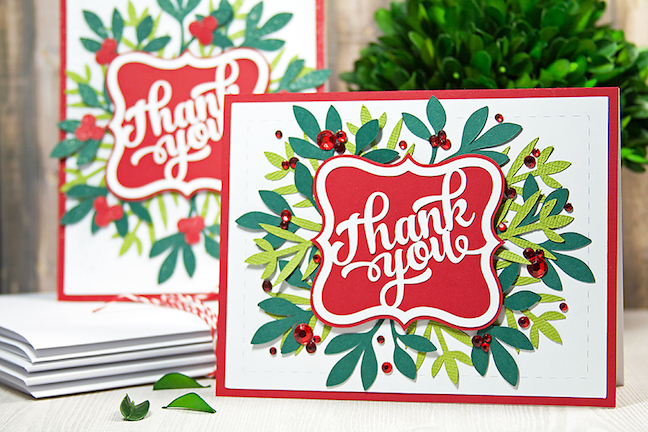
This sweet card can be made with any of the Silhouette cutting machines. And best of all, it’s not hard to mass produce.
Supplies Needed:
- Cardstock in red, white, light green and dark green (found here or at your local craft store)
- Assorted embellishments such as sequins, gems, sparkle sprays
- Foam Squares or other 3D adhesive
- White glue or craft glue
- Holly, ID #53265
- Thank You Label, ID #64688
- Pine Boughs, ID #70963
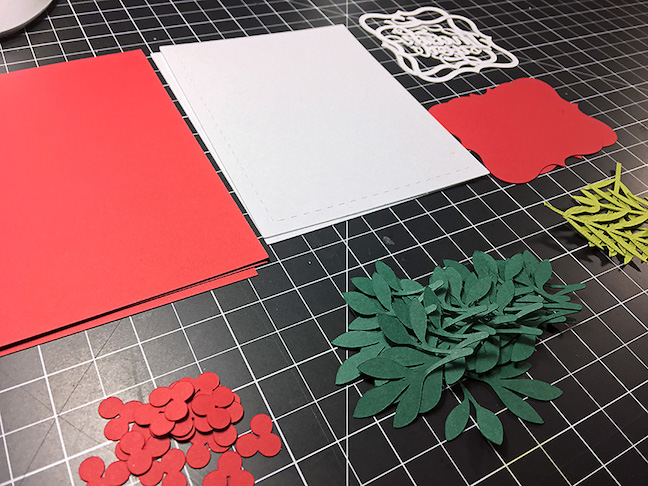
Gather Your Pieces
STEP ONE: CUT YOUR FOLIAGE 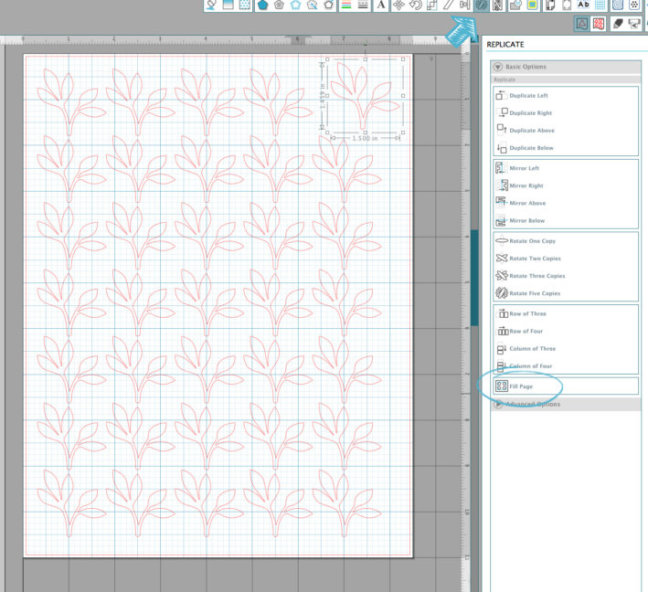
Open up the Holly design in Silhouette Studio®. Make sure the design is selected, then right-click and choose Ungroup.
Select the berries and delete them—we just need the leaf for our project. Next, resize your holly leaf to a width of 1.5 in. by either pulling on one of the corners of the selection box around it or using the Scale tool in the top button bar.
Then, use the Replicate tool (there’s a great explanation of how this tool works here) to fill your sheet with holly leaves.
This is where mass production gets easier—you can cut as many sheets as you need to make as many cards as you want. Go ahead and stick a dark green piece of cardstock onto to your mat, match your cut settings to the type of paper you have, and click Send to Silhouette.
For the Pine Boughs, follow the same steps to cut a sheet full of images, except change the width of the pine boughs to 2 in. Cut these from the light green cardstock.
STEP TWO: CUT YOUR CARD PANELS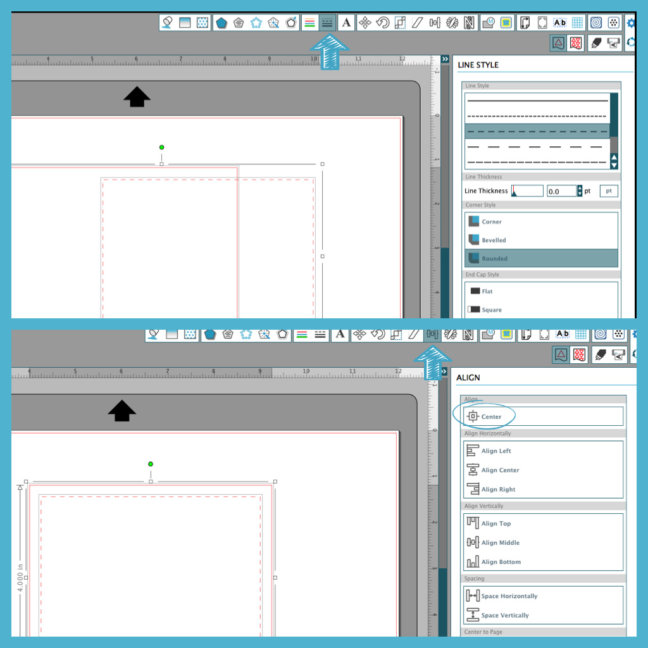
Open a new design page. Draw a 4 in. x 5.25 in. rectangle. Using the Offset tool, create an internal offset of 0.25 in. Select this new smaller rectangle and change it to a dashed line with the Line Style tool. If you need to move it to do this, you can center both shapes back into place with the Alignment tool.
Fit as many as you can on your page, load your white paper, and check to make sure your cut settings match your paper type, then Send to Silhouette.
STEP THREE: CUT THE SENTIMENT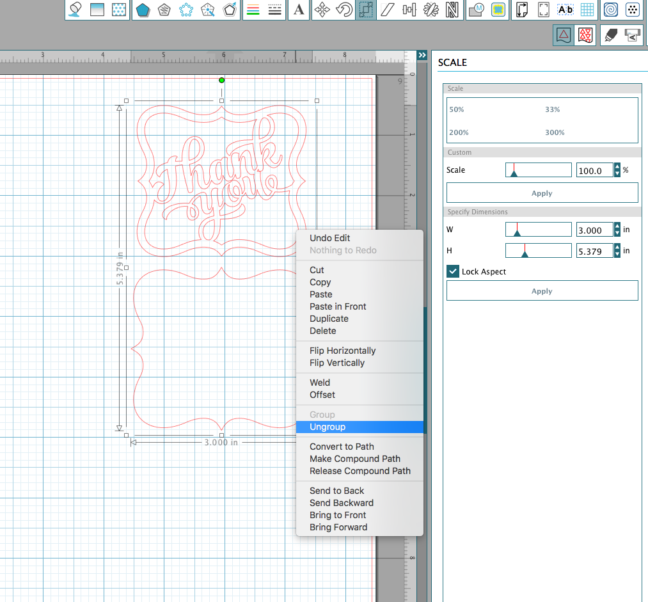
Open the Thank You Label design and resize its width to 3 in. Right-click on the image and choose Ungroup. For now, we only need the word layer, so go ahead and delete the solid shape.
Using the Replicate tool again, fill your page. Cut these from white cardstock.
To cut the other layer of this tag, we are going to use the red cardstock.
Open up the Thank You label design again, resize to 3 in., and Ungroup. This time, delete the sentiment layer and fill your page with the solid shape.
If you would like, add some small circles or use the berries from the Pine Bough design in the extra space on your red paper. Finally, send that to your Silhouette, and we are done cutting with your machine.
Putting It All Together
The only other cuts we need can be done by hand. You’ll need to cut some red 4.25 in. x 5.5 in. rectangles and some A2-size (4.25 in. x 5.5 in.) white card bases.
You have had lots of cutting practice, now comes the fun part—building your cards!
STEP FOUR: BUILD THE CARD BASE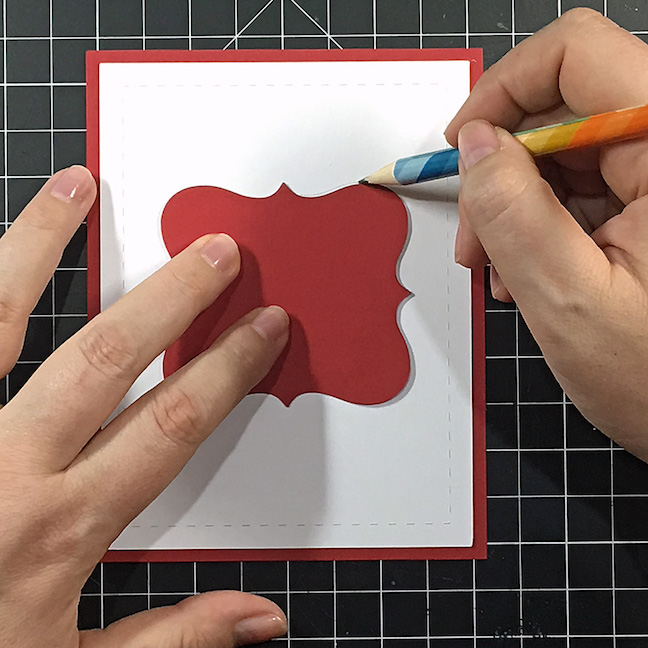
Adhere your white “stitched” panel to a red rectangle, and use one of the red label pieces to trace lightly where your sentiment will go.
STEP FIVE: CREATE YOUR LAYOUT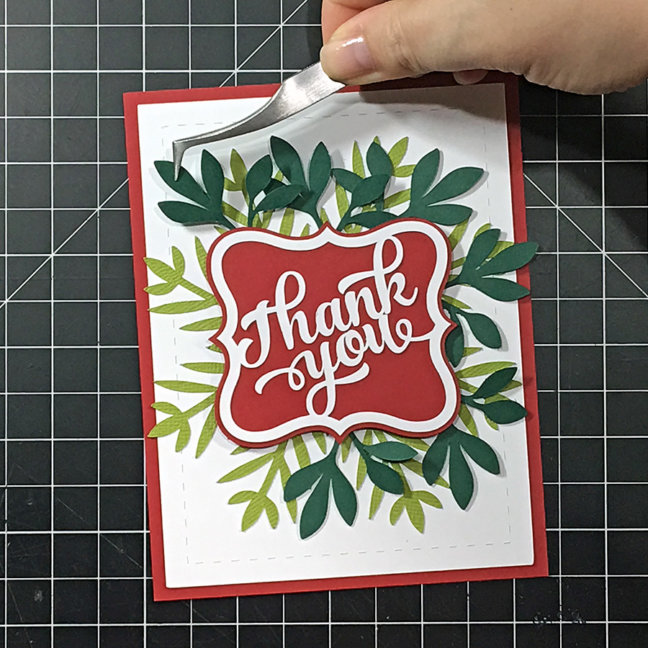
Put together your sentiment labels and attach them to your card front with a couple of foam squares.
Beginning with the light green pine boughs, arrange them how you would like around the sentiment and stick them down. If you are using Adhesive Backed Cardstock, this part is super easy!
After you are done with the pine boughs, go ahead and tuck in your holly leaves.
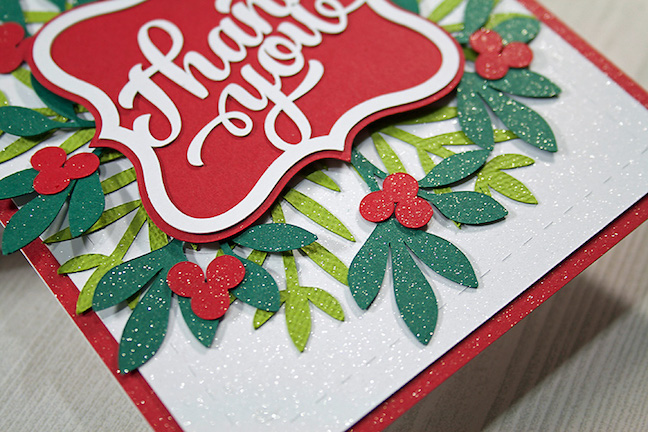
STEP SIX: EMBELLISH!
What’s a holiday card without a little sparkle? The berries are a great option to punch up your design. Use gems or sequins to create berry clusters, or maybe try a little sparkle spray on an entirely paper-made card (this is a great option for cards that will go through the mail).
Thanks so much for visiting today to check out my holiday thank you notes! Do you make your own thank you notes for gifts? Leave a comment below and let me know!
Julie B
December 25, 2016
What is the name/manufacturer of the sparkle spray you mention? Thanks!
Niki Coursey
December 27, 2016
The best one I’ve found (and my favorite!) is Sparkle Sheer Shimmer Spritz by Tsukineko. You can find it at your local craft store, usually around the Tim Holtz area 😉
Connie Wilson
December 25, 2016
This is beautiful Niki! I love the sparkle, it really makes it pop 🙂 Merry Christmas!
Niki Coursey
December 27, 2016
Thank you Connie! Hope your holidays were fabulous!