The Send panel in Silhouette Studio® is where you send your cut job to your Silhouette machine. In each of these Action areas, whether Simple, by Line, by Fill, or by Layer, you’ll always choose a material for your tool.
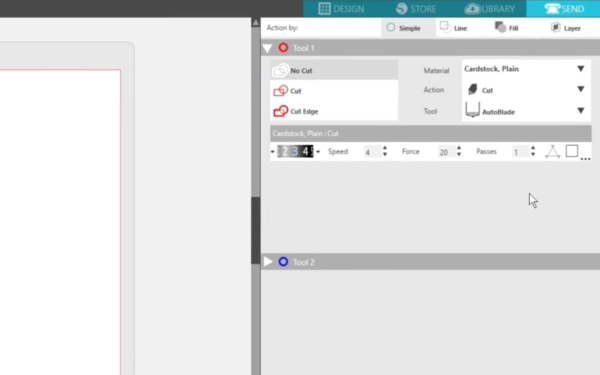
The drop-down list shows a list of common materials you can use, along with all of the Silhouette specialty materials.
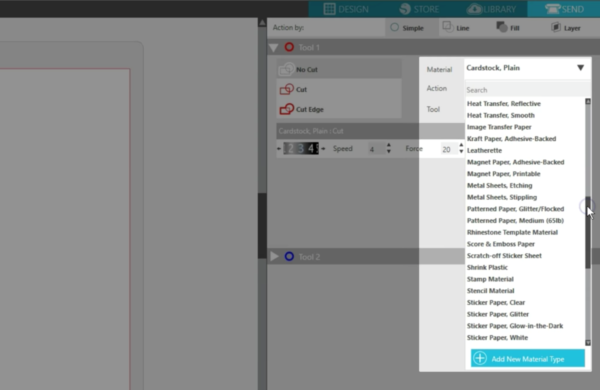
At times you may need to add your own custom material, so we’ll walk you through that process. Let’s say we want to add a certain type of glitter cardstock we’ve tested and know what settings to use, and it’s not part of the existing list. In the Send panel, click the drop-down arrow for Material. At the bottom, choose “Add New Material Type.”

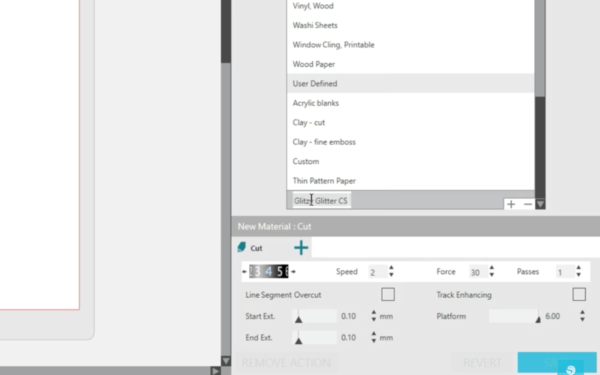
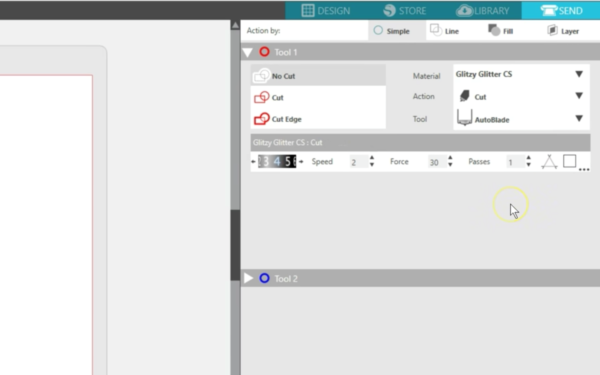
Change the settings. We want blade depth 4, speed 2, force 30, passes 1. If we were using the Curio, we could set a platform number as well.
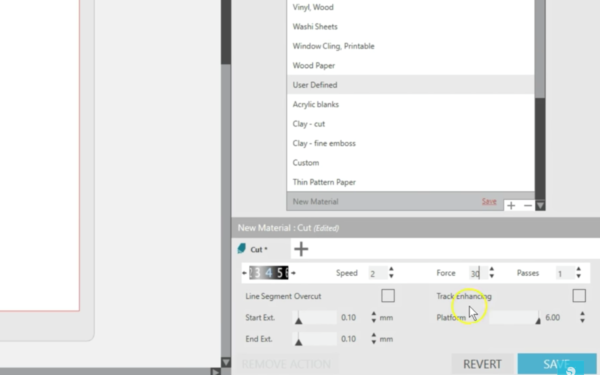
If you want to do an action other than Cut, you can click on the + symbol to add a different action, such as Score or Sketch. If using a Curio, this + symbol is how you would set an Emboss or Etch or Stipple action to a new material too. When it’s set the way you want, click the blue Save button.
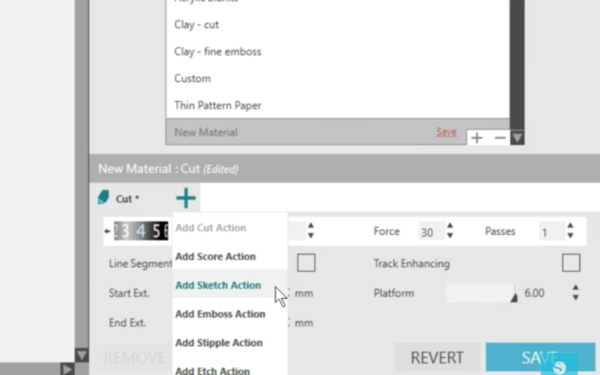
Double-click the “New Material” text to change the name for your custom material.
Hit Enter when done.
Now click the X under the Send panel’s blue tab at the top to get back to the normal Send panel view.

Now whenever we need that custom glitter cardstock setting, we can click on the Material drop-down arrow, scroll to the bottom, and find it in the User Defined section.
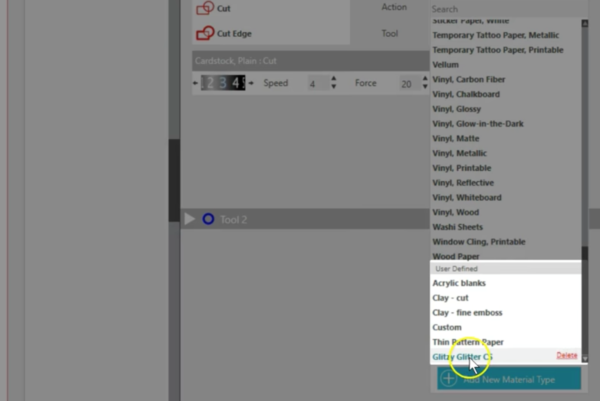
The settings we chose when we saved it will all be there, and they can be adjusted further, if necessary.
If we change any existing material settings, perhaps increase the force or change the blade type, we can choose to Revert the setting back to what it was or save it as a permanent change.
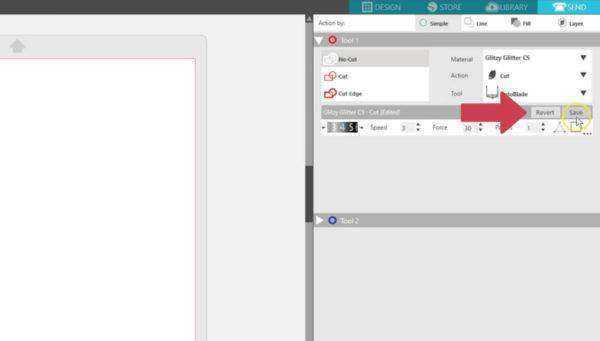
You’ll also get a reminder when you close Silhouette Studio® if you changed any material settings, and you can save or discard those changes. That’s how to add custom materials in Silhouette Studio®.