If you haven’t tried out the sketch pen feature you really should put it on your ‘to-do’ list. There are so many fun features and ways to add pizzazz to your sketched designs.
Before I share with you how I created my sketched designs on my layout I want to go through some of the features of the Sketch Window with you first.
BASIC AND ADVANCED OPTIONS
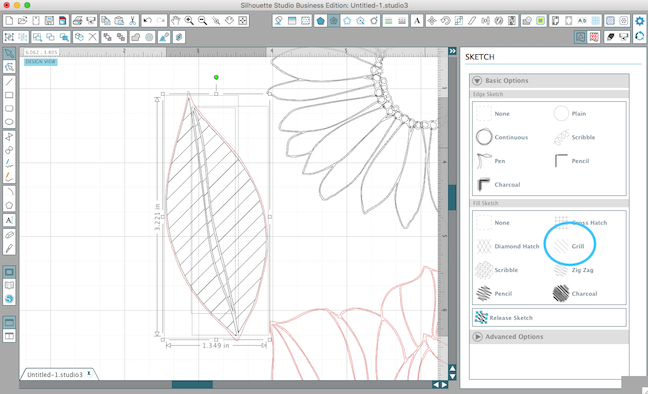
When you first open the Sketch window you will see the Basic Options for the Edge Sketch and the Fill Sketch.
Edge Sketch – the outside of your design.
Fill Sketch – clicking on one of these options will fill the inside of your sketch design with lines.
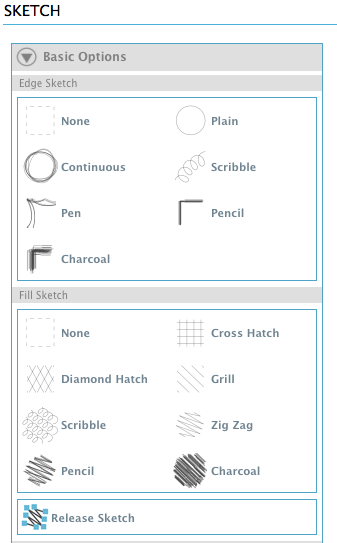
If you choose to fill your sketch design, you will also be able to select the Advanced Options. This will allow to change the look of the fill image.
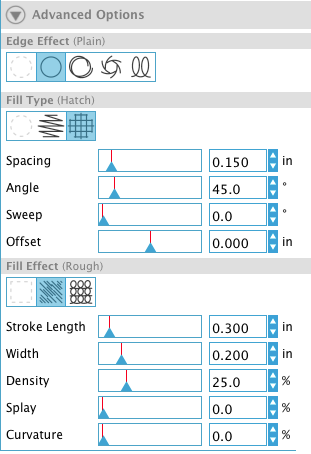
As seen in the picture above you will notice a variety of options. Let me briefly explain these to you with some examples.
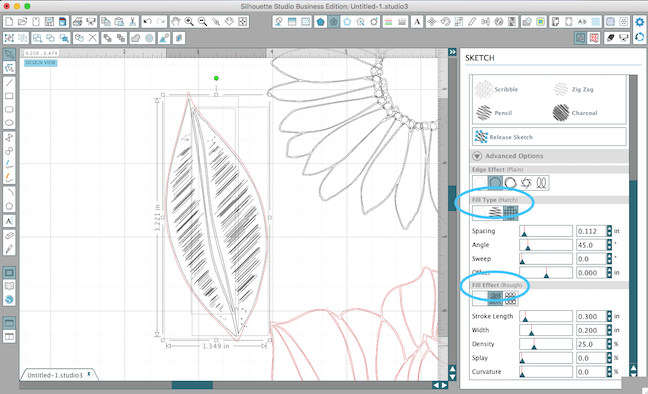
Fill Type
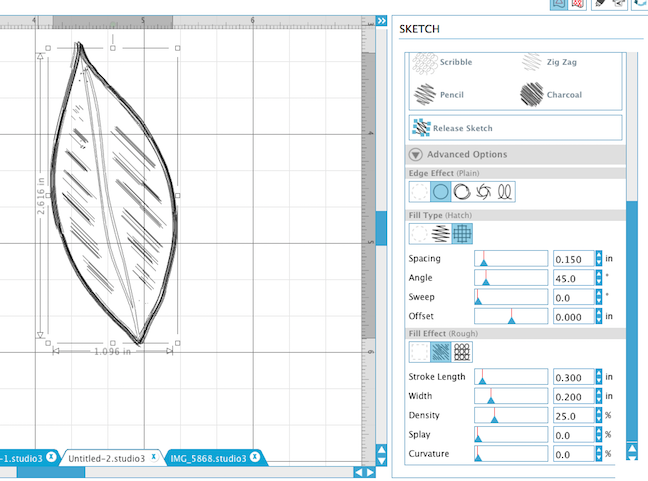
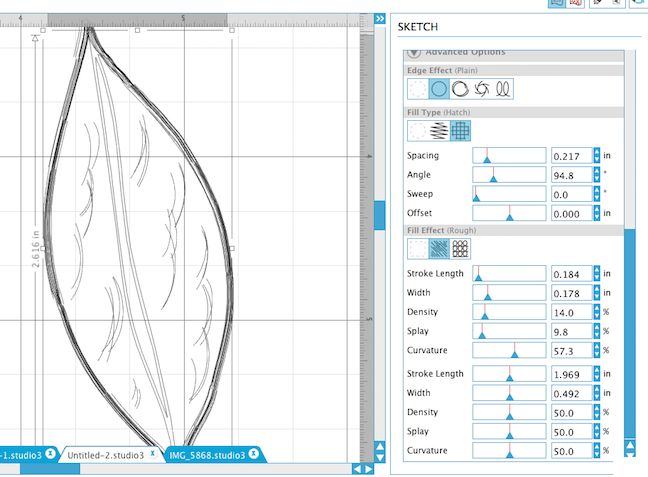
In this picture, I’ve filled the leaf design with the Charcoal Fill.
Spacing – changes how close the lines are to one another.
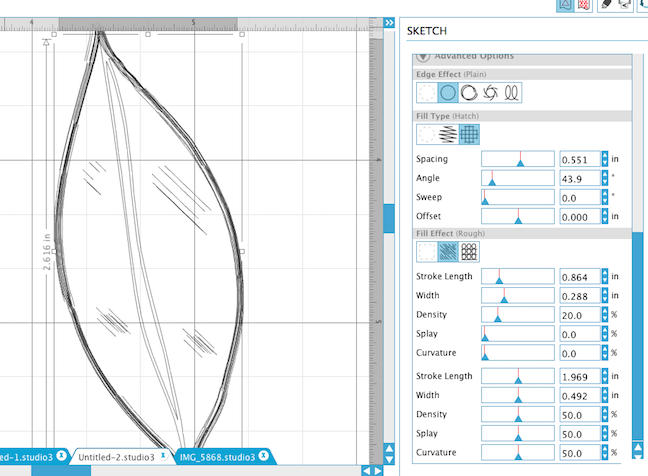
Angle – changes the angle of the lines.

Sweep – takes one group of lines and puts them on an angle while the other group of lines stays in the direction it started at.
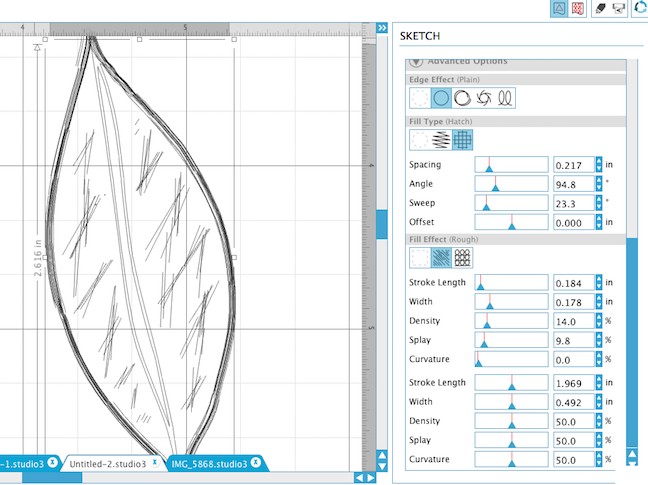
Offset – changes the amount of space between the lines & the outside edge of the design (the lower the number, the more the lines extend outside the design outline).
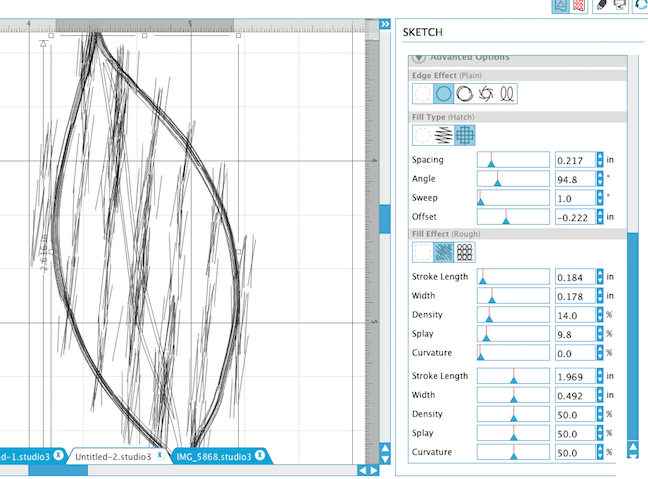
Fill Effect
Stroke Length – exactly what it says . . . It changes the length of the lines.
Width – again, what it says . . . It changes the distance of the lines.
Density – allows you to fill in with more lines as you move the slider to a higher number.
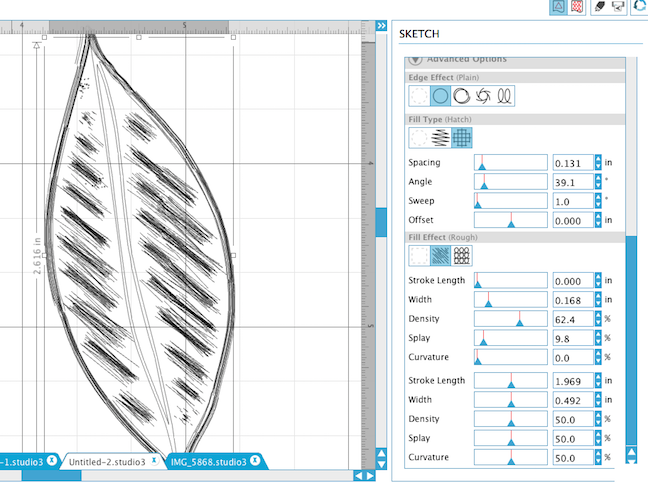
Splay – changes the directions of all the lines.
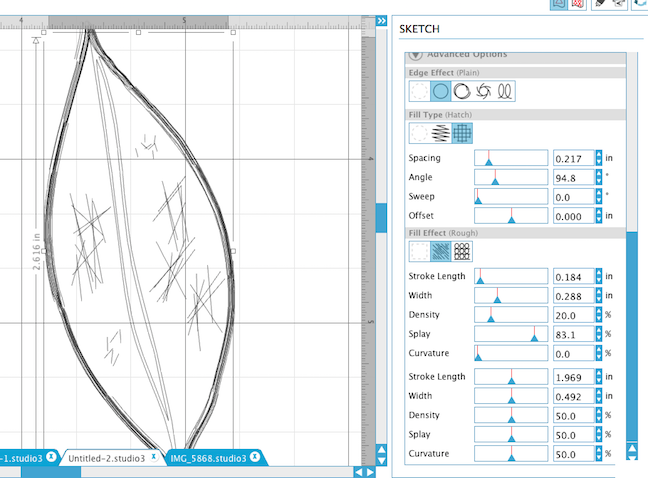
Curvature – this is a fun option that will add curves to the lines.
Hopefully this gives you a bit of an idea on how the features work in the Sketch Window.
Now let me quickly go over how I created my sketched designs.
BONUS TUTORIAL | SKETCH LAYOUT
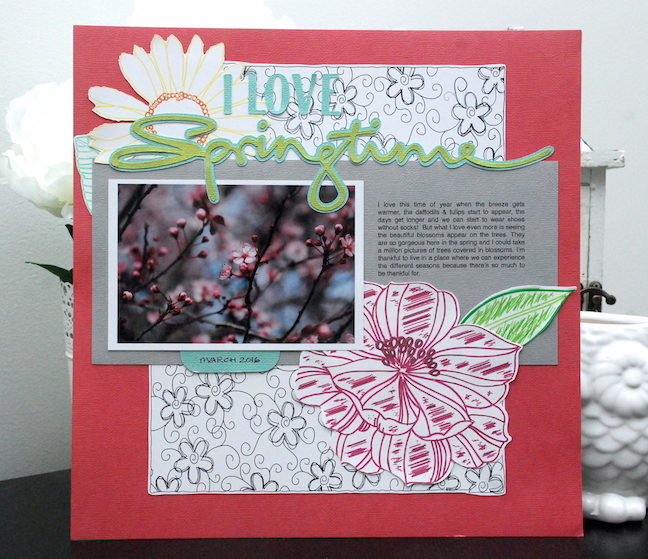
Today I’m sharing with you this layout that I created with a plain sketched background and then detailed sketched designs.
You Will Need:
- Silhouette CAMEO® (or Portrait or Curio)
- Silhouette Studio®
- Silhouette Sketch Pens
- Silhouette Printable Adhesive Cardstock
- Silhouette Adhesive Backed Cardstock
Step One: Opening Your Design
(1) Open up your design in the Silhouette software
(2) Ungroup the design
Once it’s ungrouped you will notice many small boxes in the design.
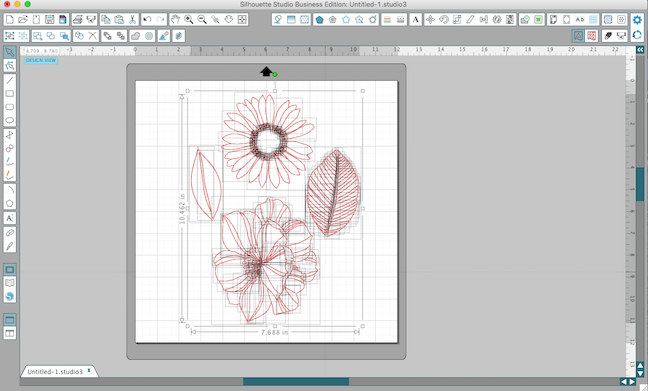
Step Two: Choosing an Outside Edge
For the daisy shaped flower I decided to keep it simple.
(1) Click on the entire image (you will drag your mouse across the entire image making sure to include all the small boxes)
(2) Choose the Plain outline edge.
This gives a nice clean edged look. This is an option that you can use for most designs if you don’t want to do anything ‘fancy’ or complicated.
Then repeat the above process for one of the leaf designs.

For the smaller leaf I wanted to add some visual interest. I noticed that after ungrouping this design, there was an outline image and then three smaller shapes inside that.
To add interest to the smaller leaf:
(1) Select the three boxes on the inside and chose Plain Edge.
Keeping those three boxes grouped together you can now fill them with more lines.
(2) Select the Grill option.
Here’s where the fun part happens and you can change the look of these lines completely by using the options in the Advanced Panel that I described earlier on.
Once your designs have all been created in the Sketch window you will then be able to start using those sketch pens.
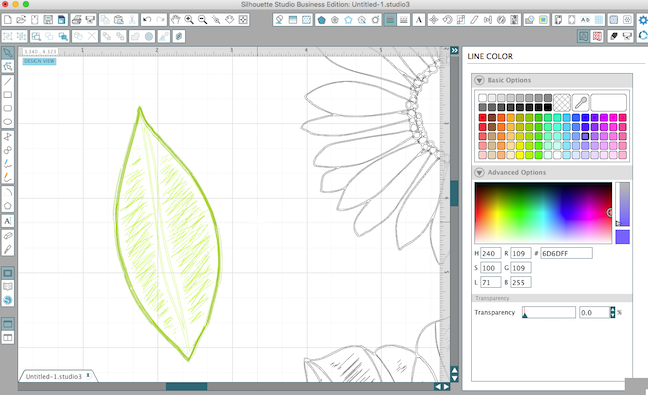
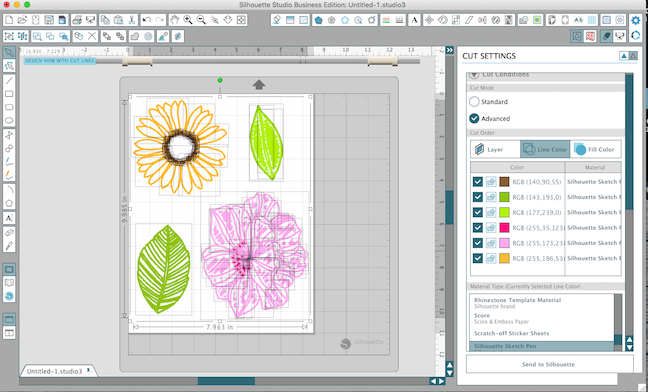
Step Three: Coloring the Sketch Lines
I wanted to use multiple colors of sketch pens on my designs so this next step is very important and will make things much easier when you head to the Cut Settings window.
(1) Head to the Color Window and select the lines of your designs and choose a variety of colors.
I chose colors that were similar to the sketch pen colors I was going to use. That way I could envision what it would look like. Below you can see that I chose a darker green for the outside edge while using a lighter green on the inside sketch lines.
Step Four: Sketch Magic
Once your designs are all color coded you will:
(1) Click on the Cut Settings panel
(2) Select all of your sketch designs
(3) Choose “Cut Type > No Cut and Material Type > Silhouette Sketch Pens”
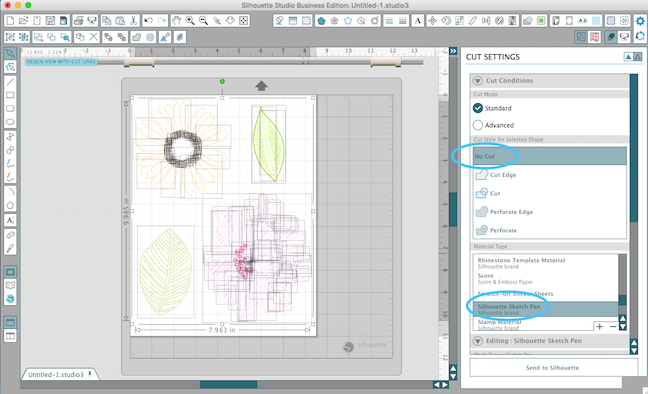
(4) Under Cut Mode select Advanced (this will take you to another window with some more options)
Here you will notice that all the line colors you’ve selected are listed. You can change the order of them by using your mouse and drag the various colors in place. (I grouped mine according to each design—this makes it easier when changing the sketch pens as well).
To change the sketch pens during the cut job, you can:
(1) Right click on each color
(2) Select Add Pause.
The machine will pause and give you time to change out the sketch pens. How cool is that??
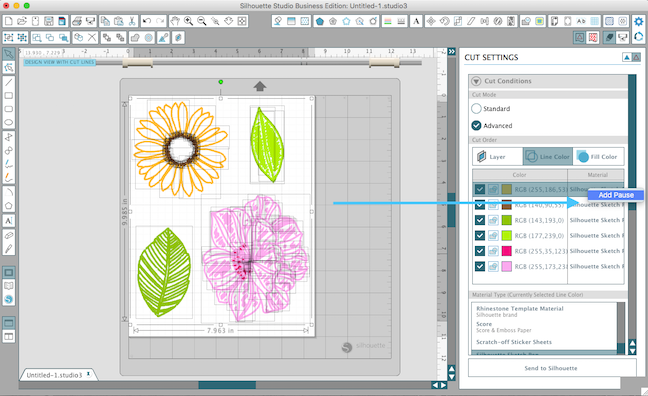
Once you’ve set everything up you are ready now to press that Send to Silhouette button! And the magic will unfold before your eyes!
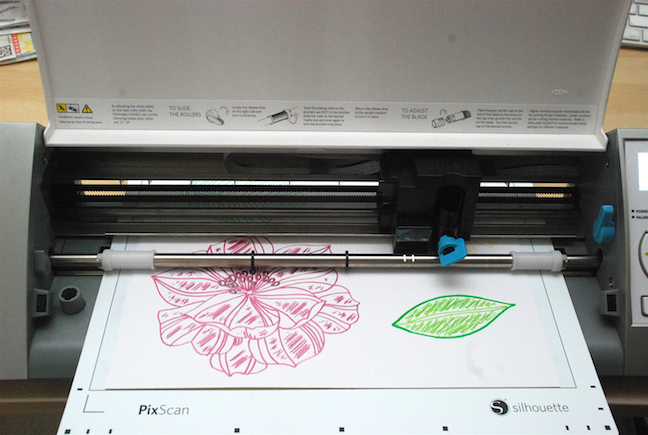
Step Five: Use PixScan™ and Add Details
After the design finishes sketching:
(1) Place the paper onto a PixScan™ mat (you can click HERE for a recent tutorial by Erica Sooter).
This amazing tool allowed me to cut out the sketched designs and use them on my scrapbook layout.
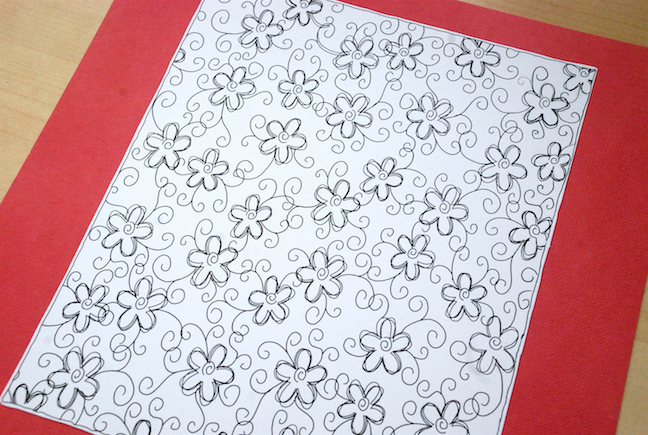
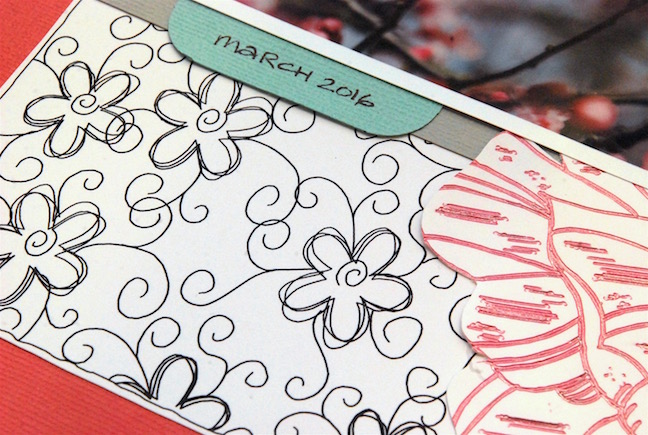
I also created a background page for my layout using a sketch 8.5 in. x 11 in. design from the Silhouette Design Store. I just sketch this with the Plain outside edge and used a black sketch pen.
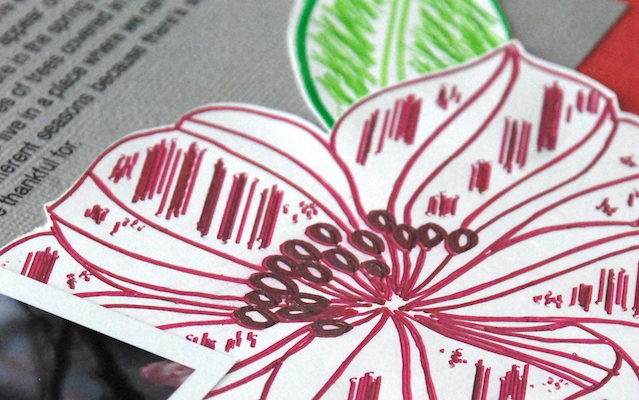
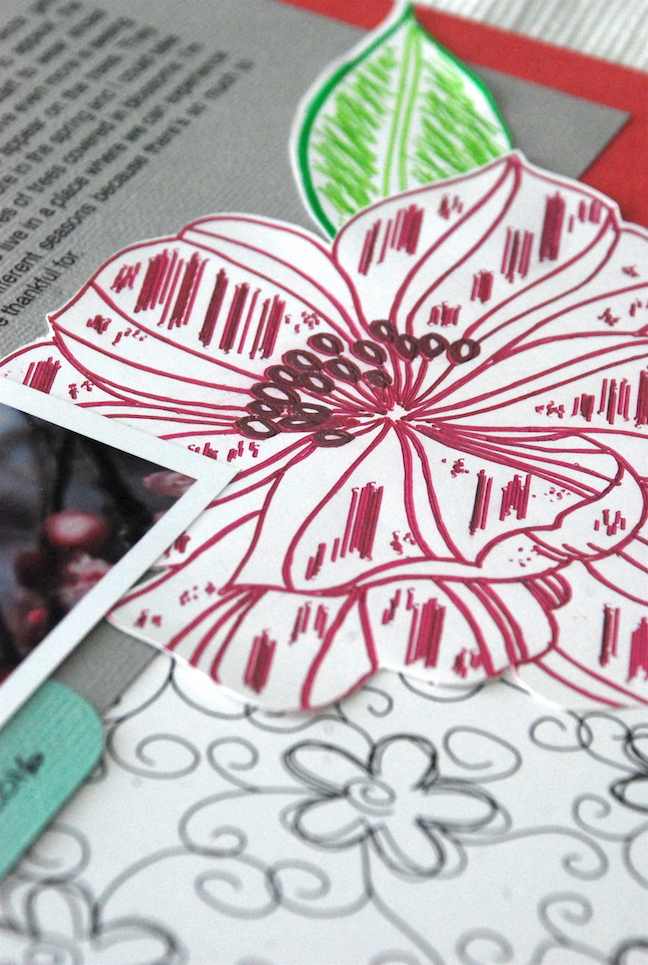
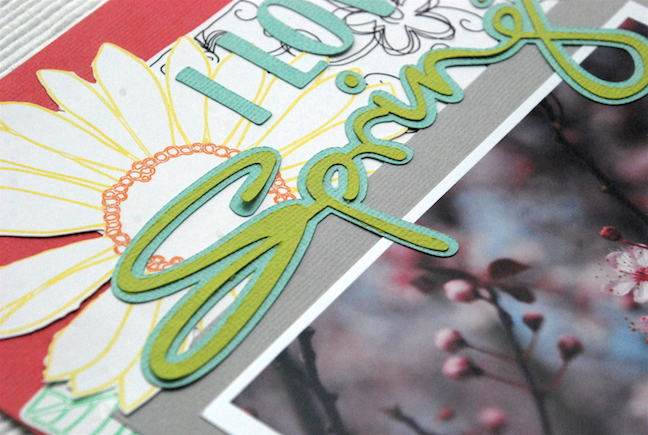
Here’s some close-up shots of my finished layout.
I love this large flower!
Here’s a close-up of the other flower and title designs.
janet
April 19, 2016
THANK YOU!!! Brilliant tutorial 🙂
Cari
April 25, 2016
You’re very welcome Janet!
Gilda
April 19, 2016
Thanks for this comprehensive and easy to understand tutorial!
Cari
April 25, 2016
I’m glad you liked it Gilda. Thanks!
Andrea Friedell
April 19, 2016
Great tutorial. I have yet to try sketching with any cutter because I haven’t decided yet what substrate to use. Maybe a sticky back canvas would be fun… and then add paint!
Kelly Wayment
April 19, 2016
Excellent tutorial, Cari! And your finished page is gorgeous (as usual). 🙂
Cari
April 25, 2016
Thanks so much Kelly! 🙂
Paula Gale
April 19, 2016
Such a fabulous tutorial. Being at college has meant no playtime for nearly 2 years on my Cameo. I still enjoy reading and using my subscription to shop in the store though! Tutorials such as yours make me want to get back into crafting immediately – thank you for sharing your work and for the inspiration. Not long til the end if my course do I can play.
Paula.
Cari
April 25, 2016
I’m so glad that I’ve inspired you Paula!
And good luck finishing up your course! 🙂
Brenda
April 21, 2016
I have the basic edition of Silhouette Software and I have the sketch pens but haven’t done much with them. I tried to follow this tutorial but can’t seem to find the sketch window to open – can you please tell me where it’s located on my edition or what the icon for it looks like? Thanks for the help!
Cari
April 25, 2016
Let me find out for you Brenda (I have the Business edition so it’s quite different. )
Cari L
April 27, 2016
Hi again Brenda!
So, here’s what you have to do.
When you click the ‘cut’ blade, click on material. You will then see the ratchet blade option. Click on the drop down menu that is there and select Sketch Pen.
You can also just head into the Materials section and click on sketch pens – just another option.
Hope this helps.
Annie W
April 27, 2016
Gorgeous layout Cari…I love the sketched background!