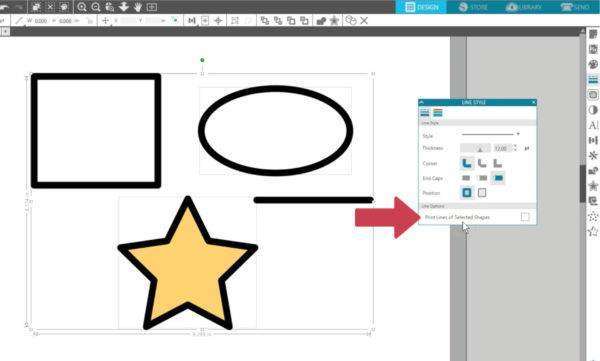
In this tutorial, you’ll learn about the Line Style panel. This is where you can adjust line properties for your designs. You can find the Line Style panel along the right-hand side of the work space. It looks like three horizontal lines of varying patterns and thickness.
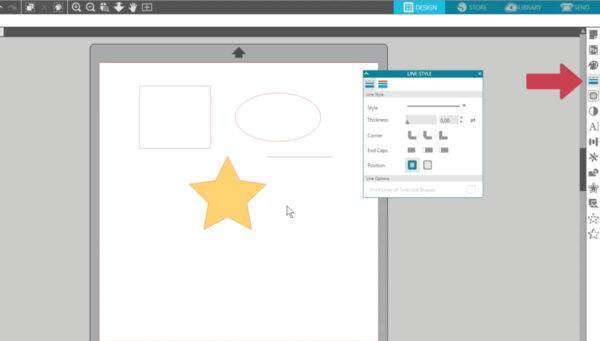
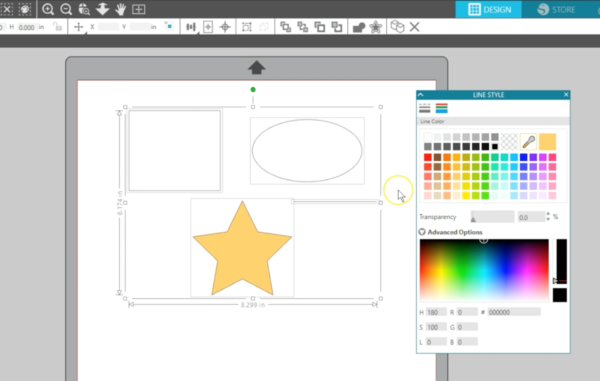
We have on the page a rectangle, an oval, a star, and a line. The star is filled with a color, but the others are unfilled. Watch what happens to each of these types of designs as we make changes to their line styles. First, let’s look at the second tab of the Line Style Panel for “Line Color.” It looks like stacked lines of varying colors and thickness. This is where you can change the line color of a selected design.
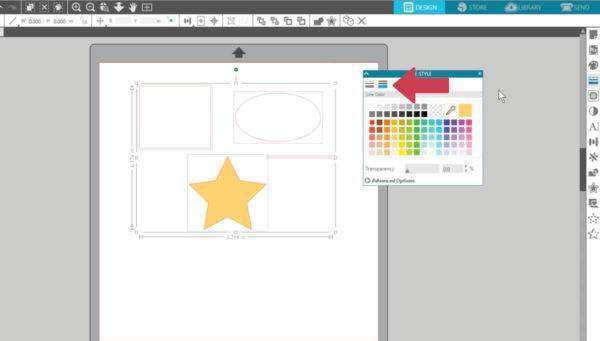
You can also access most of these line color options in the Quick-access Toolbar. Click on the drop-down arrow next to this rectangle that looks like a red outline. You can choose line colors, a blank line color, or use the eyedropper to pick a line color from any color on the page.

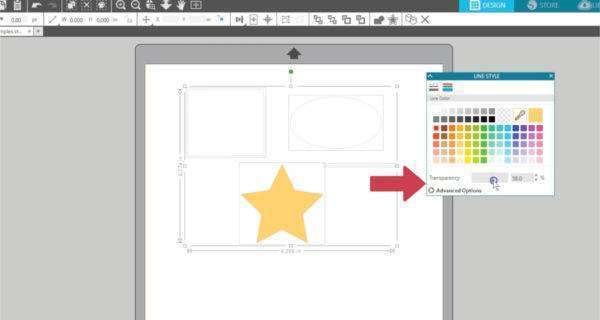
These colors are the same in the Quick-access Toolbar and in the panel. However, in the panel you can also increase the Transparency of a line color or click “Advanced Options” to pick a custom color.
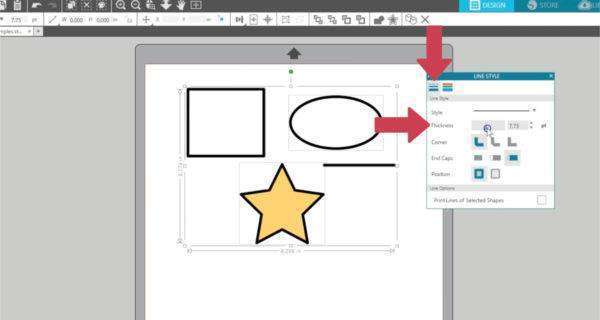
Let’s select all of these shapes on the page and give them a black line color so that the next steps will be easy to see.
Now let’s go to the Line Style tab, which is the first tab in this panel. In this panel, you can adjust a line’s thickness. The default for cut files from the design store or for freehand-drawn shapes is 0.0. Drag the thickness slider up or use the input box to increase the line thickness. We will start at 1.0 just so you can see the lines better.
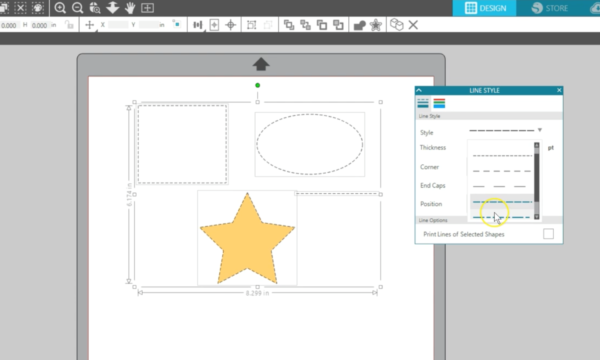
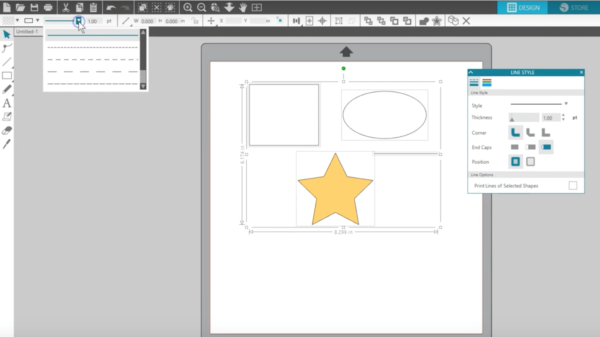
Style lets you choose between a solid line and various dashed lines, which can be used as perforations for cutting, or for decorative edges for printing or even drawing borders with sketch pens.
Line Style and Line Thickness can also be found on the Quick-access Toolbar.
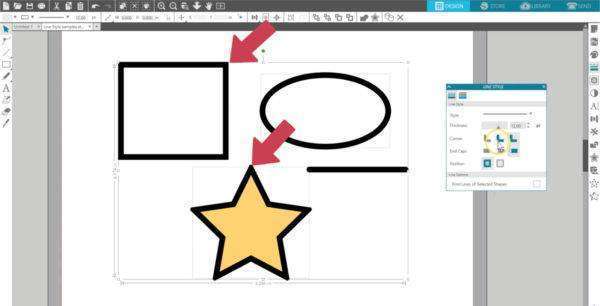
Now we will thicken these lines even more before moving on to the next three options, which are for working with thick lines.
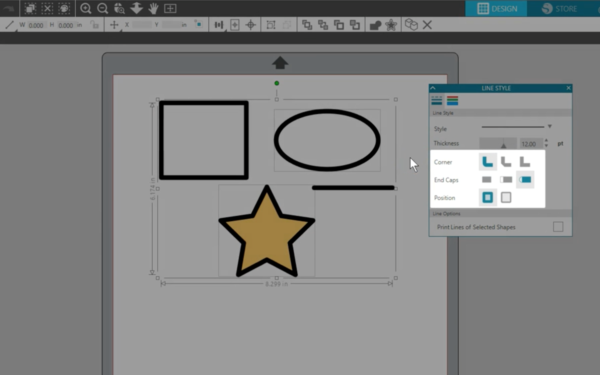
Here are choices for corner styles. You’ll only see the difference on thick lines with corners, like the rectangle and the star. Rounded corners is the default, but you can also choose flat corners or sharp corners.

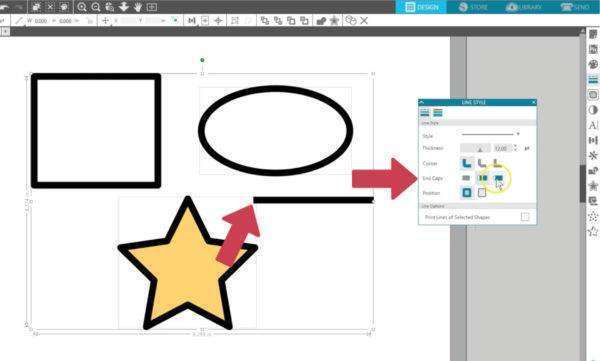
End caps can be seen on thick lines. There’s no end cap, an added square end cap, or a rounded end cap. Rounded is the default.
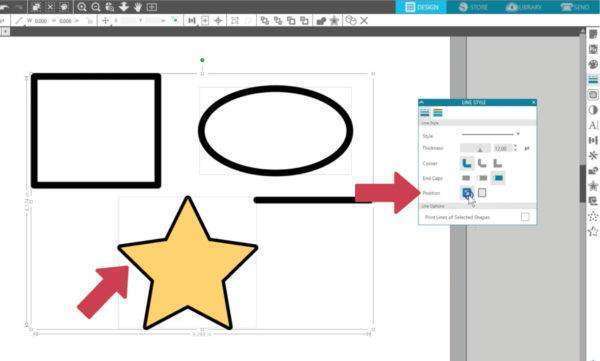
Position can be seen on filled shapes, like the star. The default is to put the outline in front of the filled shape. Or you can choose to place the thick outline behind the shape.
The last choice on this panel is to “Print Lines of Selected Shapes.” Line colors do not print unless you increase the line thickness above 0.0, or check this box while those shapes are selected to get your 0.0-thickness lines to print.
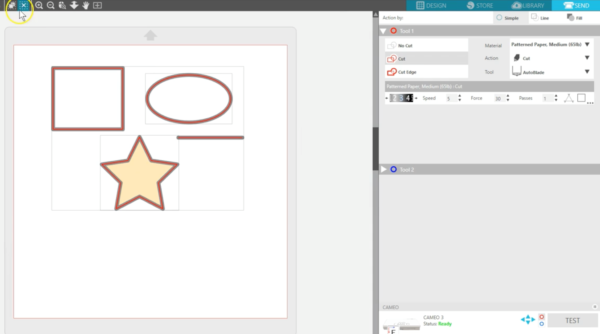
Now let’s look at something you should be aware of when you’re working with thick lines. Go to the Send panel, and you’ll see with all of these thick lines that have their lines set to Cut, that the machine will cut (or score or sketch) only in the midpoint of the line.
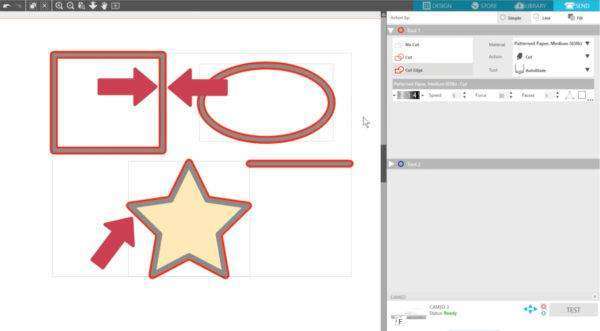
When we choose Cut Edge, that’s when the blade will cut around the edge of each line. Notice that with unfilled shapes that it will cut on either side of the thick line, and with filled shapes it will just cut around the outside edge of the line.
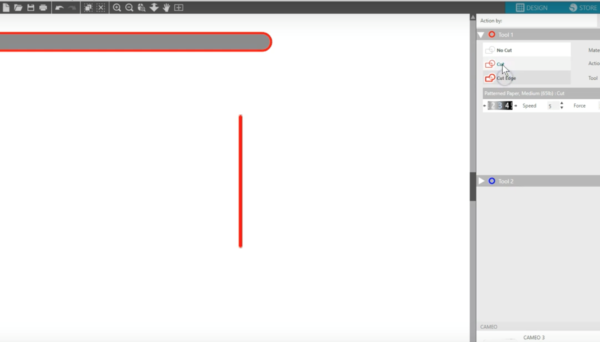
If your lines are only slightly thickened and you’ve chosen Cut Edge for unfilled shapes or for line segments that are not closed, the blade will cut those lines very close together, which may not be desirable, so that’s something to keep in mind.
That’s how to use the Line Style panel and work with lines in Silhouette Studio®.