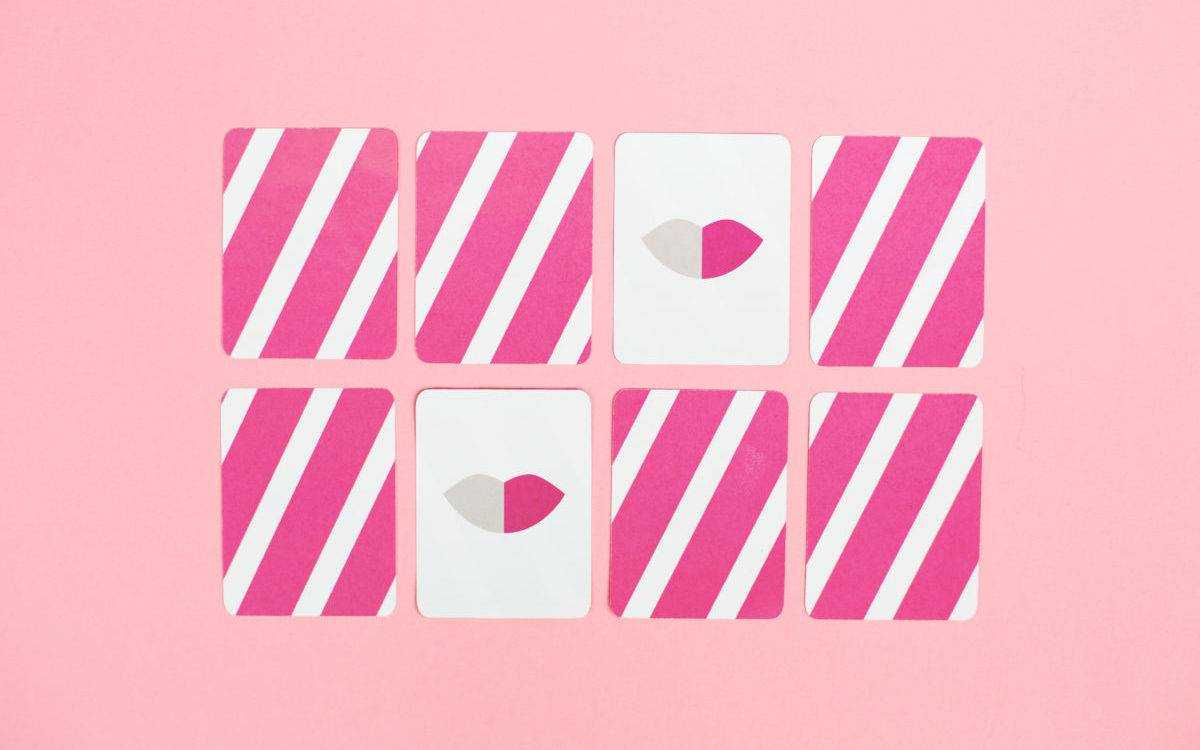
With this week’s tutorial, we wanted to show you that you can take any design in the Silhouette Design Store and totally customize it. For example, this Valentine’s Day Garland design is going to be turned into a matching game. How? You will just need to follow along to see.
Supplies Needed:
- Silhouette CAMEO® or Silhouette Portrait® or Silhouette Curio™
- Silhouette Cutting Mat
- Silhouette Cutting Blade
- Silhouette Studio®
- White Cardstock or Photo Paper
- Printer
- Design ID #241192
- Design ID #133475
Step One: Make The Lips One Shape
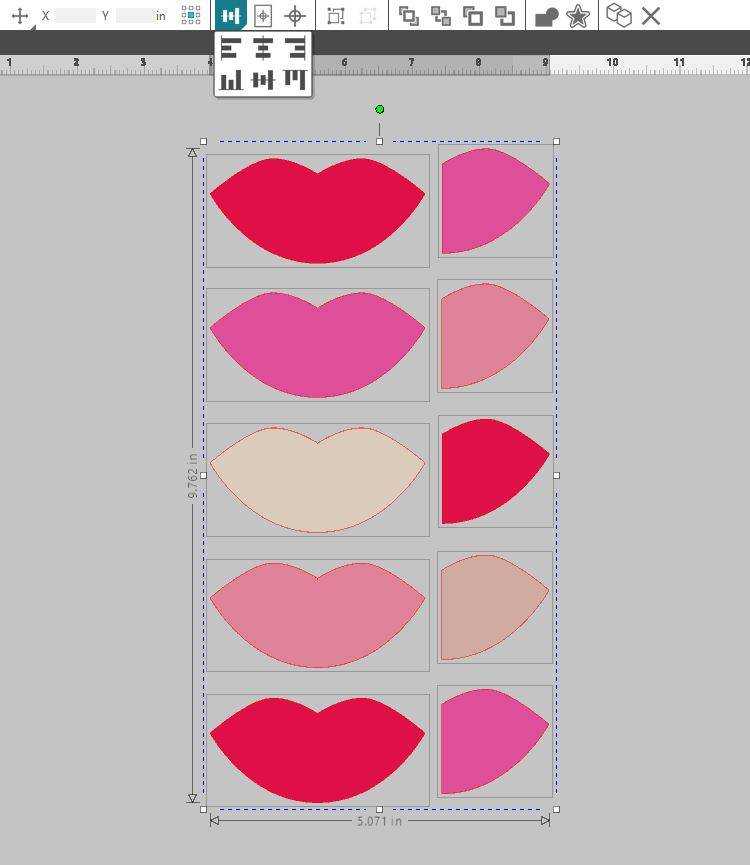
- Open Design ID #241192 in Silhouette Studio® by locating it in your library.
- Delete everything but one row of lips and one row of half lips. You will be left with this.

- Shrink down all of the shapes until they measure 4.163 inches tall by 7.028 inches wide.
- Now we will want to combine the lips and half lips into one shape. To do, so we are going to use tools that are located in the toolbar above the workspace. The Align tool will help us to perfectly overlay the half lip on top of the lip shape. (This toolbar only becomes visible when a shape is selected.)
- Select all the shapes. Roll your mouse over the Align Tool and select the align type in the top right-hand corner. This is going to align everything flush on the right.
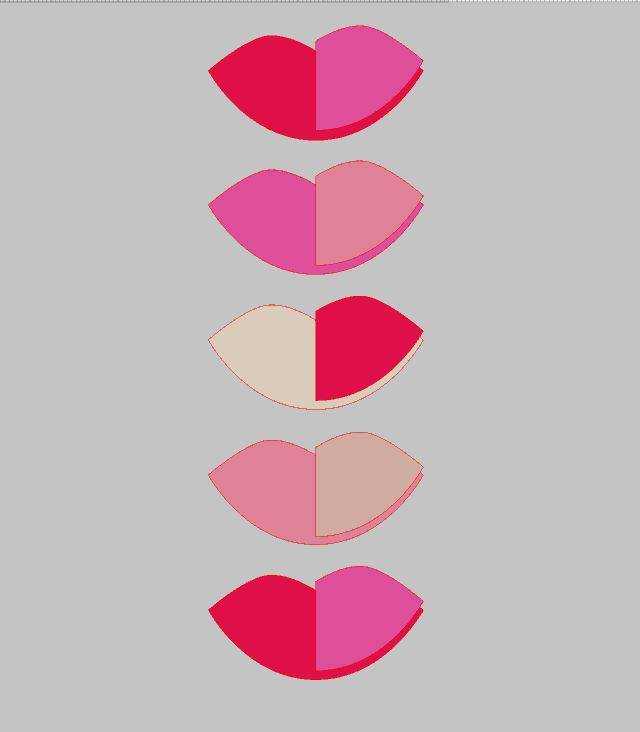
- Now that everything is aligned on the right, we need to align everything to the bottom. By taking the first row of lips at a time, select both shapes (lips and half lips). Roll your mouse over the Align tool and select the align type in the bottom left-hand corner. Repeat this step with each row of lips.
- Now that each row of lips is perfectly centered and looks like a single shape, we will Group each pair of lips together. Select one row of lips at a time. Right-click with your mouse until a window pops up. Lastly, select Group.
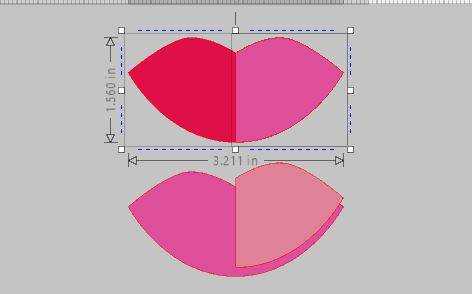
- Now that all lips are grouped, we need to duplicate each one so that there are matching pairs. To duplicate the lips, right-click on a shape and then select Duplicate.
Step Two: Create The Matching Card
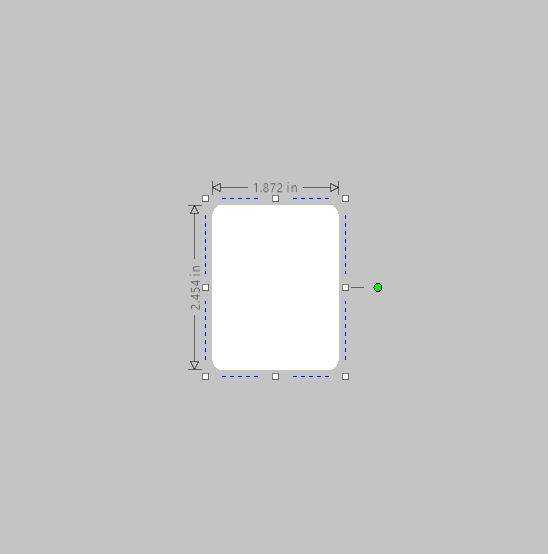
- Go to the Draw A Rectangle Tool (this tool can be found in the toolbar on the left-hand side of the page) and hover over the tool until you see a variety of shapes that you can choose from. We will want to use the Rounded Rectangle Tool. With this tool selected, we are now ready to make the card shape.
- We will want to make a rectangle that is 2.454 inches wide and 1.872 inches in tall. To get the exact measurements, you can use the Scale Tool (found in the top toolbar).
- Now we will want to duplicate this shape 8 times since we have 4 pairs of matching lips.
- With our 8 cards and 8 lips, we will want to combine them with a card. Using the Align Tools we used earlier, we will center each lip shape perfectly onto each card. Use both of the Align tools in the middle to get a perfectly centered lip shape. The end result should look like this:
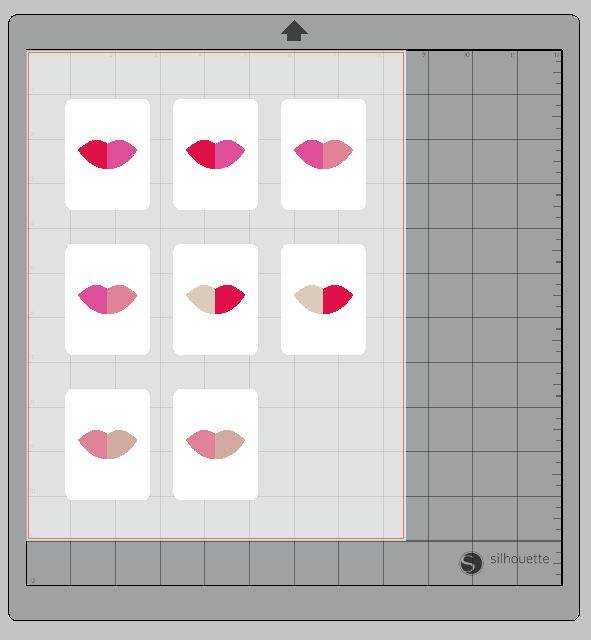
- Now that everything is in place, select all the shapes and Group them together.
Step Three: Print On Both Sides
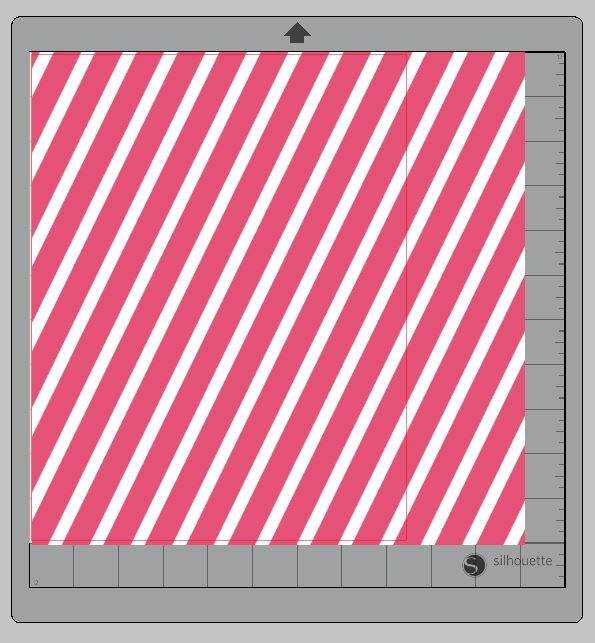
- We want to give the back side of our cards a fun look. We brought in a patterned paper from the Design Store to do this Design ID #133475. Locate this design in your library and bring it into your workspace by double-clicking it.
- We now will want to enlarge the design to cover our 8.5-inch x 11-inch paper completely. To make the shape larger, select it and grab the boxes in the outer corners. It will then look like this:
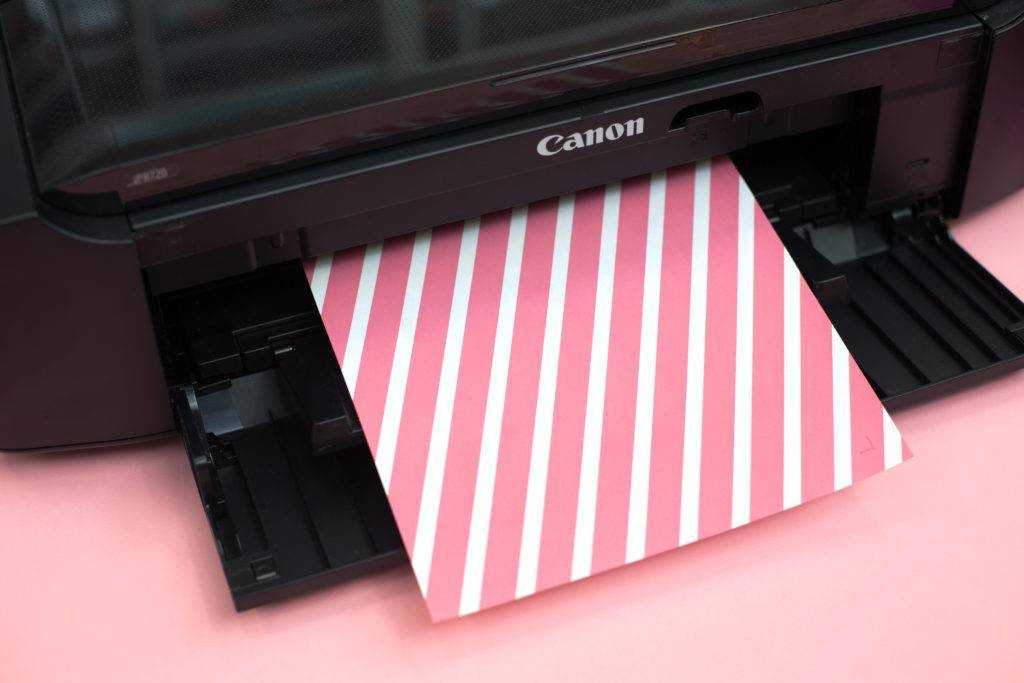
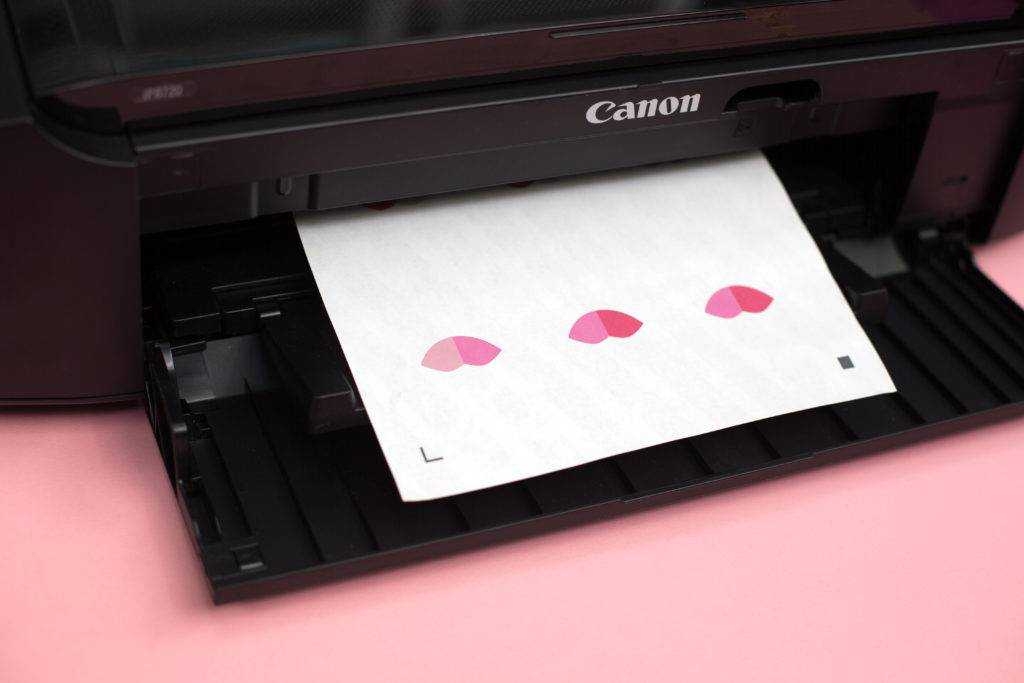
- Now we are ready to print the backside of the card. Select the Print Icon and send to your printer. You will want to choose a thicker cardstock or photo paper so that your printer ink doesn’t show through to the other side too much.
- With the back of the cardstock printed, now it’s time to print the front. This side is a bit trickier, so take your time to get everything right. Remove the patterned paper from your workspace.
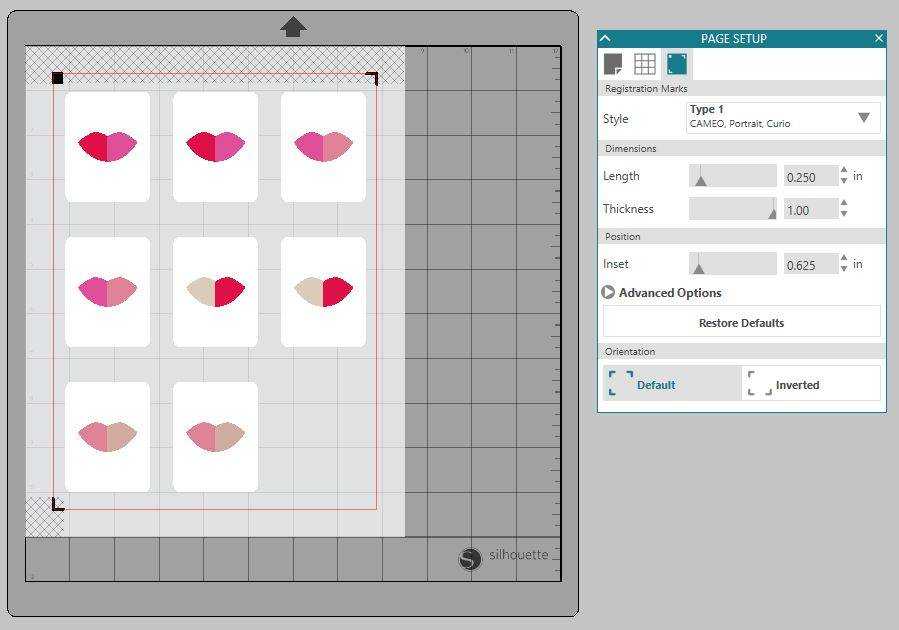
- Next, in the Page Setup tab on the toolbar on the right-hand side, we will want to select the Registration Marks and turn them on. Select Type 1 and you will notice that registration marks appear. These are important to make sure that when we Print & Cut everything is done precisely.
- Place all 8 cards within the boundaries of the registration marks. Anything outside of the marks will not be cut. Your page, when done, should look similar to this:
- You are now ready to print the front side. Depending on the printer, you use you will need to pay attention to which side it prints on. Our Canon printer prints on the top of the paper that is fed through. So in this case, we flipped the patterned (already printed side) to the back leaving us the blank white side up. We then selected print in Silhouette Studio® and waited for it to all be printed.
Step Four: Cut Out The Cards
- Since the registration marks are only printed on one side, you will want to place your page onto the cutting mat with the registration marks facing up. This will allow your machine to read them properly.
- Load your cutting mat into your machine.
- In the Send window in Silhouette Studio® select the material and blade you are using. For this project, we used the “Cardstock. Plain” setting and made sure our blade was adjusted to a 3.
- Select the Send button, and your machine will begin to search for those registration marks. After it has located all of them, it will begin to cut.
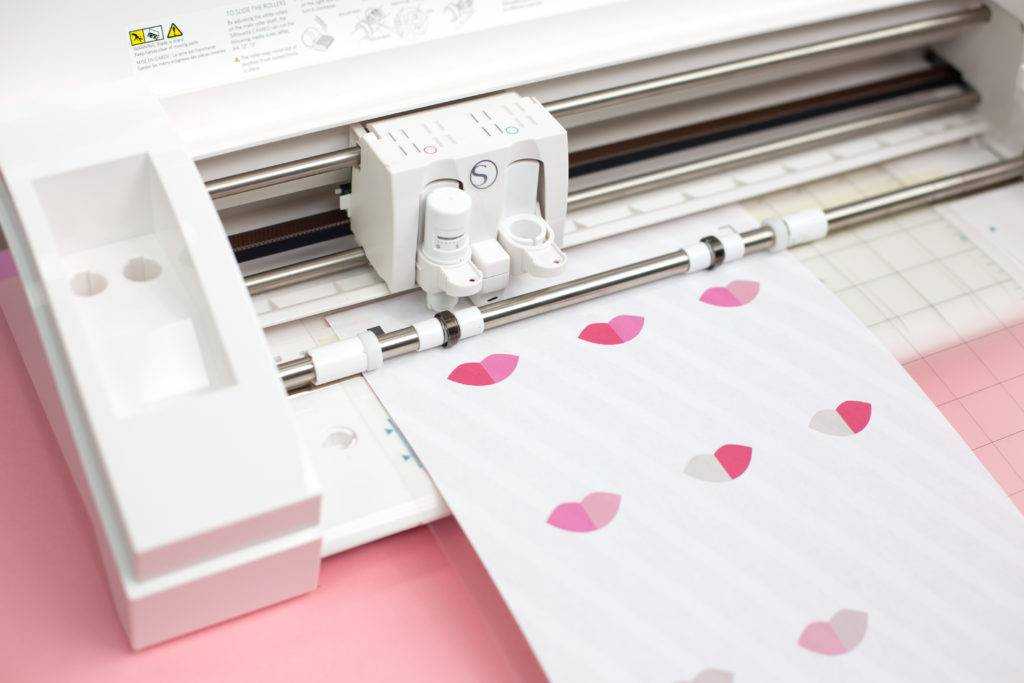
- After your machine is done cutting, unload your cutting mat from your machine. Carefully remove your cards from the machine and dispose of the excess paper.
Now you have a fun matching game!
Joy
January 31, 2018
You could make 8 different lips on one sheet then print/cut out two sheets for more cards/bigger game 🙂