
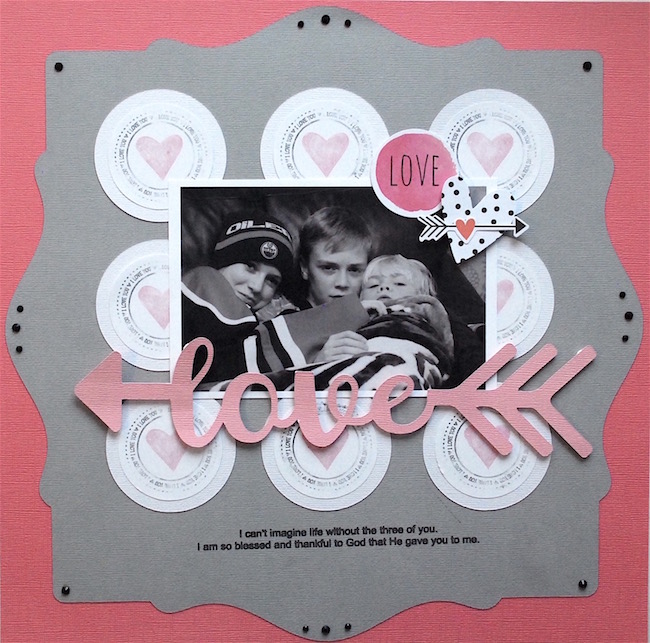
I’m sharing with you a layout that I created using a stamp that I made with the Silhouette Mint™. I used the stamped image to create the design of my layout.
To create this layout you will need:
- Silhouette CAMEO® and 12 in. x 12 in. mat
- Silhouette Mint™ and stamp ink of your choice (in 2 colors)
- Cardstock (in 4 colors)
- Silhouette Rhinestone setter and rhinestones (2 sizes)
- PixScan™ mat
- Adhesives
Step One: Creating My Stamp
To begin my layout, I started by creating the stamp. I opened up the library in Mint Studio™ and chose the round “I love you” design. (This is a free design that comes with the Mint, so you don’t even have to worry about purchasing anything!)
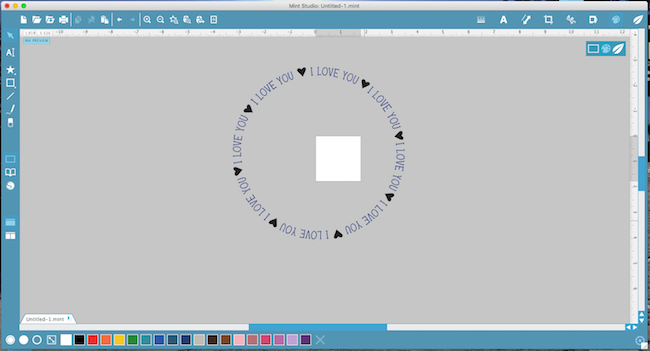
As you can see, it’s quite large compared to the stamp size of 45 mm x 45 mm. You can size it smaller by clicking on the image and moving the little arrow inwards.
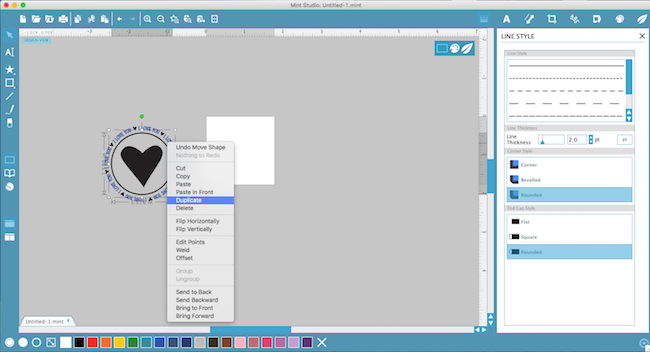
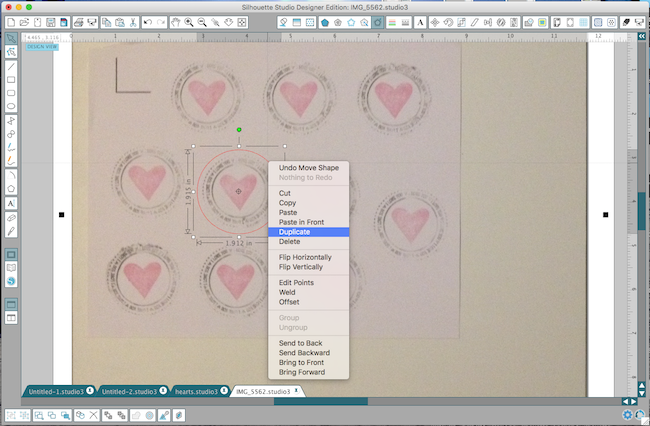
I wanted to add a heart shape in the middle so I ungrouped the entire design.
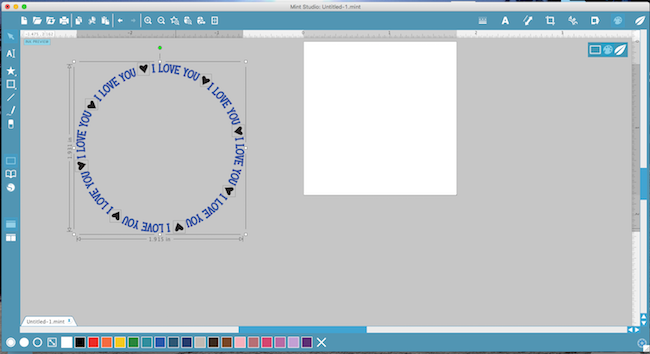
Then I clicked on one of the heart shapes and duplicated it.

I then moved that heart into the center of the words and made it larger.
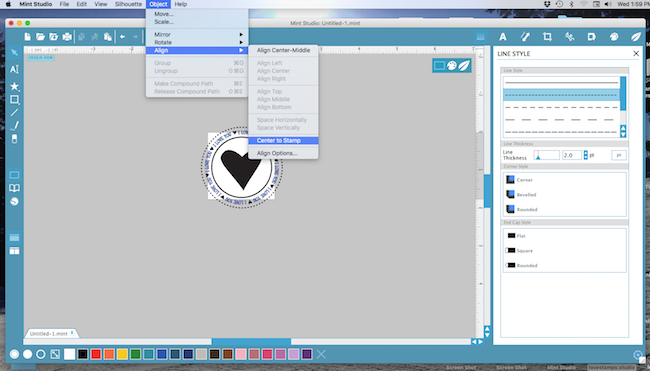
I then thought that it would look nice with some circles around the design . So I opened up the shape window (shown on the left side) and clicked the circle image.
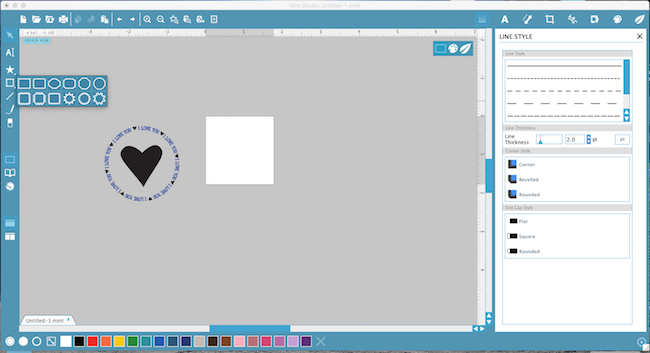
I sized the circle to fit inside the design.
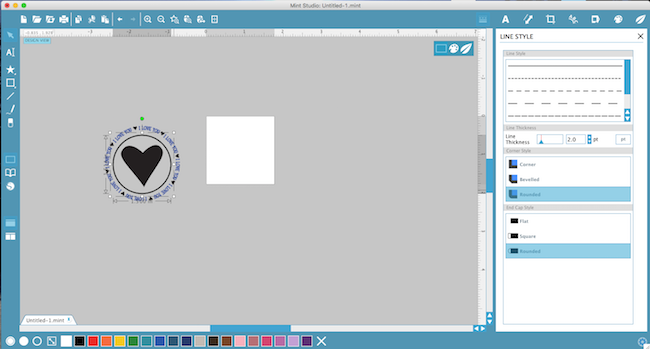
And then I duplicated this circle (because I wanted to have another circle around the outside edge).
I chose to change the line style of the ouster circle to a dashed line. You can do this by going into Line Style (which brings up the drop down menu shown on the right side in the picture below).
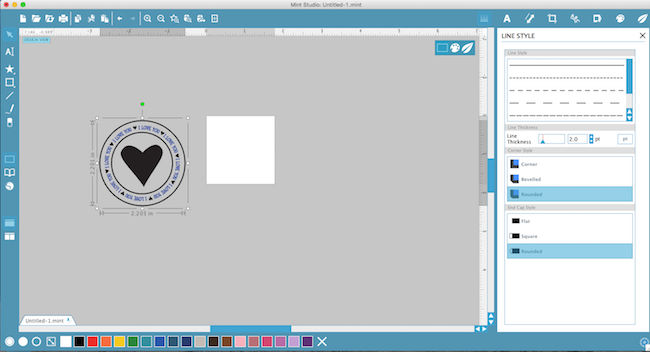
I grouped the design to make it easy to move and then moved it to the white stamp section.
Go into Object drop down menu at the top of the program and click on Align > Center to Stamp.
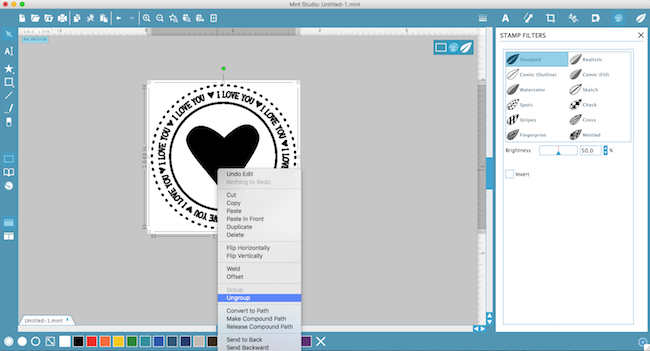
I then just resized the image to fit better in the stamp size.
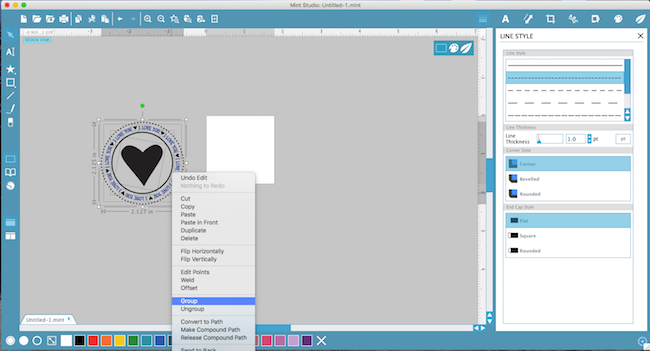
Once it was the size that I wanted I then ungrouped the design because I wanted to change the filter on the heart image.
To do this click on Stamp Filters > Stripes (or select whatever option you like).
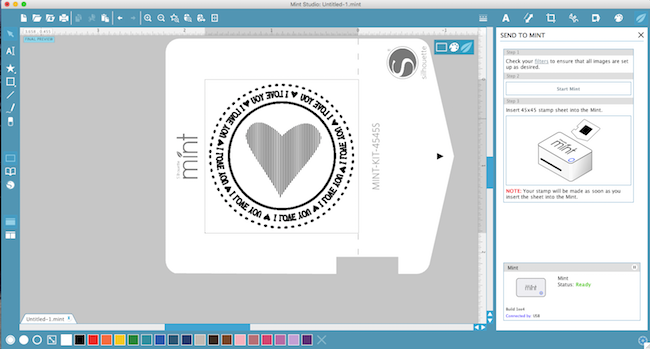
Click on the Mint (leaf shape) > Start Mint. (Here you will notice that the design has been flipped. You don’t have to worry about flipping your design. The Mint does it for you!)
You can then send the stamp card through the Mint machine.
I love listening to the Mint in action and then watching it come out of the machine!
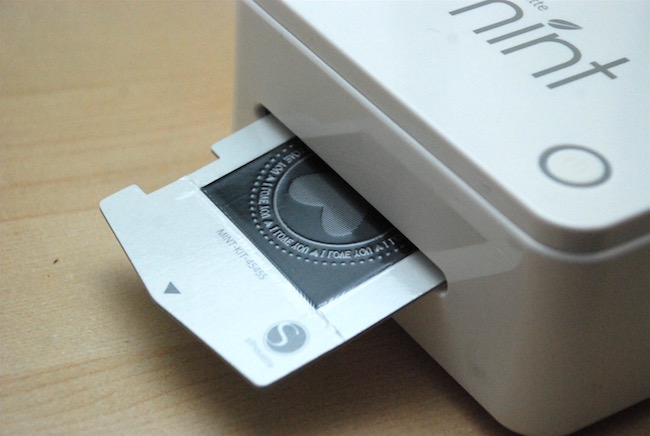
Here’s what it looks like when it comes out of the machine.
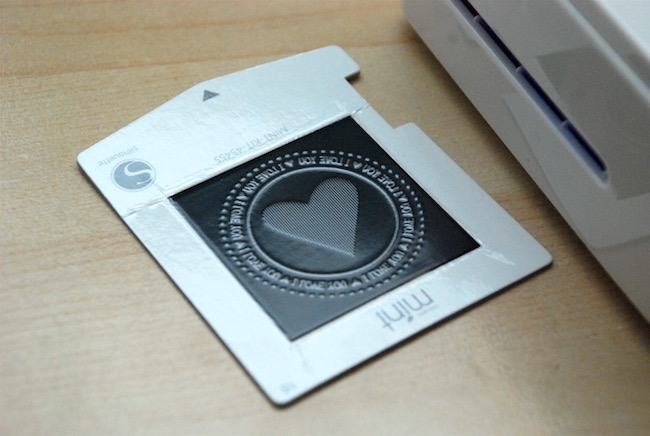
If you go back to previous Mint posts, you’ll see that you just bend the stamp card along the perforated line and remove the black stamp piece. You can then adhere to the white stamp section on the wooden block. Check out my post HERE for more details.
I then inked the heart with magenta Mint Ink and the outside portion with black.

I then stamped it a few times on a black piece of paper until I had a nice clean image ready to use for my layout.
Step Two: Using PixScan™ to Cut Out Stamped Image
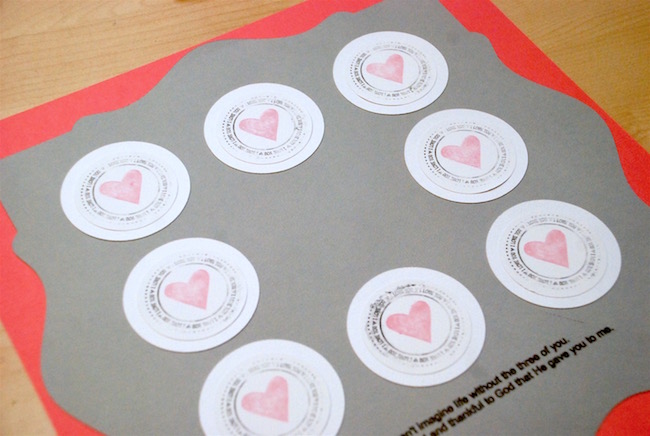
I stamped the design eight times on Silhouette white sticker paper and then placed the sticker paper onto the PixScan™ mat and took a photo with my iPhone to use in Silhouette Studio®. From there, I transferred the photo from my iPhone to my computer.
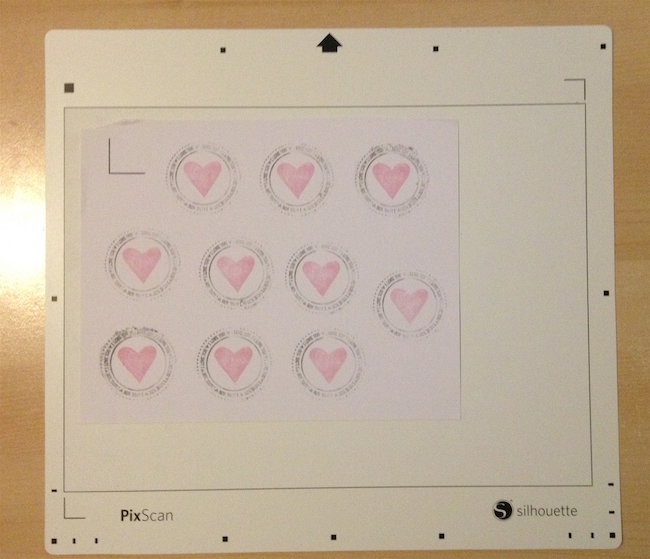
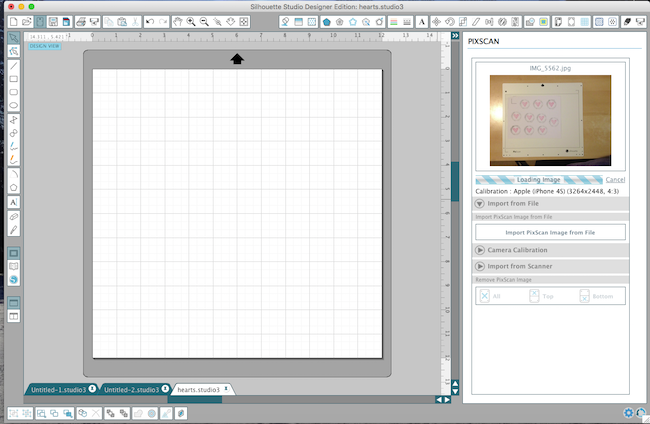
Next I chose the PixScan™ icon and opened the file up where the photo was located.
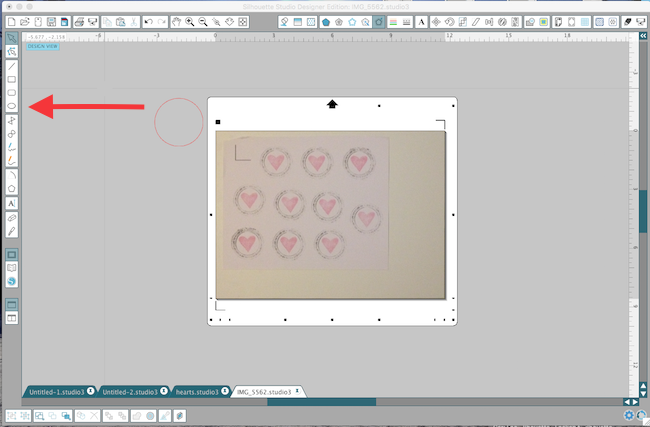
I wanted to create circle shape around the stamped designs, so after the image had loaded, I clicked on the left side menu bar and created a circle that fit around the stamped image. I duplicated this so that there was a circle around each stamped image.
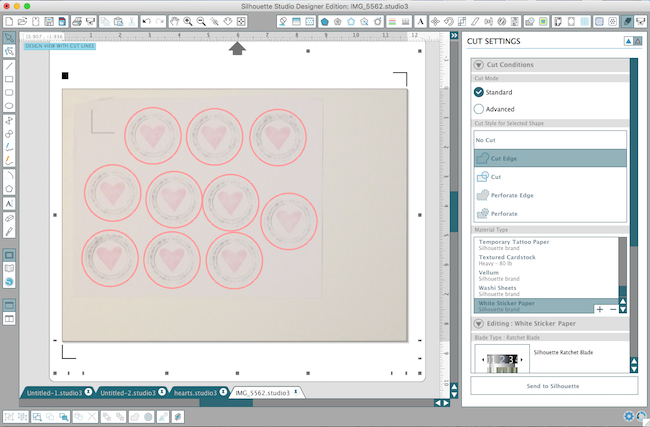
I then inserted the PixScan™ mat in my Silhouette CAMEO®, clicked on Send to Silhouette and my stamped images were cut out.
Step Three: Creating Multiple Shapes and Text with Sketch Pens
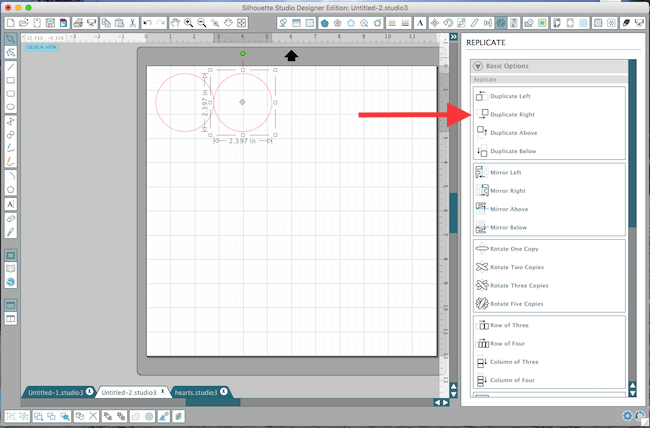
For the background, I wanted to have multiple circles so I created a circle with the drawing tool (as mentioned above), then opened up the Replicate window (on right side menu bar).
Click on the circle and then choose Duplicate Right. this will repeat the shape as many times as you want.
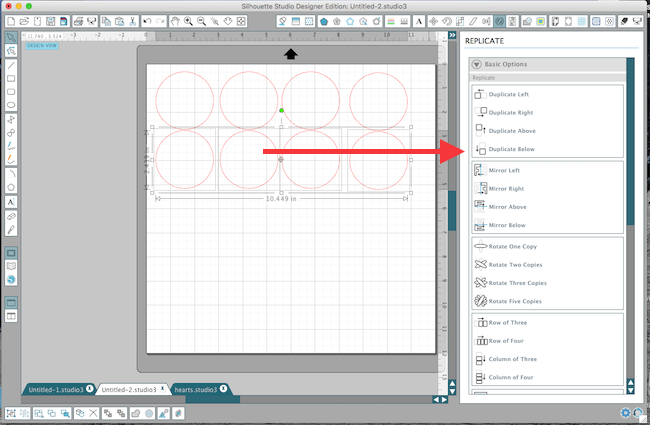
For the next row I just clicked on the first row that I made and then chose Duplicate Below. I now had two rows of circles ready to cut.
I then adhered my stamped pieces to the white circles.
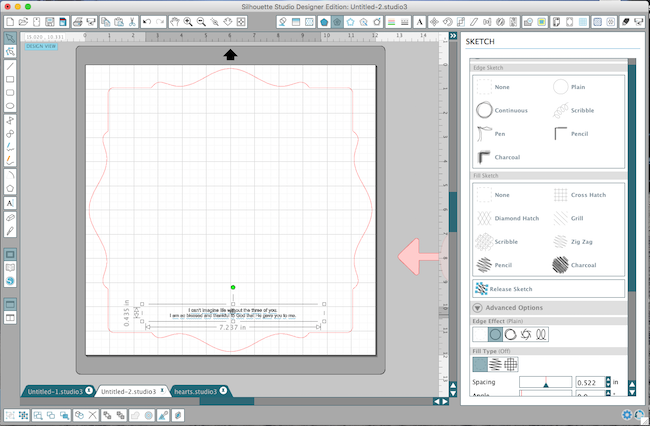
I chose another background design for my layout but wanted to print some journaling on it before I cut it out. I don’t own a 12 in. printer so I use the Silhouette sketch pens to do my text. I typed up my text in Silhouette Studio®, opened up the Sketch window, and clicked on Plain for the edge type. I then opened the Line color window and selected Black.
Below you can see how the text turned out! I love it! The letters aren’t filled in and I really like how it looks.

Once the text was done I switched out the sketch pen and replaced it with the blade so that I could cut out the background piece.
Step Four: Assemble
Phew. Almost there. Now we’re ready to put it all together.
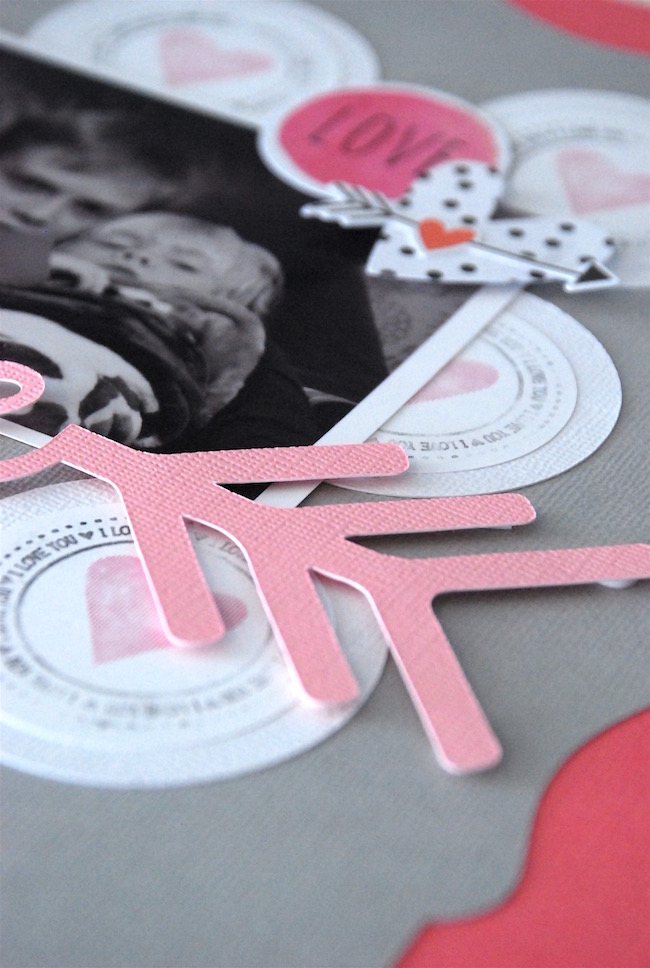
I found a great arrow in the Design Store with the word ‘love’ on it and thought it fit perfectly on my page. I used foam squares to adhere it to my layout.

Next, I added some black rhinestones.

Here’s the finished project!
Kelly Wayment
January 20, 2016
Beautiful (as always), Cari! I love how you’re able to incorporate Mint stamps into your scrapbook layouts.
Rosalyn
January 21, 2016
Thank you so much! I thought this was great. I appreciate the detail.