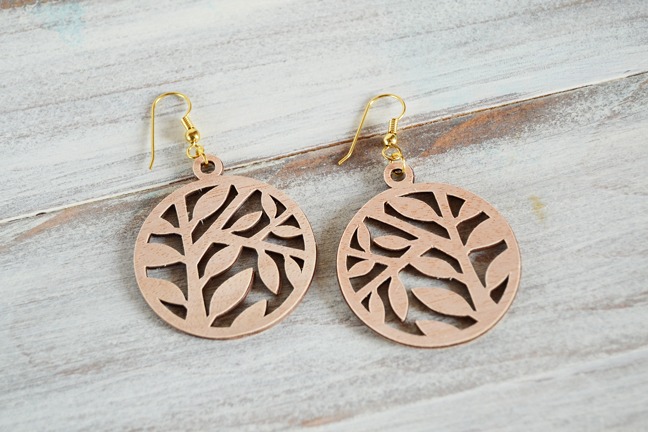
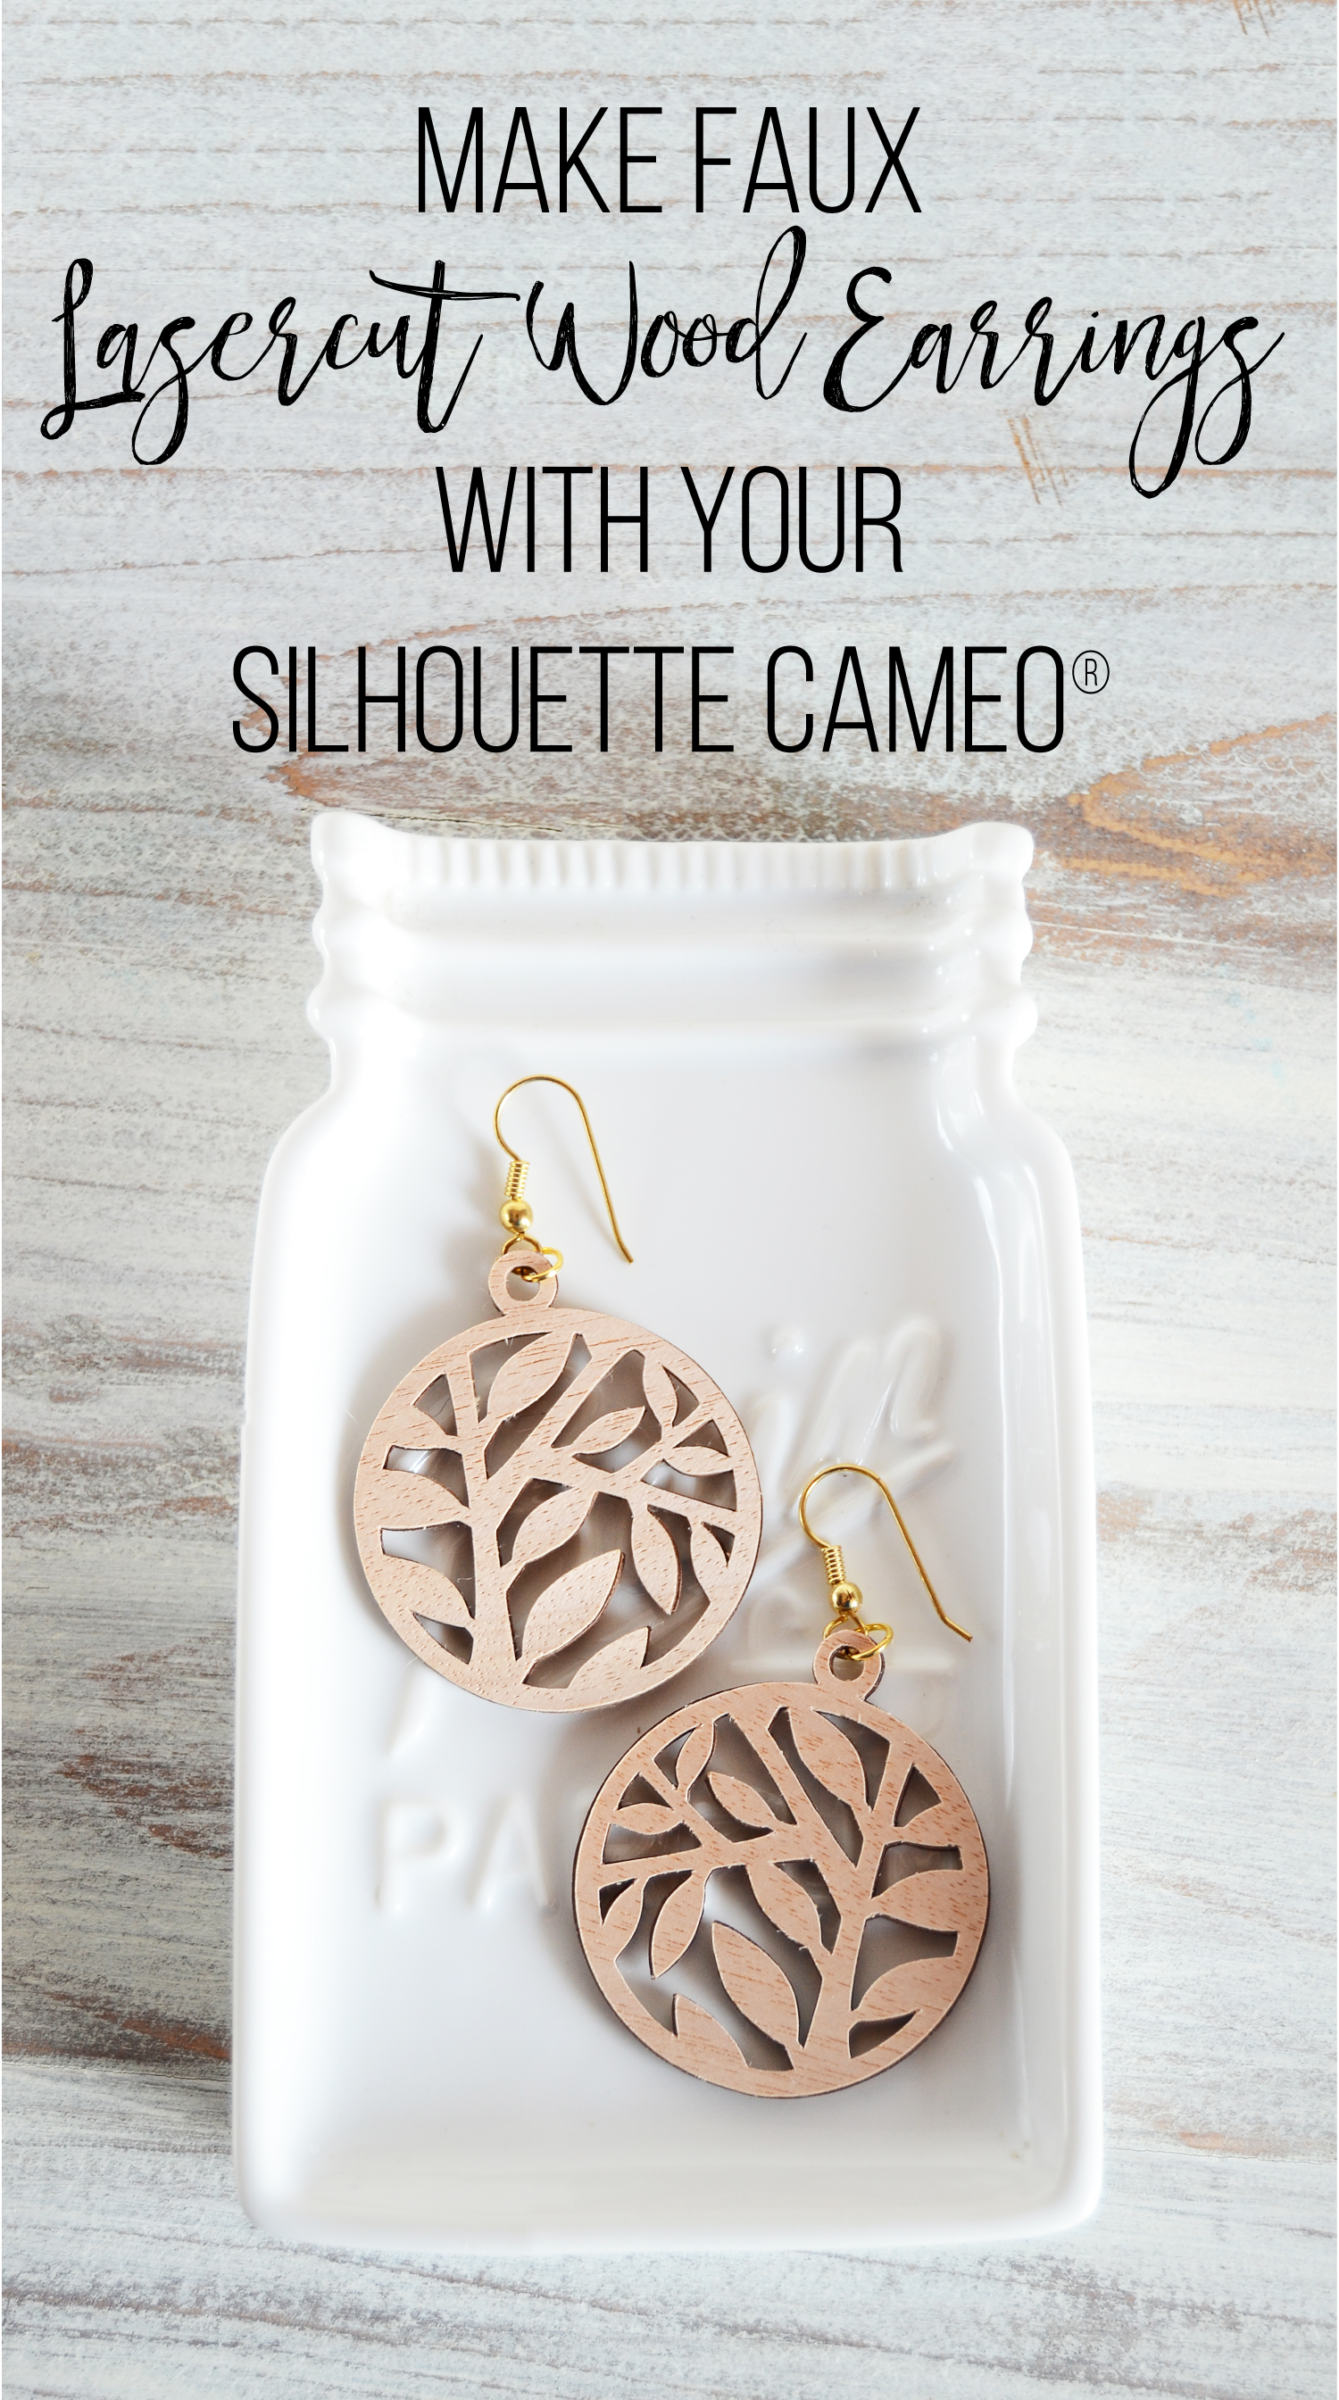
I’ve always admired lasercut items, specially jewelry. They just look so intricate and lovely! With your Silhouette CAMEO®, now you can create faux lasercut wood jewelry with just a few steps.
With the assortment of shapes you can select from the Silhouette Design Store (or maybe dream up your own?) you can definitely create one-of-a-kind, custom jewelry using this tutorial. So what are you waiting for, let’s jump in!
Supplies Needed:
- Silhouette CAMEO®
- Brown Cardstock
- Silhouette Wood Sheets
- Glue
- Jump rings
- Earring hooks
- Flat nose jewelry pliers
Step 1. Create you Earring Shape
Size your chosen shape on Silhouette Studio®. I chose the fun Branches and Leaves design by A Little Hut (Design ID #27039) and sized mine around 1.5″ inches in diameter.

Add a loop for your earring hooks. Do this by creating two circles on top of your chosen design. Select both circles, go to Object > Modify > Subtract to merge the two objects together.
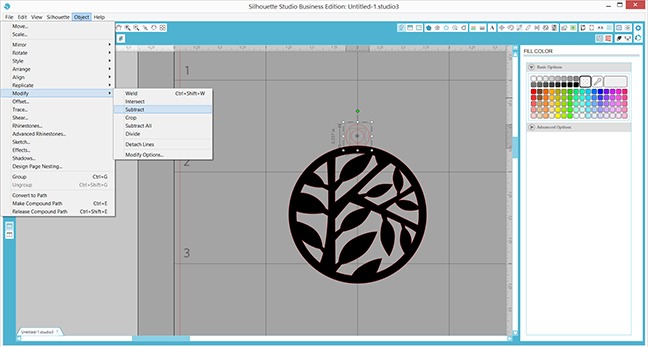
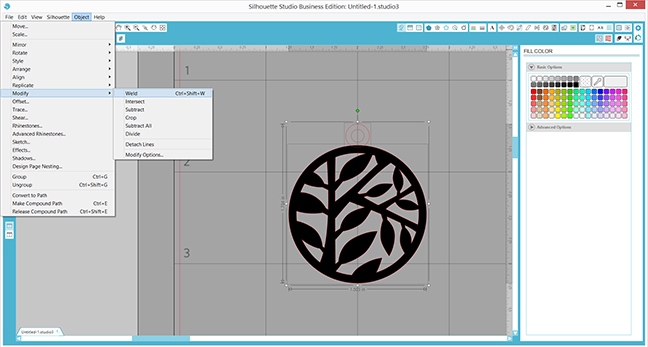
Select all your shapes, got to Object > Modify > Weld to attach your loop to your chosen shape and finalize the earring design.
Step 2. Cut your Earrings
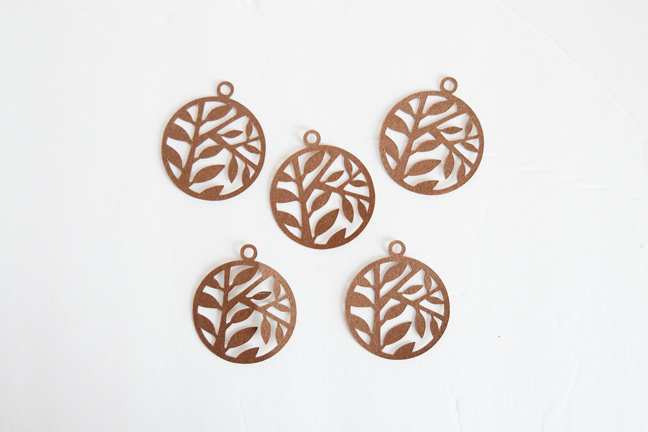
Cut ten (10) of your earring shape on brown cardstock – you will need at least 5 layers for each earring to create a thick and sturdy earring.

Why brown cardstock? It’s so that we create the ‘burnt effect’ on the edges when they are glued together – it looks more realistic when we have that burnt wood effect as opposed to have it in white or any other color, but you can have fun with it as well!
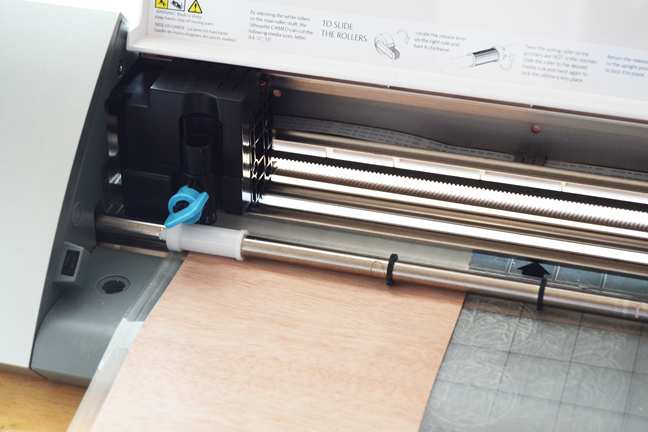
Cut four (4) pieces of your earring shape, two in the same orientation and two flipped on your wood sheet to create the frontside and the backside pieces of your earrings.
When cutting your wood sheet, secure the top and bottom of your sheet with some tape to prevent it from curling while cutting.
Step 3. Assemble your Earrings
Assemble each pair first by gluing 5 of the shapes together, making sure they are properly aligned. It helps if you use a fine-tip glue applicator if you are adhering intricate shapes together.

Now, starting from the top of the earring, carefully adhere the wood front and backside of your earring. It comes with an adhesive backing so we don’t have to worry about gluing it in place!
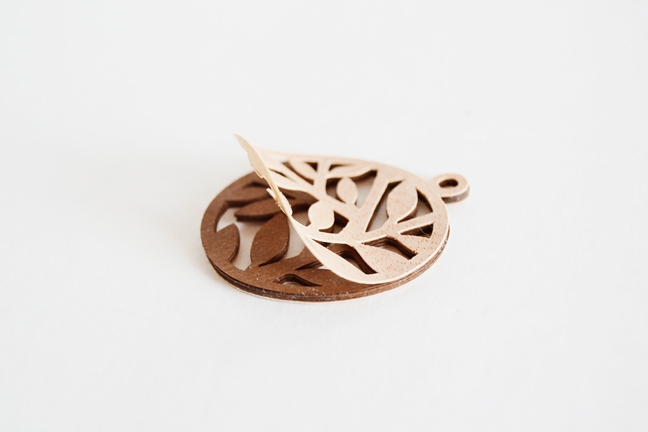
Make sure they are all adhered together – I like leaving them to ‘bond’ between pages of a really thick book to make sure they’re as flat as can be.
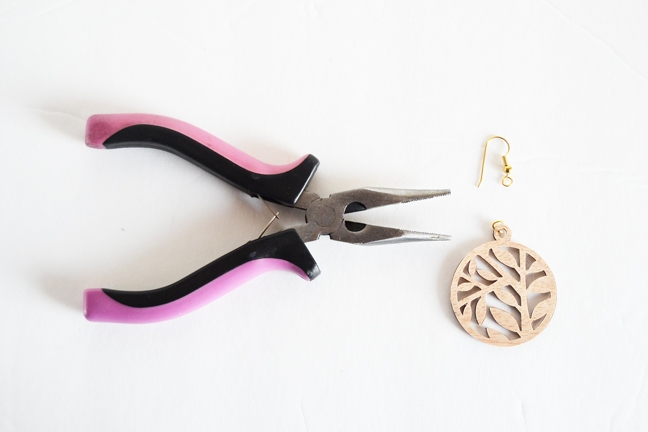
Finally, attach your earring hooks using a pair of flat-nosed pliers and a jump ring.
And voila! Custom earrings for yourself or for someone special. Choose from the assortment of shapes on the Silhouette Store and have fun, friends!

What type of jewelry would you make with this idea?
Taysha Riggs
March 2, 2017
Would this be possible with the Silhouette Portrait?
Sierra Dungan
March 2, 2017
Yes, you can cut Silhouette Wood Sheets with any Silhouette cutting machine (CAMEO, Curio, or Portrait).
Susan
March 2, 2017
Super smart idea to stack up the thinner sheets to make a thicker one. I can see applying that technique to a lot of small items I make.
Kelly Wayment
March 2, 2017
You’re so clever, Aki! I always love your jewelry ideas!
Cari Locken
March 2, 2017
Aki these look amazing!!!
Heather
March 3, 2017
Thanks for this article. I’m inspired!
Charisa Hudson
March 3, 2017
Oh wow! Just got my Cameo 3 and I’ve done jewelry for years…I knew I would try some avenue to connect the two but you help me along! Thanks greatly!!!
Jenny M
March 3, 2017
I think this could easily be adapted for shrink plastic for a different look.
Sandra Nigro
March 4, 2017
Thank you, Ali. I love all your beautiful designs and ideas! I’m curious about the step to make two circles and modify and subtract? Why not just one and weld? Thanks again!
Normandie
March 6, 2017
Sandra – Because if you only make one circle, you’ll have a solid circle instead of a loop.
Shasheila
March 5, 2017
How do I get the deep blade option in the cut settings for the cameo 3?
Kelly Wayment
March 9, 2017
Shasheila, when you click on a material type (paper, vinyl, wood paper, etc.) in the Cut Settings Window, your options open to choose your blade and customize speed, thickness, etc. Click on the little dropdown arrow by the ratchet blade, and it will let you select “Deep Cut” as your blade.
Luz
March 6, 2017
Hi, Thanks for this usefull article!
Which blade did you use?
Kelly Wayment
March 9, 2017
I believe based on the photo in step 2 that Aki used the standard ratchet blade. You should be able to use any regular Silhouette blade on the wood paper. The suggested default setting shows a blade setting of 3.
Alejandro
March 28, 2017
Hi, what think is the wood??? thanks
Kelly Wayment
March 29, 2017
You can find the Silhouette wood sheets here: https://www.silhouetteamerica.com/shop/specialty-media/MEDIA-WOOD