As a kid, whenever we went on vacation, you could always find me lurkin’ around the personalized key chain display. I love things with my name on them! This love for monograms and personalization is what sparked the idea for today’s DIY project: a customized beach towel. I’ve always wanted a personalized beach towel, the perfect summer accessory, but I’m too cheap to pay the personalized price. This is why I spent many hours (and ruined many towels) honing this method, so read on to find out the secret to trendy beach towels.
Supplies needed:
- Silhouette CAMEO®
- Silhouette Stencil Vinyl
- Silhouette Studio®
- Gel toilet cleaner with bleach
- Solid color beach towels
- Cotton swabs
Step One: Create your design in Silhouette Studio®

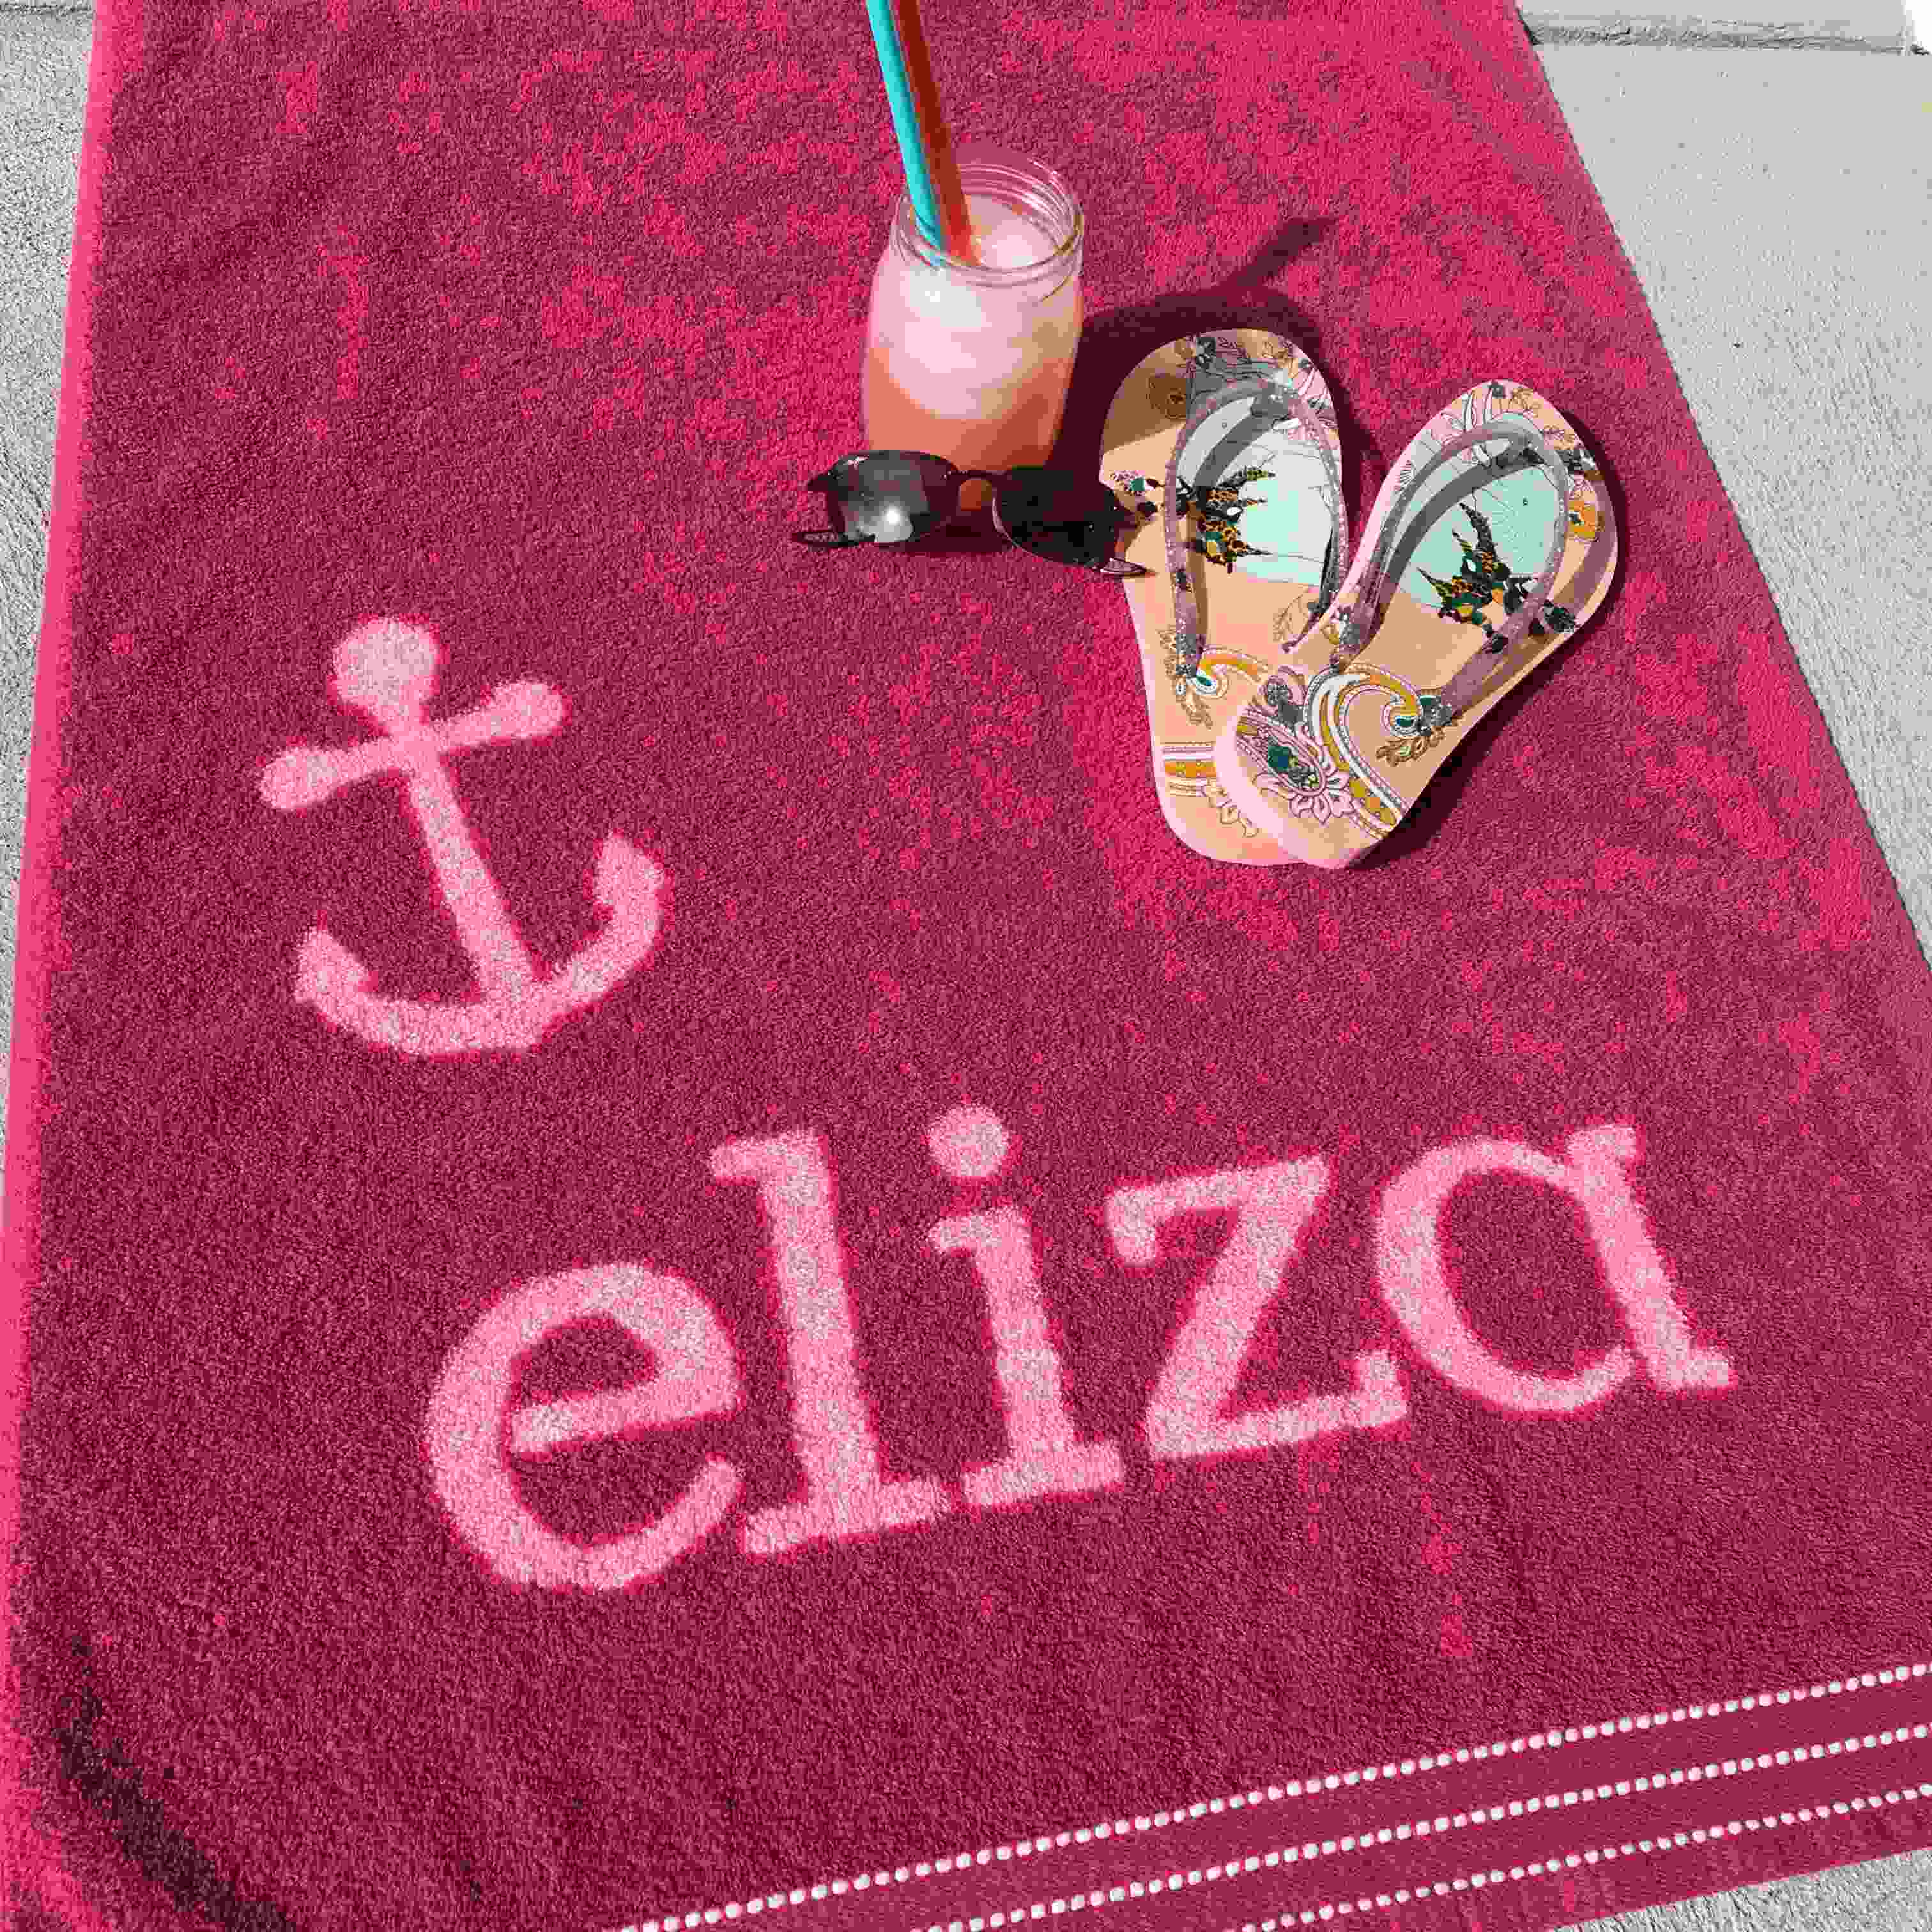
The possibilities for your beach towel are endless. You could cover the whole towel in chevron stripes or add your company’s logo. For my beach towel, I wrote my daughter’s name in LW Creative Font and used Design ID #62348 for an anchor. You could also do a pair of sunglasses, a sun, or some flip flops.
- Set your page size to 9 in. x 3 ft. (the same size as the Silhouette Stencil Vinyl) and select “none” from the cutting mat menu.
- Type your text and select your font.
- Open any images you would like to use from your library or downloads.
- Resize your design to fit your towel. I made mine about 17 inches across.
If you are new to Silhouette Studio® or your machine, here is a great tutorial for beginners.
I specifically chose Silhouette Stencil Vinyl for this project rather than a different type of stencil material because the transfer paper means I don’t have to connect any “islands” in my design to the rest of the stencil. No special adjustments required! If you don’t have Silhouette Stencil Vinyl on hand, you could also use Silhouette Stencil Material or Silhouette Adhesive Stencil Sheets.
Step Two: Cut and apply your stencil

- Select “Stencil Material” from the material menu and adjust your blade accordingly.
- Move your rollers to the 9 in. setting and load your vinyl.
- After cutting your stencil, weed the vinyl and apply transfer tape (transfer tape comes with the vinyl).
- Remove brown paper backing from the vinyl.
- Apply your stencil to the towel and remove transfer tape.
- Press the stencil down FIRMLY, especially around the edges of the design.
Tip: Weeding a stencil is different than weeding regular vinyl. You will be removing the main part of the design so you are left with the “negative space” to which you will apply your bleach. If you’ve never used stencil vinyl before, here is an informative tutorial.
Step Three: Apply bleach toilet cleaner

- Being very careful to get the cleaner ONLY on your design, use a cotton swab to fill in your stencil.
- Press a paper towel into each letter to soak up any extra cleaner.
- Let the cleaner sit on the towel until desired color is achieved! This process can be sped up using a hair-dryer to heat the applied bleach.
You may be thinking, “Why toilet cleaner???” Well my friends, I tried many different types of bleach and ruined many towels searching for the perfect medium for this project. The toilet cleaner worked perfectly while all other types of bleach failed. The gel consistency keeps it from bleeding under the stencil and it has enough bleach to give you a nice, bright design. So, just trust me.
Step Four: Wash towel
- When desired bleachy-ness has been acquired, remove the stencil.
- Rinse towel with cold water, being careful to not transfer any cleaner to other parts of the towel.
- Wash towel immediately.
Step Five: Repeat!
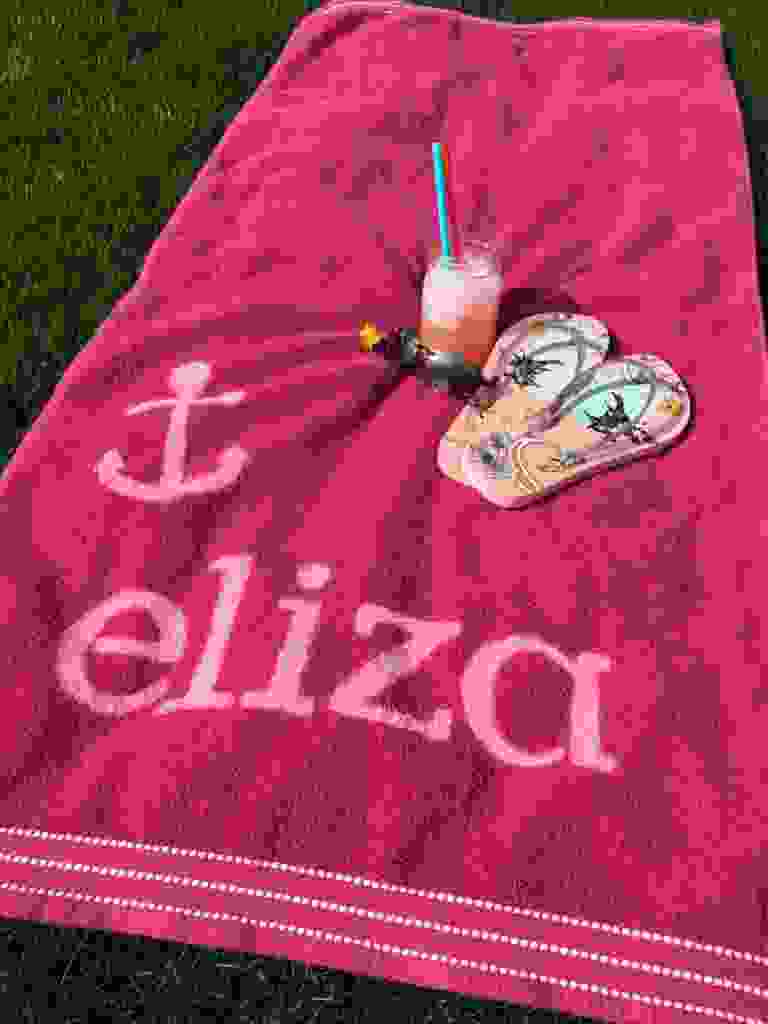
Everyone in your family needs their own towel, right?! Now hit the pool and enjoy the sunshine. Good work you DIY pro!
Amy Adamson
June 18, 2017
So clever! That bleach job has got such clean edges! I’m going to make one!
Susanne
June 19, 2017
Hi. Love the idea, but that isnt the correct font.
Charlene
June 19, 2017
Love this idea!