I love the look of watercolors, don’t you? Although I haven’t spent much time learning and practicing my watercolor skills, I’ve found a few ways to use basic watercolors with my Silhouette creations. This technique uses Silhouette Stencil Material to create a mask on watercolor paper, so you can add lots of color but include a crisp white phrase within the design.

While you could use regular vinyl or stencil vinyl for this project, I prefer the thick stencil material because it’s stiff enough that you don’t need any transfer tape. You can also reuse it, so one stencil lasts for many cards. Let’s get started!
Supplies Needed:
- Silhouette CAMEO®, Silhouette Portrait®, or Silhouette Curio™
- Stencil material, adhesive
- Watercolor paper
- Cardstock
- Watercolor paints
- Hello Beautiful Phrase (Design ID#146798)
- Heart Confetti (Design ID #246268)
Step One: Prepare the Stencil
- In Silhouette Studio®, open the Hello Beautiful phrase and resize to 4.75 in. wide. (Resize with a corner handle or use the Scale option and make sure the lock symbol shows locked.)
- Set your page size to match the adhesive stencil material you’re using. This comes in letter-size sheets or on a roll.
- In the Send Panel, choose:
- Material = Stencil Material
- Action = Cut
- Tool = AutoBlade or Ratchet blade (depending on your machine and preference)
Tip: Make sure you perform a test cut with this thick stencil material. Personally, I like the settings of Blade 4, Speed 2, Force 33, Passes 2. (This is higher than the current default settings.)
- When your stencil material is on your mat and loaded into your cutter, send the cut job.
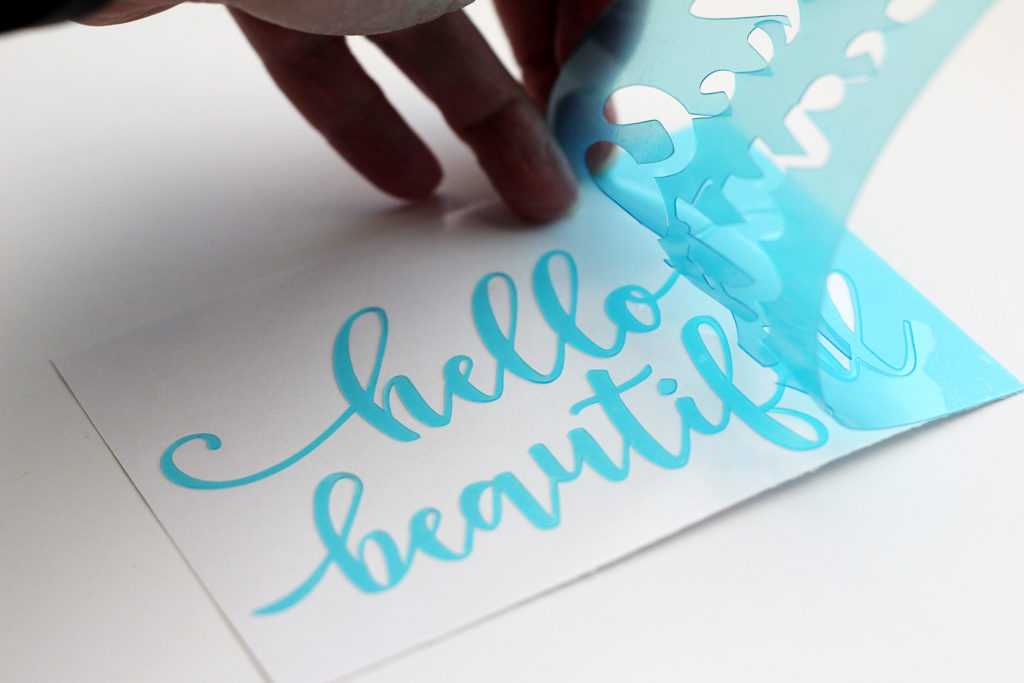
- Once the cutting is complete, remove the stencil material, trim down if necessary, and weed away all the letter centers and outer edges. We only need to keep the words themselves. (See image above.)
Step Two: Prepare the Paper
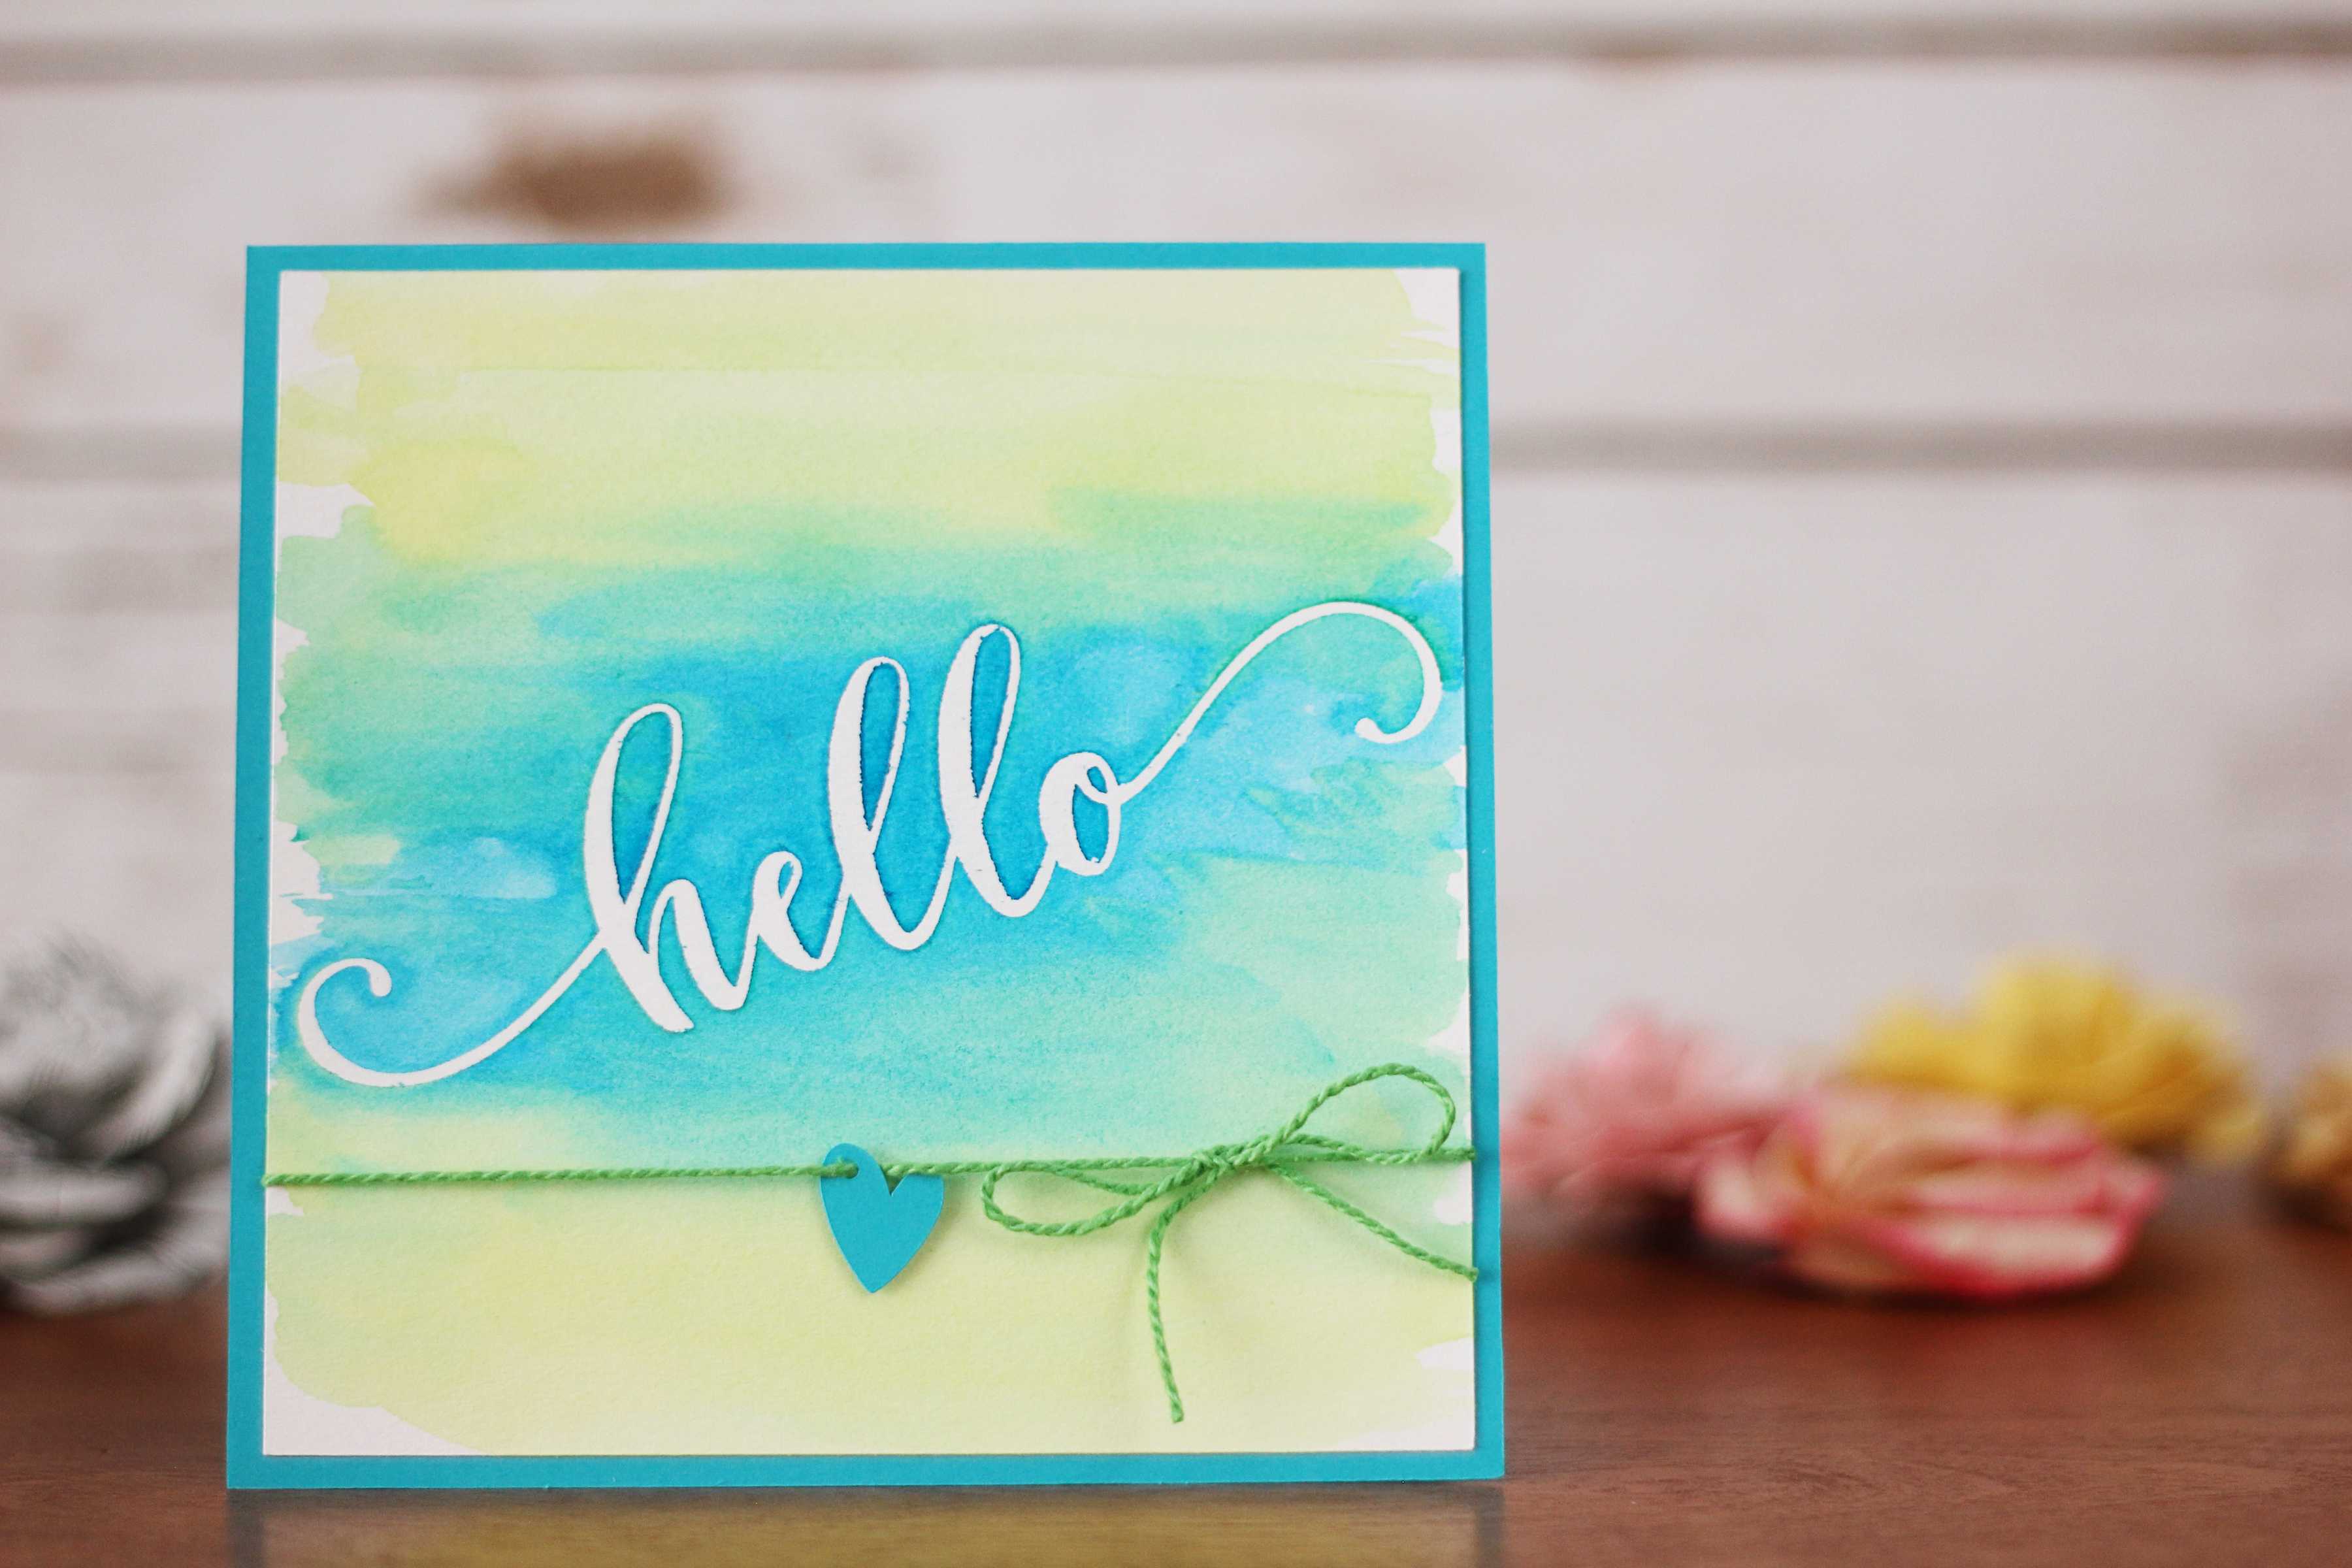
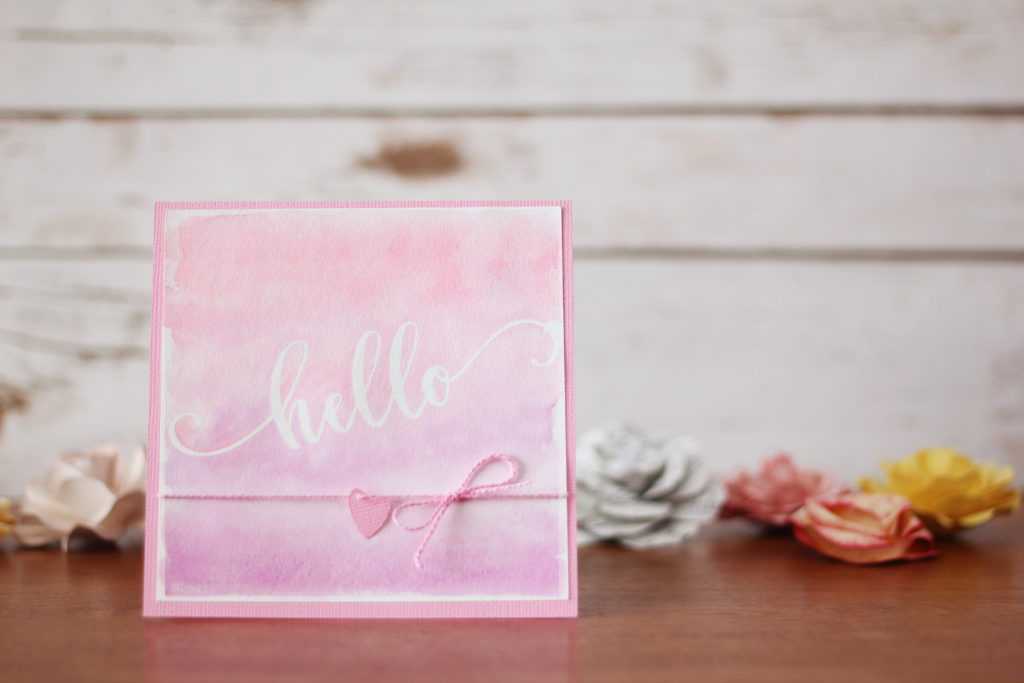
- Make a card base by cutting a piece of cardstock 5 in. wide x 10 in. high, and fold in half to give a 5-in. square card front.
- Cut out a piece of watercolor paper 4.75 in. square. I used inexpensive 90 lb. cold press watercolor paper, but you can use whatever you’ve got.
- Place the “hello” cutout on the watercolor square and press it down firmly so moisture doesn’t seep under the edges. (See image above.)
Note: I only used the “hello” part of the stencil for this project, but I cut both parts of the design so I can use the “beautiful” part of the phrase for another card.
Step Three: Apply the Watercolors
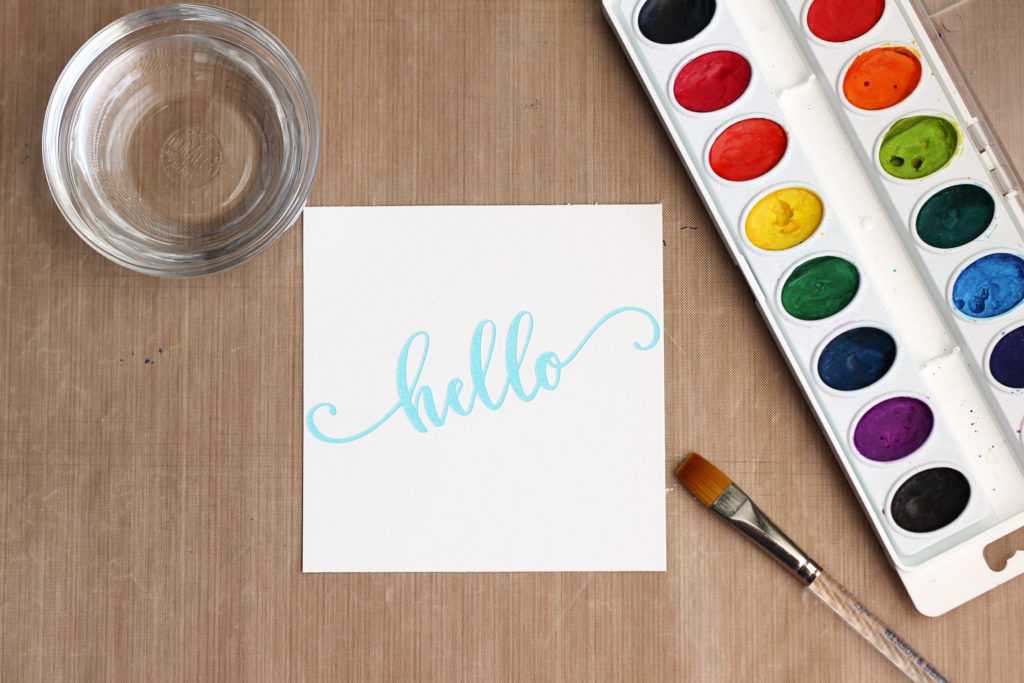
- Brush the watercolors onto your watercolor paper, right over the top of the stencil piece. The stencil behaves as a mask to block color from that section of paper.
- You can make your colors light or dark, but the effect will be much more vivid if you choose a darker color to go immediately over the stencil mask.
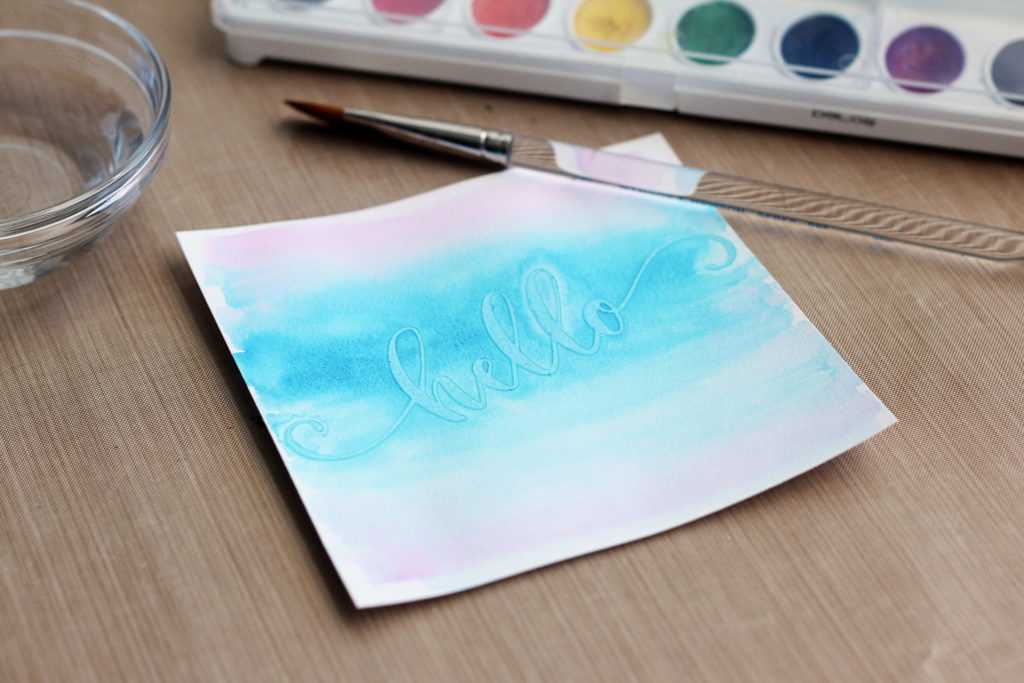
- Let the paint dry before removing the stencil. A hair dryer helps speed this process along.
- Carefully remove the stencil so the paper doesn’t tear and so you can save the stencil for another card.

Note: Don’t worry too much about small flaws if the mask or painting isn’t perfect; that’s part of the charm of watercolors!
- Rinse the stencil under water and let dry, sticky-side up. A hair dryer speeds this up, too!
- Use the stencil for another card when it’s clean and dry, or set it on its backing to use again later.
Tip: This stencil material is reusable! I made at least 6 cards with the same cutout, and it’s still sticky enough to keep using for more cards.
Step Four: Embellish and Assemble the Cards
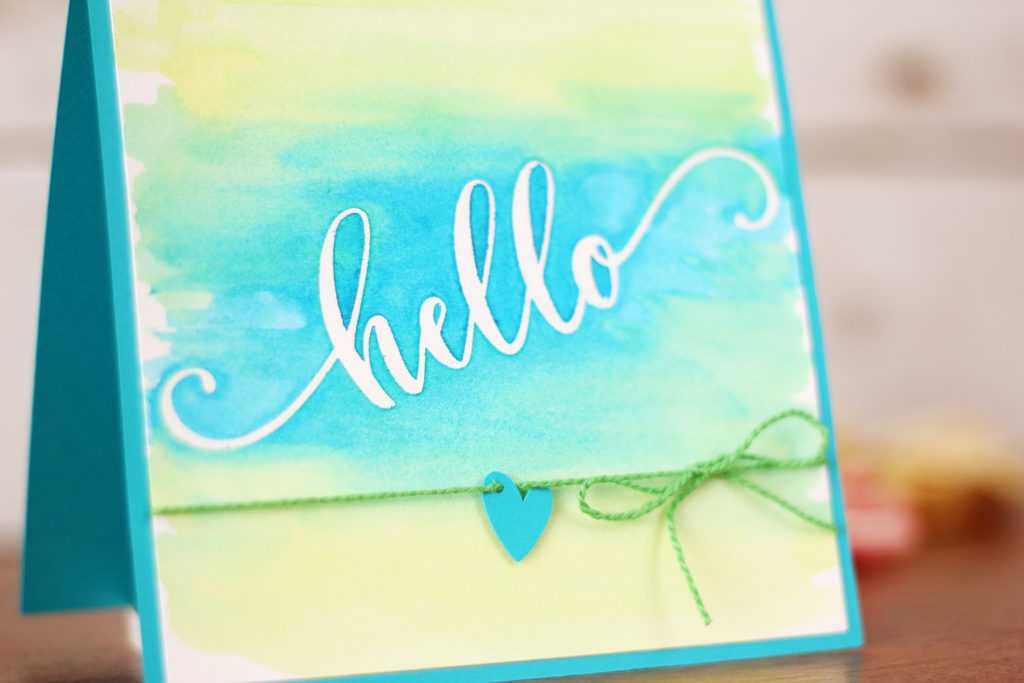
- When your watercolor square is dry, glue it to the square card front.
- If you want, cut a small heart out of the same cardstock as your card front, add a small hole, and tie it with string before gluing the square in place.
Erika
March 21, 2018
Excellent tutorial! I made a stencil using your custom settings and it came out great the first time. Thank you for the extra time you spent testing and optimizing the cut settings with the stencil material so I didn’t waste any. I’m doing a run of over 100 calligraphy signs on wood and this was just the right solution. You’re the best, Kelly!
Kelly Wayment
March 26, 2018
Thank you so much, Erika! I’m so glad this was a timely solution for you! 🙂
Lori m
March 26, 2018
Thank you for the great tutorial, how beautiful your cards look. Often my time runs short and this is the perfect way for me to try new cards and challenge myself. Hugs, Lori m
Kelly Wayment
March 26, 2018
Thank you, Lori!