
Is it a tray? A coaster? Or a catch all? I guess it could be anything you want it to be! When I first saw this beautiful design by Sophie Gallo, I thought “How awesome would this be as a wooden tray?” This multifunctional monstera tray is giving me all the feels, and I’ll show you how I made it.
Supplies Needed:
- Silhouette CAMEO®, Silhouette Portrait®, or Silhouette Curio™
- Silhouette Cutting Mat
- Silhouette Cutting Blade
- Silhouette Studio®
- Silhouette Scraper
- Silhouette Vinyl
- Silhouette Transfer Tape
- .5-inch Plywood
- Scroll Saw
- Rotary Tool
- Sander
- Wood Stain
- Safety Glasses
- Safety Mask
- Design ID #131819
- Design ID #240205
Step One: Create the Monstera Design

- Stretched the design out as much as you can to fit the entire 12 x 12 inch space.
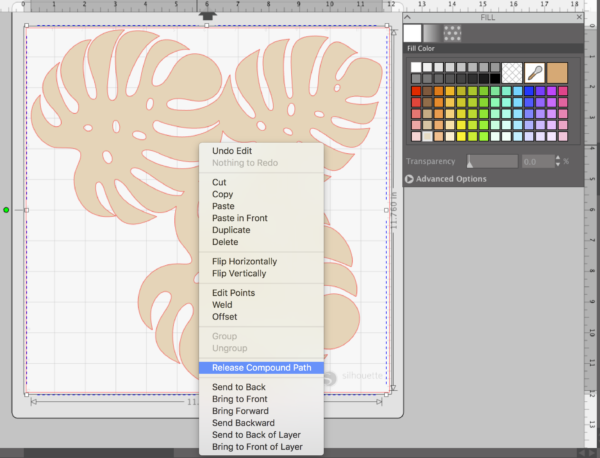
- Delete the holes in the middle of the the large monstera leaf. To do that, you’re going to either use the Eraser tool, located on the left-hand toolbar, to erase each hole or right-click the design and select “Release Compound Path.” Then click on and delete each hole.
- Type the letter of your choice with the Nobita Script font. I used the letter A for my last name but I feel like any personalization really makes this tray unique.

Step Two: Cut The Design
- Once your design is ready, send it to your Silhouette machine to cut out the design out of vinyl. If you have never cut a design before, here is a simple vinyl tutorial.
Step Three: Place Vinyl On The Plywood
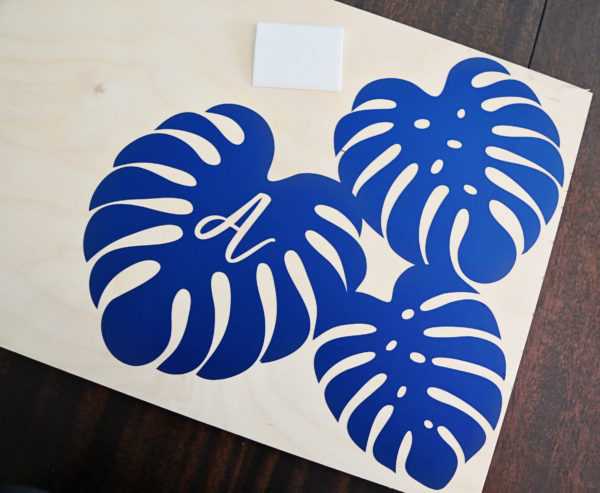
- Use the Silhouette transfer tape to place the vinyl onto the plywood. Then use the Silhouette scraper tool to press the vinyl firmly onto the wood.
Step Four: Cut Design with a Scroll Saw
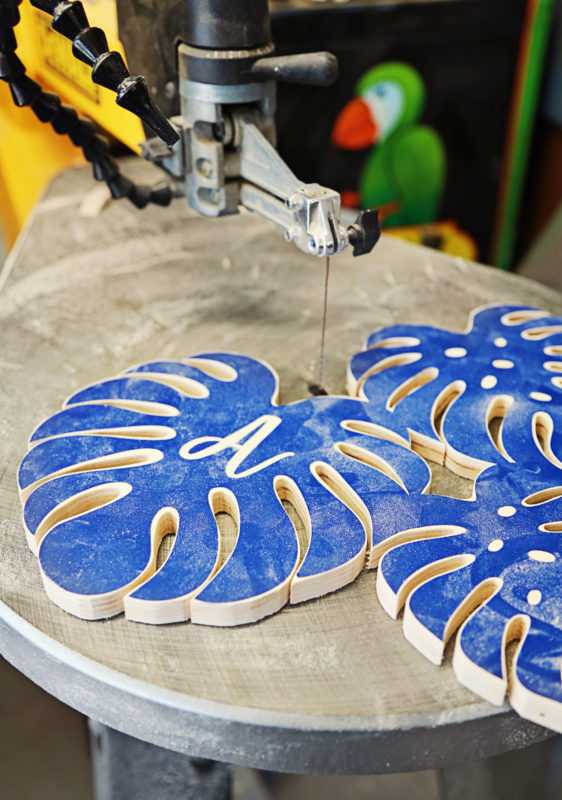
- Use your vinyl as a stencil to cut you design out of plywood. As you can see, you really don’t need to have the cuts perfect. That’s the beauty of tropical leaves—each one is a little different.
Step Five: Engrave the Leaves
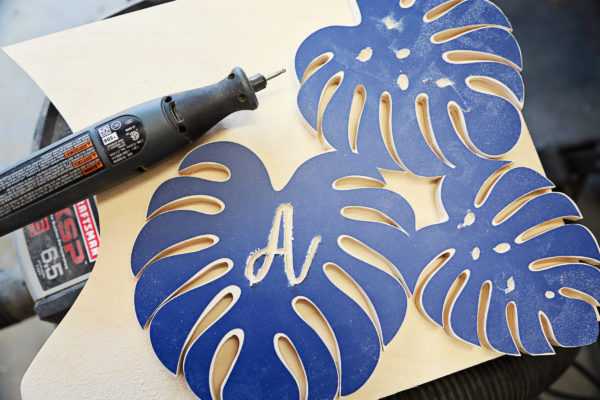
- Keep your vinyl on the plywood while you’re engraving to protect the rest of the design. I used my rotary tool that I purchased from the hardware store to engrave the A and the little monstera holes.
Step Six: Stain the Wood
- Remove the vinyl from the plywood.
- Sand down any rough edges with a sander.
- Apply your stain. Make sure you follow the directions on the stain’s can to determine the drying time.

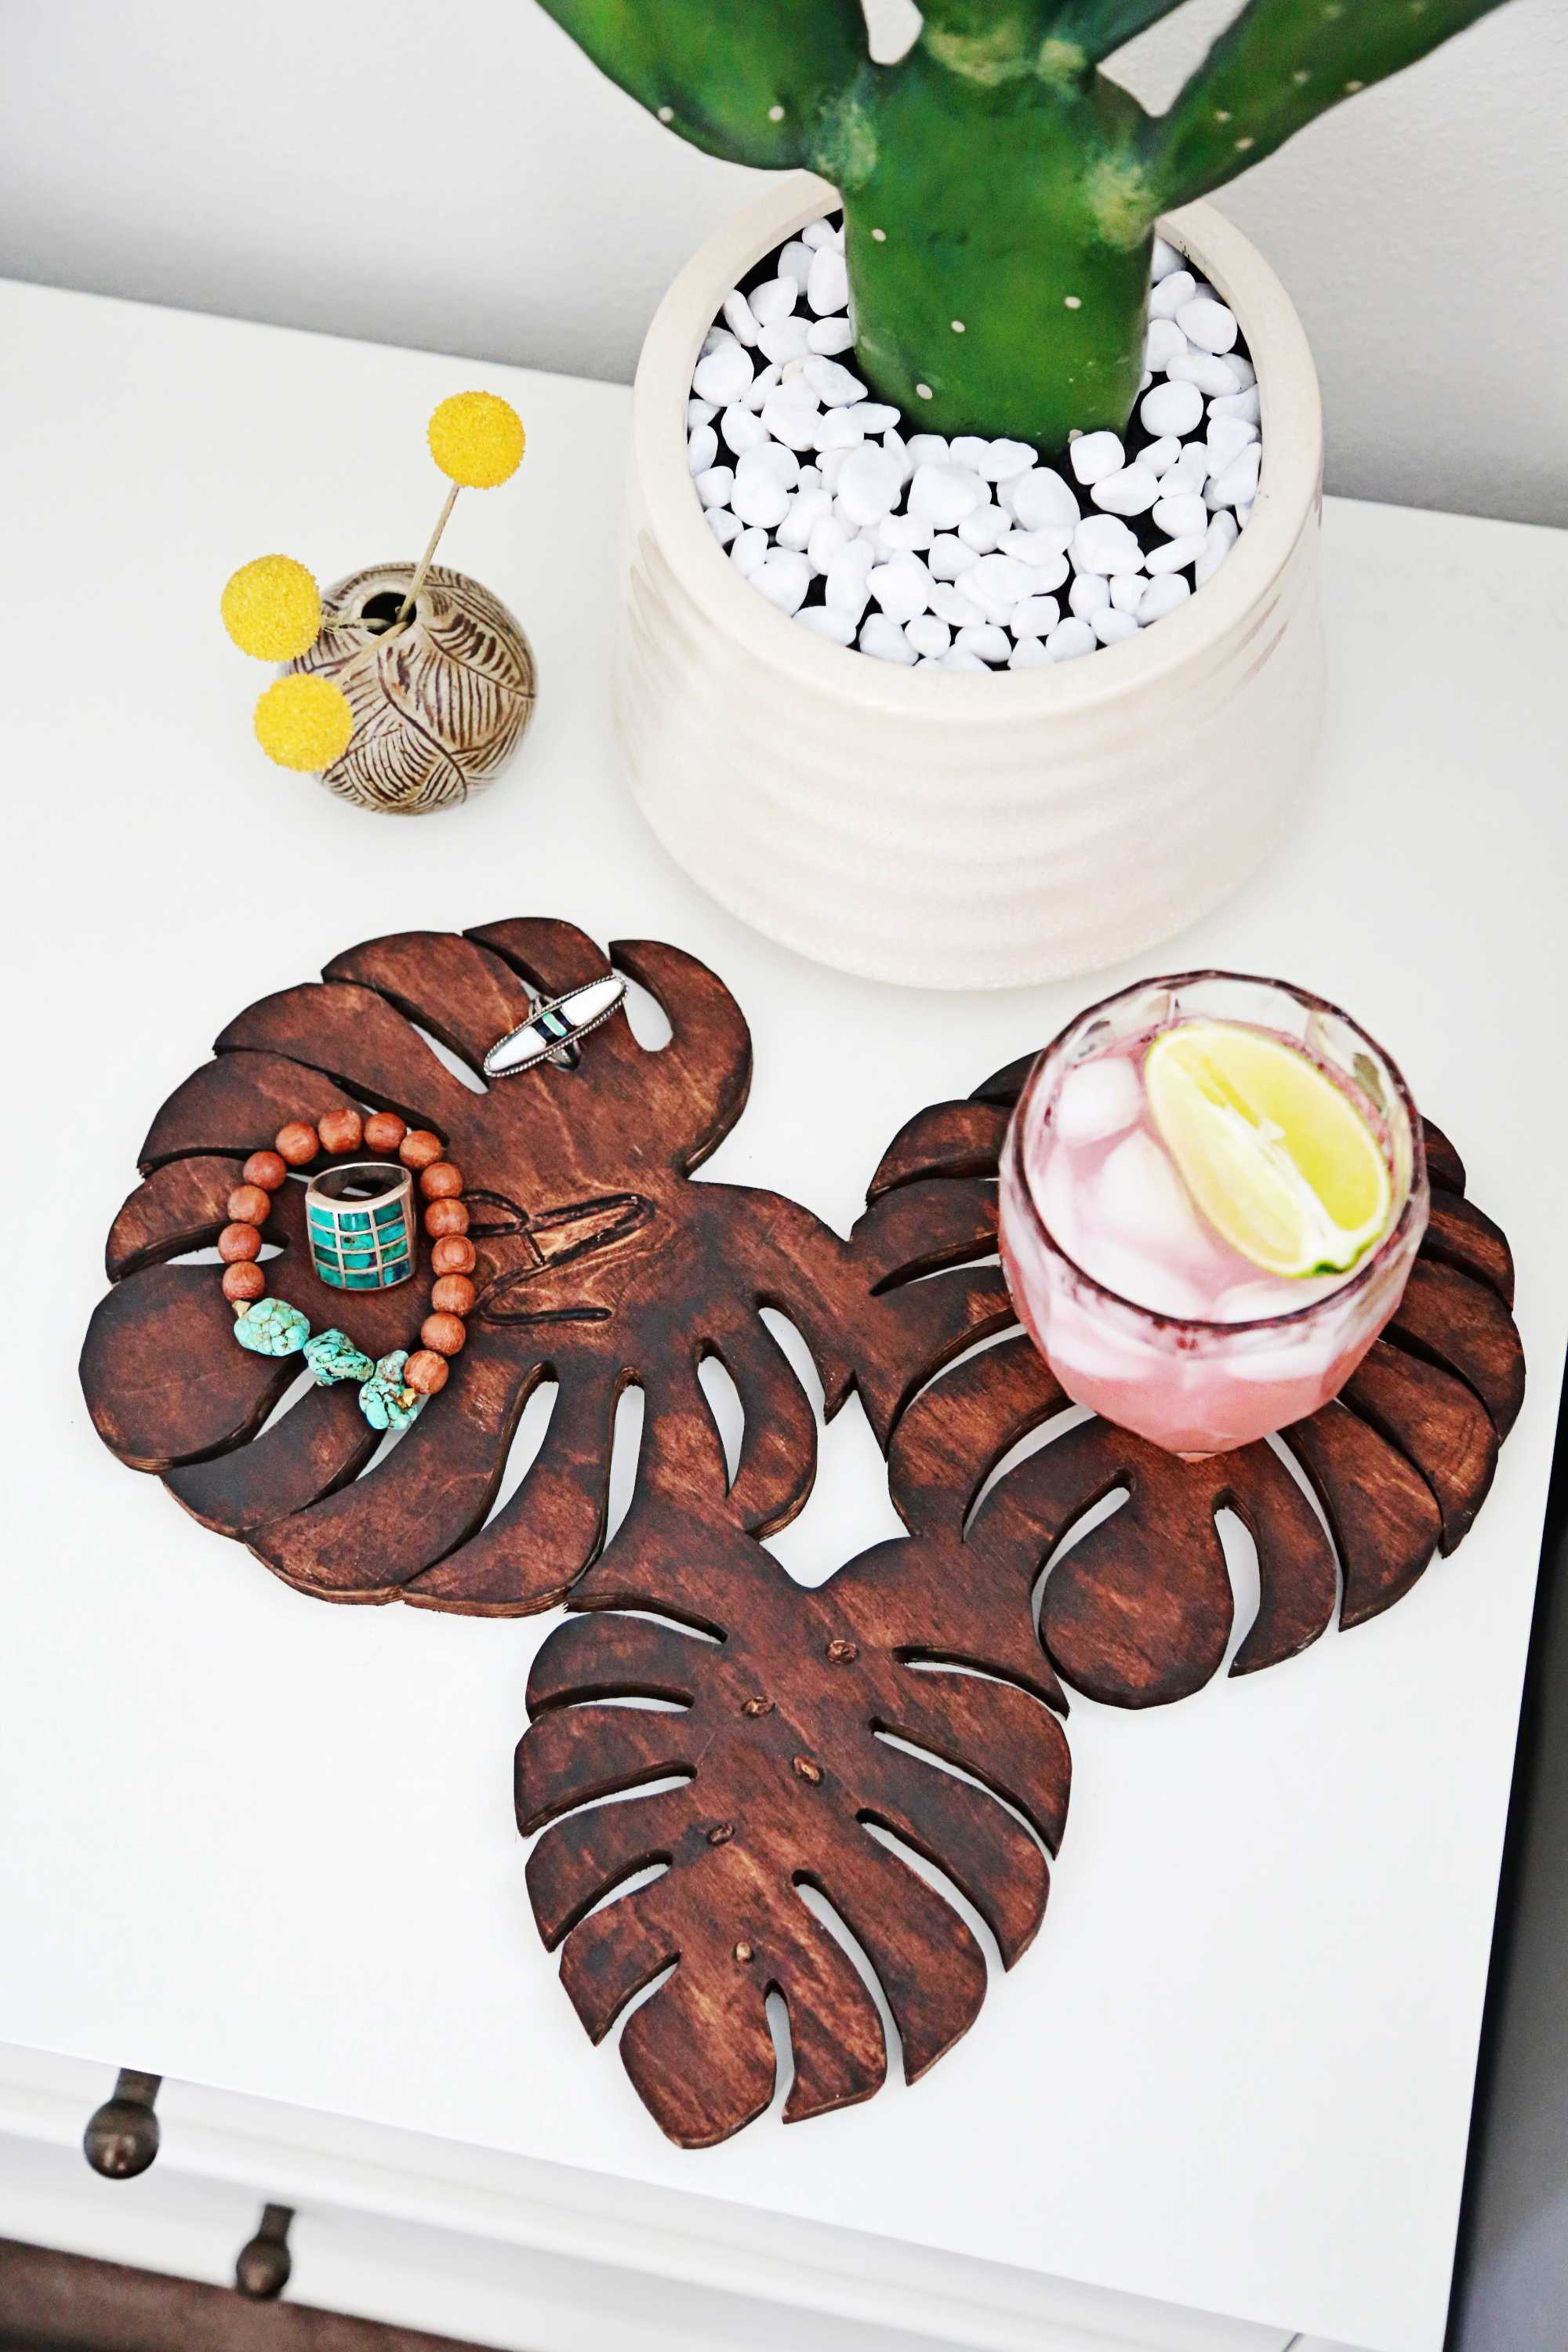
You guys, this project was so fun! I like it when things come together just as you imagined them in your head.
What are you going to use your tray for? Tell us in the comments below!