Hi everyone, my name is Kathi. I’m new here and I’m uber excited to be a part of the Silhouette Design Team this year. So what better way to celebrate this new adventure with a little tutorial on how to personalize any party or occasion using the Silhouette Mint™ and Silhouette CAMEO®! Spring is not only the foundation of your mattress—it’s the best season of the year! I love spring and lucky for me my beautiful daughter Makaila was born during this blooming season. While thinking about her birthday, I asked myself, “What would a 10 year old girly girl want for her birthday party?” (Besides Justin Bieber, duh!) The answer? A garden tea party, of course!
So, I wanted to show you lovely viewers how simple and how beautiful your next event will look with your new BFFs, the Silhouette Mint™, and the Silhouette CAMEO®.
You Will Need:
- Silhouette CAMEO®
- Mint Inks (choose what will match your party theme)
- Mint stamp kits (15 mm x 15 mm, 15 mm x 60 mm, and 45 mm x 45 mm)
- White cardstock
Additional accessories*:
- Floral paper straws
- Toothpicks
- Mason jars
- Garden trowel
- Twine
*These aren’t required, but they’re what I used to make these specific decorations and party favors. Feel free to choose your own additional accessories to fit the theme of your party!
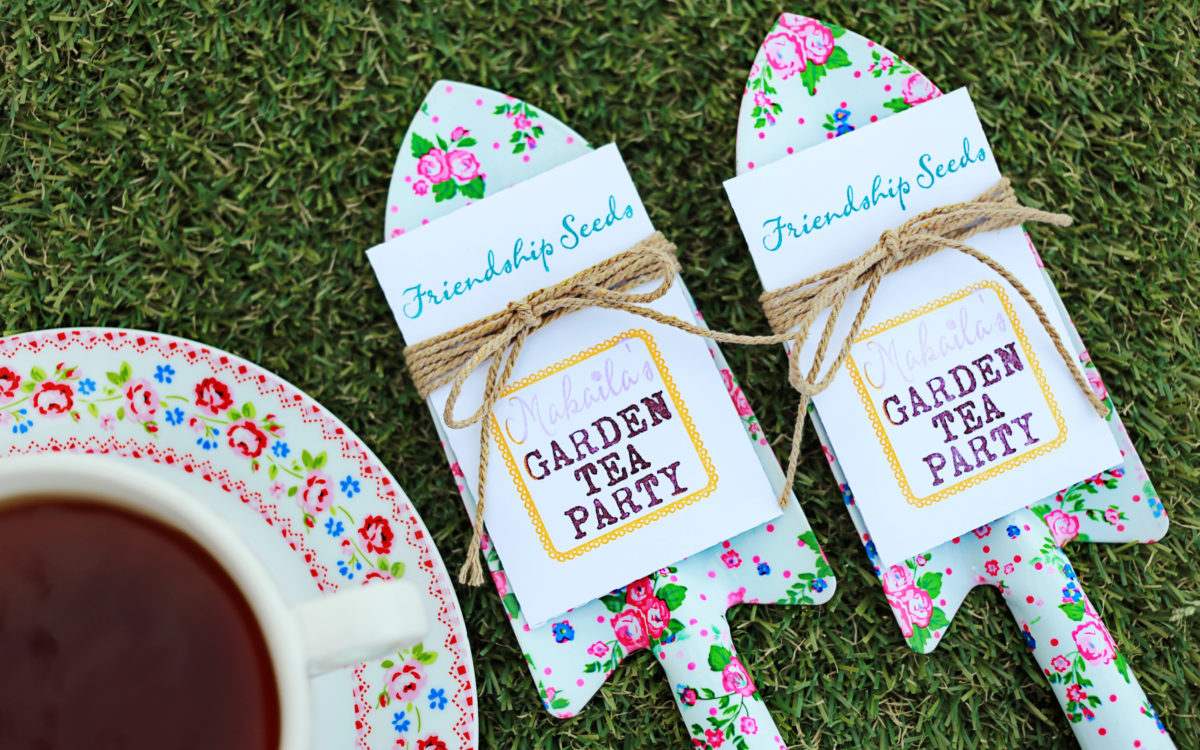
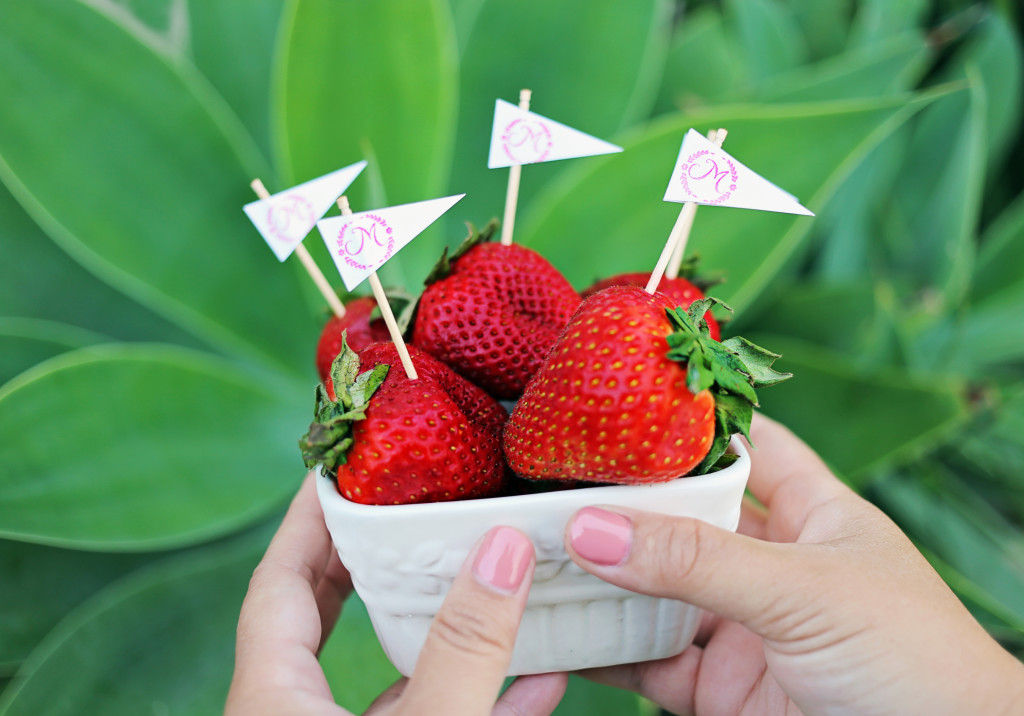
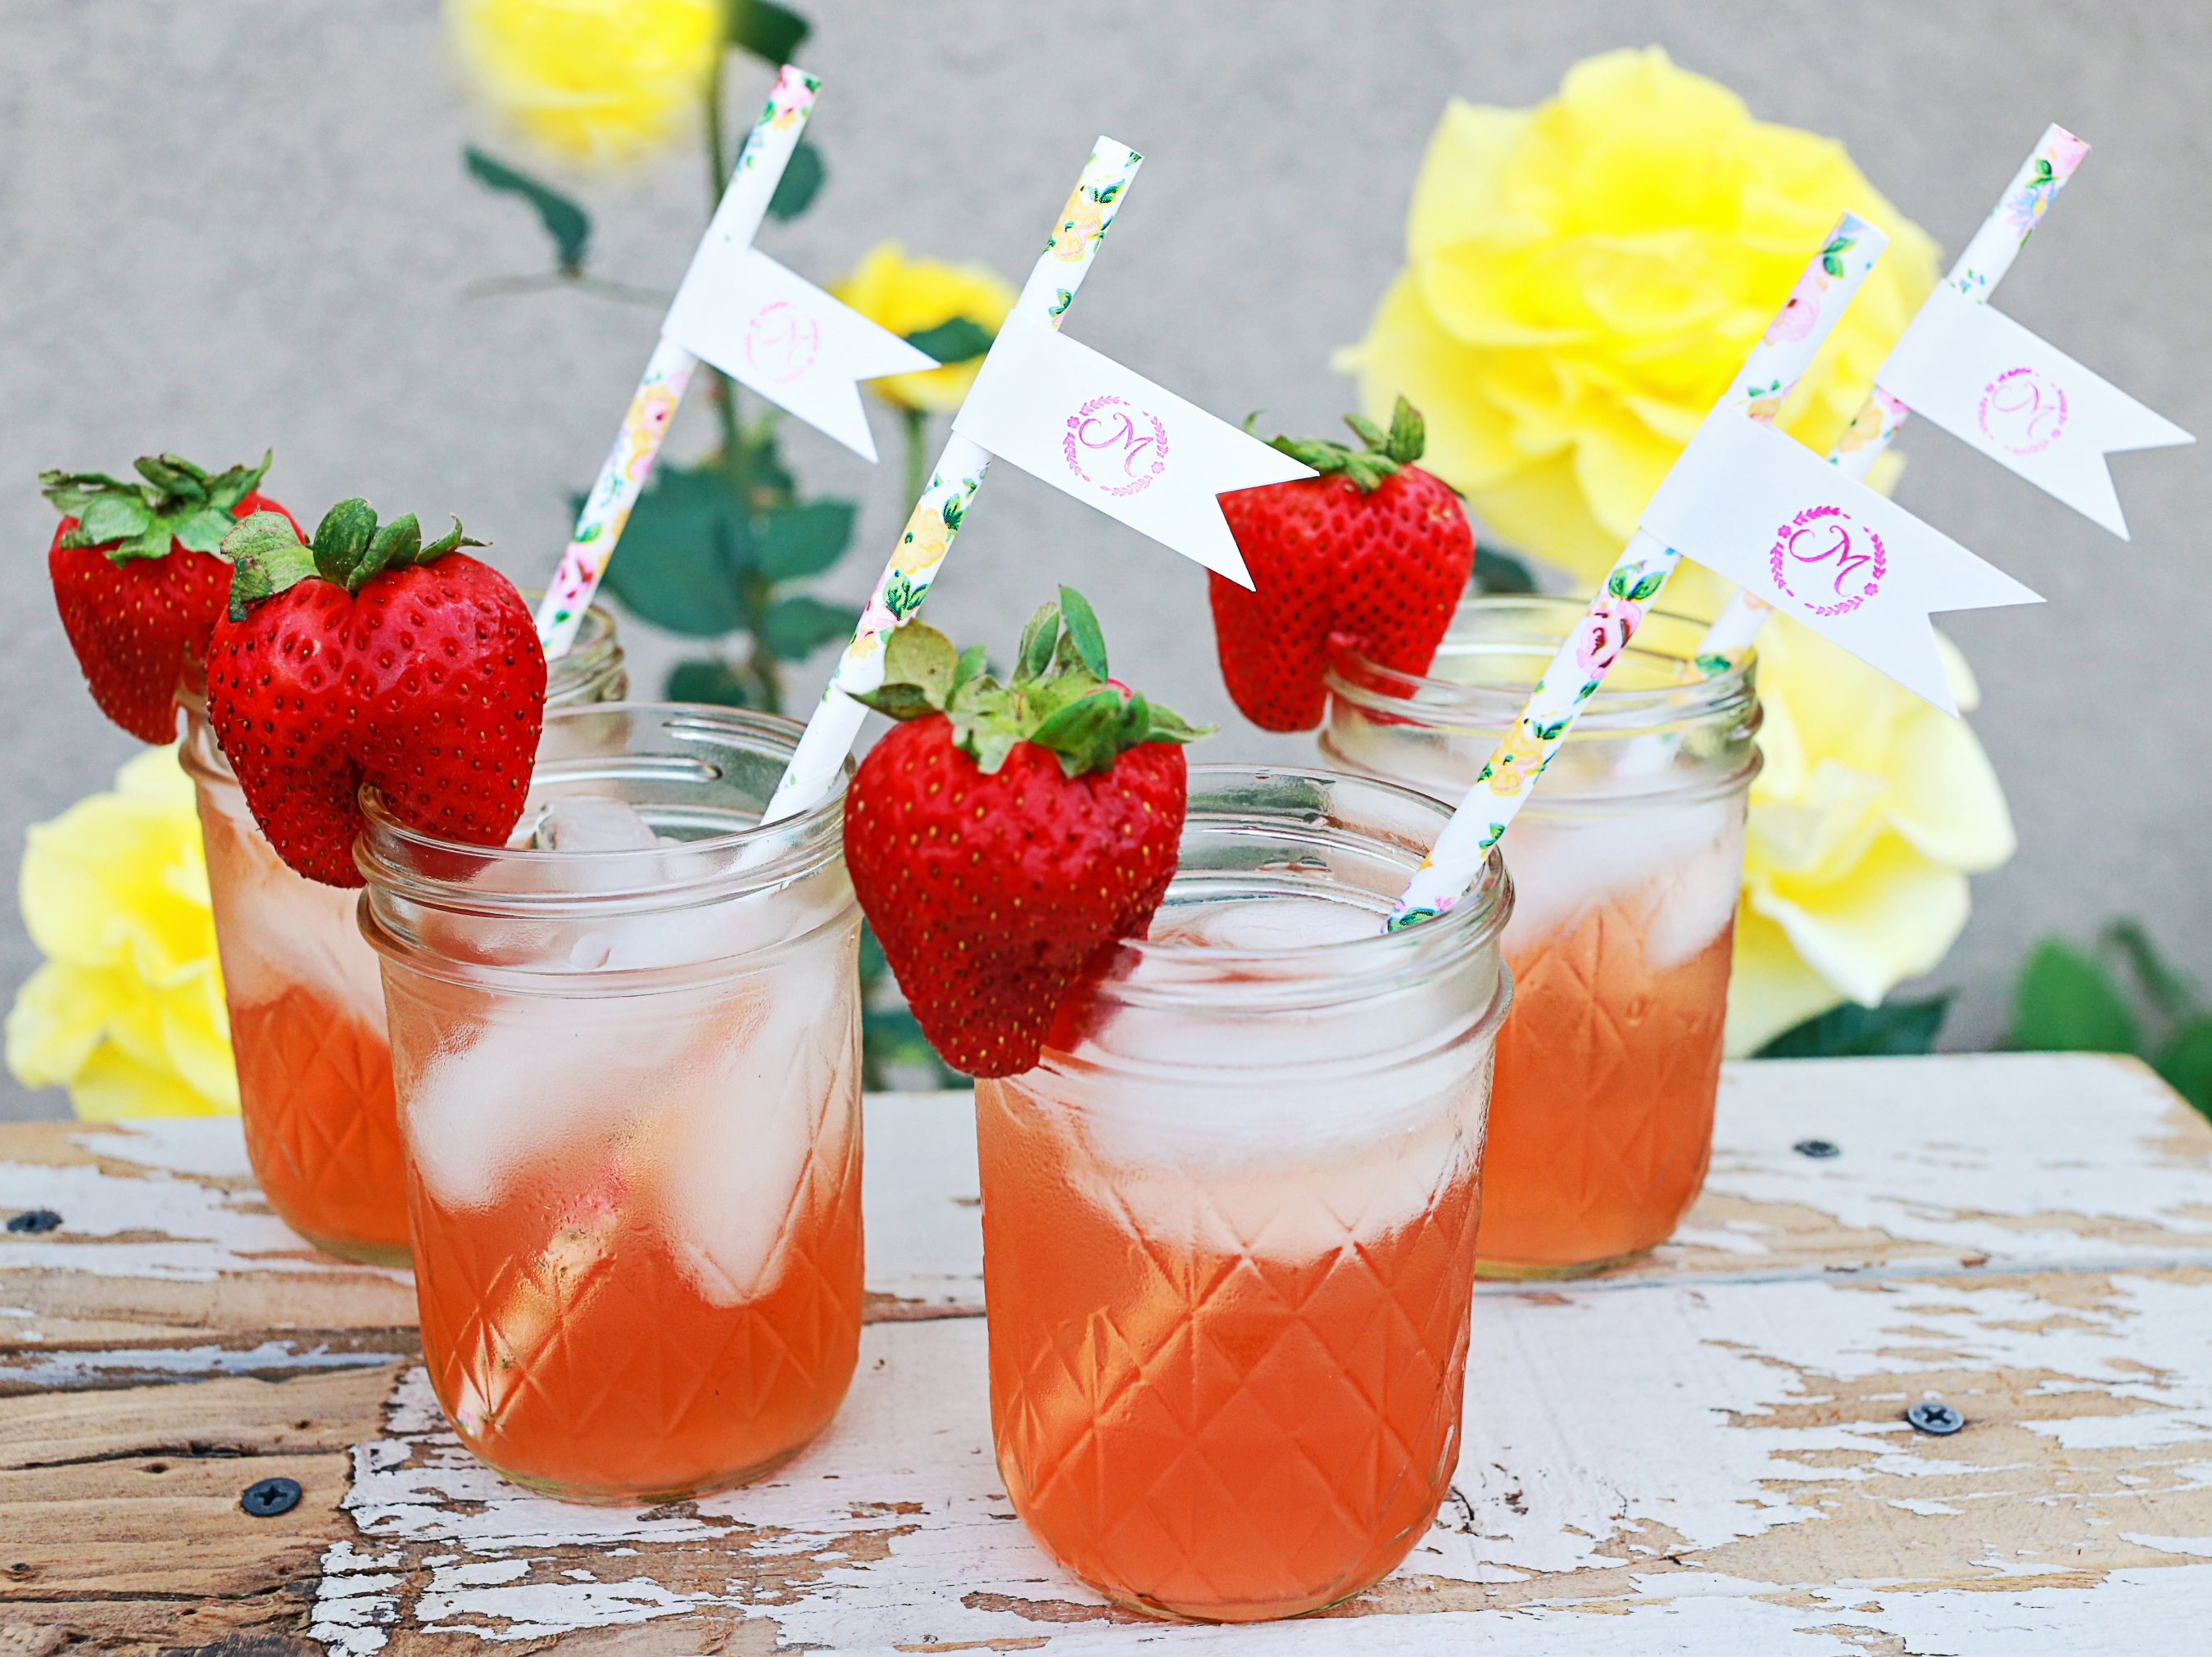
Garden trowel party favors with flower seeds? Yes, please! Juicy red strawberries with little monogrammed flags? Perfect!
Here’s how I started to make these cute giveaways. And by the way, you’ll need your Silhouette CAMEO® for assistance and several pieces of white card stock.
Step One: Cut Seed Packets with the CAMEO
There are several seed packet designs to choose from the Design Store, but since I was going to create a custom stamp I really just needed a simple one (like ID #48164).
Notice the size I used on the above picture? It’s 5.312 in. x 5.005 in..
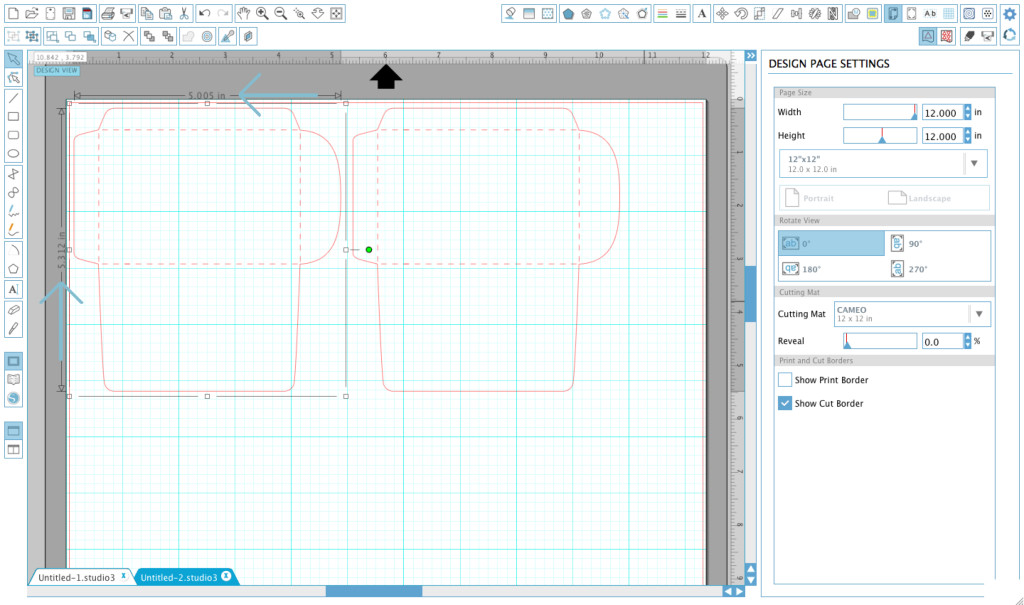
This will fit perfectly on a standard garden trowel.
Once you’ve got your supplies and additional accessories, you’re ready to use the Silhouette CAMEO® to cut.
(1) Place cardstock on mat and load into CAMEO.
(2) Adjust cut settings to “Cardstock.”
(3) Click “Send to Silhouette”
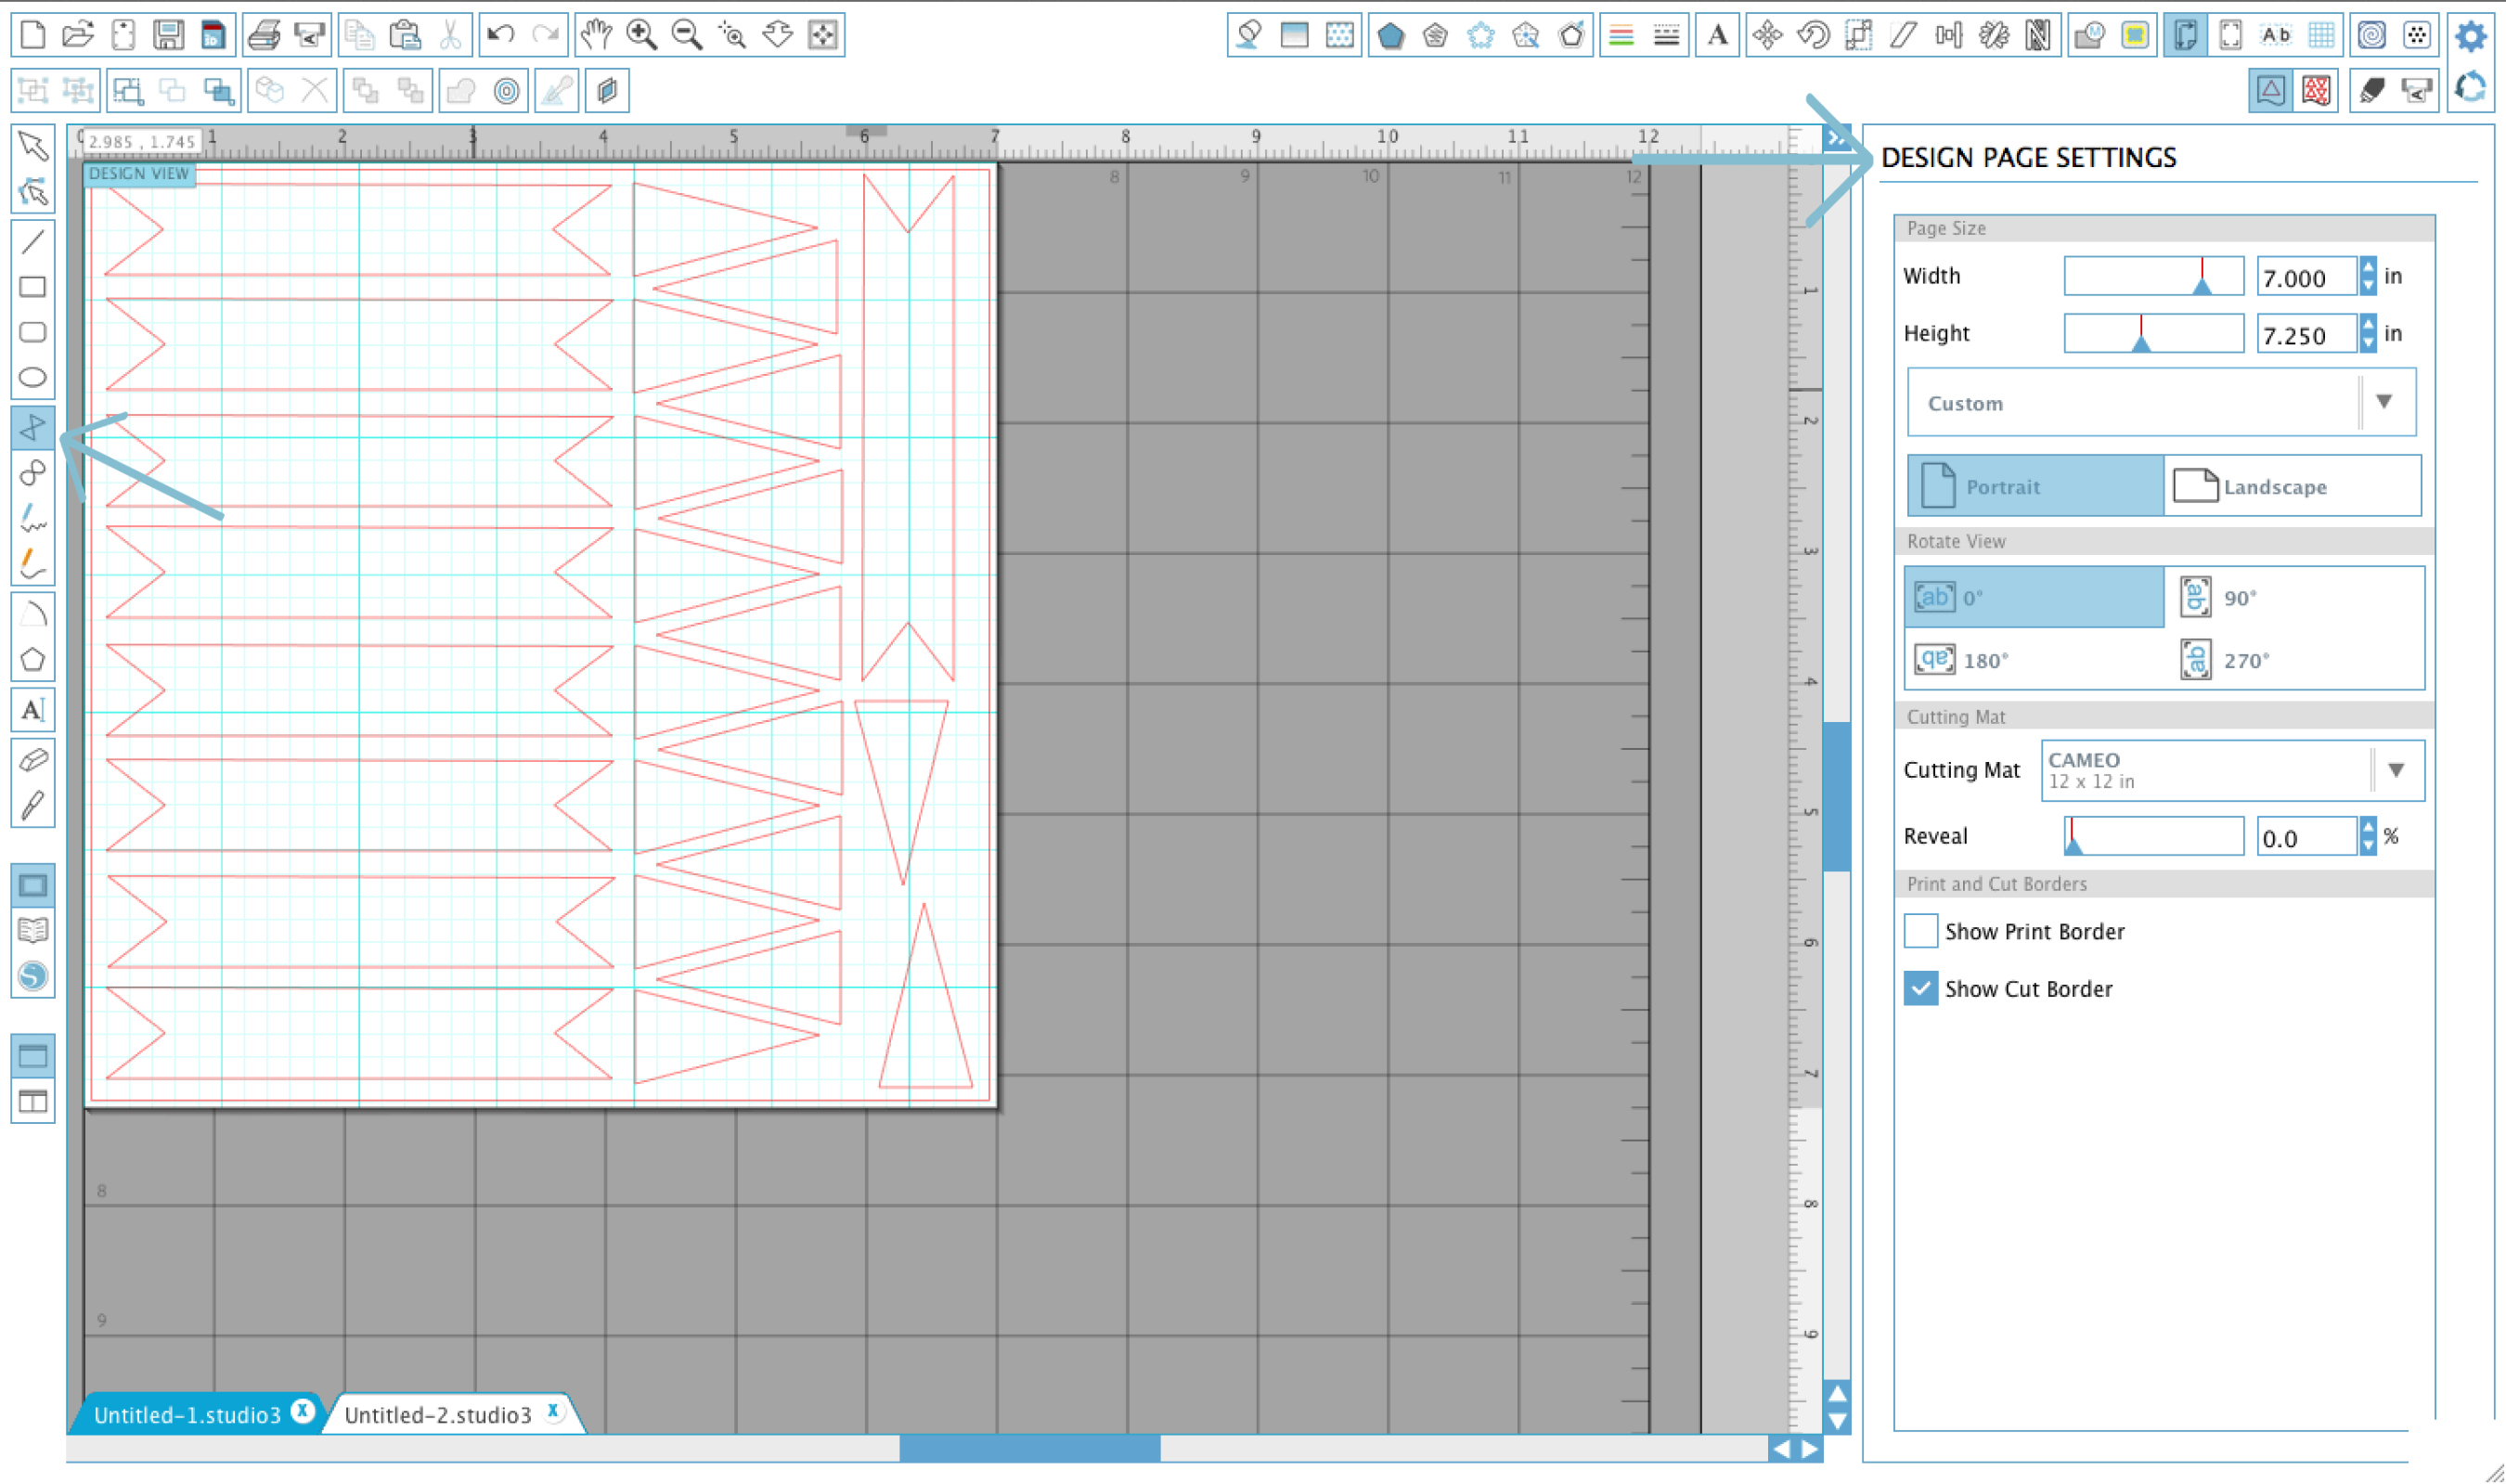
As for the small flags, I decided to create my own. To create the small flags:
(1) Select the polygon tool (located on the left toolbar) and draw your flags.
(2) Use your mouse to make them to the proper size.
(3) Cut using your Silhouette (see process above for help).
Once everything is cut, set it aside for the time being.
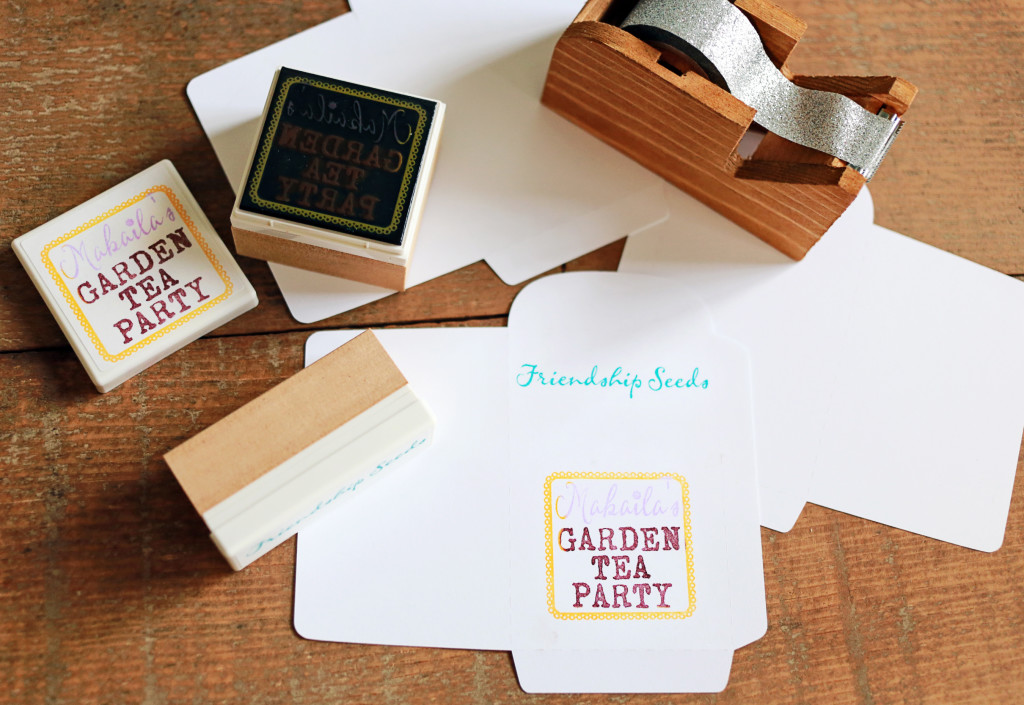
So now it’s time to bust out some customized stamps with Silhouette Mint™ for the seed packets.
Step Two: Mint Stamps for Seed Packets
Friendship Seeds—I sprinkle this stuff everywhere. (Or at least I try to. Adulting is hard.)
But anyways, to make the stamps for the Friendship Seeds in Mint Studio™:
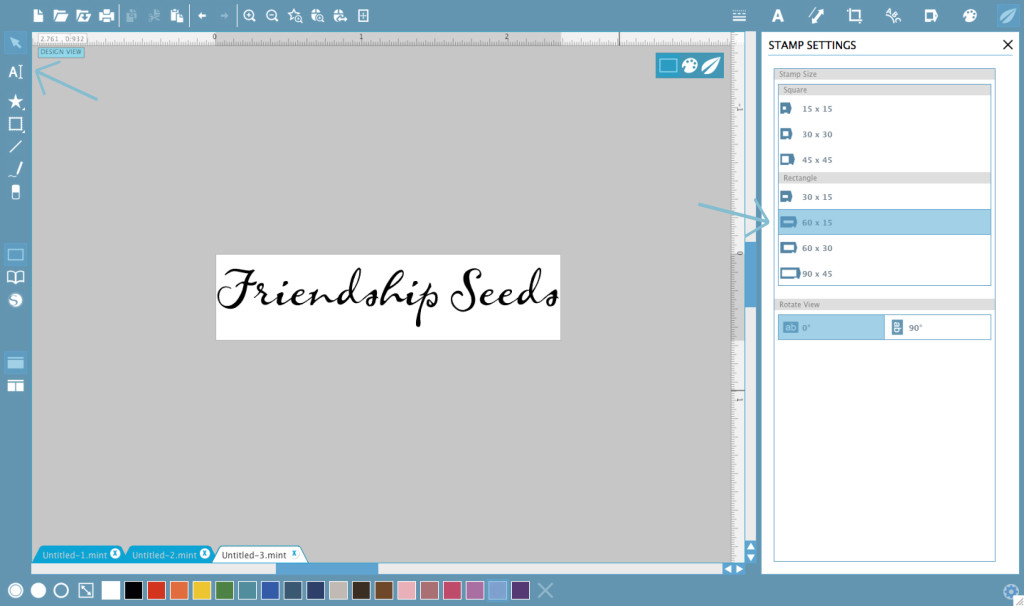
(1) Select 60 mm x 15 mm stamp size.
(2) Insert your text (for the first stamp I wrote ‘Friendship Seeds’ using the LD Cursive font).
(3) Click “Send to Mint.”
Just follow the prompts given right in Mint Studio™ to load your Mint. It’s that easy!
Repeat this process for the rest of your stamps. For example . . .

. . . with this stamp I used the 45 mm x 45 mm size and looked for a thin decorative frame (like ID #93814, shown above). That way, I would have more room for the words inside the frame.
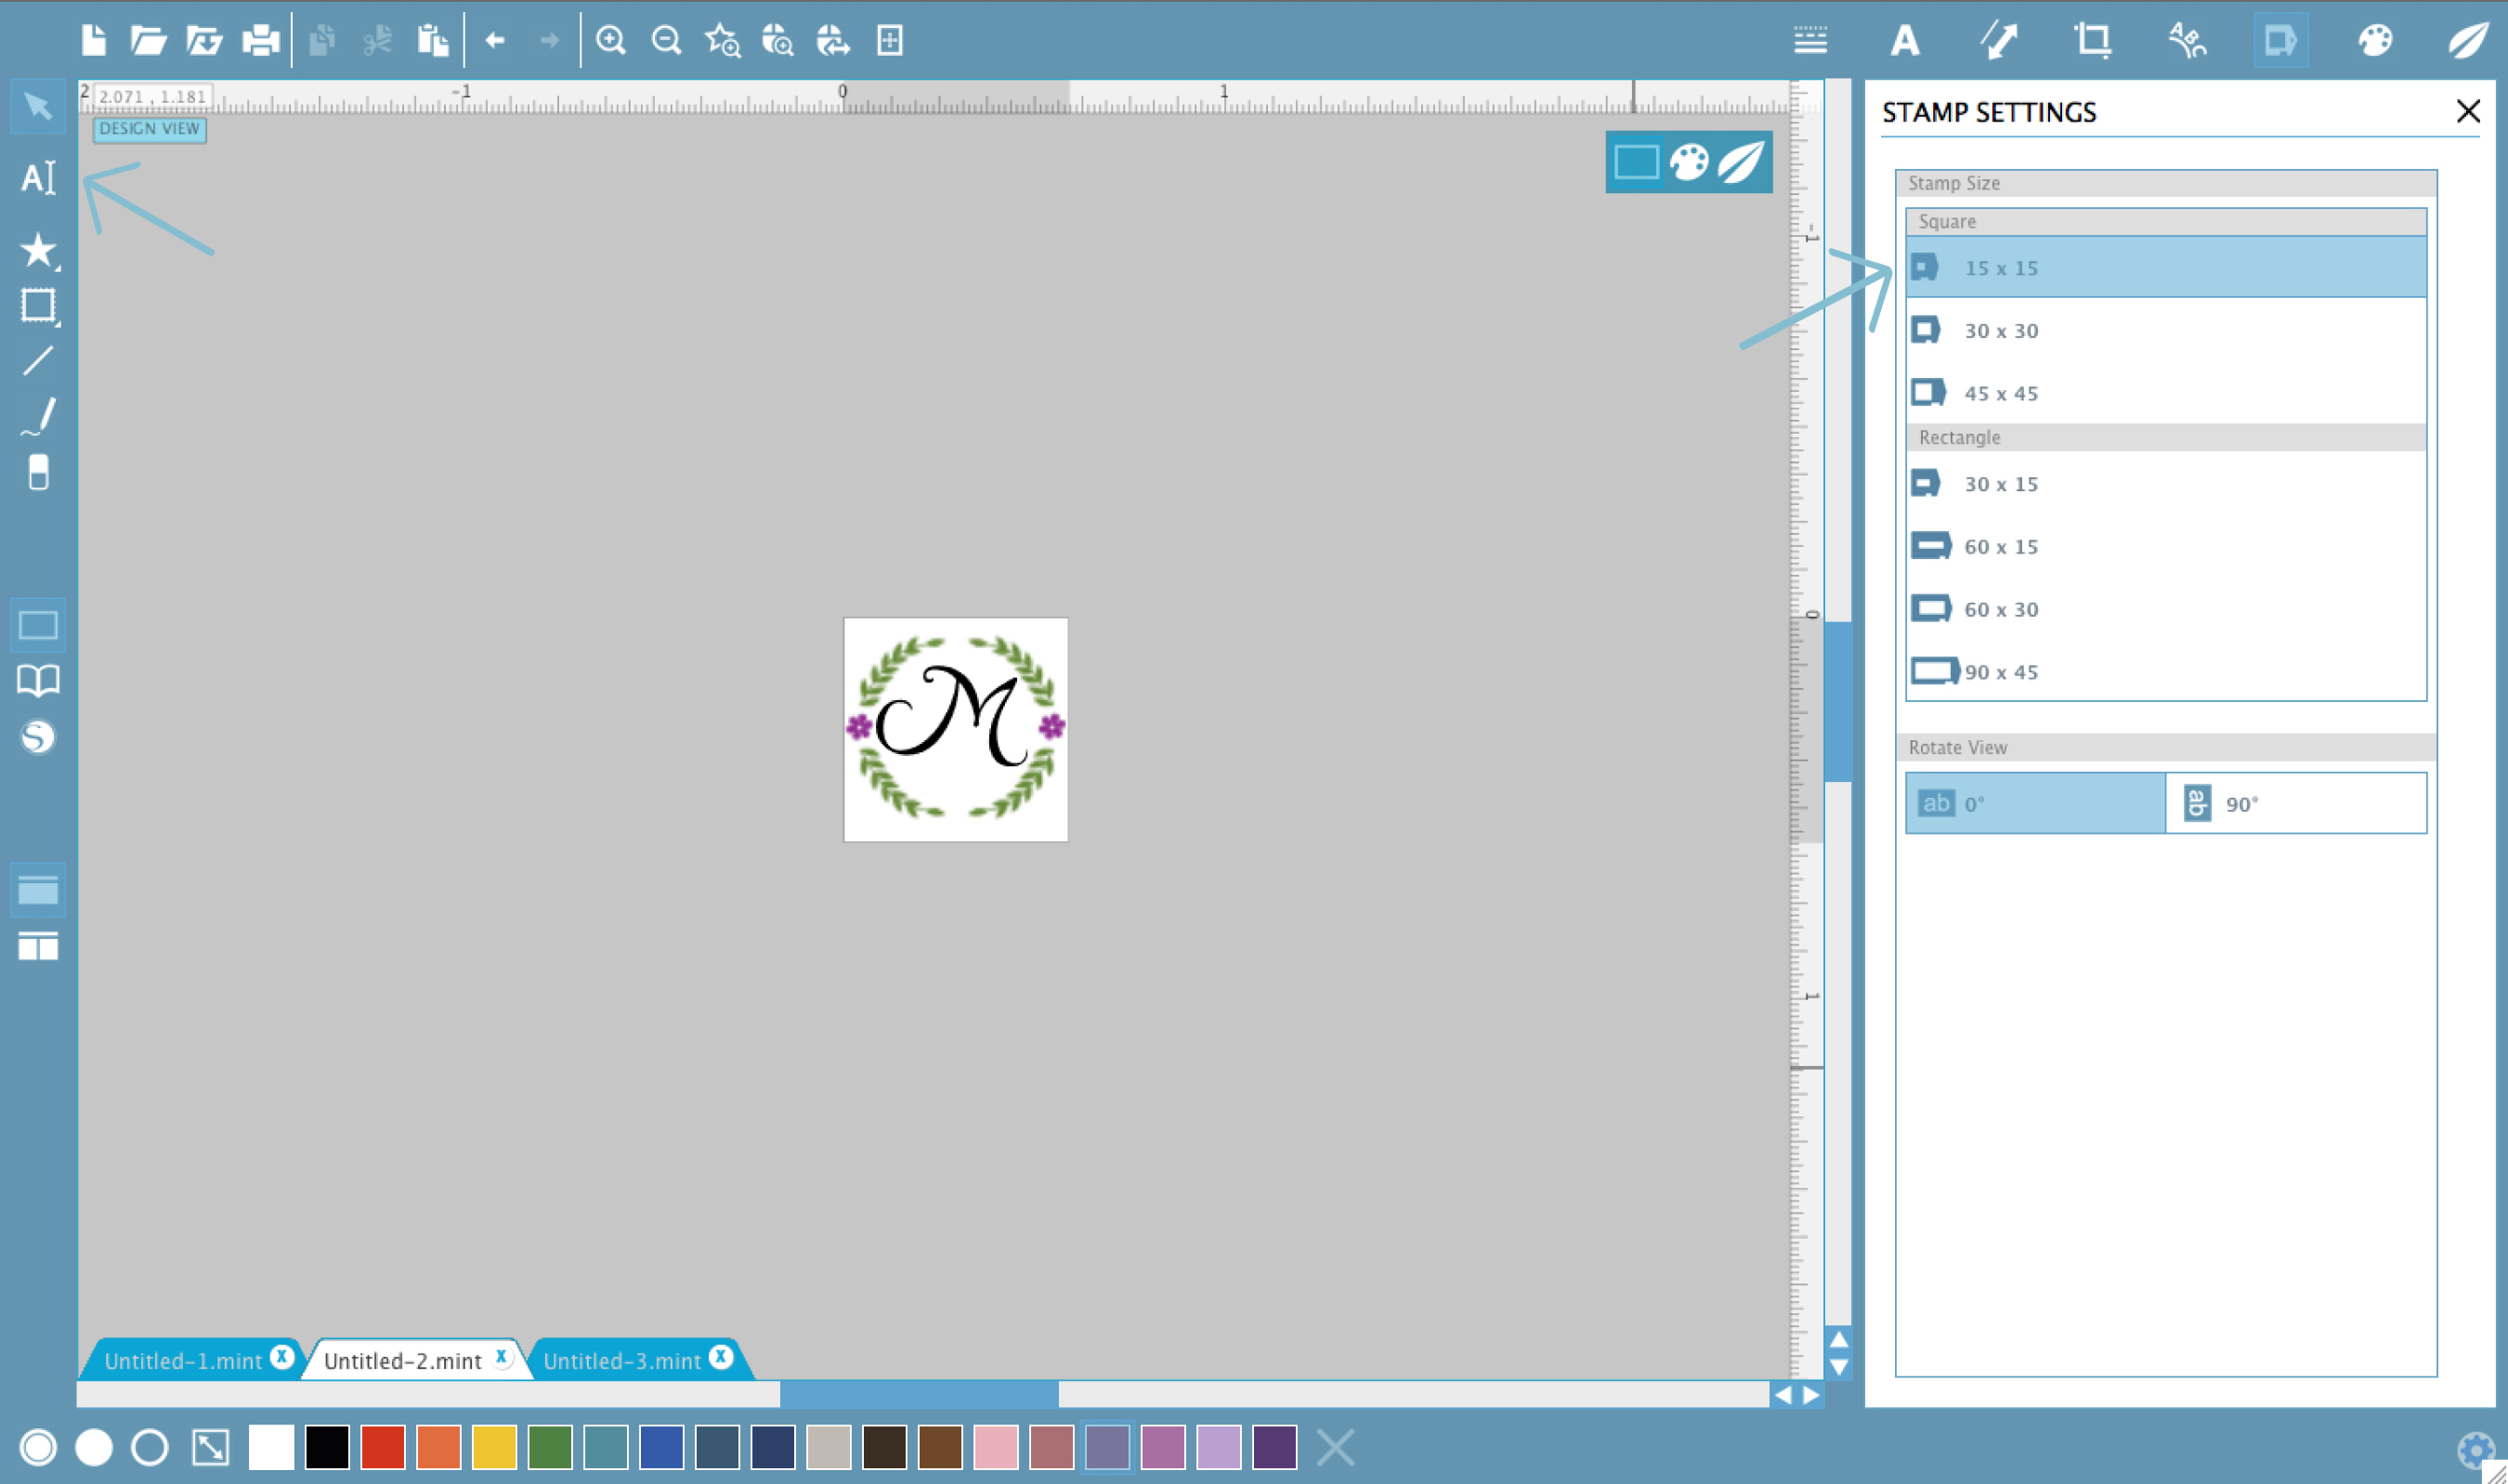
And for the small flags, I used a 15 mm x 15 mm stamp size (it’s so cute and mini!). This stamp is small enough to go onto the sticker flags I cut with the CAMEO. The stamp was a snap to design. All I did was use a vine frame from the Design Store and type the letter ‘M’ for my daughter’s name. The Mint seriously takes care of the rest!
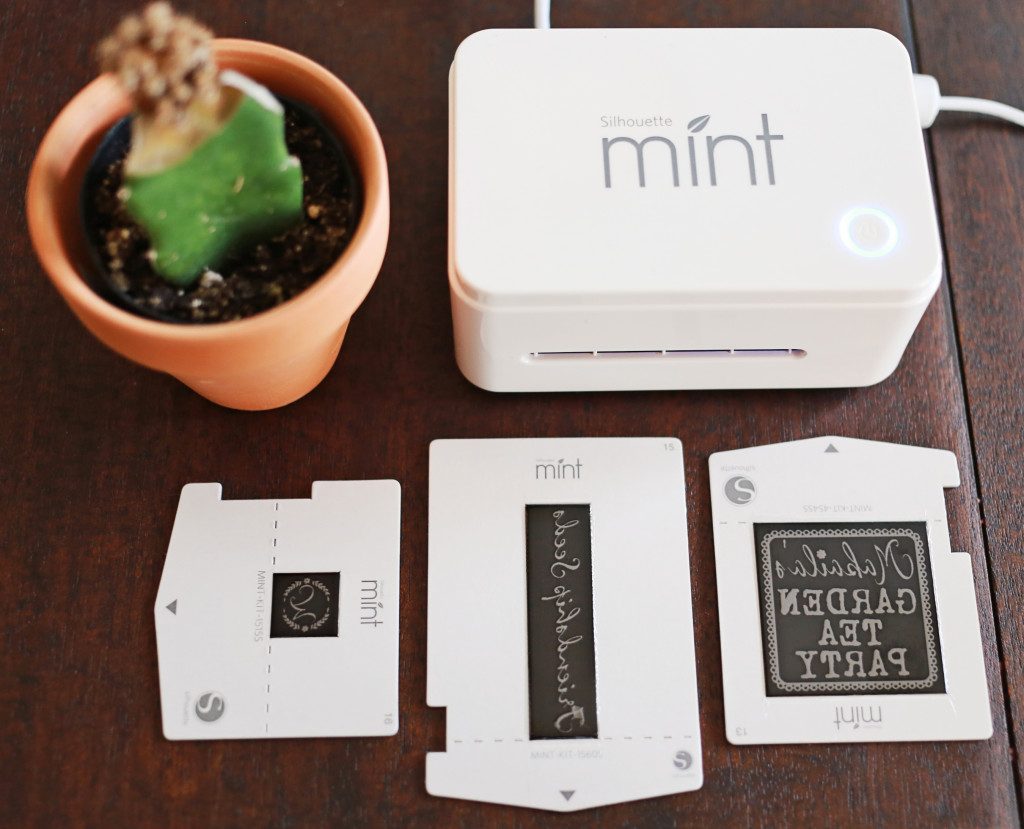
Isn’t it awesome how Silhouette Mint™ automatically reverses the images before printing? That way, you never waste a stamp sheet by printing it the wrong way! It’s the little things like this that make me so happy.
When you’re ready to use your stamp:
(1) Bend back the packaging using the perforated lines.
(2) Use the sticky adhesive on the included stamp block to attach the stamp.
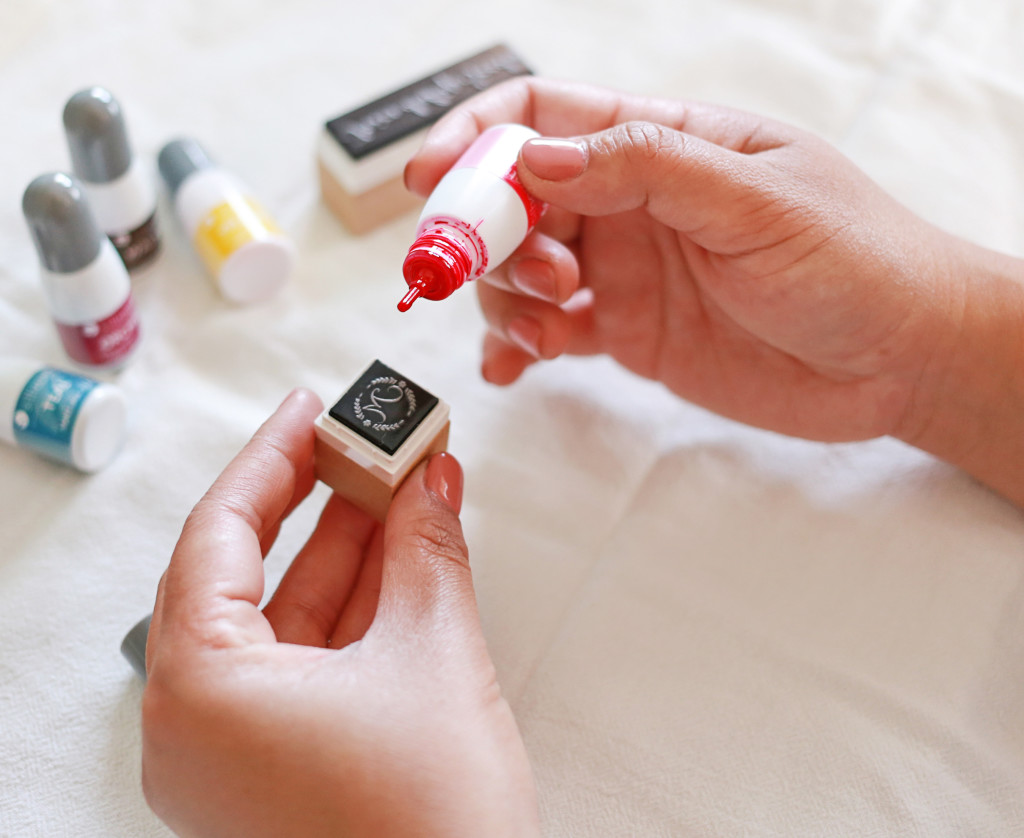
Step Three: Ink It and Stamp It
I absolutely LOVE all of the available ink colors for the Mint. They’re bold and colorful and look good enough to eat—but don’t actually eat it because that can be dangerous (and just plain weird)!
Once your stamp is adhered to the stamp block, it’s time to ink it. To ink your newly minted stamp:
(1) Apply the ink directly onto the stamp design.
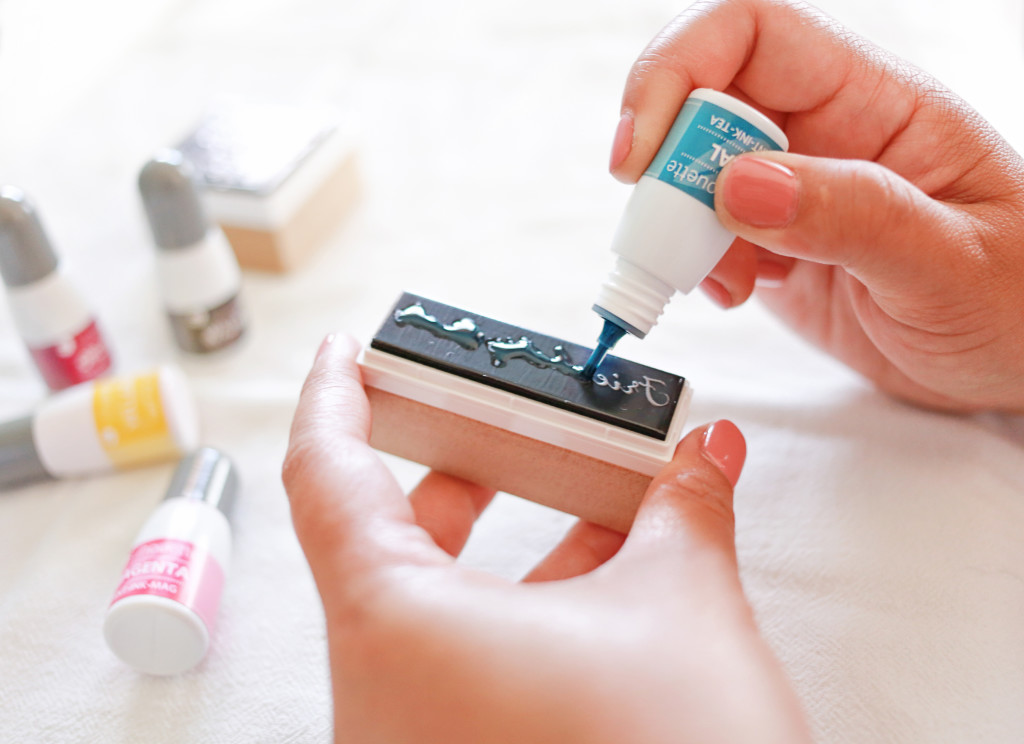
(2) Set stamp aside and let the ink absorb for 5 minutes or so. (And if you’re a coffee addict like me then this is a perfect time for a little coffee break.)
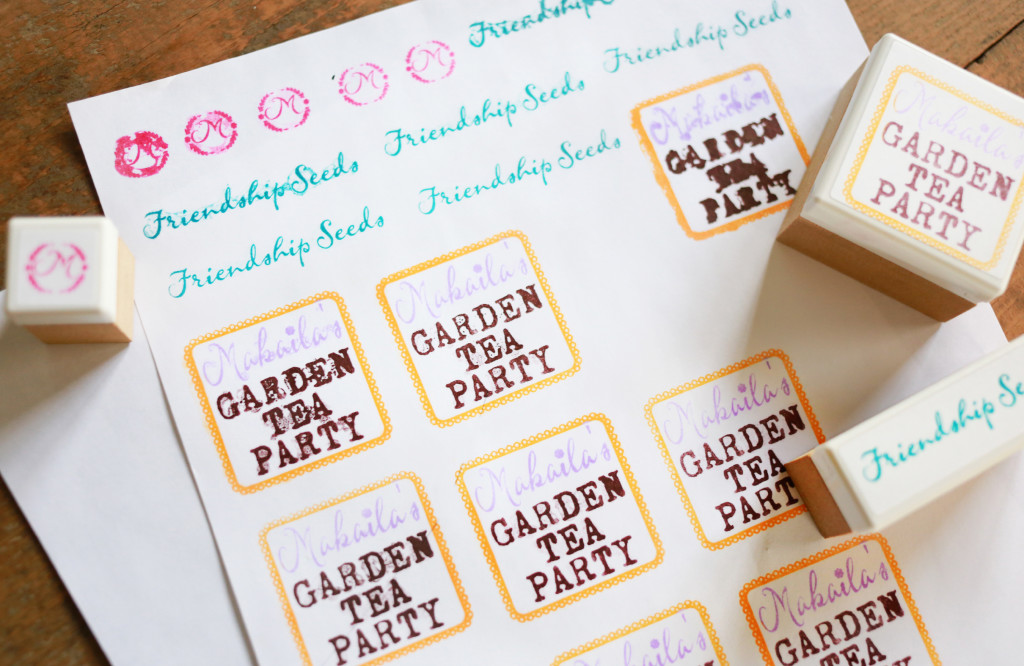
All of the dark gray areas will not absorb the ink, while all of the light gray areas will absorb the ink. And because you apply the ink directly to the stamp you can apply multiple colors to one stamp, like I did with the 15 mm x 15 mm monogrammed stamp.
Cool, right?
Step Four: Assemble Your Party Accessories
Now that you have your stamps and your flag stickers, you’re ready to stamp and flag everything in sight!
Below, you can see that I stamped the seed packets first before folding it over.
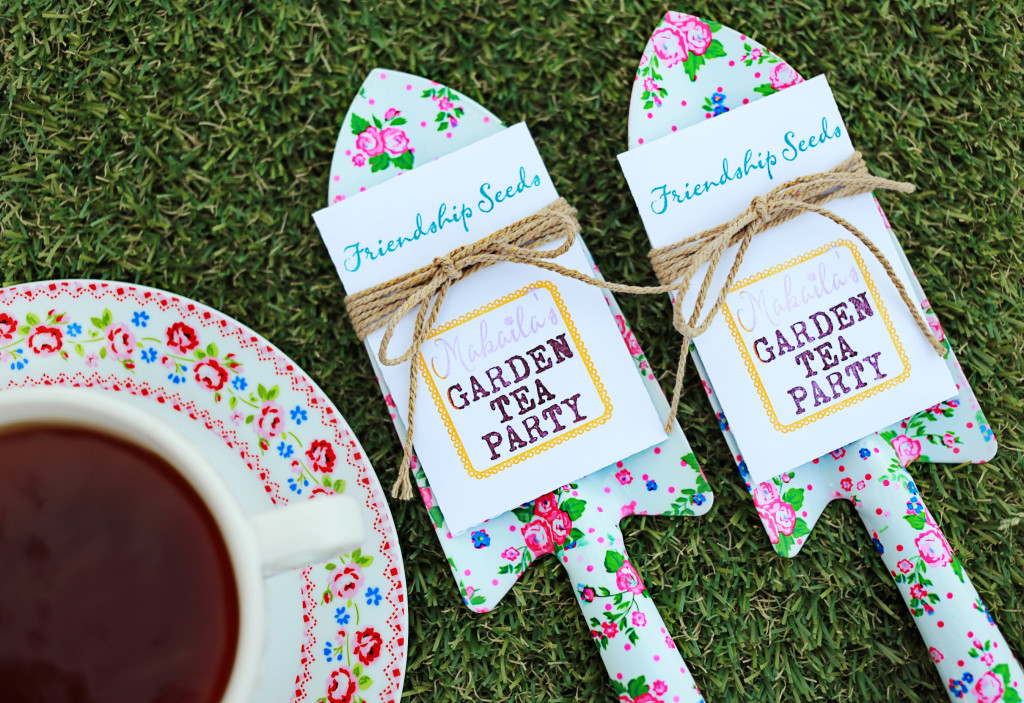
And that’s it! You’re ready to assemble your Personalized Garden Tea Party and take your party to the next level.
A FEW SILHOUETTE PRO TIPS:
1. Always remember to grab a blank sheet of scrap paper and stamp several times to remove any excess ink. Your stamp will be blotchy the first couple of times, but once you blot off the excess ink it’ll come out crisp and clean for 50+ stampings!
2. Stamp your media before assembling them. For example, I used the long stickers for the floral straws and the smaller triangle flags for the toothpicks, but it’s much easier to stamp the mini flags first before you sandwich the toothpicks. That way they don’t move around as much.

Now these refreshments have a little more sass, don’t you think?
Man this stamping project was so much fun! When’s the next party? Soon I hope.
Kelly Wayment
April 20, 2016
What a great party idea! I love all the cute stamps and flags and seed packets and colors and… (love it all). 😉
Kathi Arbiso
April 20, 2016
Thank you, Kelly. You are too sweet!
Nicole Lensen
April 20, 2016
This is so ridiculously adorable!!! Love it all!
Kathi Arbiso
April 20, 2016
Thank you so much, Nicole!
Connie Wilson
April 20, 2016
So so cute 🙂
Connie Wilson
April 20, 2016
So cute! 🙂
Joan
April 21, 2016
THis is a super party idea…earth day fun!
janet
April 21, 2016
What lovely ideas – thank you 🙂
And, wonderful first post – welcome!!
Melissa Gomez
April 21, 2016
This is so stinking cute, you are a genius! You know, I currently own a cricket but I’m slowly but surely being sold on this silhouette… it can really do it all! * PS love your nail color
Aubrey Claybrook
April 21, 2016
This is so cute! Makes me want to have a garden party now!!
Annie W
April 27, 2016
Love all the details…so pretty!