Fidget spinners are awesomely popular right now. Would you believe me if I told you that you could make your very own? Custom make them in any shape, color, or size you want? Using Silhouette Shrink Plastic, you can! So, let’s get spinning.
You Will Need:
- Silhouette CAMEO® or Silhouette Curio™
- Silhouette Shrink Plastic
- Design ID #176173
- Pattern ID #48195
- Printer (optional)
- Colored pencils or permanent markers (optional)
- Superglue
STEP ONE: SET UP YOUR DESIGN

(1) Open the Page Setup panel and select these settings:
- Page Size: Letter (8.5 x 11.0 in)
- Cutting Mat type (mine is Curio)
- Open the third tab at the top of the Page Setup panel (Registration Marks) and select Style Type 1
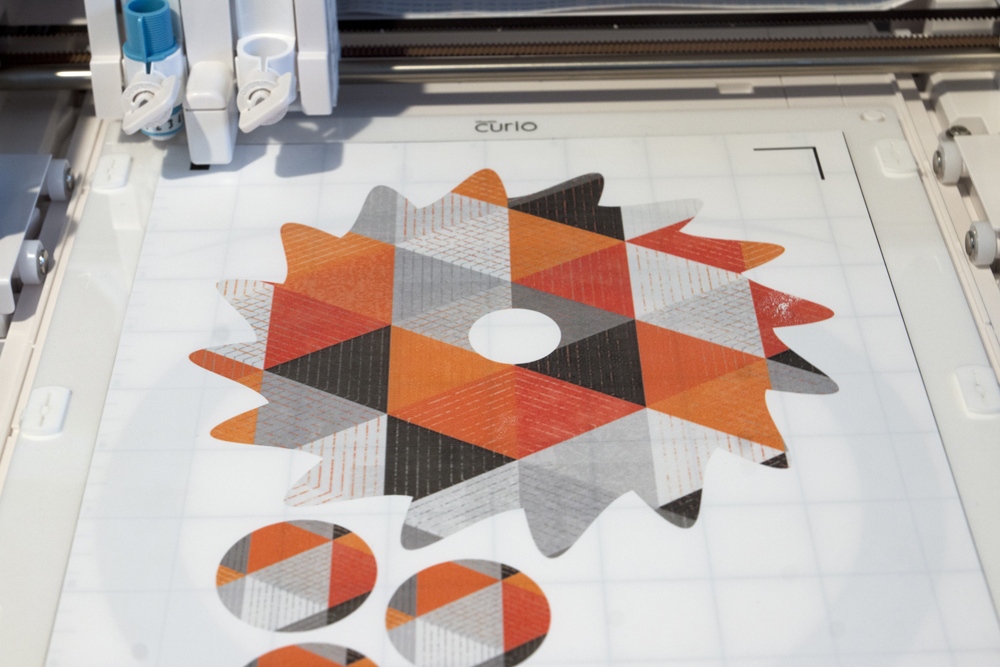
(2) Import your design in the Silhouette software. I chose this gear design for my spinner, but there are many more!
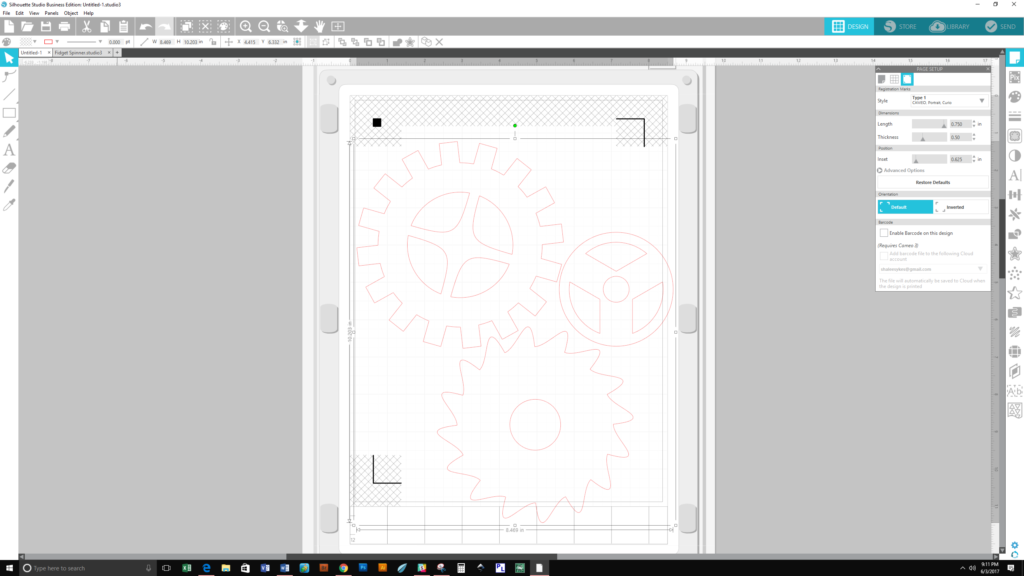
(3) Right click and ungroup the shapes. Delete the extra shapes (there is room for only one spinner per shrink plastic sheet).
(4) Resize the spinner to 7 in. at its widest measurement.
(5) Right click the gear and click “Release Compound Path.” Select the center circle and open the Transform panel. Select “Scale” and specify dimensions to 1 in. x 1 in. Hit “Apply.”
Tip: If using a shape without a center circle for your spinner, simply select the circle shape tool on the left-hand toolbar and draw a circle sized 1 in. x 1 in.
(6) Click and drag your cursor over the gear and circle to select them. Open the Transform panel and align to center the shapes horizontally and vertically.
(7) With both shapes still selected open the Modify panel and select “Subtract.” (This will ensure that the fill pattern does not fill in the center circle.)
(8) Draw six more circles: three at .9 x .9 in. and three at 1.5 in. x 1.5 in.
You will be using only two of each for the assembly of the actual spinner, but I made three of each size of circle in case one did not shrink well.
STEP TWO: FILL WITH PATTERN
There is a great tutorial here by former Design Team member Alissa Lines on filling shapes with patterns (start at Step Three). If you have any questions on Print & Cut at this point there is a great tutorial here by Design Team member Aki Altuna that I love to refer to for detailed step-by-step Print & Cut instructions. Fill the gear and three larger circles with the pattern; the pattern I used was Design ID #48195. If you are going to color your spinner by hand, you can skip this step.
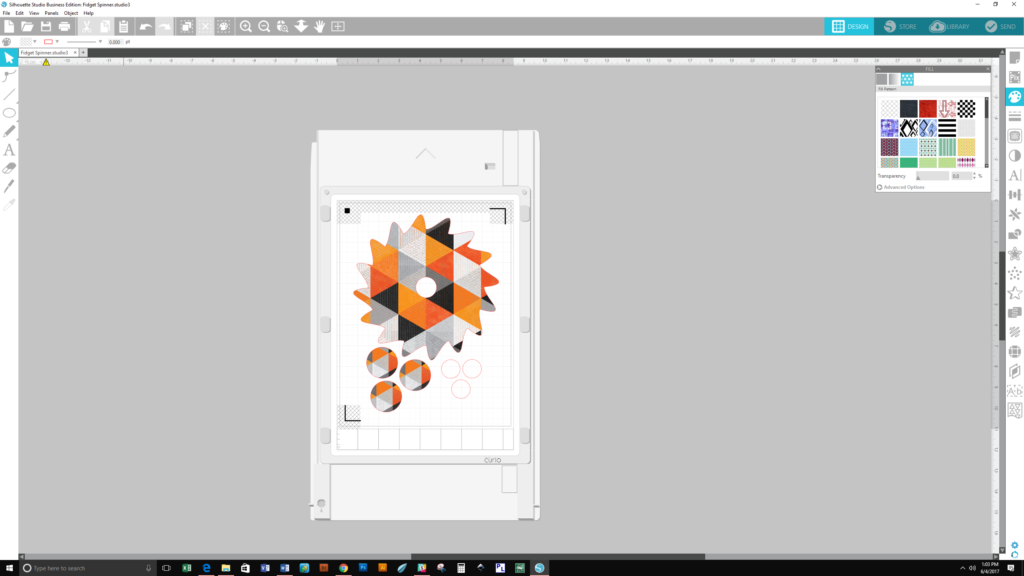
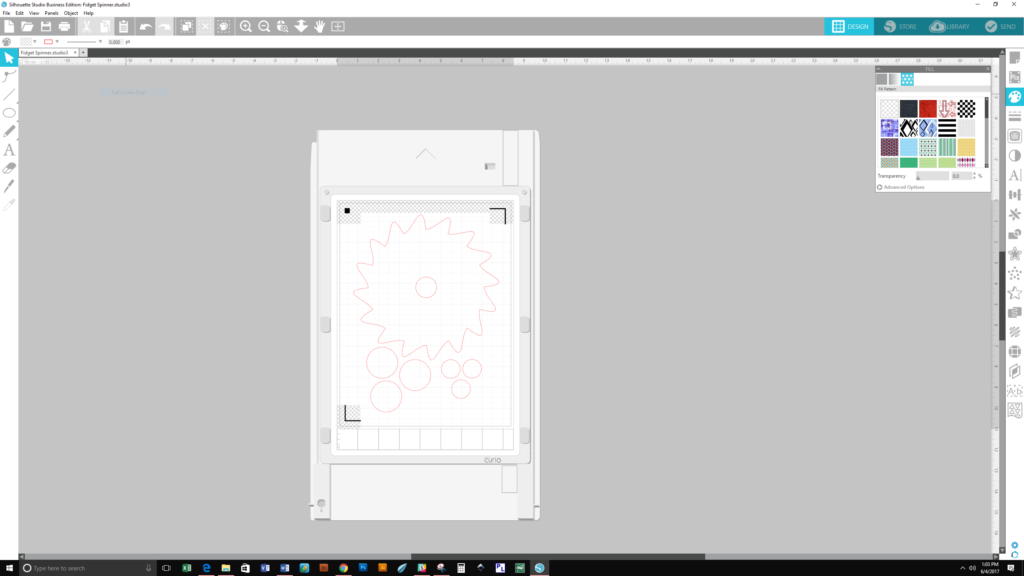
(1) Before printing, make sure that the design is within the boundaries made by the print and cut setting (the upper left square and the two black right angles in the corners).
(2) Print your design on the rough side of the shrink plastic.
Tip: Try not to touch the ink from the printer—it will smudge until you actually bake your plastic.
STEP THREE: CUT
(1) Fit your printed design onto your cut mat, making sure the black printed square is in the upper left-hand corner.
(2) Open the Send panel in the Silhouette software.
(3) Under Material, select “Shrink Plastic.” You may need to change the default settings to
- Blade 5
- Speed 1
- Thickness 33
- Double Pass
(4) Hit “Send.”
(5) Optional: If you are not printing a design on your spinner and choose to cut it out on your Curio™ and then color it by hand instead, this is when you would color the cut plastic with colored pencils or permanent markers.
STEP FOUR: BAKE

(1) Preheat your oven to 325°F.
(2) Place your cut shapes on a piece of parchment paper on a cookie sheet.
(3) Bake until the plastic fully shrinks and then wait an additional thirty seconds. This may take longer than you think it should; be patient!
Tip: Before I even take my pieces out of the oven, I use a metal measuring cup to squish them down to be sure my pieces are fully flat. Immediately after I take the pieces out of the oven, I place heavy drinking glasses on them and wait for them to cool.
STEP FIVE: GLUE
(1) Gather your newly shrunk pieces—one gear, two small circles, and two large circles.
(2) Superglue a small circle to the center of the “nonprinted” side of a large circle. Wait for it to dry.
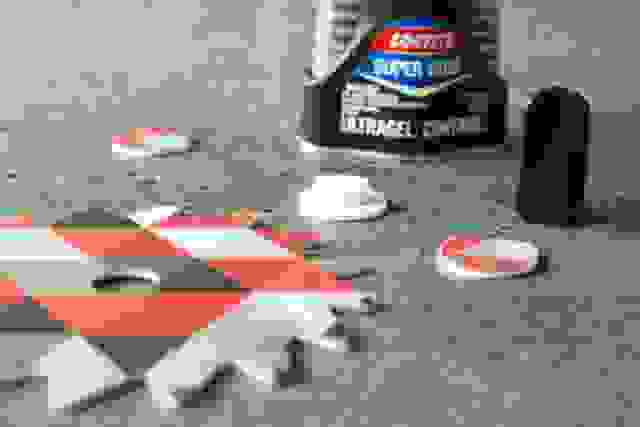
(3) Superglue the second small circle on top of the first small circle, trying as hard as you can to keep them lined up. Wait for it to dry.
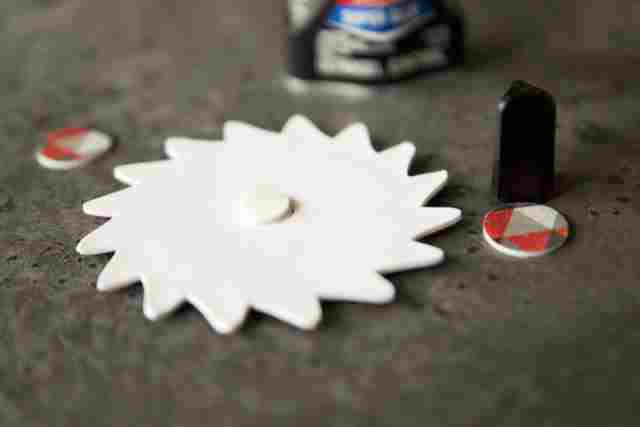
(4) Layer the gear on top so that the small circles go through the hole. Test the spinner to be sure it spins all the way around. (You could sand the plastic if needed, but I’ve never had a problem.)

(5) Superglue the final large circle to the top. Be careful not to get any glue on the gear or spinner. Wait for it to dry.
(6) SPIN!!!
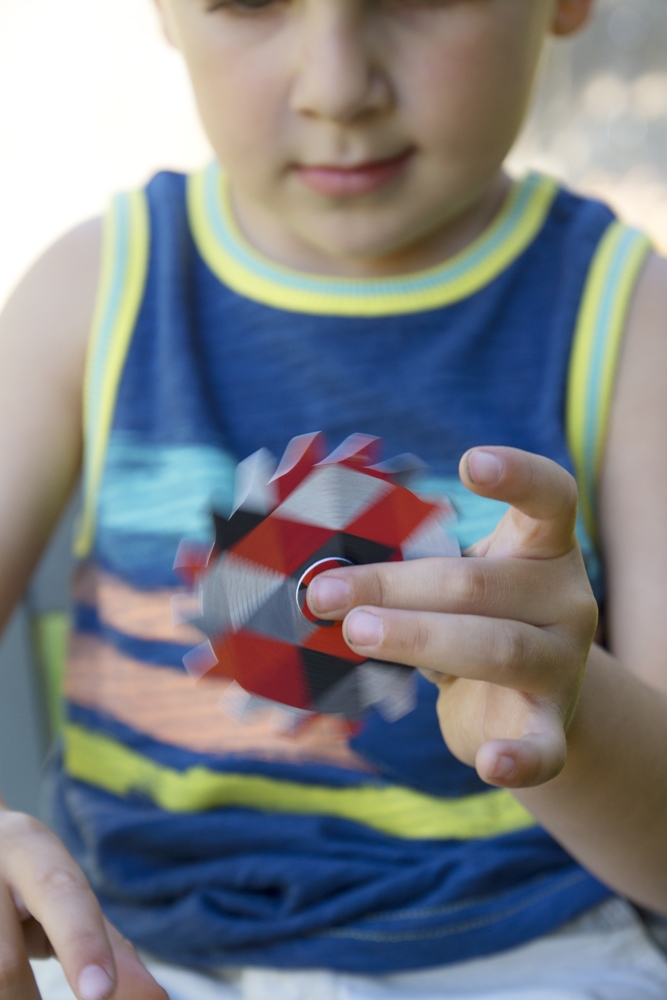
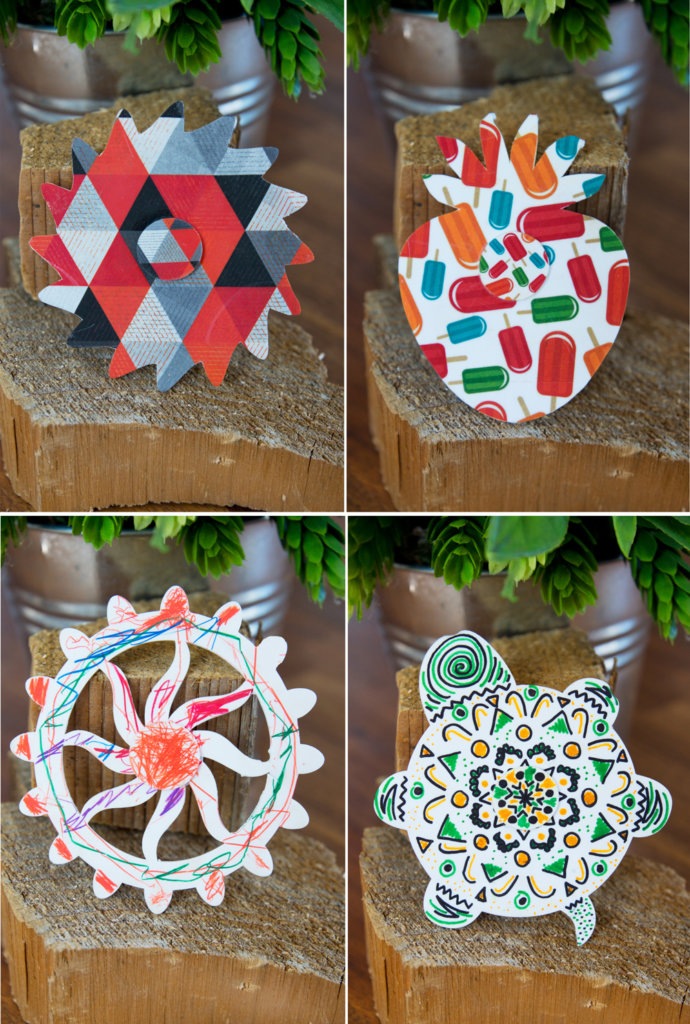
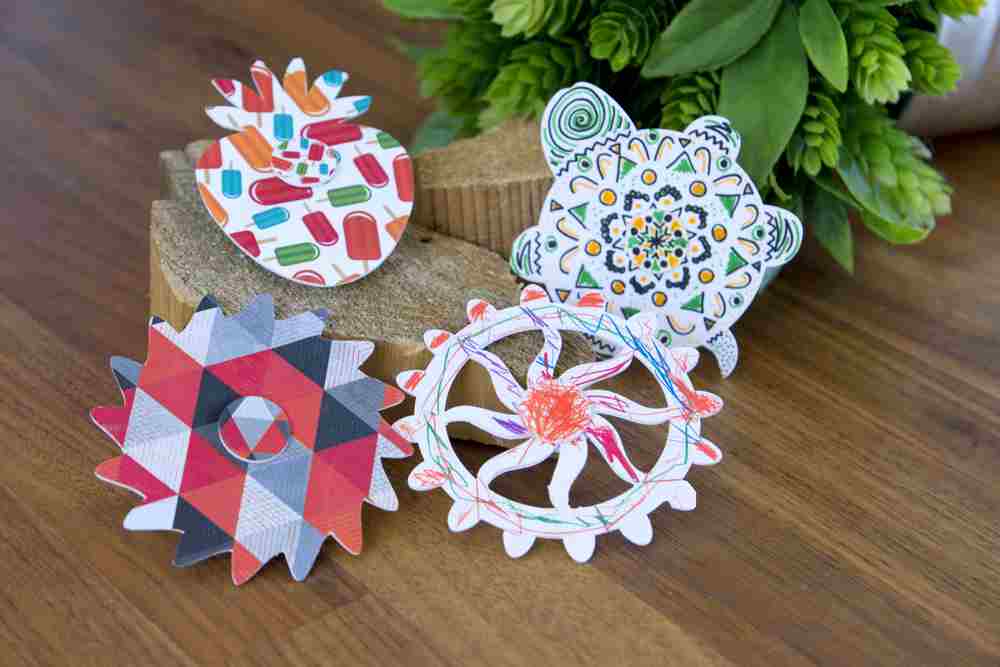
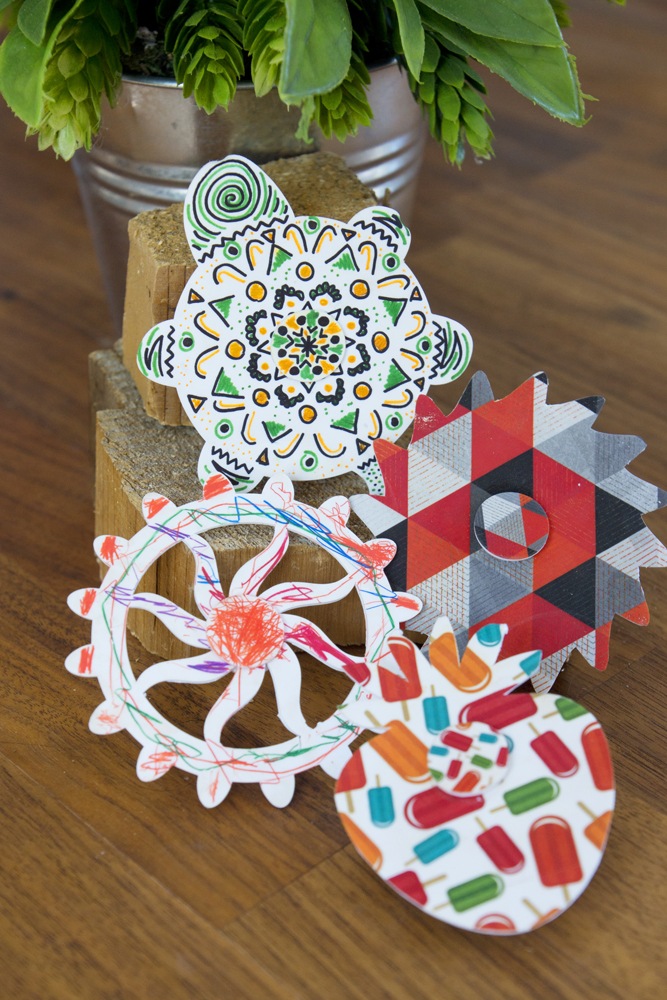
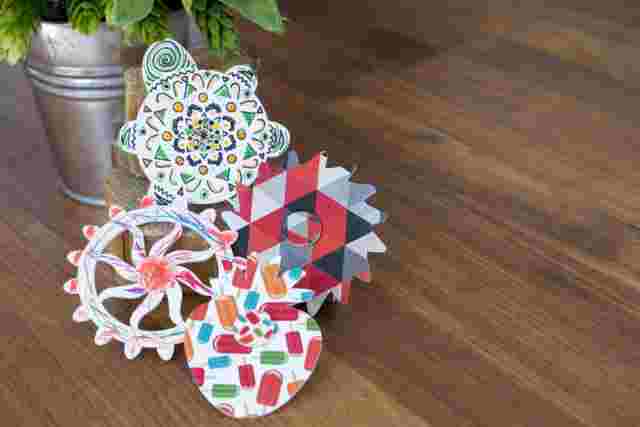
This project can work with almost any design you want. I chose a few other roundish shapes and had great success following the same steps. I even let my son choose a shape and pattern—that’s how I ended up with a delicious-looking ice pop–patterned strawberry!
What fun shapes will you cut and spin?
Lynn
July 14, 2017
Do you know the pattern for the turtle? I would like to get it but I didn’t see where the Design ID was listed for it. Thanks!
Kelly Wayment
July 17, 2017
I don’t know if it’s the same turtle Shalee used, but it looks a lot like the turtle in #63448 (tropical straw sliders).
Shalee Sykes
July 19, 2017
Hi! The turtle I used for the spinner was Design ID #27853. I let my son pick out his favorite turtle from the design store, haha. I just used the simple outline of it and added the hole in the center with the shape tool. Good Luck!