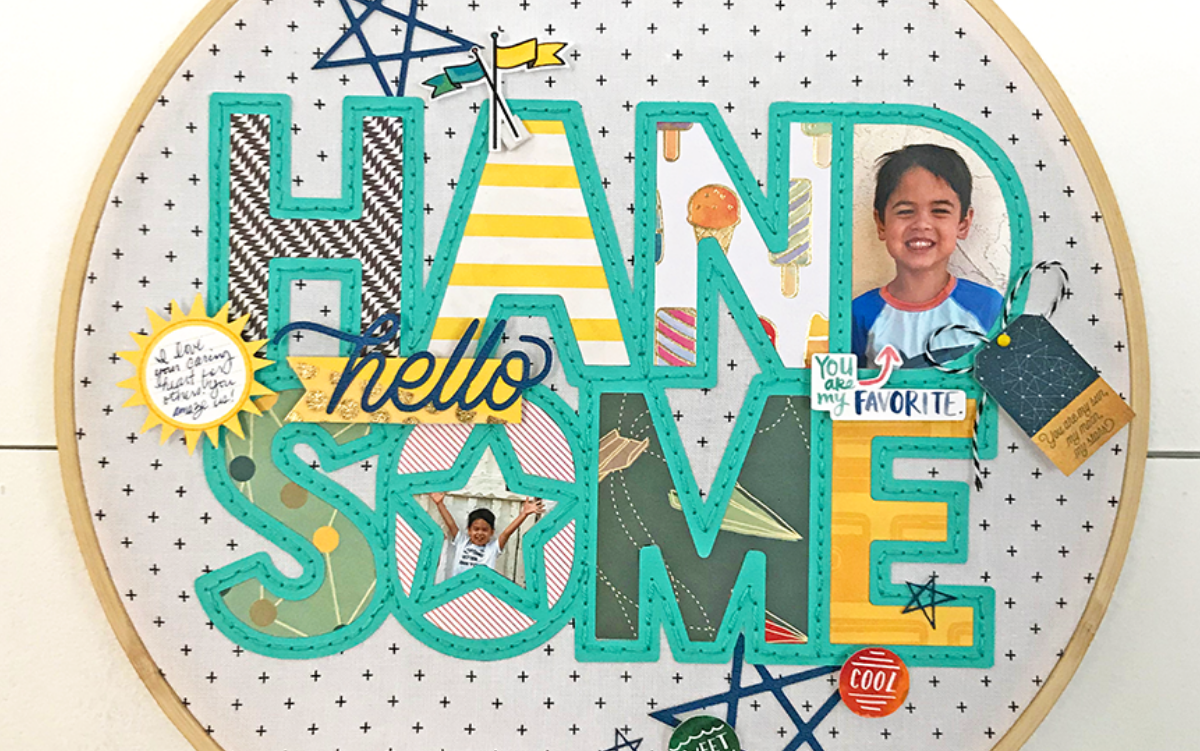
Typically, scrapbooking is done on paper and stored inside an album, but the fun part of creativity is that there are no rules and it’s okay to do things a little differently. For this project, I wanted to showcase a scrapbook design in a way that is displayed on a wall as if it was art because, let’s be real, scrapbooking is really an amazing artform! So, here is a project that not only combines scrapbooking with embroidery but also features a mash-up of various Silhouette Design Store designs.
Supplies Needed:
- Silhouette CAMEO® or Silhouette Portrait®
- Silhouette Studio®
- Silhouette Cutting Blade
- 10-inch Wooden Embroidery Hoop
- Fabric
- Scissors
- Ballpoint Pen
- 12 x 12 inch Colored Cardstock
- DMC Embroidery Floss in same color as the colored cardstock
- Sewing Needle
- 8.5 x 11 inch White Cardstock
- Colored Cardstock
- Bakers Twine
- Gold Dots Washi Tape
- Patterned Scrapbook Papers of your choice
- Scrapbooking Glue
- Foam Dimensional Stickers
- Two Pictures
- Color Inkjet Printer
- Design ID #273597
- Design ID #247600
- Design ID #17222
- Design ID #63695
- Design ID #86234
- Design ID #125312
- Design ID #206573
- Design ID #221421
Step One: Set Up Embroidery Hoop
- Cut a 15-in circle from your fabric. Tip: Iron out any wrinkles from the fabric before proceeding.
- Center the fabric circle over the inner hoop and place outer hoop over the fabric so that the fabric is sandwiched between the two hoops.
- As you tighten the embroidery hoop screw, pull fabric taut as necessary so that the main working space (inside the embroidery hoop) is flat and smooth.
Step Two: Create the Base Design
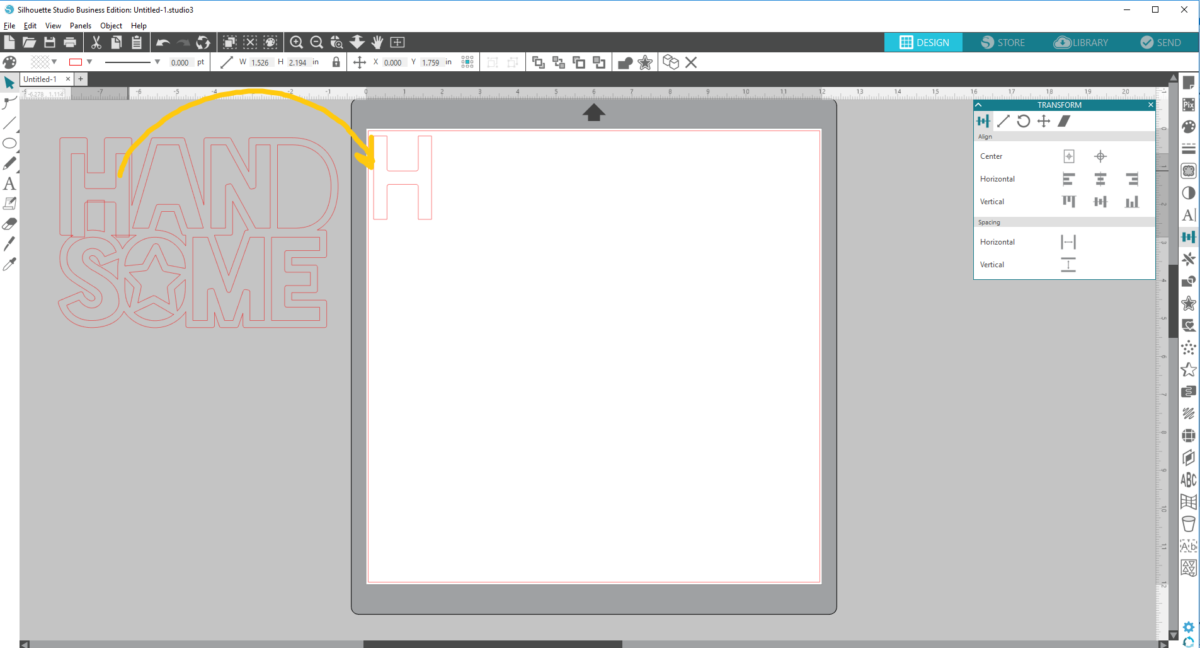
- Set up a 12 x 12 in. page in Silhouette Studio® and open Design ID #273597.
- Before resizing the design, lock the aspect ratio. Resize the design with a 5-in height.
- Set your colored cardstock on your cutting mat and send to your Silhouette with the proper cut settings. This is the outlined base piece.
- Now, we will cut out the internal pieces on various patterned scrapbook paper. This is such a great way to use up paper scraps!
- Right-click and choose Release Compound Path.
- Move the entire design off the page.
- Starting with H, select the internal piece and send to the Silhouette. Cut it out of the patterned scrapbook paper of your choice.
- Continue the previous step on letters A, N, S, O (the tiny pieces outside of the star), M, and E.
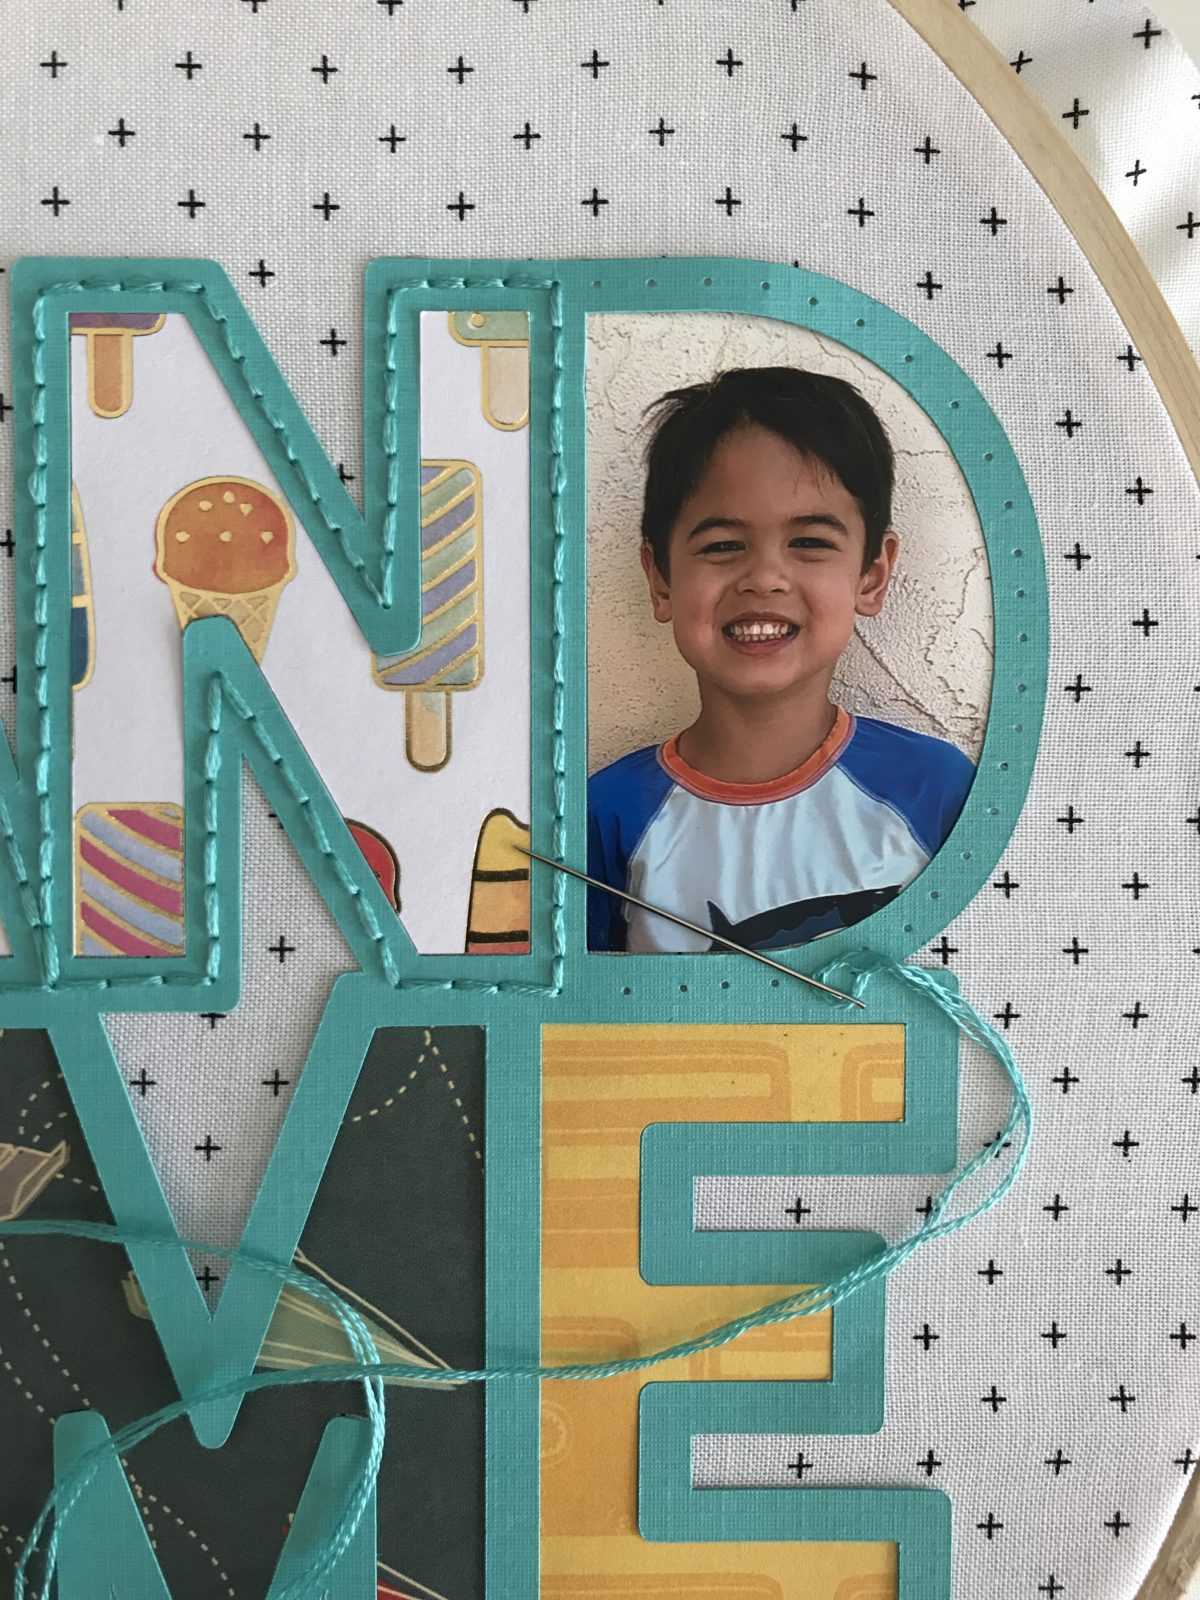
- For letters D and O (inside the star), use scrap pieces of cardstock because we will use these pieces as a traceable stencil.
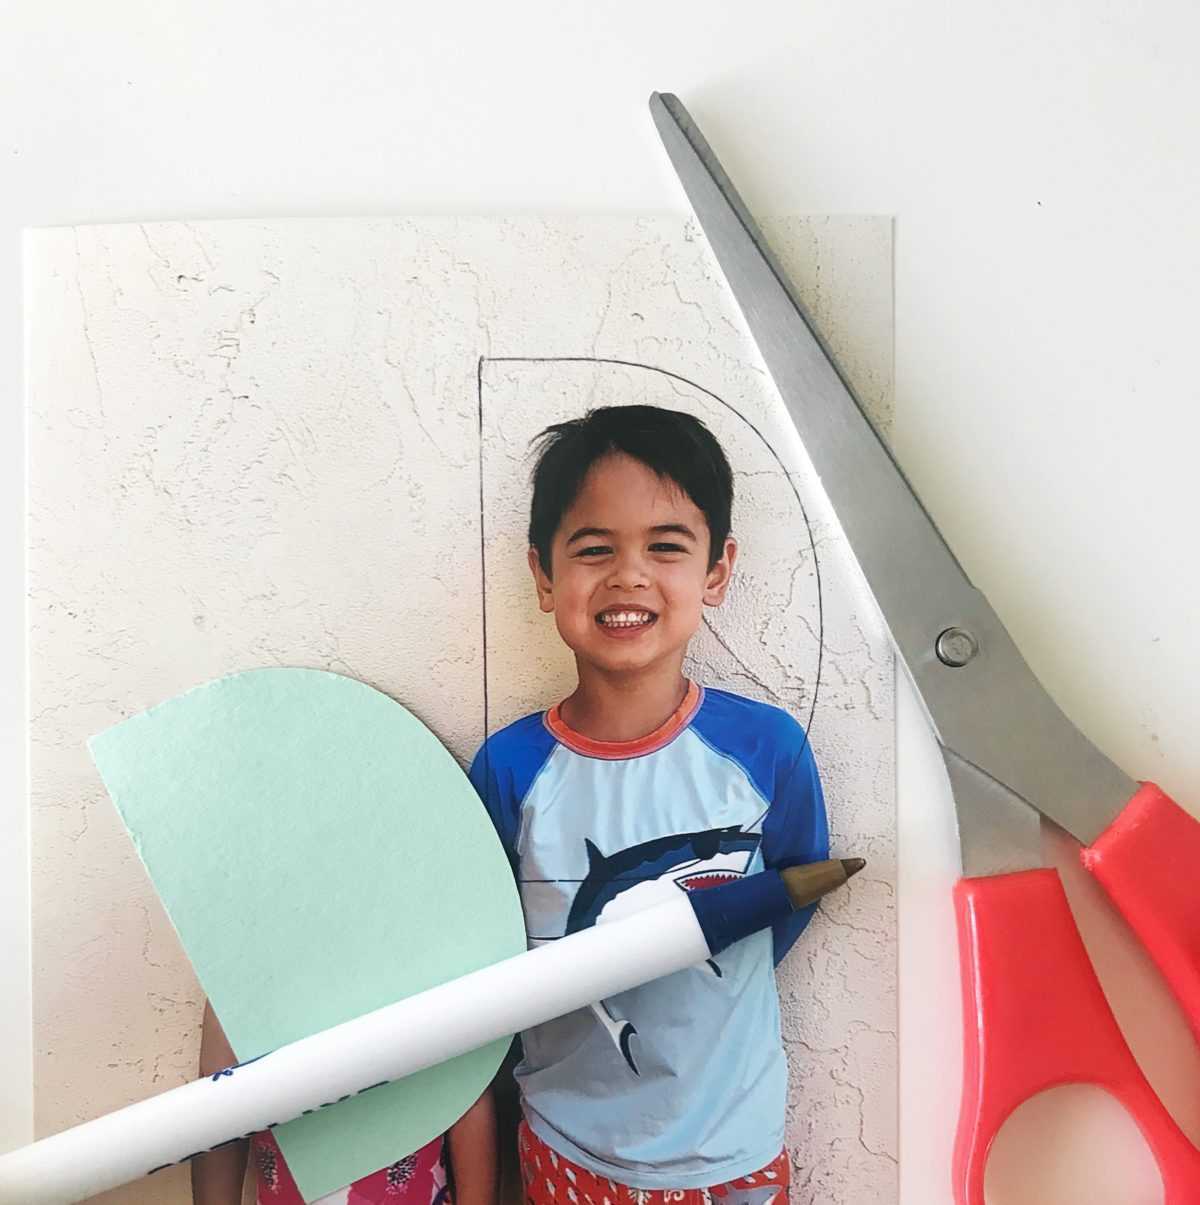
- Place cutout D and O over your photos and use a ballpoint pen to lightly trace around cutouts D and O.
- Use scissors to cut along the marked lines.
- Set your outlined base piece centered on the fabric hoop. Insert the internal pieces to make sure they fit nicely within the outlined base piece.
- Use scrapbooking glue to secure the outlined base and internal pieces to the fabric. Tip: After you apply the glue, I suggest turning the hoop over (face down) and pressing down on the fabric to ensure the base pieces are glued to fabric.
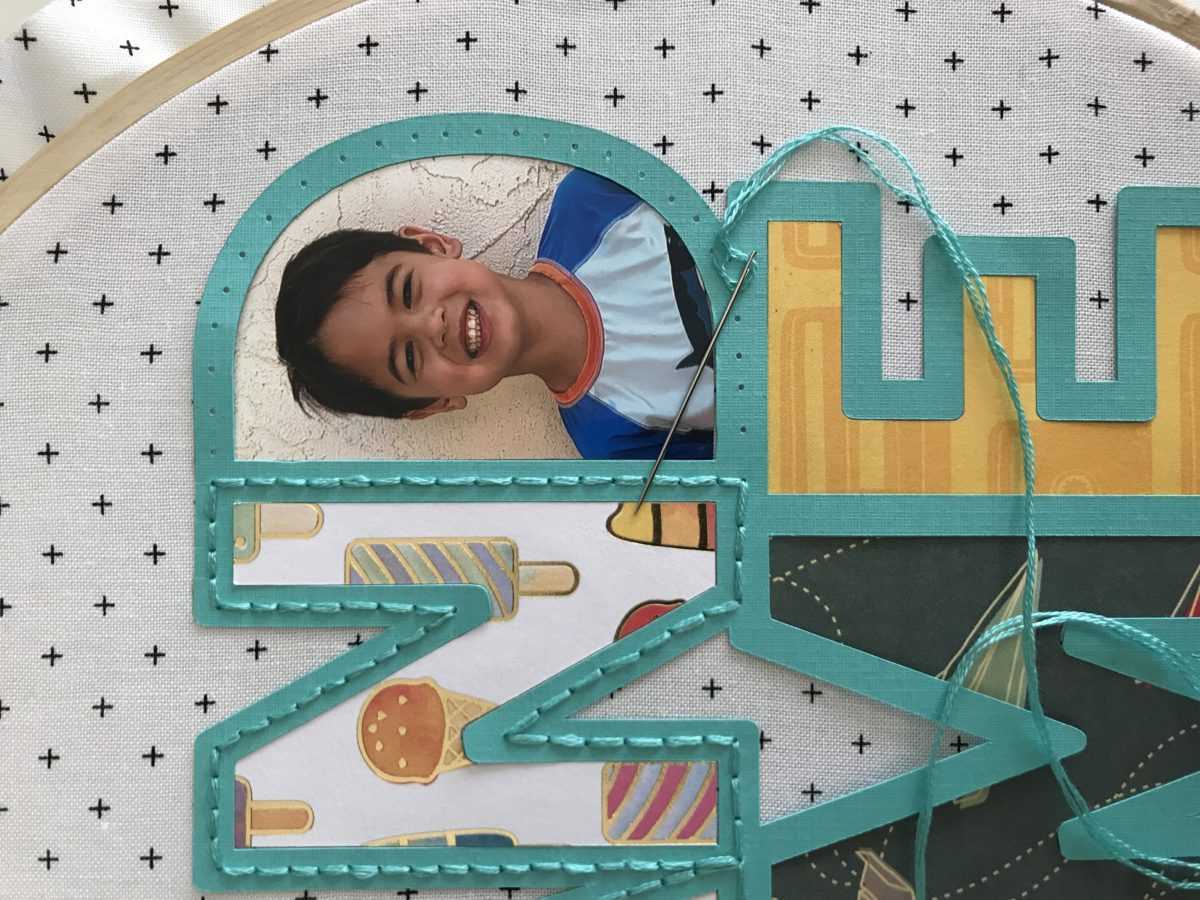
- Lastly, backstitch along the outlined base piece using a sewing needle and DMC embroidery floss. Tip: I recommend separating the floss and using two strands at a time. I also highly recommend prepunching holes with your sewing needle before backstitching.
Step Three: Add Scrapbooking Embellishments
- Open the Print & Cut designs (Design IDs #221421, #206573, #125312, #86234, and #63695) on a blank 8.5 x 11 in. page size. Resize as you see fit for your project.
- Before printing, ensure that registration marks are turned on and visible. Make sure your Print & Cut designs are not inside the cross-hatched registration lines.
- Send to your color inkjet printer.
- Then load the printed sheet onto your cutting mat and send to Silhouette with proper cut settings. Set aside these Print & Cut pieces until step 9.
- Next, cut out Design IDs #247600 and #17222 using the colored cardstock of your choice.
- Use scissors on colored cardstock to make simple ribbon piece cutout (as shown behind the “hello” cutout).
- Optional: Add Gold Dots washi tape at a diagonal for visual interest.
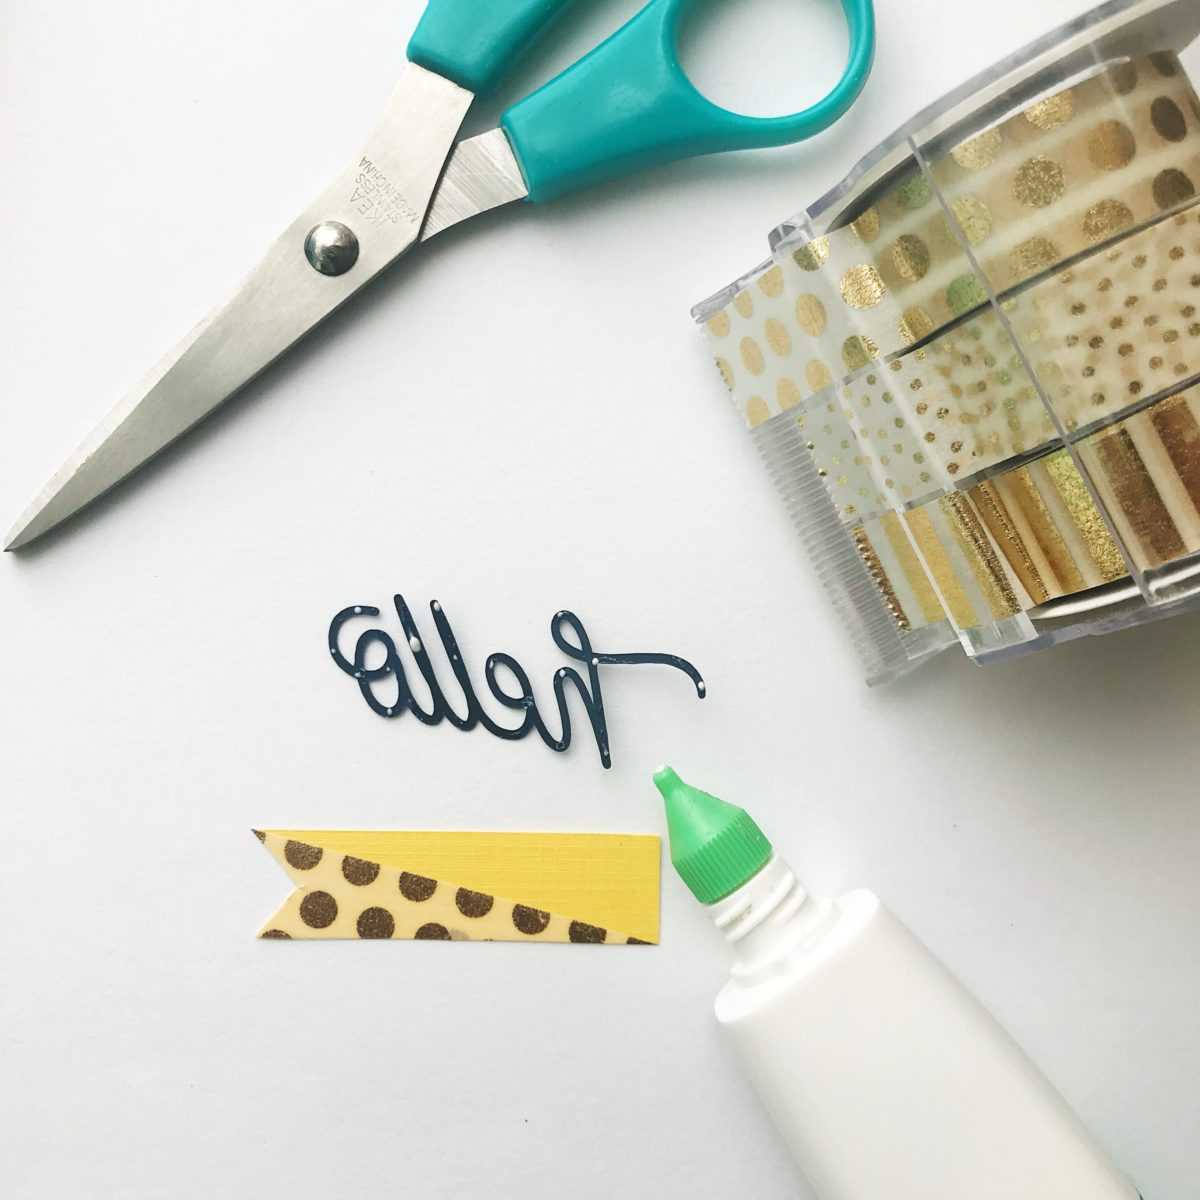
- Dab scrapbooking glue to adhere “hello” cutout to the ribbon cutout as well as to glue the cutout stars and bakers twine to the base piece and/or fabric.
- For the Print & Cut pieces, use a small foam dimensional sticker behind to create a dimensional look.
Step Four: Finalize Scrapbooking Embroidery Hoop
- Tug the fabric as necessary to make sure finished scrapbook design is centered.
- Use a running stitch to cinch the excess fabric behind the hoop.

And you’re done! Now hang up your newest masterpiece so everyone can see! Just like how a museum periodically swaps in new artwork, you can do the same at home. Simply keep the embroidery hoop and drop in a new design and store the old design in a clear protective sleeve in an album. Have fun with this craft mash-up project!