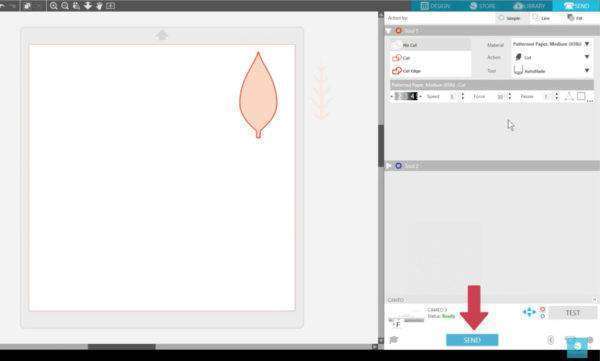
When your machine is turned on and ready with your media loaded, go to the Send panel. This page gives you a cut preview so you can see in bold lines where your machine intends to cut.

You can change selected lines to No Cut, Cut, or Cut Edge. The Cut Edge option will essentially automatically weld overlapping shapes, and Cut will just cut all the lines that are there, whether they are overlapped or not. We won’t use overlapped shapes here, so the simple Cut choice will work for this design.

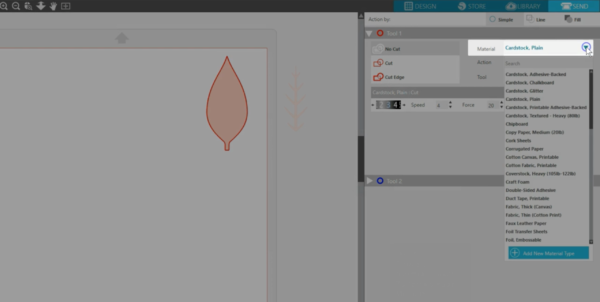
Choose a material. For this, we are using “Patterned Paper, Medium.”
The Action defaults to Cut, which is what we want to do. Depending on your machine and design, you also have choices like Score, Sketch, and Stipple.
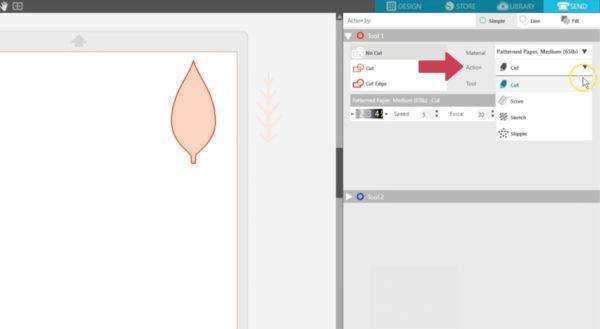
Next is your Tool choice. This will also depend on your connected machine. We are using a CAMEO 3 and we want to use the AutoBlade, which adjusts automatically based on the settings selected on this page.

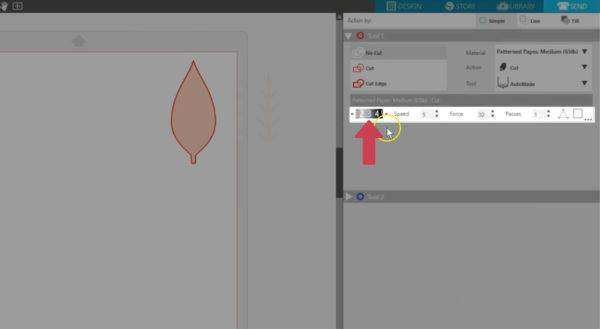
If we were using a Ratchet Blade, we would need to physically adjust the blade depth to the number setting shown here. If you want to adjust the cut settings, you can change them here. But these patterned paper settings are fine as-is, so we are ready to cut.
The paper is on the mat, the mat is loaded into the Silhouette machine, and the blade is inserted and locked into place in the blade carriage. Now we can click Send, and your machine will begin the cut job.
That’s all there is to it! You can cut so many things with these simple steps: Open or create a design, load your media, and click Send to cut it.