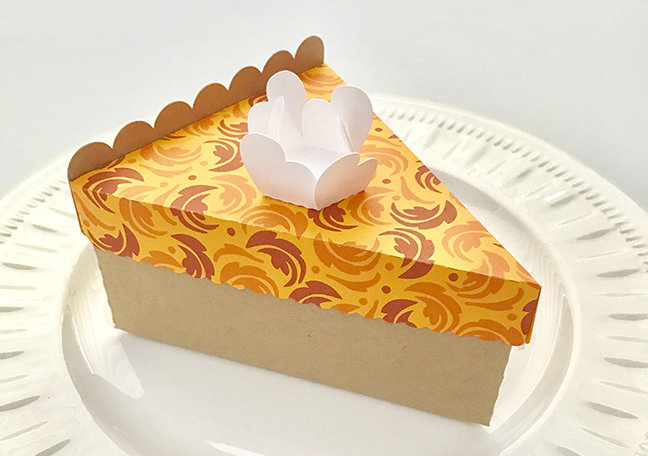
Who’s ready for pumpkin pie? I dream of my mom’s pumpkin chiffon pie from Halloween until Thanksgiving. It’s that good. I wouldn’t send you home with turkey (that’s sacred), but I’d graciously send you on your way with pie leftovers.
I found this delightful pumpkin pie box design in the Silhouette Design Store. Don’t you just love when the design store exceeds your expectations? I was searching for a wedge triangular box and—there it was! An exact pie replica paper design.
Supplies Needed:
- Silhouette CAMEO® (or Portrait or Curio)
- Cardstock (brown)
- Printer
- Silhouette Double-Sided Adhesive (or glue)
- Silhouette Printable Adhesive Kraft Paper
- Pumpkin Pie Slice Box (ID #156622)
- Fall Leaves Pattern (ID #21208)
Step One: Open Design In Silhouette Studio®
- Open the Pumpkin Pie Slice Box design in Silhouette Studio®
- Alter design as desired
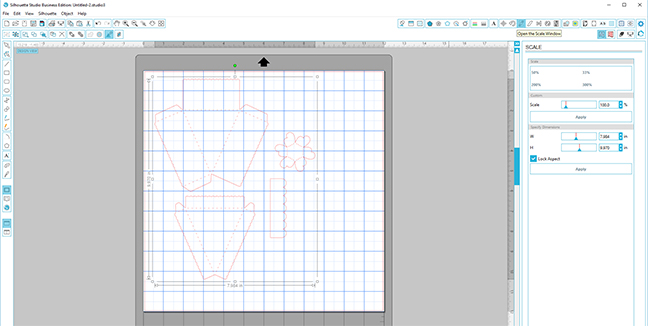
The original design was sized to fit on the standard 12 in. x 12 in. cutting mat, so we’ll have to increase the size to fit a wedge of that delicious pie.
To increase the size of the design:
- Open the Scale panel
- Increase height to 14.8 in.
This will make the longest side of the box bottom over 5 inches. It will easily accommodate a slice of a 9 inch pie and wax paper if you choose to line it.
Step Two: Separate Design Pieces
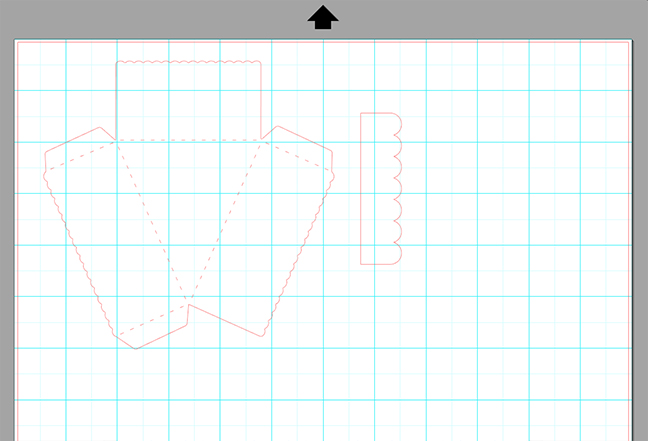
You’ll be cutting each part of the pie box out of different types of paper, so you’ll need to ungroup the design.
To ungroup your design:
- Right click on your design (CMND + Click on Mac®)
- Select “Ungroup” from the dropdown menu
Tip: You can also ungroup shapes using the shortcut CTRL + Shift + G (CMND + Shift + G on Mac®)
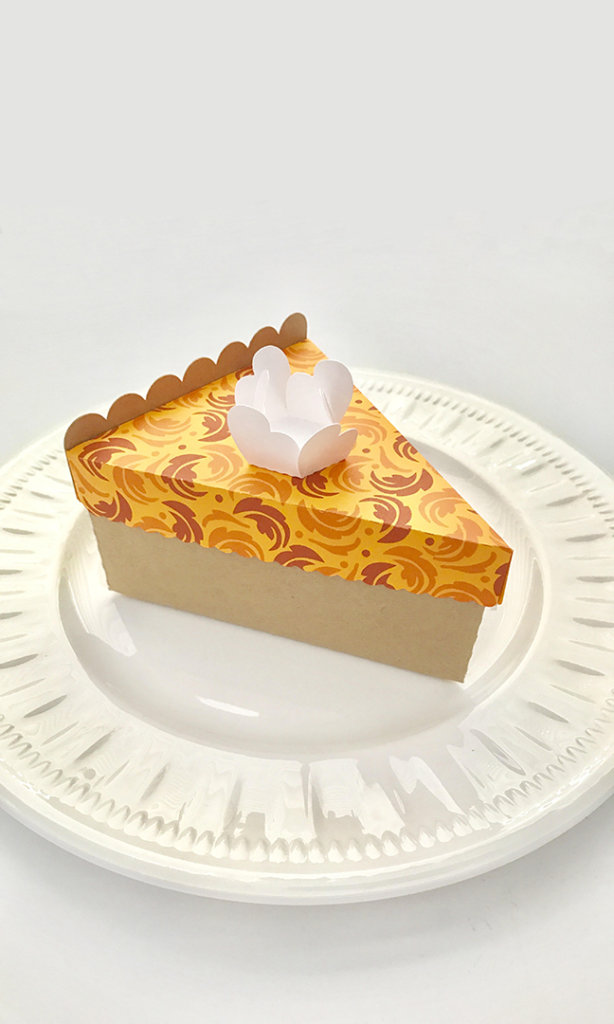
I cut the bottom of the box and the scalloped edge in brown cardstock. The remaining wedge design is the pumpkin part of the pie, so I used a pattern from the Design Store to spice it up a bit.
Step Four: Print Your Pattern
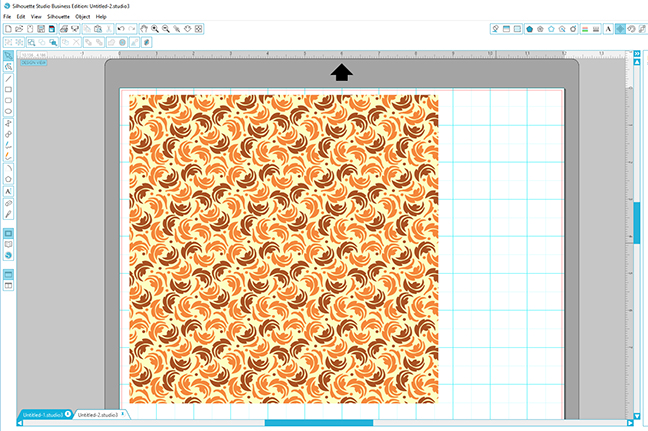
Did you know that you can buy backgrounds and patterns from the Silhouette Design Store? I love this orange pattern.
To use a printable pattern:
- Set your page size in Silhouette Studio® to the same paper size in your printer
- Double-click on the pattern design in your library to open it
- Arrange the pattern on your page the way you would like to to print
- When you’re satisfied with the pattern’s layout, print the out on white or orange cardstock
With the Silhouette Design Store’s printable patterns at your fingertips, you can make any piece of plain cardstock a show stopper.
Step Five: Cut And Assemble To-Go Box
Once you have your patterned cardstock, you’re ready to cut out your design!
To cut out your design:
- Move your design back into the live area in Silhouette Studio®
TIP: If you’re having a hard time seeing the cutlines on top of the pattern, try thickening your cut lines using the Line Type tool.
- In the Cut Settings panel, set your cut settings to your chosen media (cardstock, kraft paper, etc.)
To help make sure you cut all the way through your media, make a test cut. (For help with cut settings and the test cut, see this post here.)
- Click “Send to Silhouette”
Assembling the to-go box is as simple as following the lines. If you’ve used regular cardstock and kraft paper, you’ll need glue to get the sides to stick together. But because I’m all about no-mess, I opted to cut the Silhouette Double-Sided Adhesive.
Use Different Printable Patterns To Create All Of Your Favorite Pies
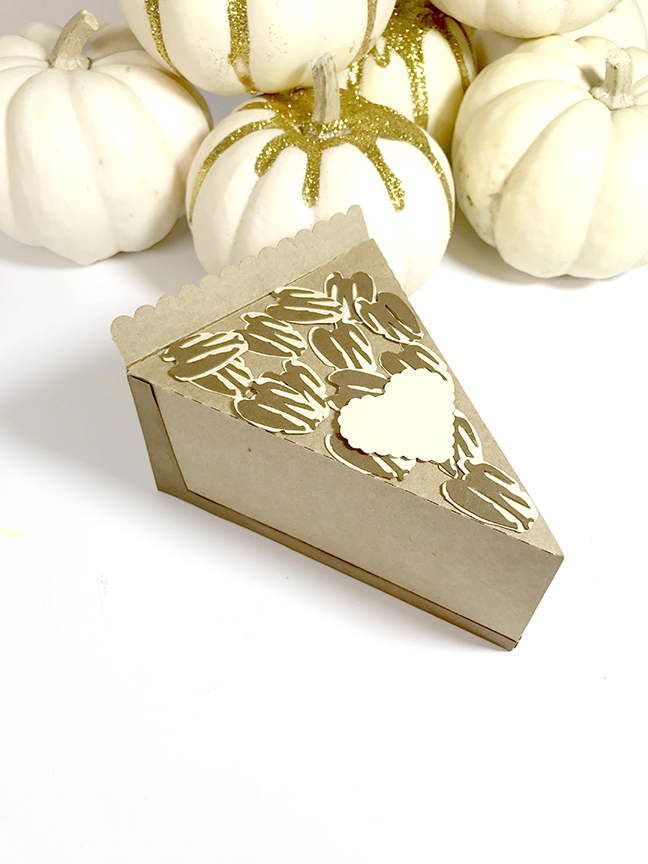
I’ve got pecan pie lovers in the house, so I made this delightful pecan pie box too. My guests can take all the pecan pie home. It looks gorgeous, but I’m not a fan!