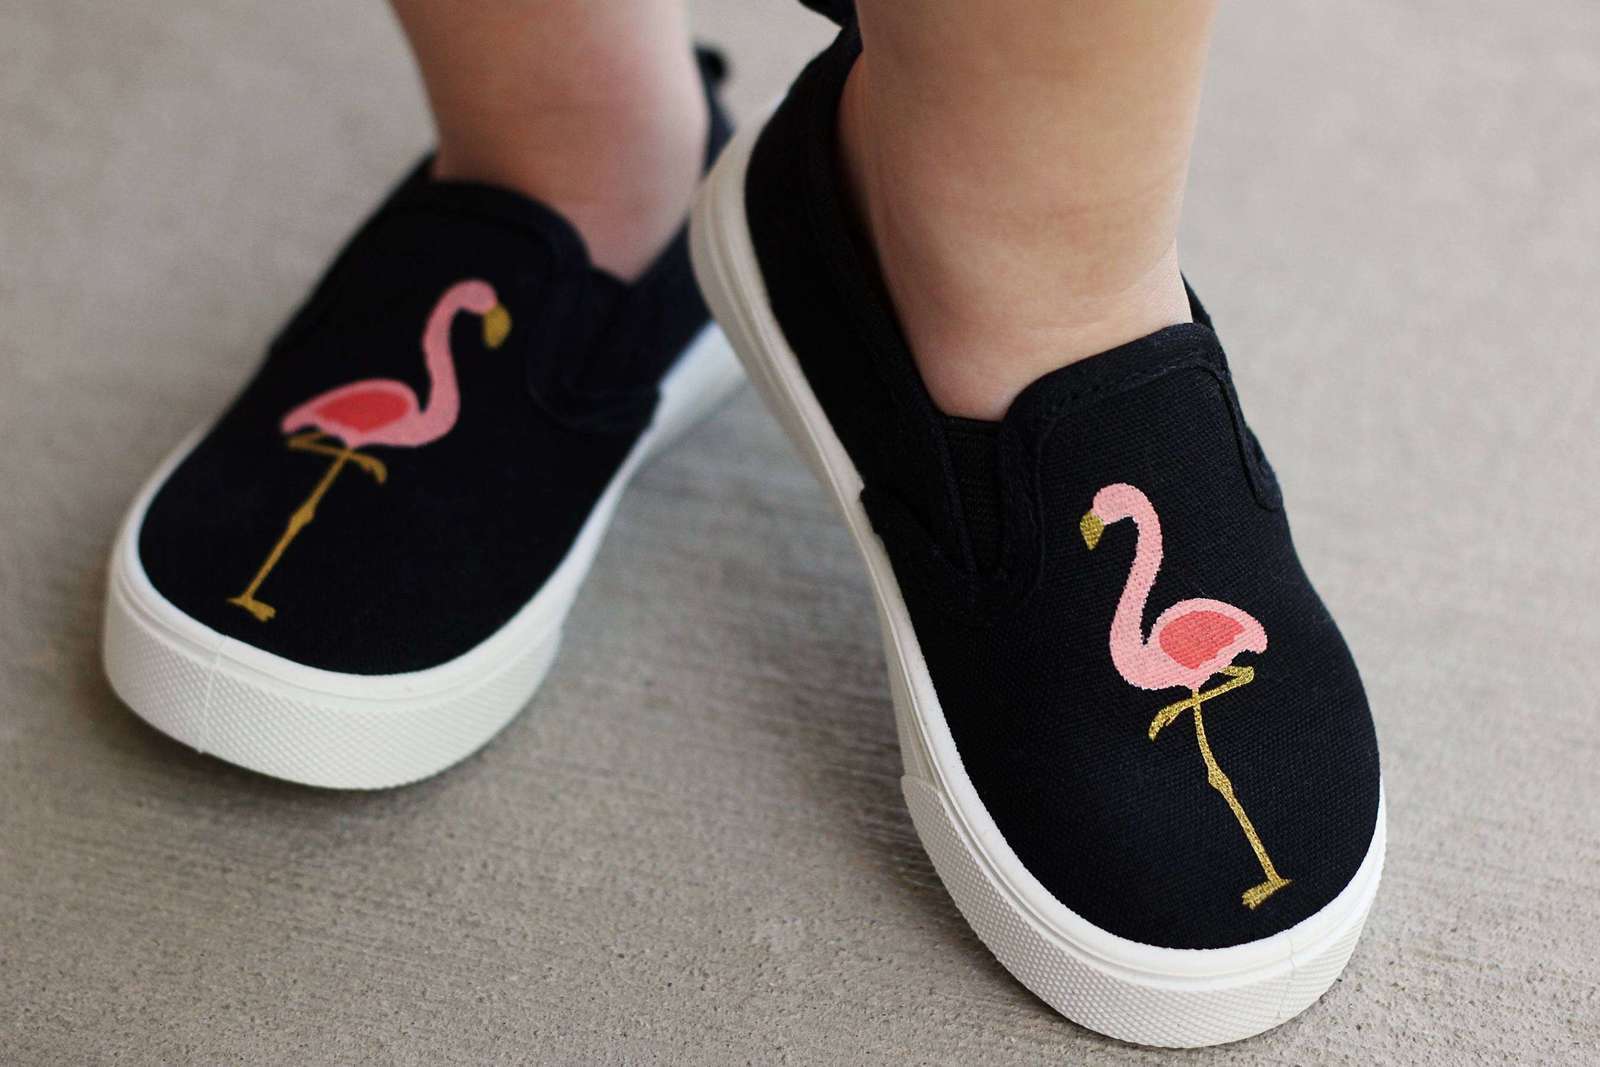
Have you ever used fabric ink to customize your apparel? How about shoes? Kelly here to share a tutorial for adding these cute multicolored flamingos to a pair of shoes with stencil vinyl and fabric ink.
Supplies Needed:
- Silhouette CAMEO®, Portrait®, or Curio™
- Silhouette Studio®
- Stencil vinyl
- Fabric ink (white, gold, coral)
- Stipple paint brush or other paint applicator
- Hook tool
- Canvas shoes
- Design ID #207548
Step One: Set Up Design
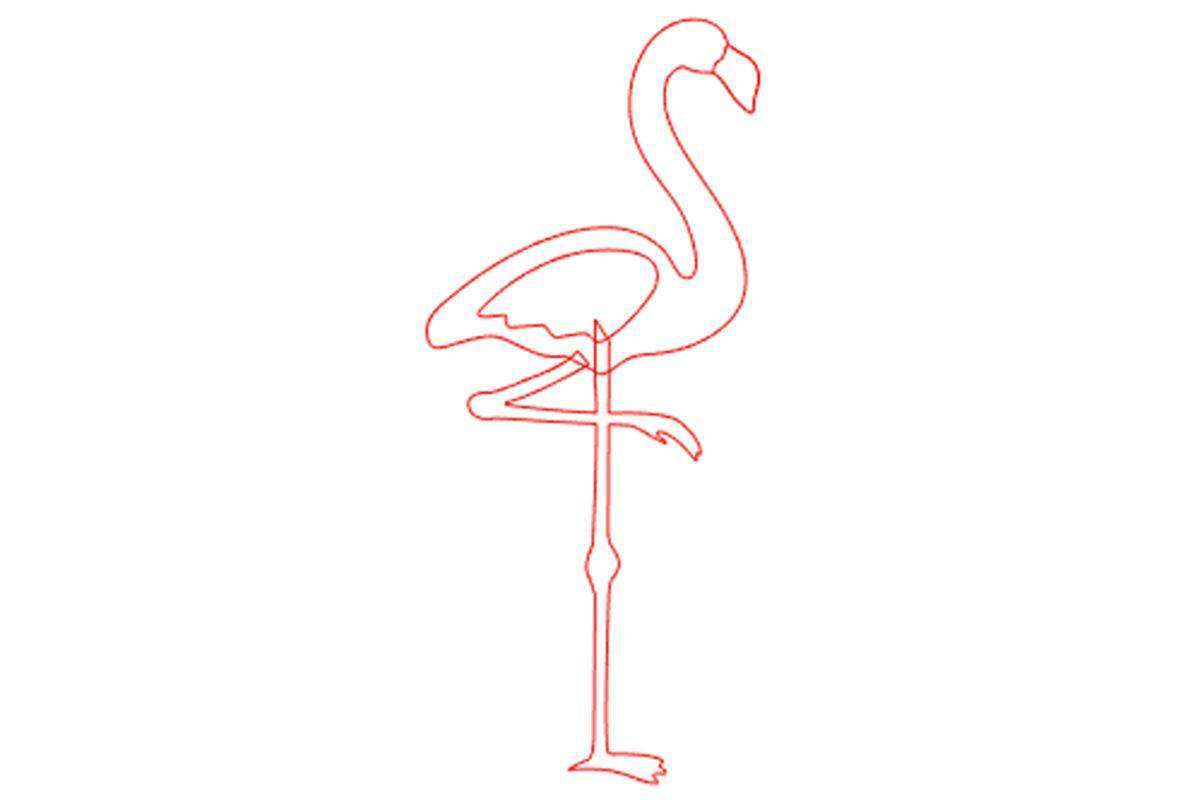
- Open the Stand Tall Flamingo design in Silhouette Studio®.
- Resize it to fit the surface to which you’ll apply it. My flamingo is about 2.6 inches tall for these small children’s shoes.
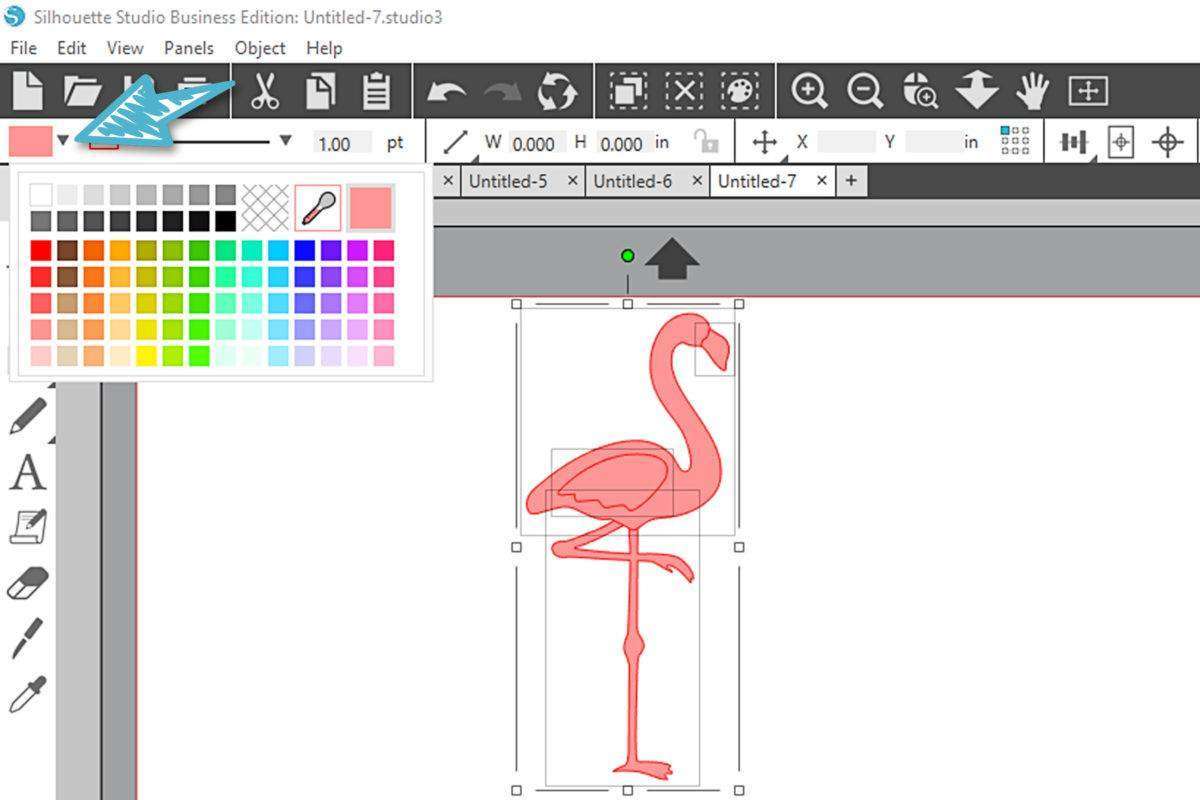
- Ungroup the flamingo.
- Arrange the pieces. Some will overlap, so we’ll do some Modify magic to alter them for stencil use. You can delete the phrase; we won’t be using it.
- Add color to the design with a fill color to make sure the right parts stay visible for layering purposes. One color for all the pieces is fine.
- If necessary, use the Arrange functions to move pieces forward or backward in order to have the correct layers showing (i.e., the leg tops are hidden by the body).

- Zoom in closely to make sure everything is aligned exactly the way you want, using the arrow keys on your keyboard to nudge selected pieces by tiny increments.
- Make a copy of the entire bird (optional), just in case you don’t like the results of the modifications we’re about to do. Or you can use the Undo button later.
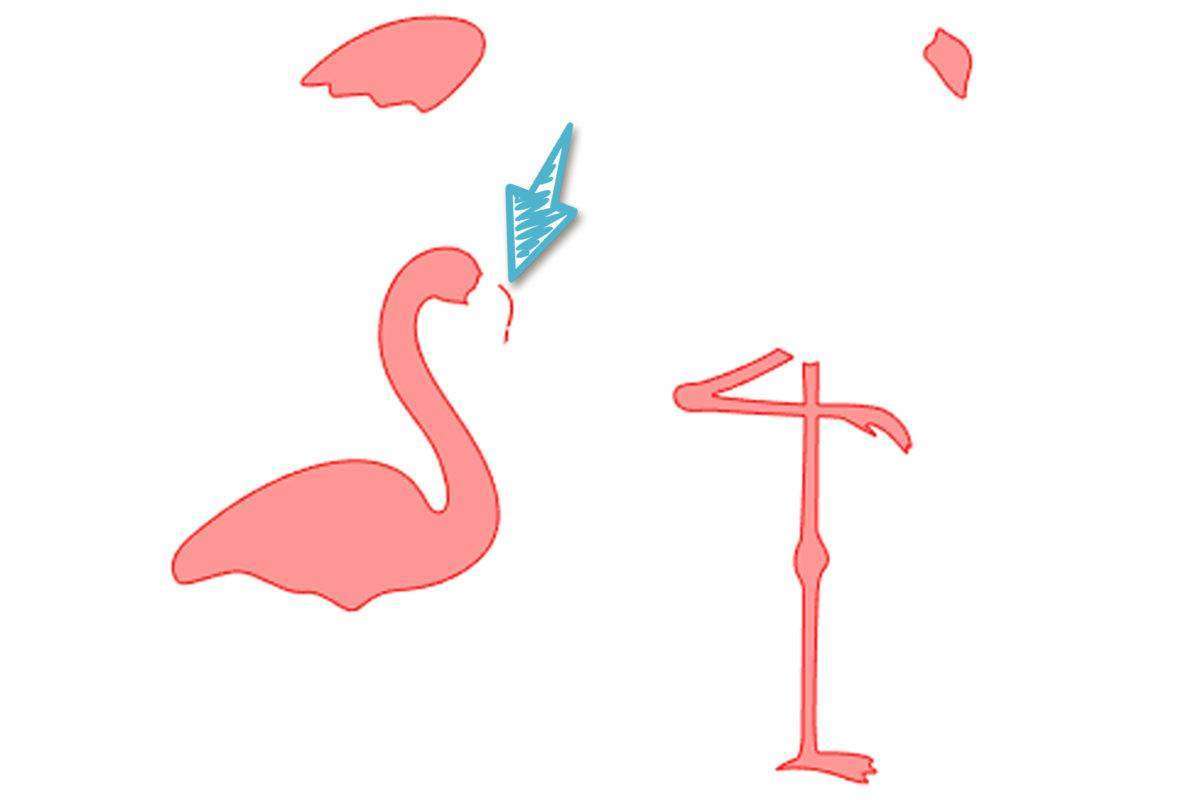
- Move the wing off to the side so it doesn’t affect the next step.
- Open the Modify panel.
- Select the legs (which should be slightly covered by the body), the body, and the beak (which should align with and cover the beak area of the body).
- With those three pieces selected, choose Subtract All.

This removes areas of shapes covered by other shapes. You probably won’t see a difference until you start moving the pieces around.
- Move the bird body away from the legs and beak. Do not move the legs or beak independently because we want to keep those two parts in exactly the same place in relation to each other.
You may have some stray artifacts from the Subtract All function, like you see here with this extra line where the beak was.
- To delete any stray pieces like this, simply Ungroup and then select and delete the pieces you don’t want. Tip: If Ungroup doesn’t work to separate pieces, try Release Compound Path (right click, or find it in the Modify panel).
- Group the legs and beak together by selecting them both and clicking Group (or Ctrl/Cmd G).
Step Two: Cut Stencils
Now that the design is set up, let’s turn it into several stencils.
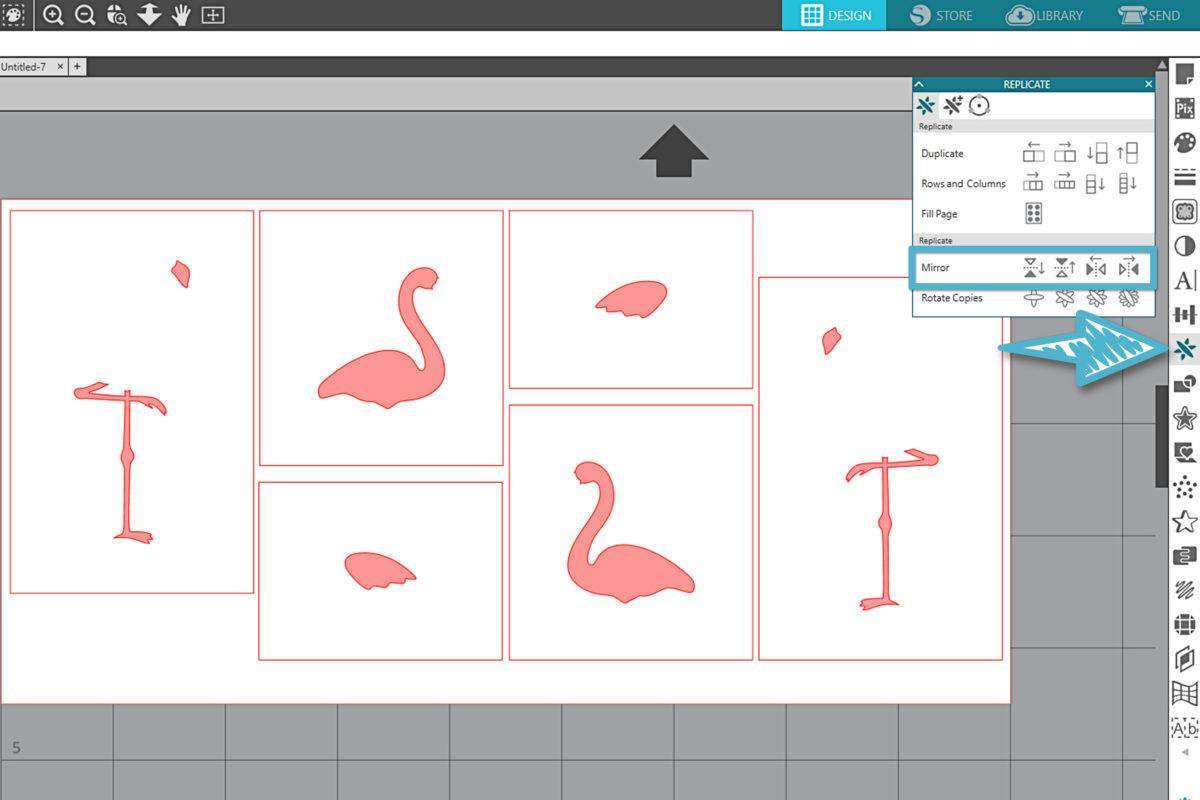
- Spread the pieces apart on your design page, and draw rectangles around each of the three sections: the wing, the body, and the beak/legs.
Leave a generous border so you don’t have to be extremely careful when applying paint. The border you leave is the mask area for the fabric ink.

- Center each flamingo piece with its border and Group it.
- Make a mirror copy of the sections by selecting them all, and then open the Replicate panel and choose Mirror Right (or Mirror Left).
- Rearrange them all to fit on your page.
Note: Make sure to set up your Page Size in the Page Setup panel to match the piece of stencil vinyl you’re using. Also verify you’ve got the correct cutting mat selected (or None).
- Go to the Send panel and set your material to “Vinyl, Matte.” If necessary, change the action to Cut and the tool to AutoBlade or Ratchet.
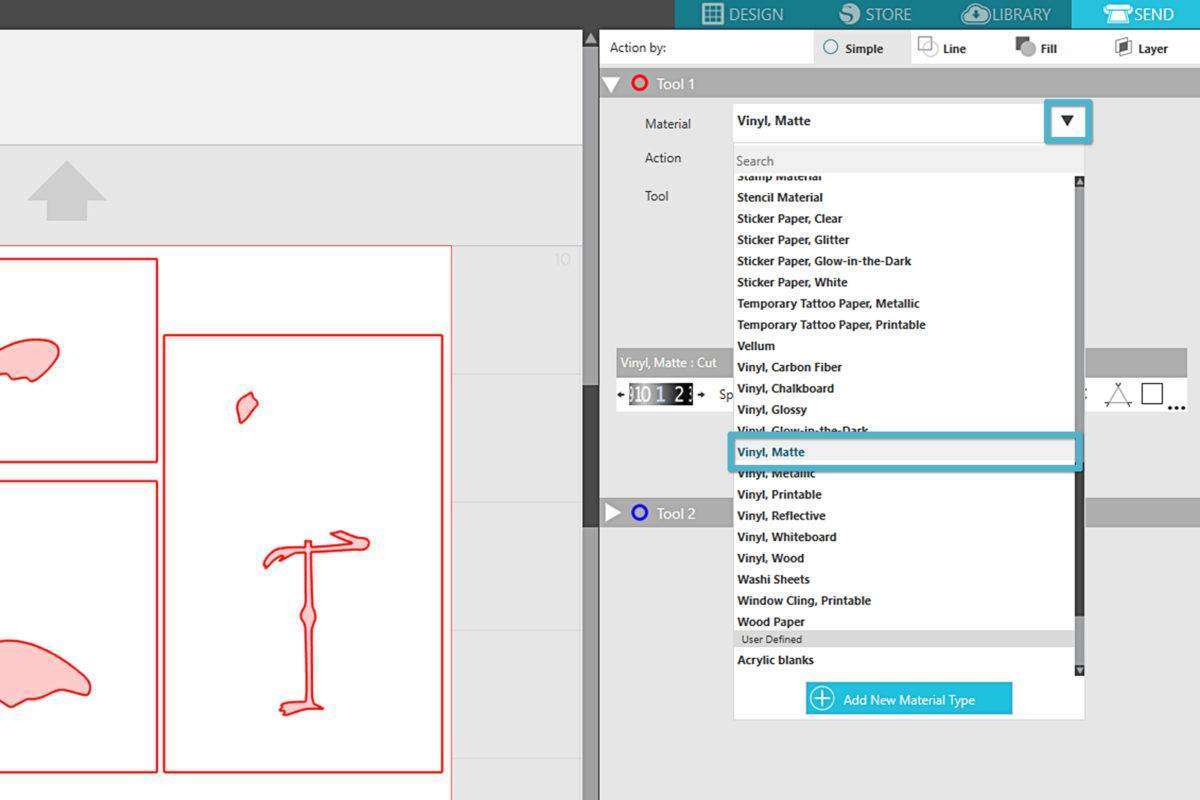
- Load your stencil vinyl into your Silhouette cutter and click Send when ready. Remove the stencil vinyl when it has finished cutting.
Step Three: Apply Fabric Ink
Now it’s time to apply the ink.
- Use a hook tool to peel away and discard the inner flamingo shapes (body, wing, legs/beak) and the excess stencil vinyl around the outside. You only need to keep the rectangle masks.
- Stuff the shoes to make them stiff so they don’t flex while applying the stencils or ink.
- Place the legs/beak mask in place on the shoes so the stencil vinyl immediately surrounding the flamingo design is pressed securely against the surface without warping the design itself.
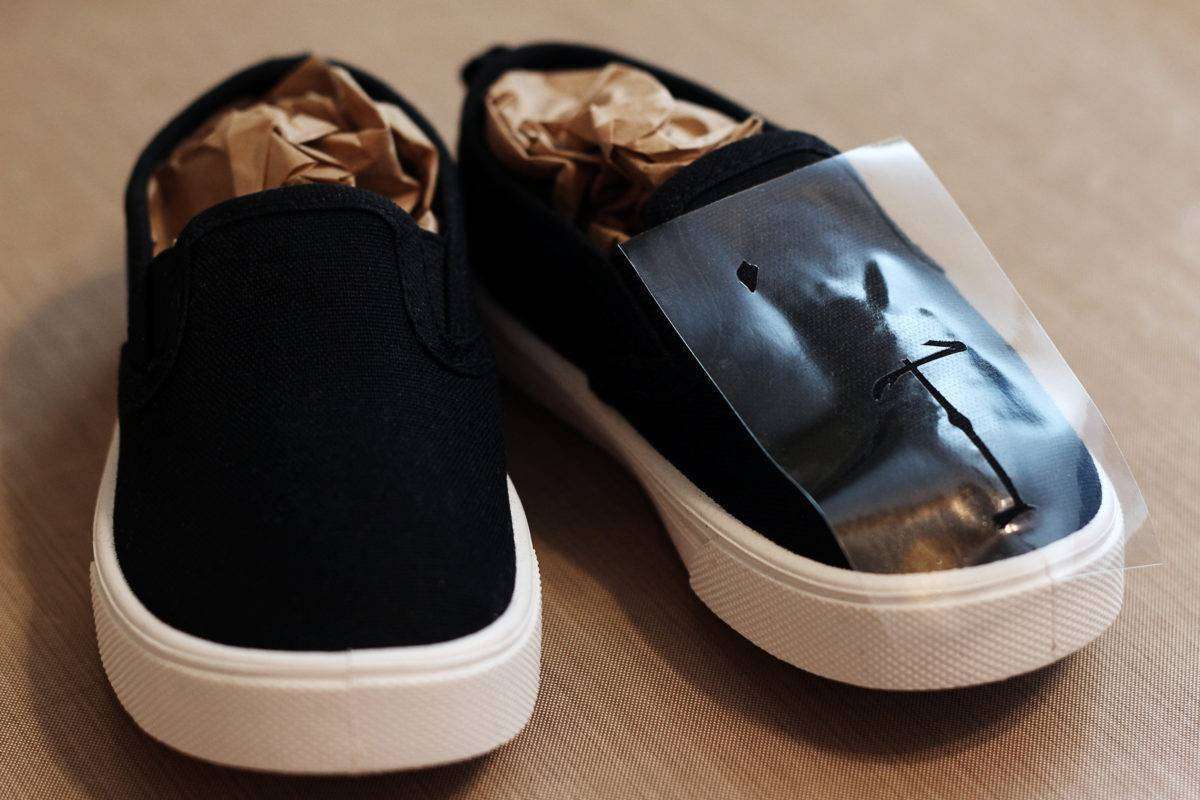
Tip: Be careful if your shoes have a curve to them. The full stencil does not need to lay flat. It’s important that the exposed design warps as little as possible, and it’s OK if the edges of the stencil are not pressed down against the shoes.
- Apply gold fabric ink with a stipple brush or other applicator to the exposed areas of the stencil mask.
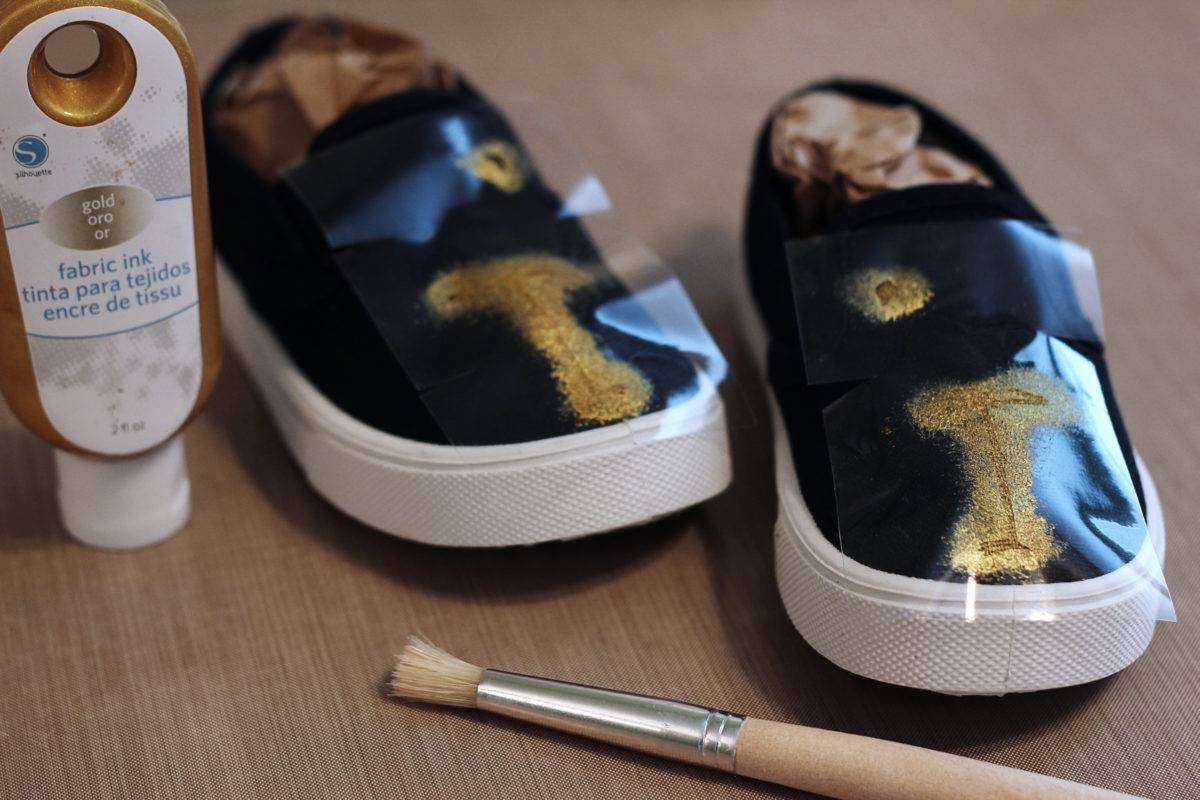
- When the ink is dry to the touch, remove and discard the stencil mask.
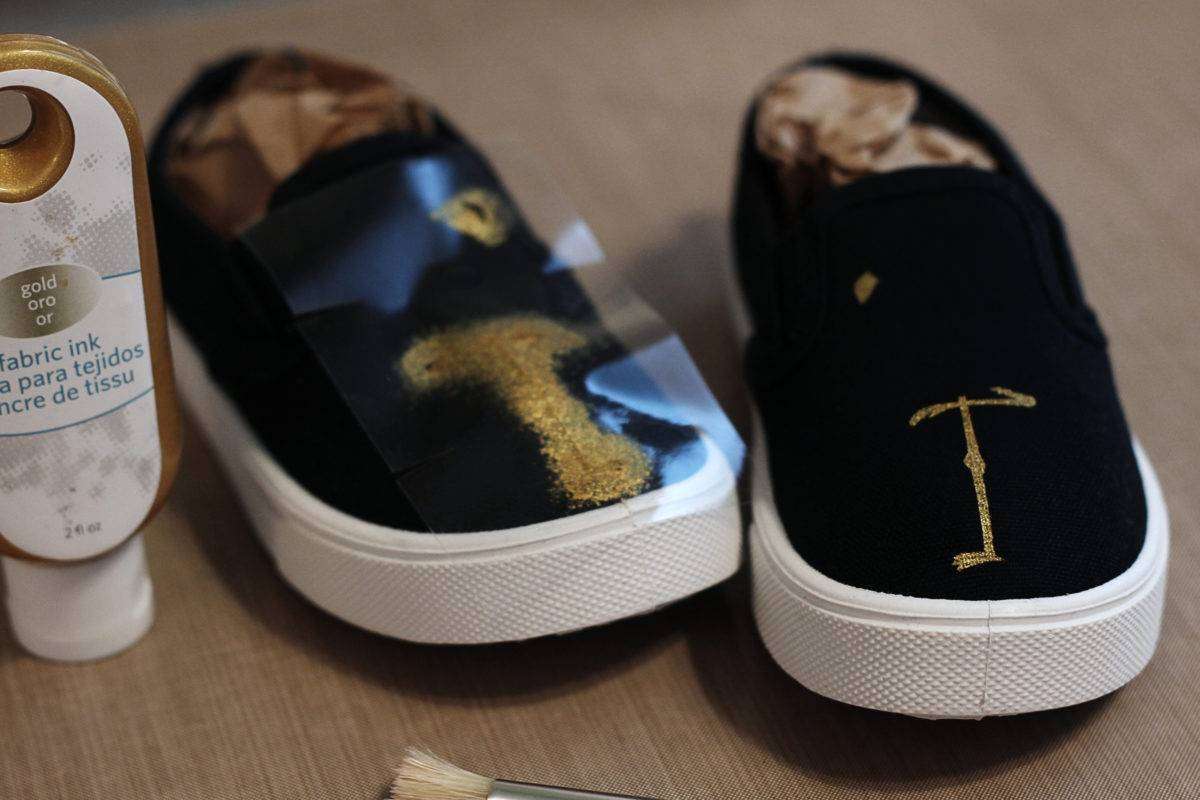
Tip: You can use a hair dryer to speed up the drying process.
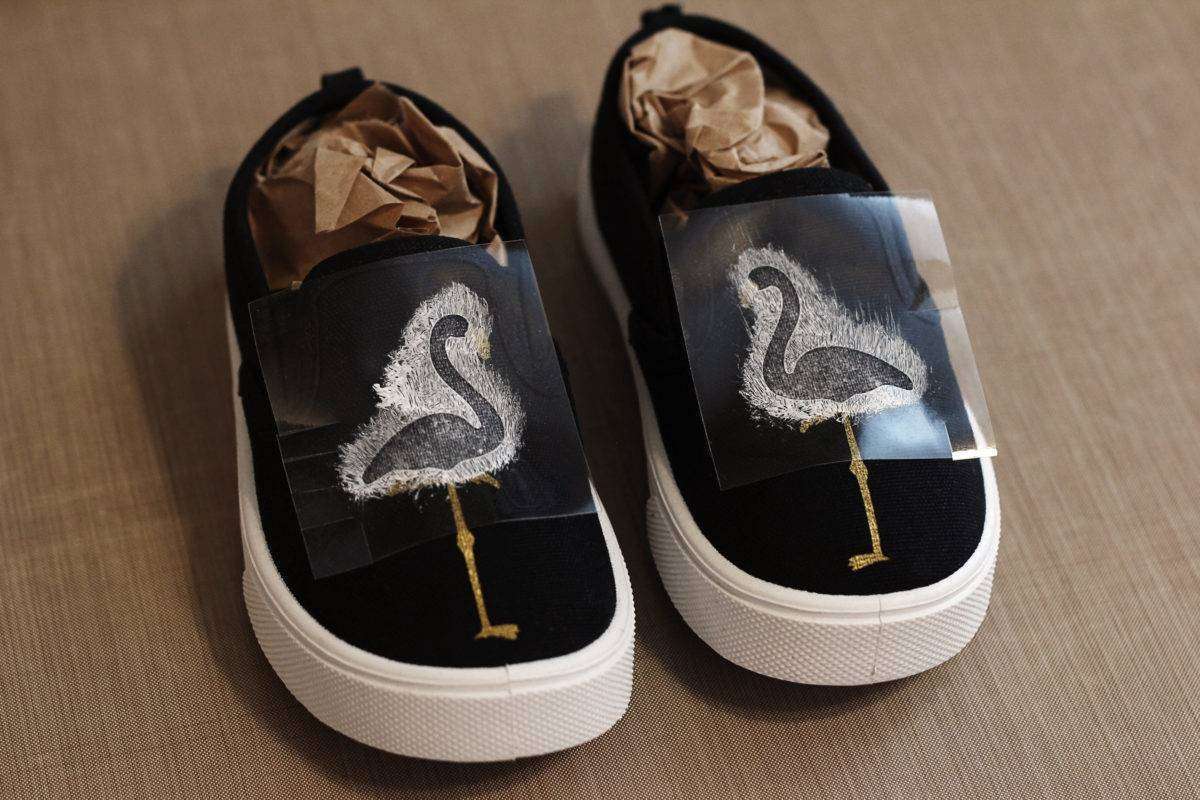
- Apply the flamingo body stencil mask to the shoes, using the existing legs and beak to align it. Again, try to avoid warping as you apply it to a slightly curved surface by focusing adhesion immediately around the exposed center. You can trim slits in the sides to help with the curve, but you will have to be careful not to apply paint where the slits are.
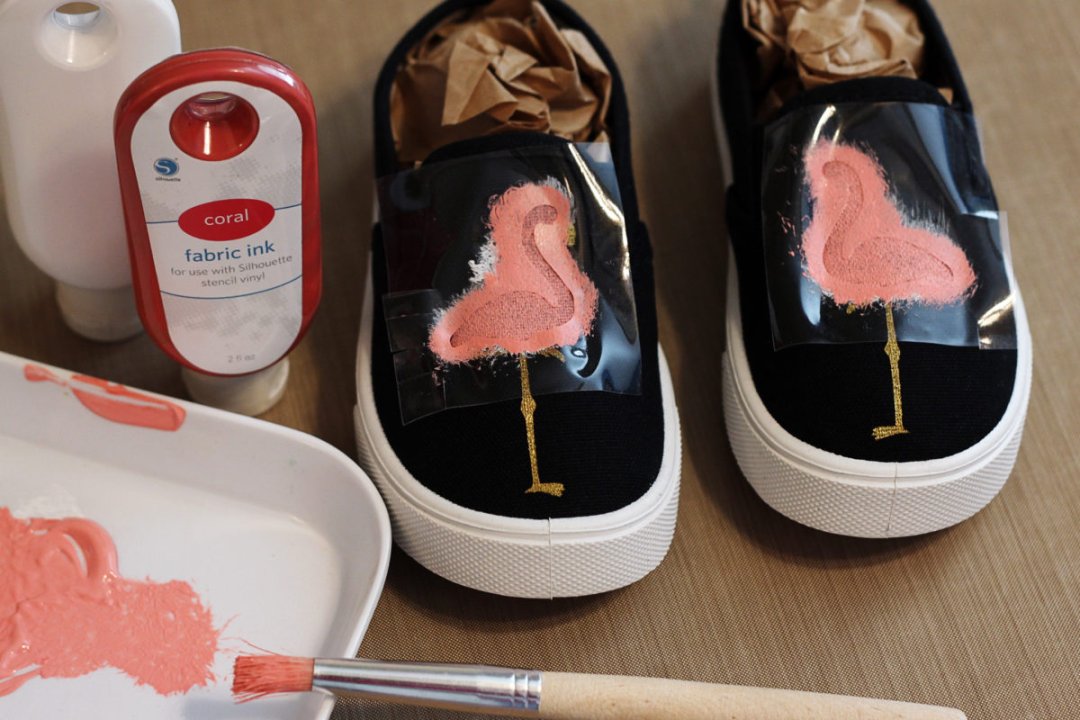
- If your shoes are dark, apply a layer or two of white fabric ink in order to avoid the pink or coral ink appearing too transparent.
-
- Mix up a shade of pink or coral for the body, and apply it directly on top of the white layer without moving the stencil.
- When dry, remove the stencil.
- Apply the wing stencil mask and add a darker shade of pink or coral.
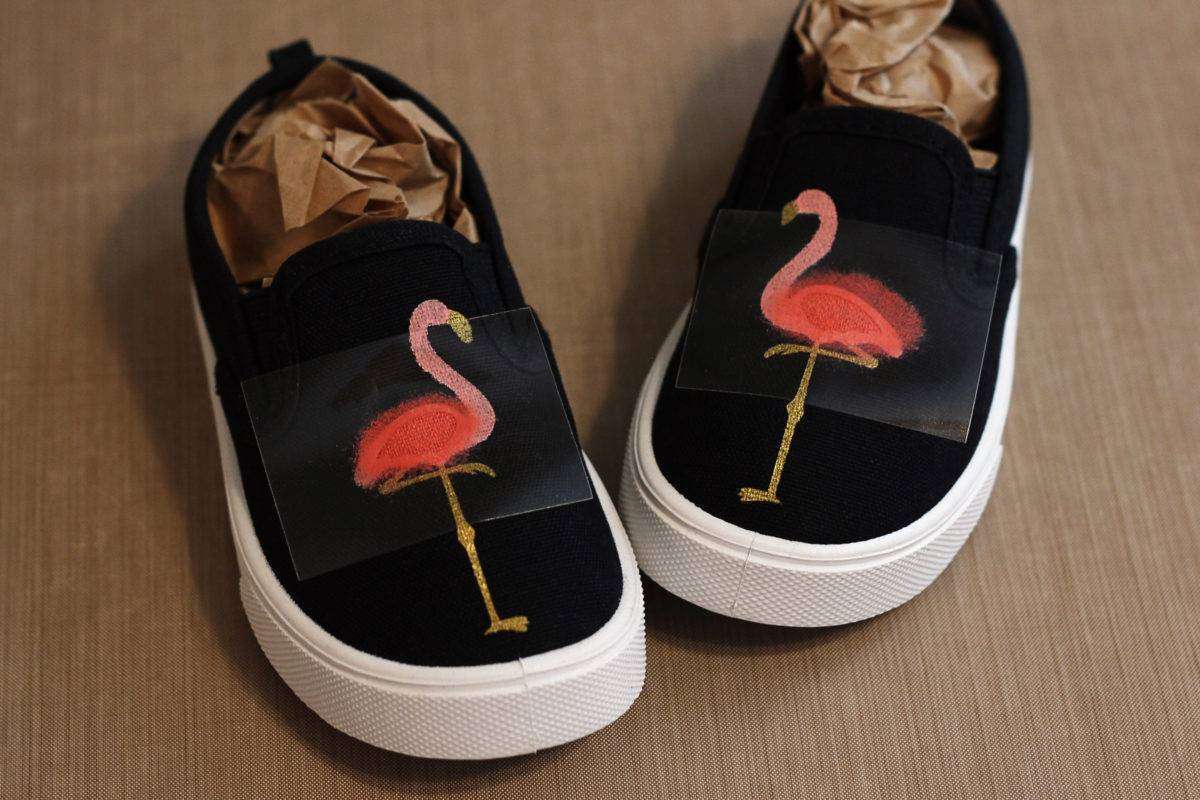
- Remove the stencil when dry, and your cute flamingo shoes are finished!

For more ideas customizing apparel, including using stencil vinyl and various other media like heat transfer, check out the Creating Custom Apparel class I created with Silhouette.