
Hey there, crafty peeps!
Kathi again, here giving you a David Letterman-esque “Top 5 Reasons You Need A Curio In Your Life” (and a little bonus tutorial too, cause I just love this machine!).
So grab your cup of coffee, get comfortable, and let me satisfy your CURIO-sity.
1. DUAL CARRIAGE CAPABILITIES

Did you know that Curio can do double-duty?
For my mini project, I debossed the word “wanderlust” and sketched a feather with my glitter Silhouette sketch pen—all in one run. I then went over the word “wanderlust” with my marker.

Are you in love with handlettering but a little hesitant to freehand something on your own? Then Curio is perfect for you.
Deboss a scripty font, like I did here, and practice your strokes. People will be amazed at your lettering talent. (For me, me it’s a great way to practice my penmanship!)
2. CUT NEW KINDS OF MEDIA
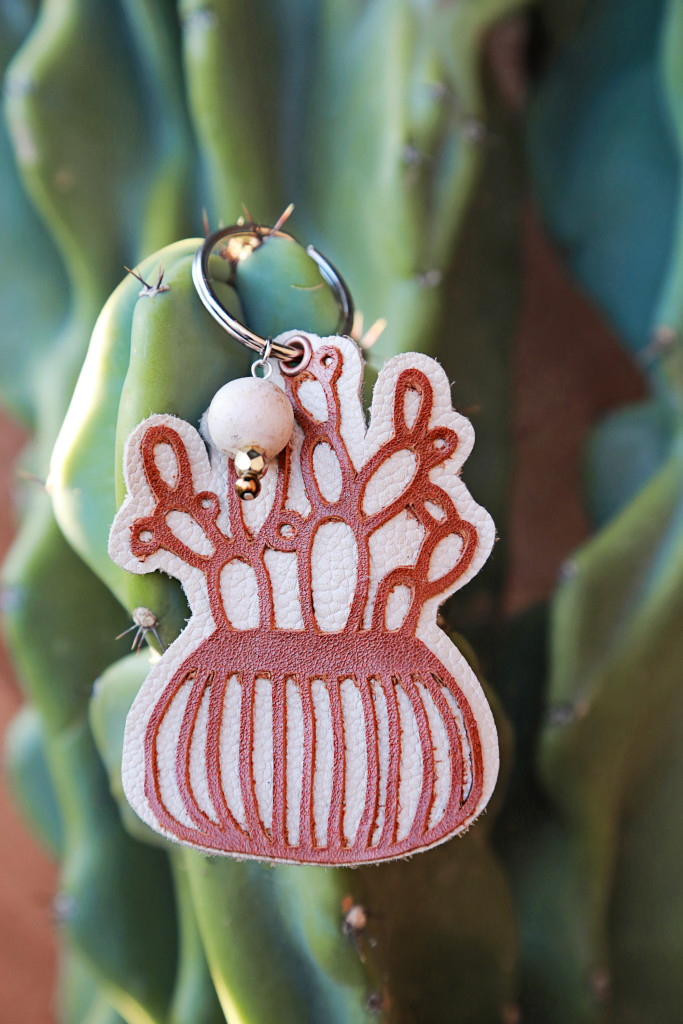
This succulent keychain is made out of genuine lether, so it smells ah-mazing (like a new car). I especially loved using Silhouette’s Deep Cut Blade for this project—especially when this succulent design had such intricate cuts!
3. SKETCH & BURN
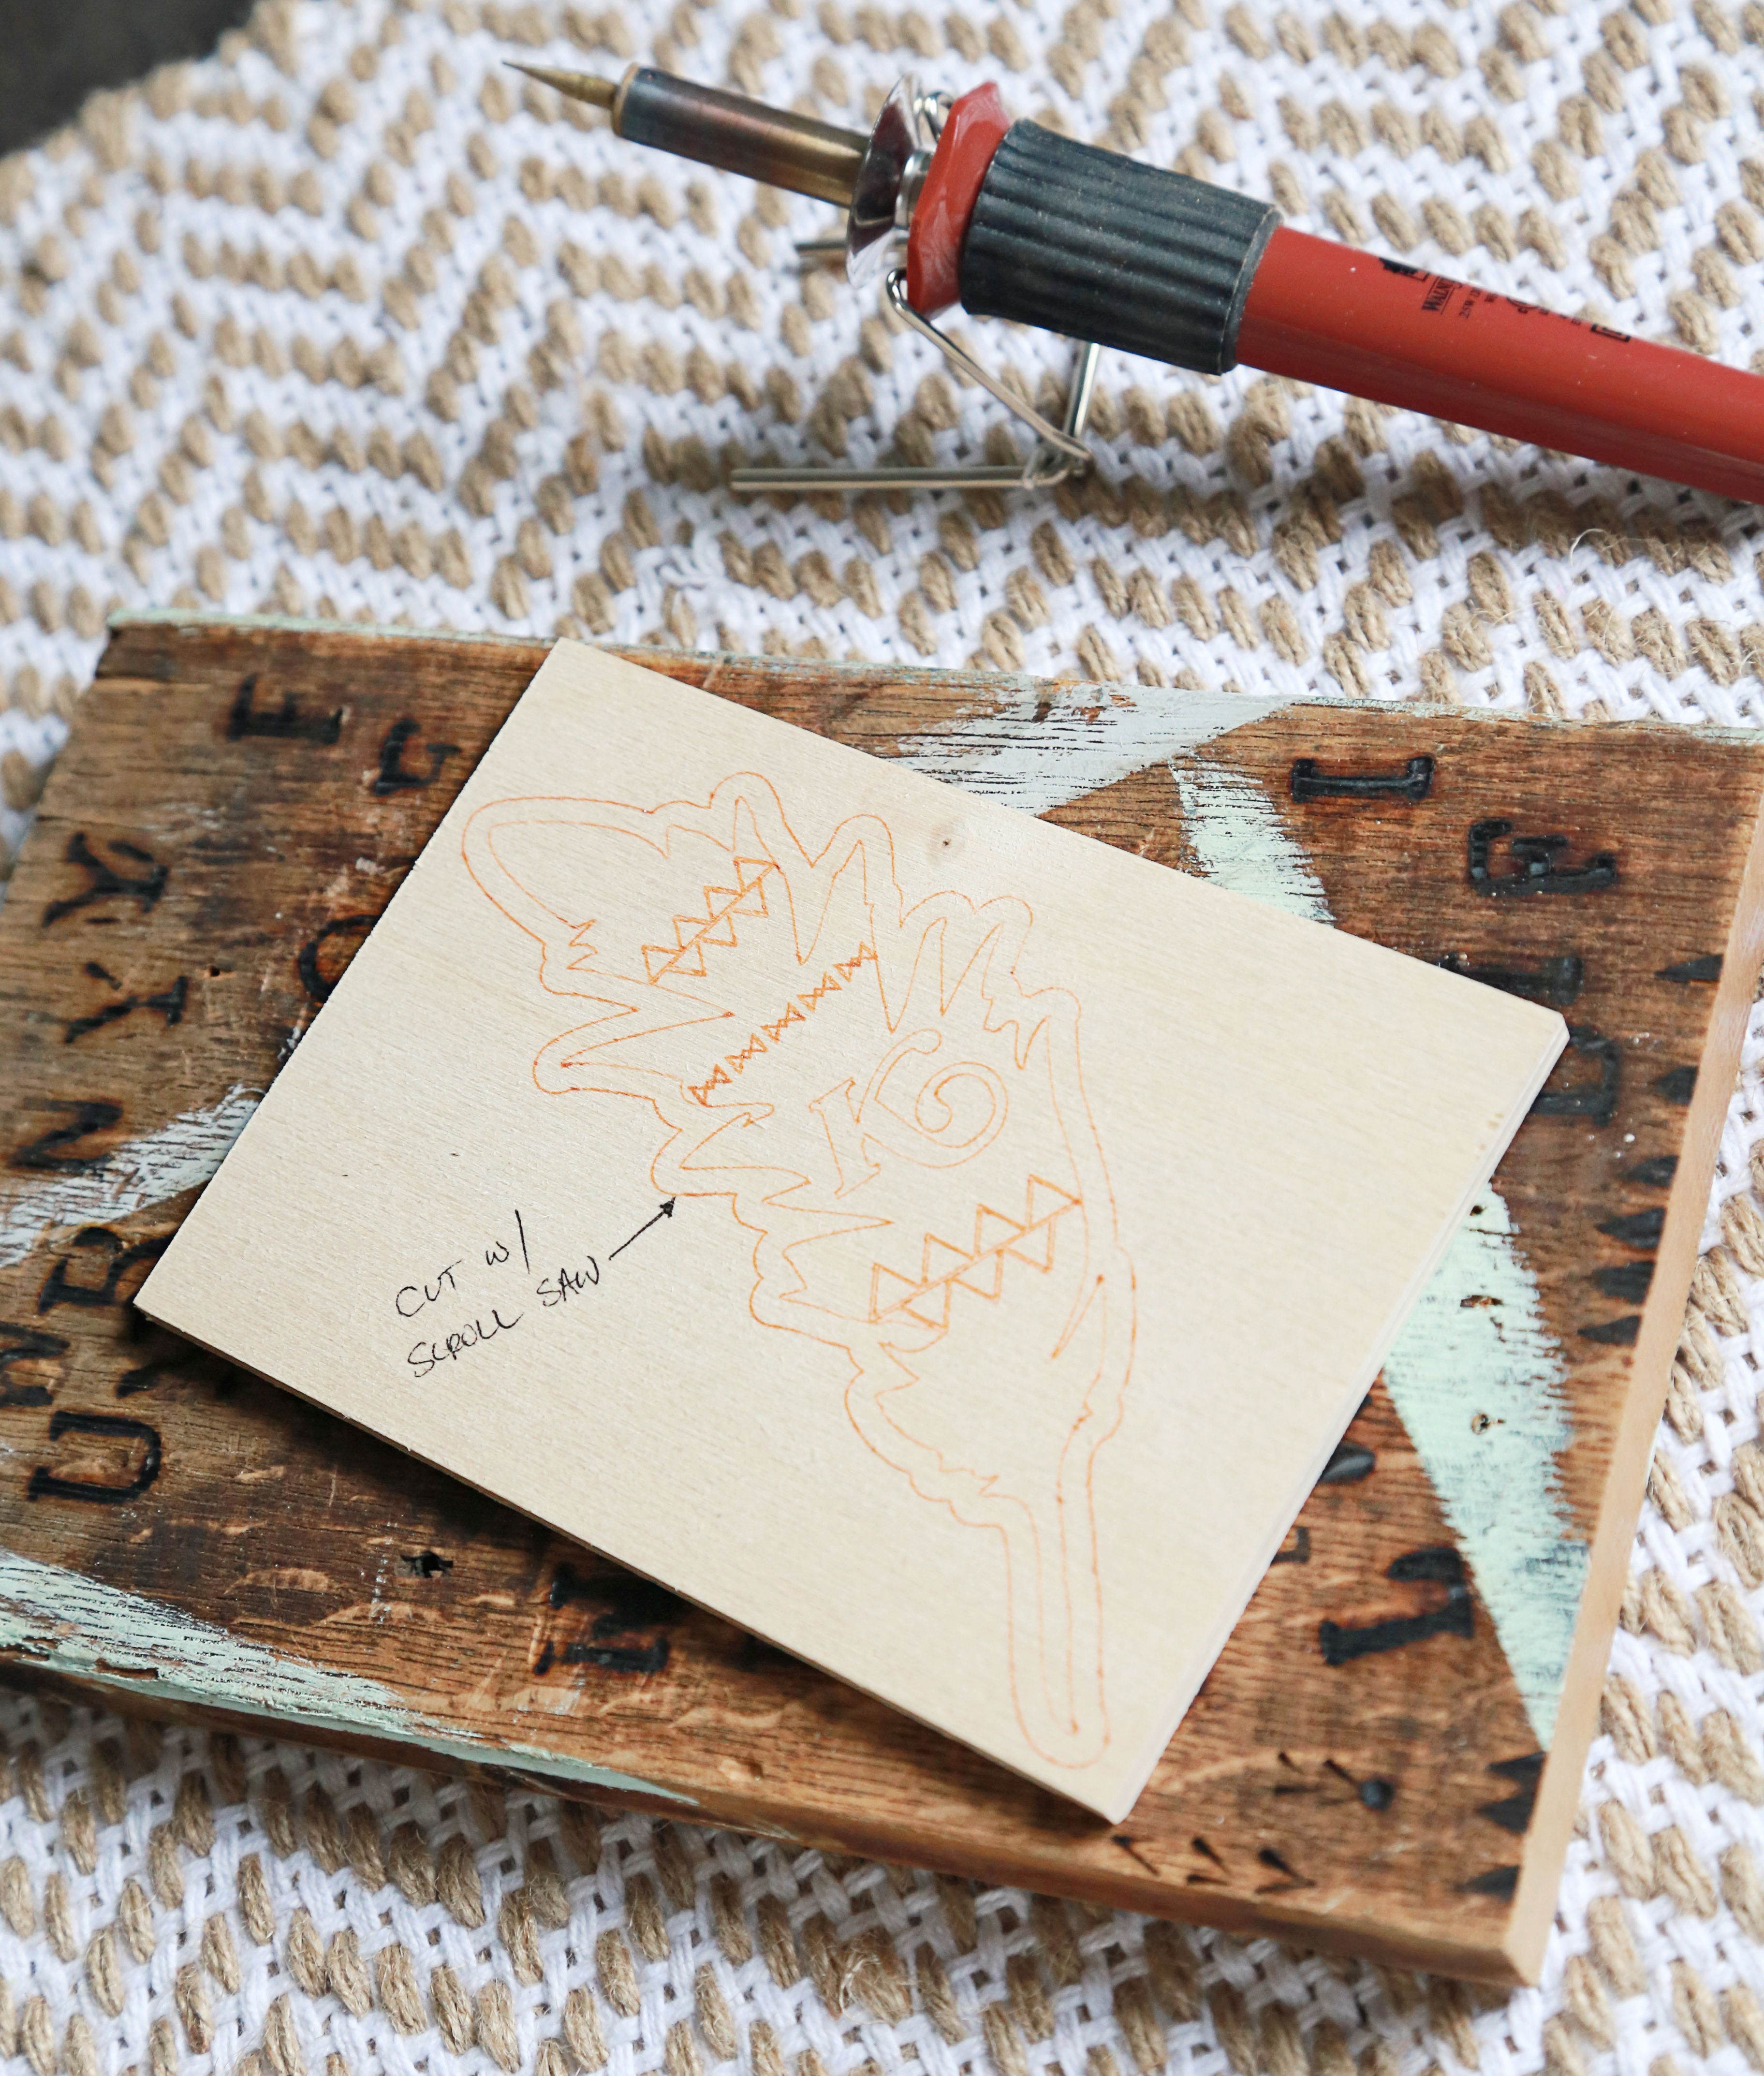
Being able to sketch onto wood that is 5 mm thick (or less!) is by far my favorite feature on Curio.
For this mini project, I sketched a feather design onto a thin piece of plywood, with an offset line to cut with my scroll saw. (The Deep Cut Blade doesn’t cut media that is thicker than 2 mm, but that’s what power tools are for!)
This was only my third time using my wood burning tool, but the sketch from my Curio made it easy to follow the design.
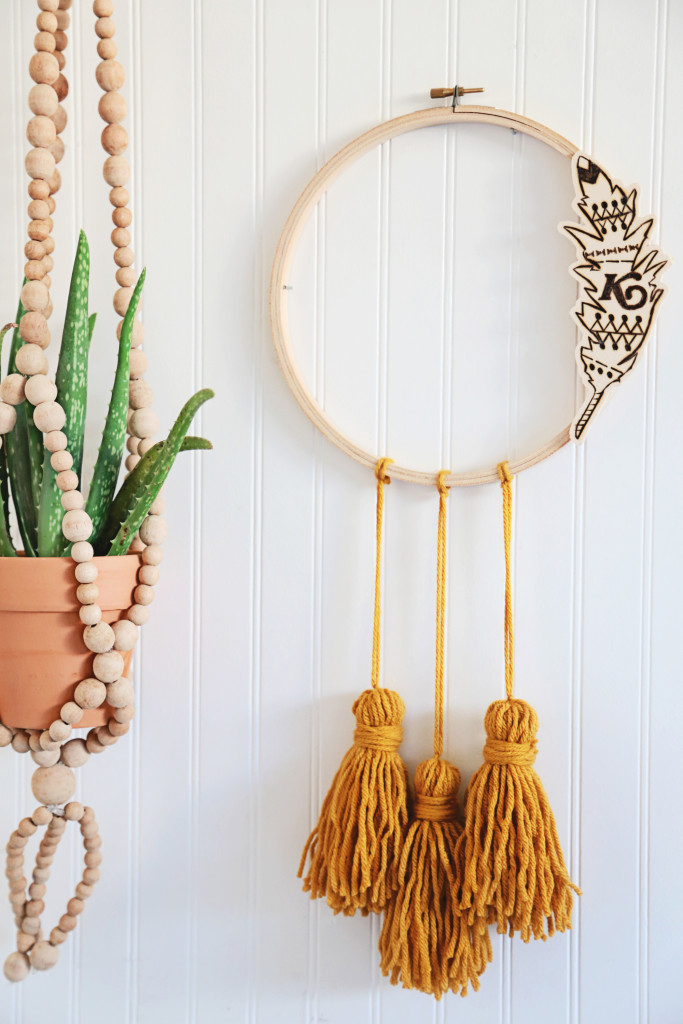
After I burned the wood and cut the feather out with the scroll saw I glued it onto an embroidery hoop and made a cute little dreamcatcher wall decor.
4. CUT THICKER MATERIAL
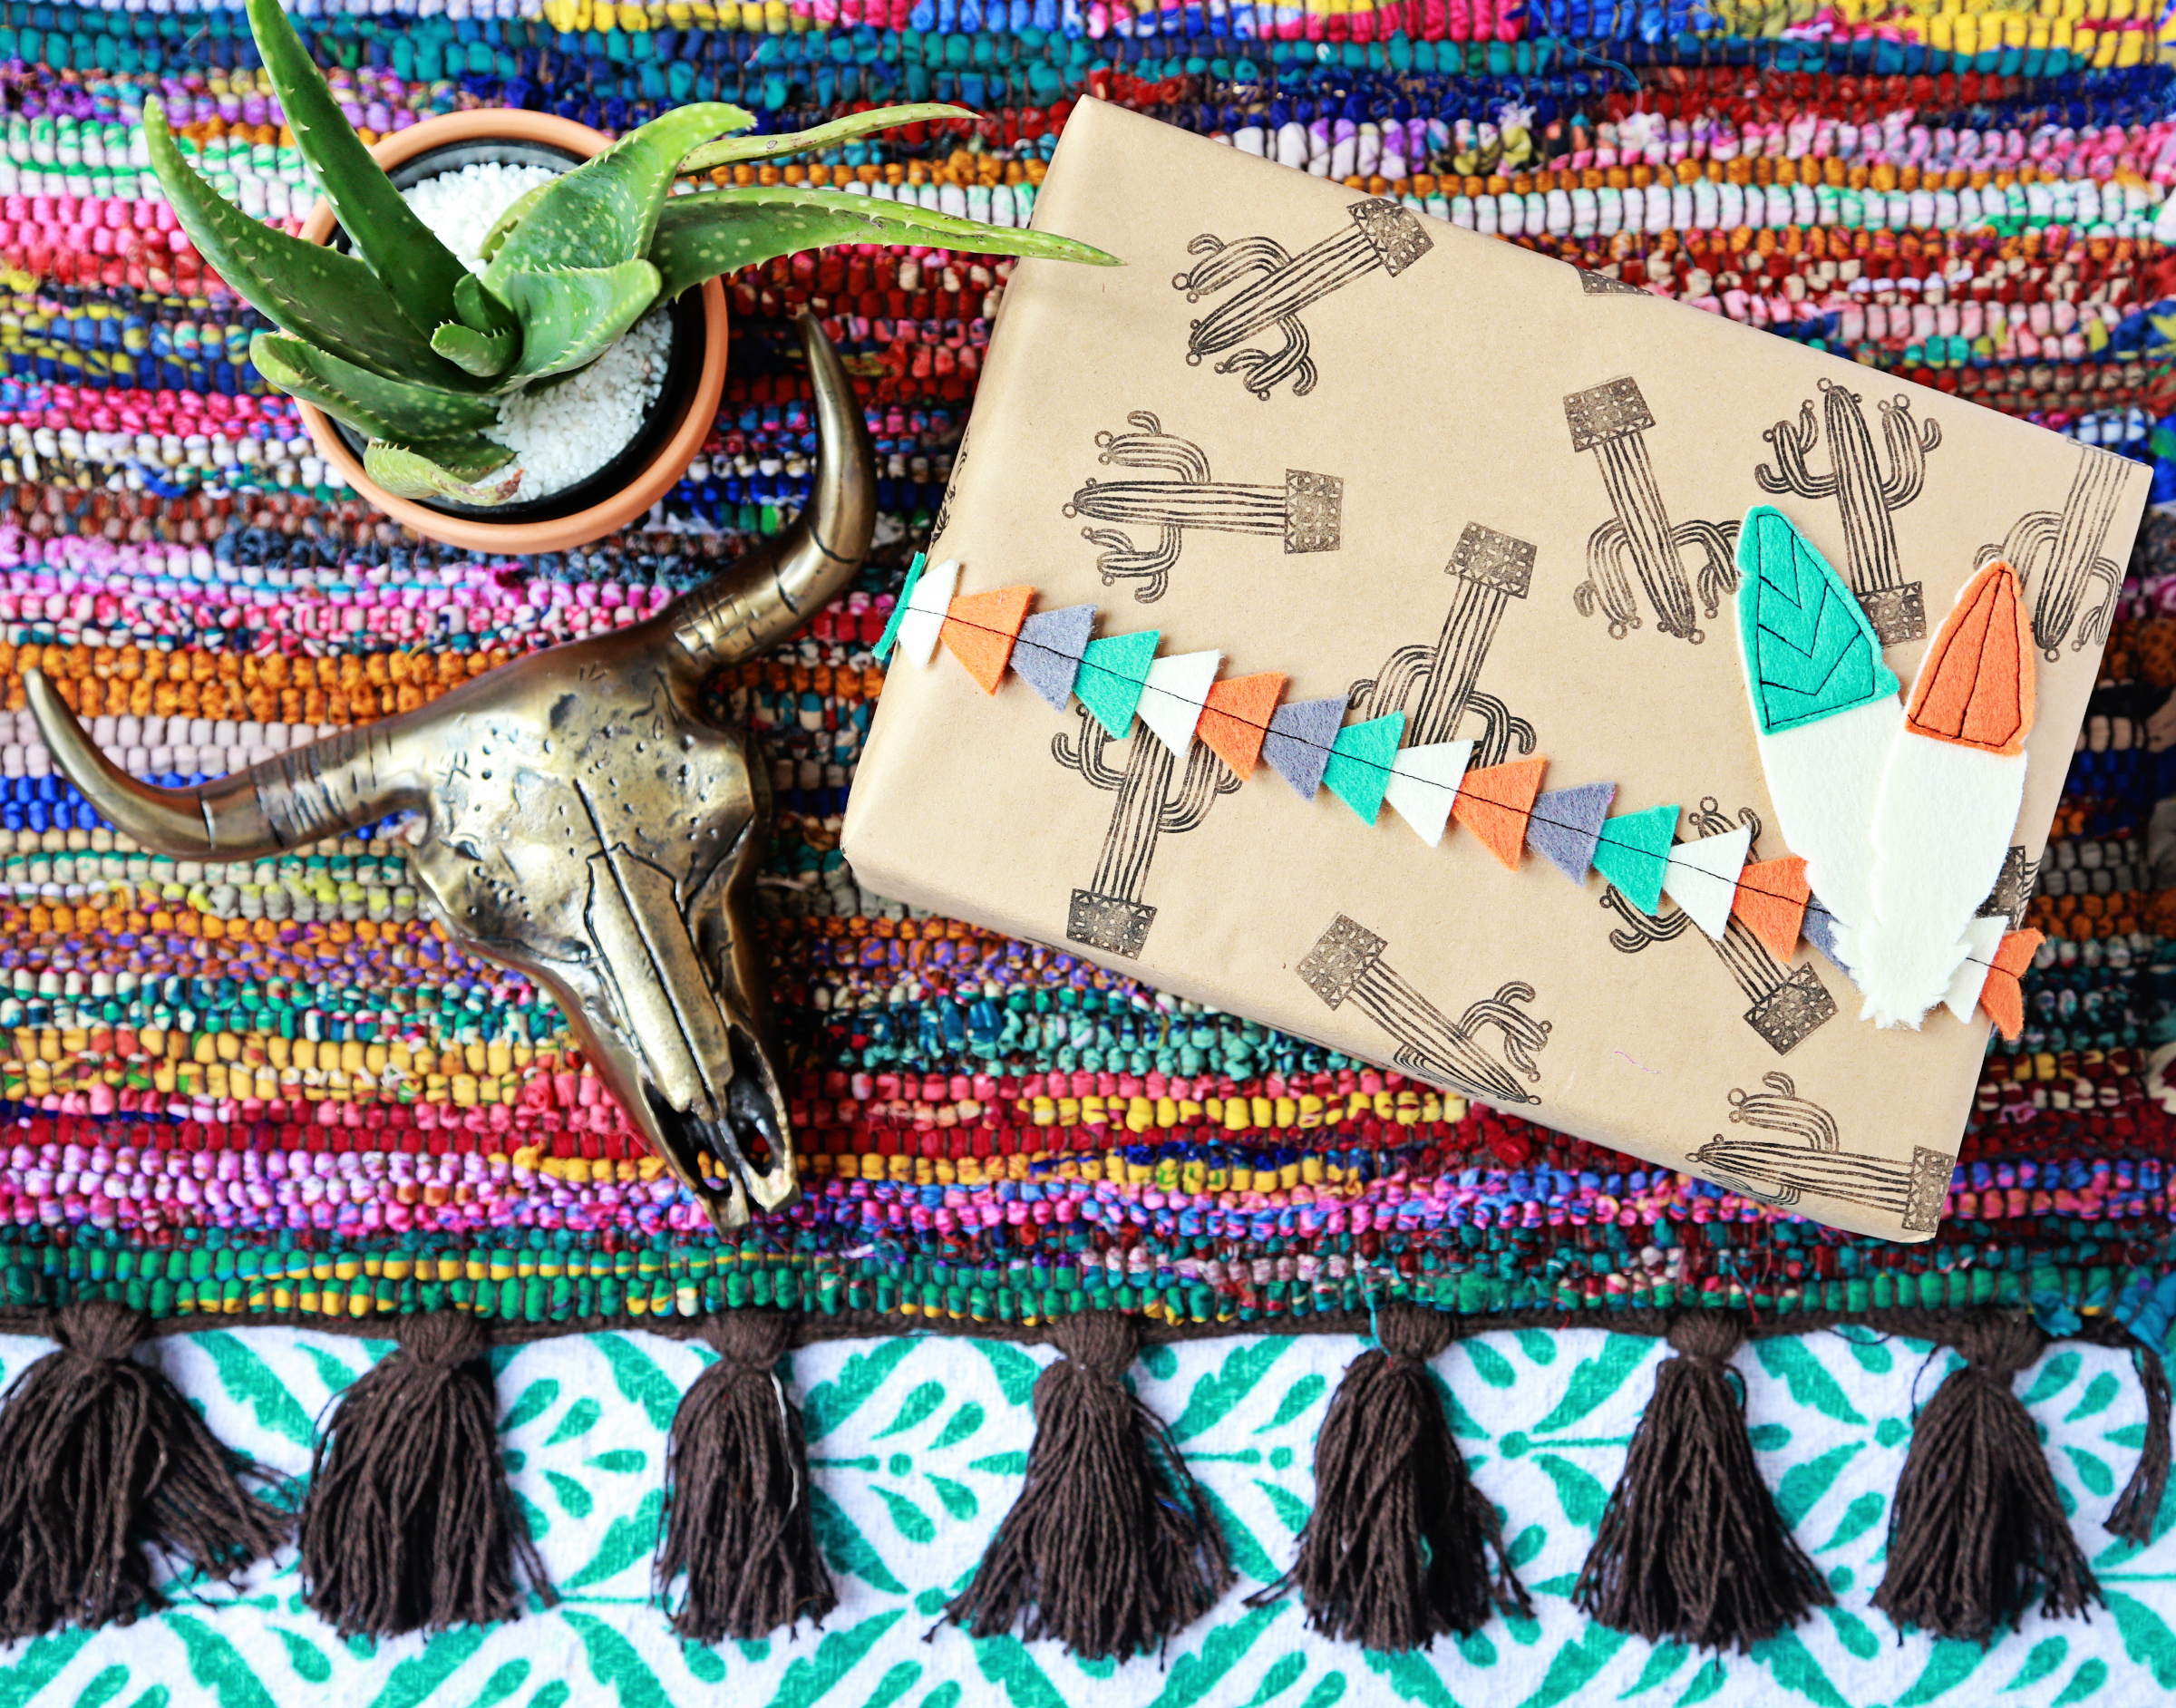
You can cut leather, foils, foams, and in my case thick felt. So for this mini project I cut feathers and triangles and sewed them together to make one super cute gift wrap. I also brought out my Mint to create a cactus stamp and made my own wrapper with kraft paper.
5. METAL ETCHING TOOL
The number one reason you need a Curio in your life—the metal etching capabilities.
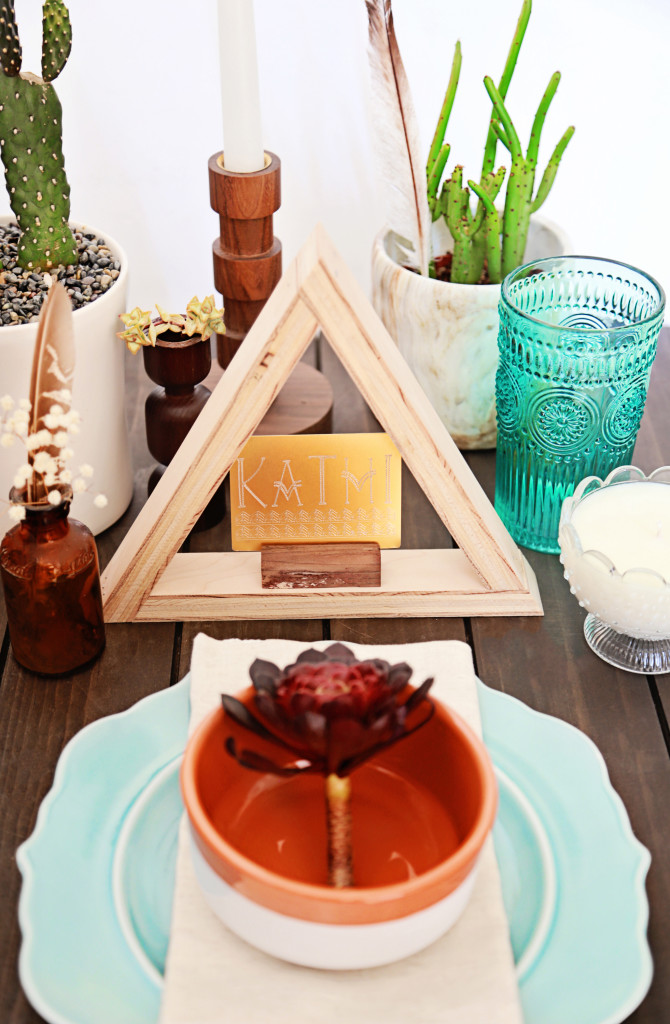
For this project I cut down Silhouette’s metal etching sheets into the size of name tags and etched out my name. Imagine this for a dinner party! It was so easy and yet people will think you went out of your way setting up the fancy decor.
Don’t worry. It’ll be our little secret! 😉
—
Curio is such a great crafting tool because it adds so much to your crafting repertoire.
I kind of thought outside the box a little bit for this project because I didn’t want to give myself any limits and what I mean about that is I wanted to be able to use power tools (my jigsaw and Dremel).
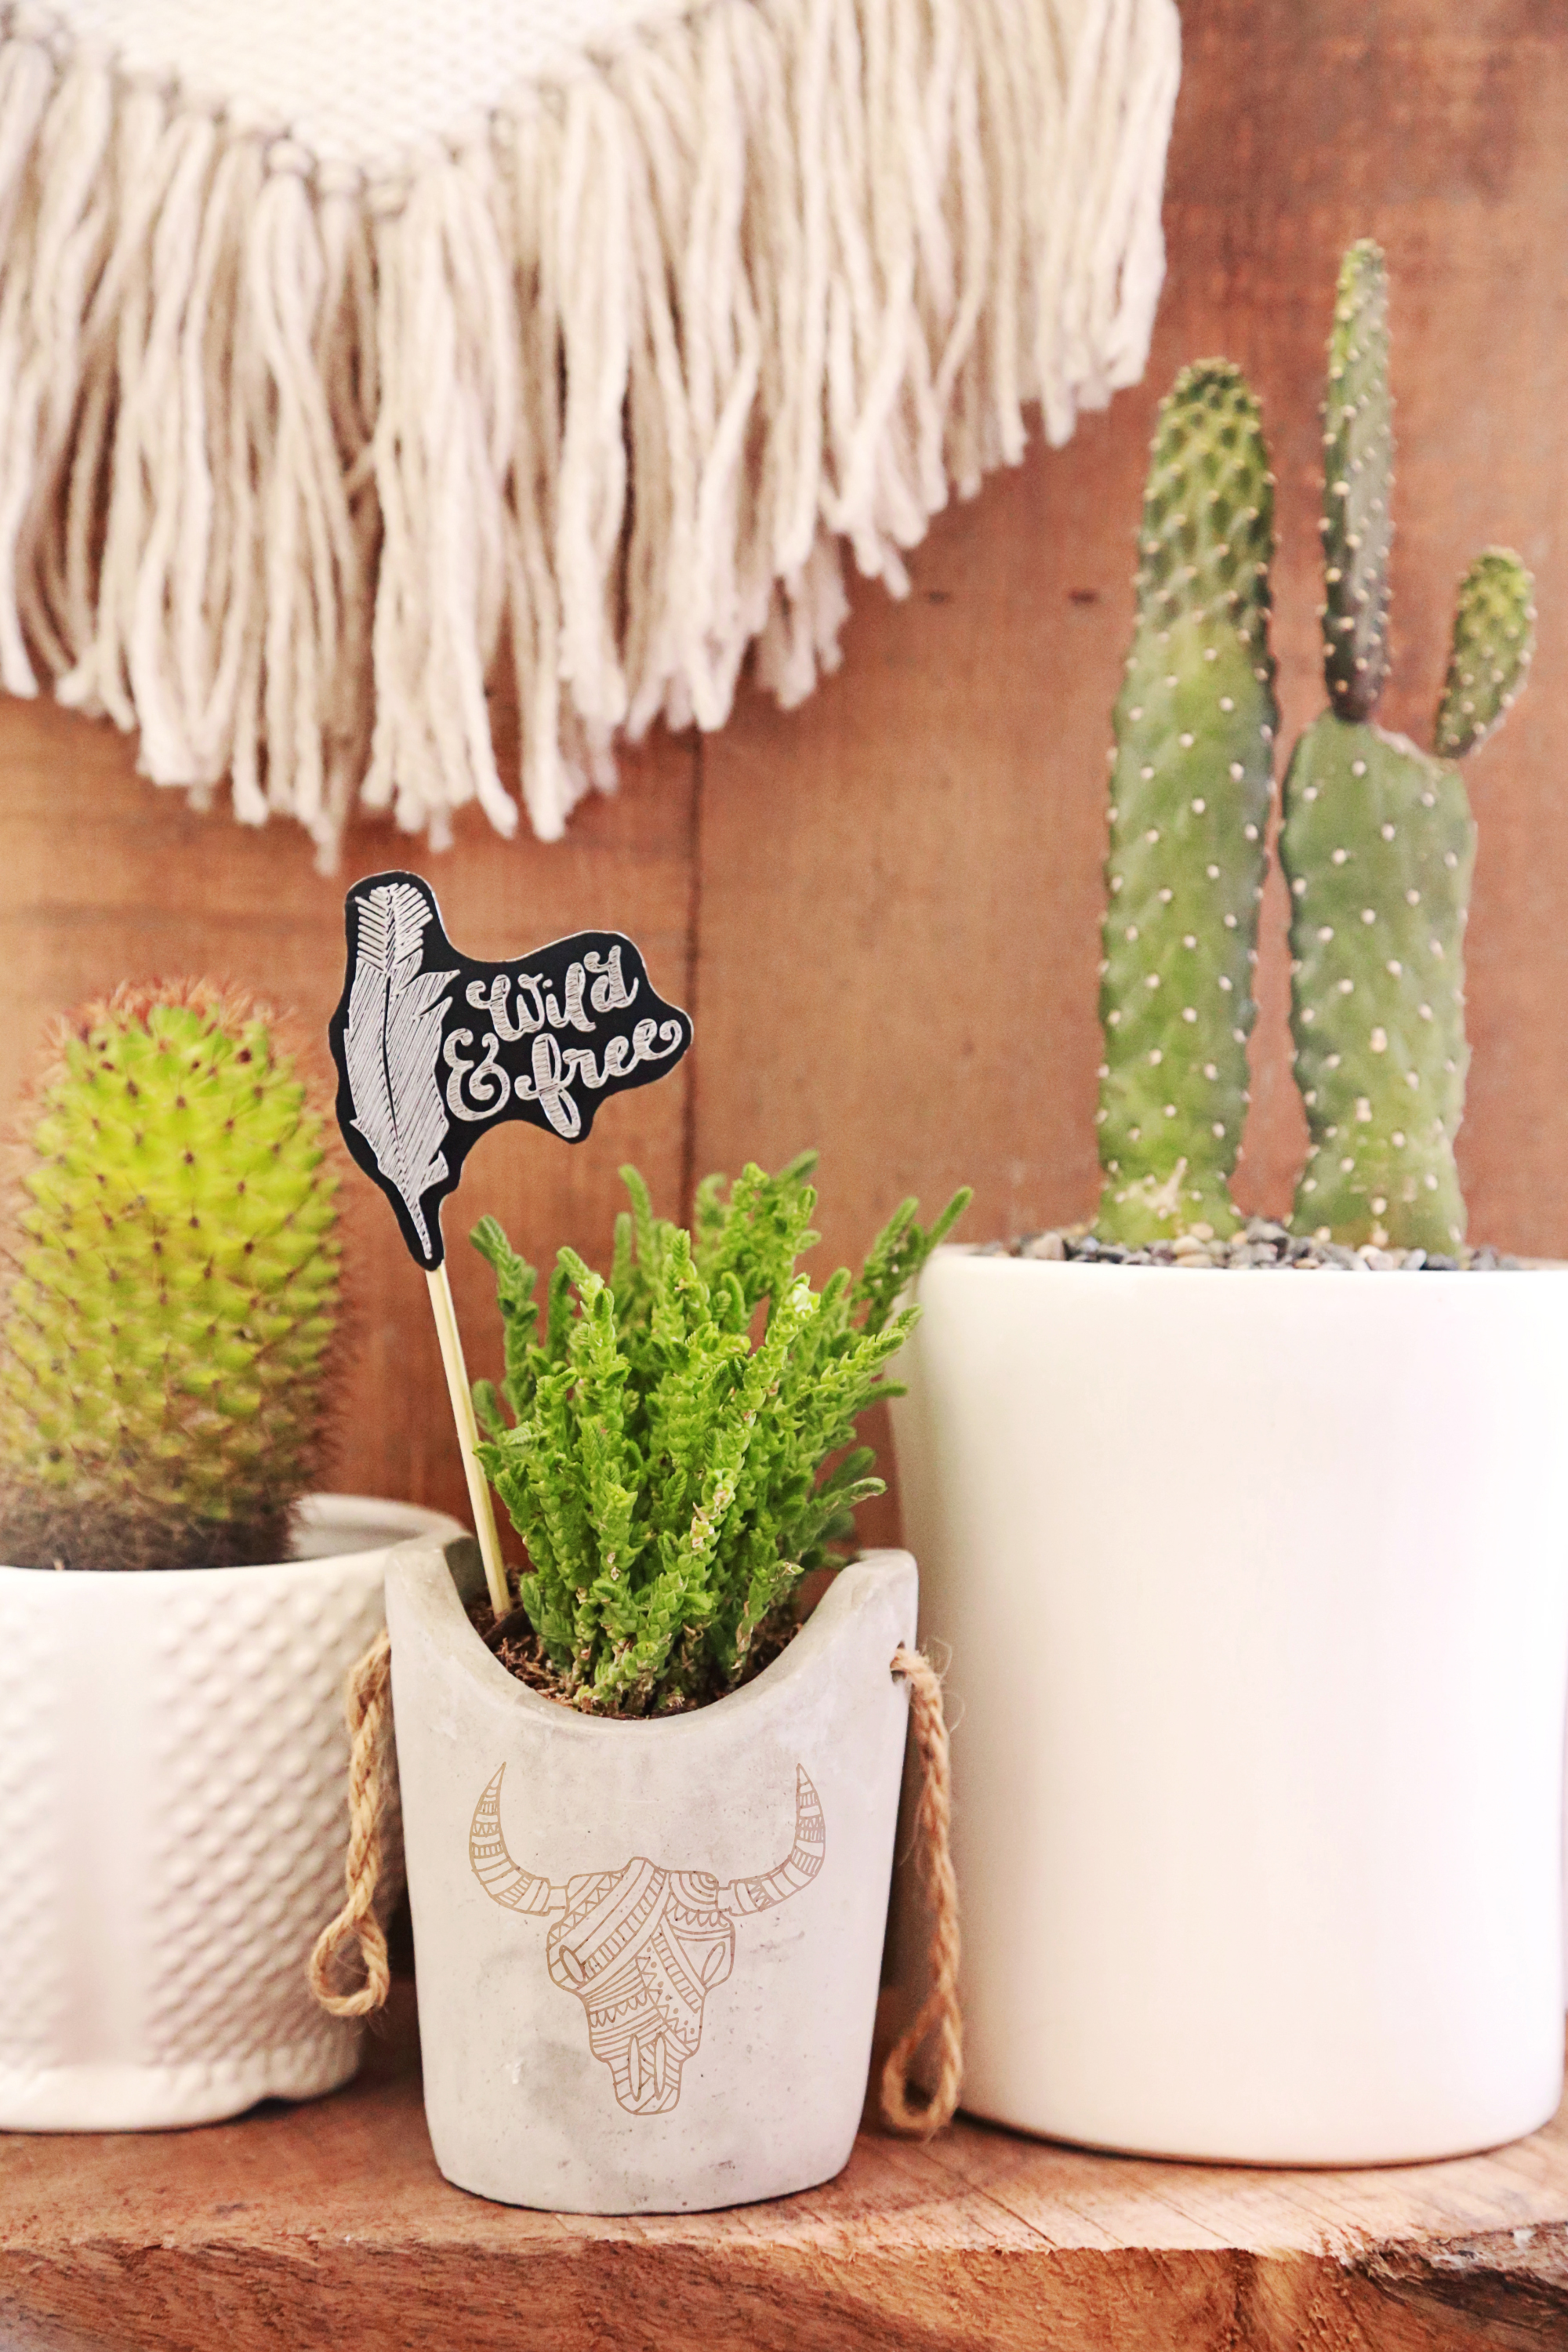
BONUS TUTORIAL: ETCHED PLANTER ORNAMENT
You Will Need:
- Silhouette Curio™
- Metal Etching Sheets
- Metal Etching Tool
- Hot Glue Gun
- Skewer (or any type of stick)
- Safety glasses
- Dust mask
- Jigsaw tool (with metal cutting blade)
- Dremel tool (with grinding stone and fine grit drum sander.)
STEP ONE: DESIGN & DEBOSS
I grabbed the designs I wanted for my plant marker and placed them to my liking.

Then open up the embossing menu, make sure you click the deboss feature, and now you can play around with the fill and lines you want on your design. I personally like the straight lines because they come out so well through the etching process.
STEP TWO: CUT SETTINGS
Make sure you have your cut setting on ‘Metal Etching Sheet’, double check that you have the etching blade set up in your Curio, and your platform is at a 5.
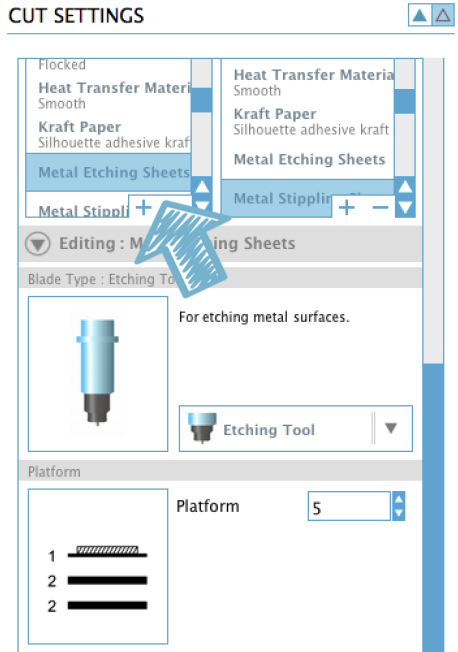
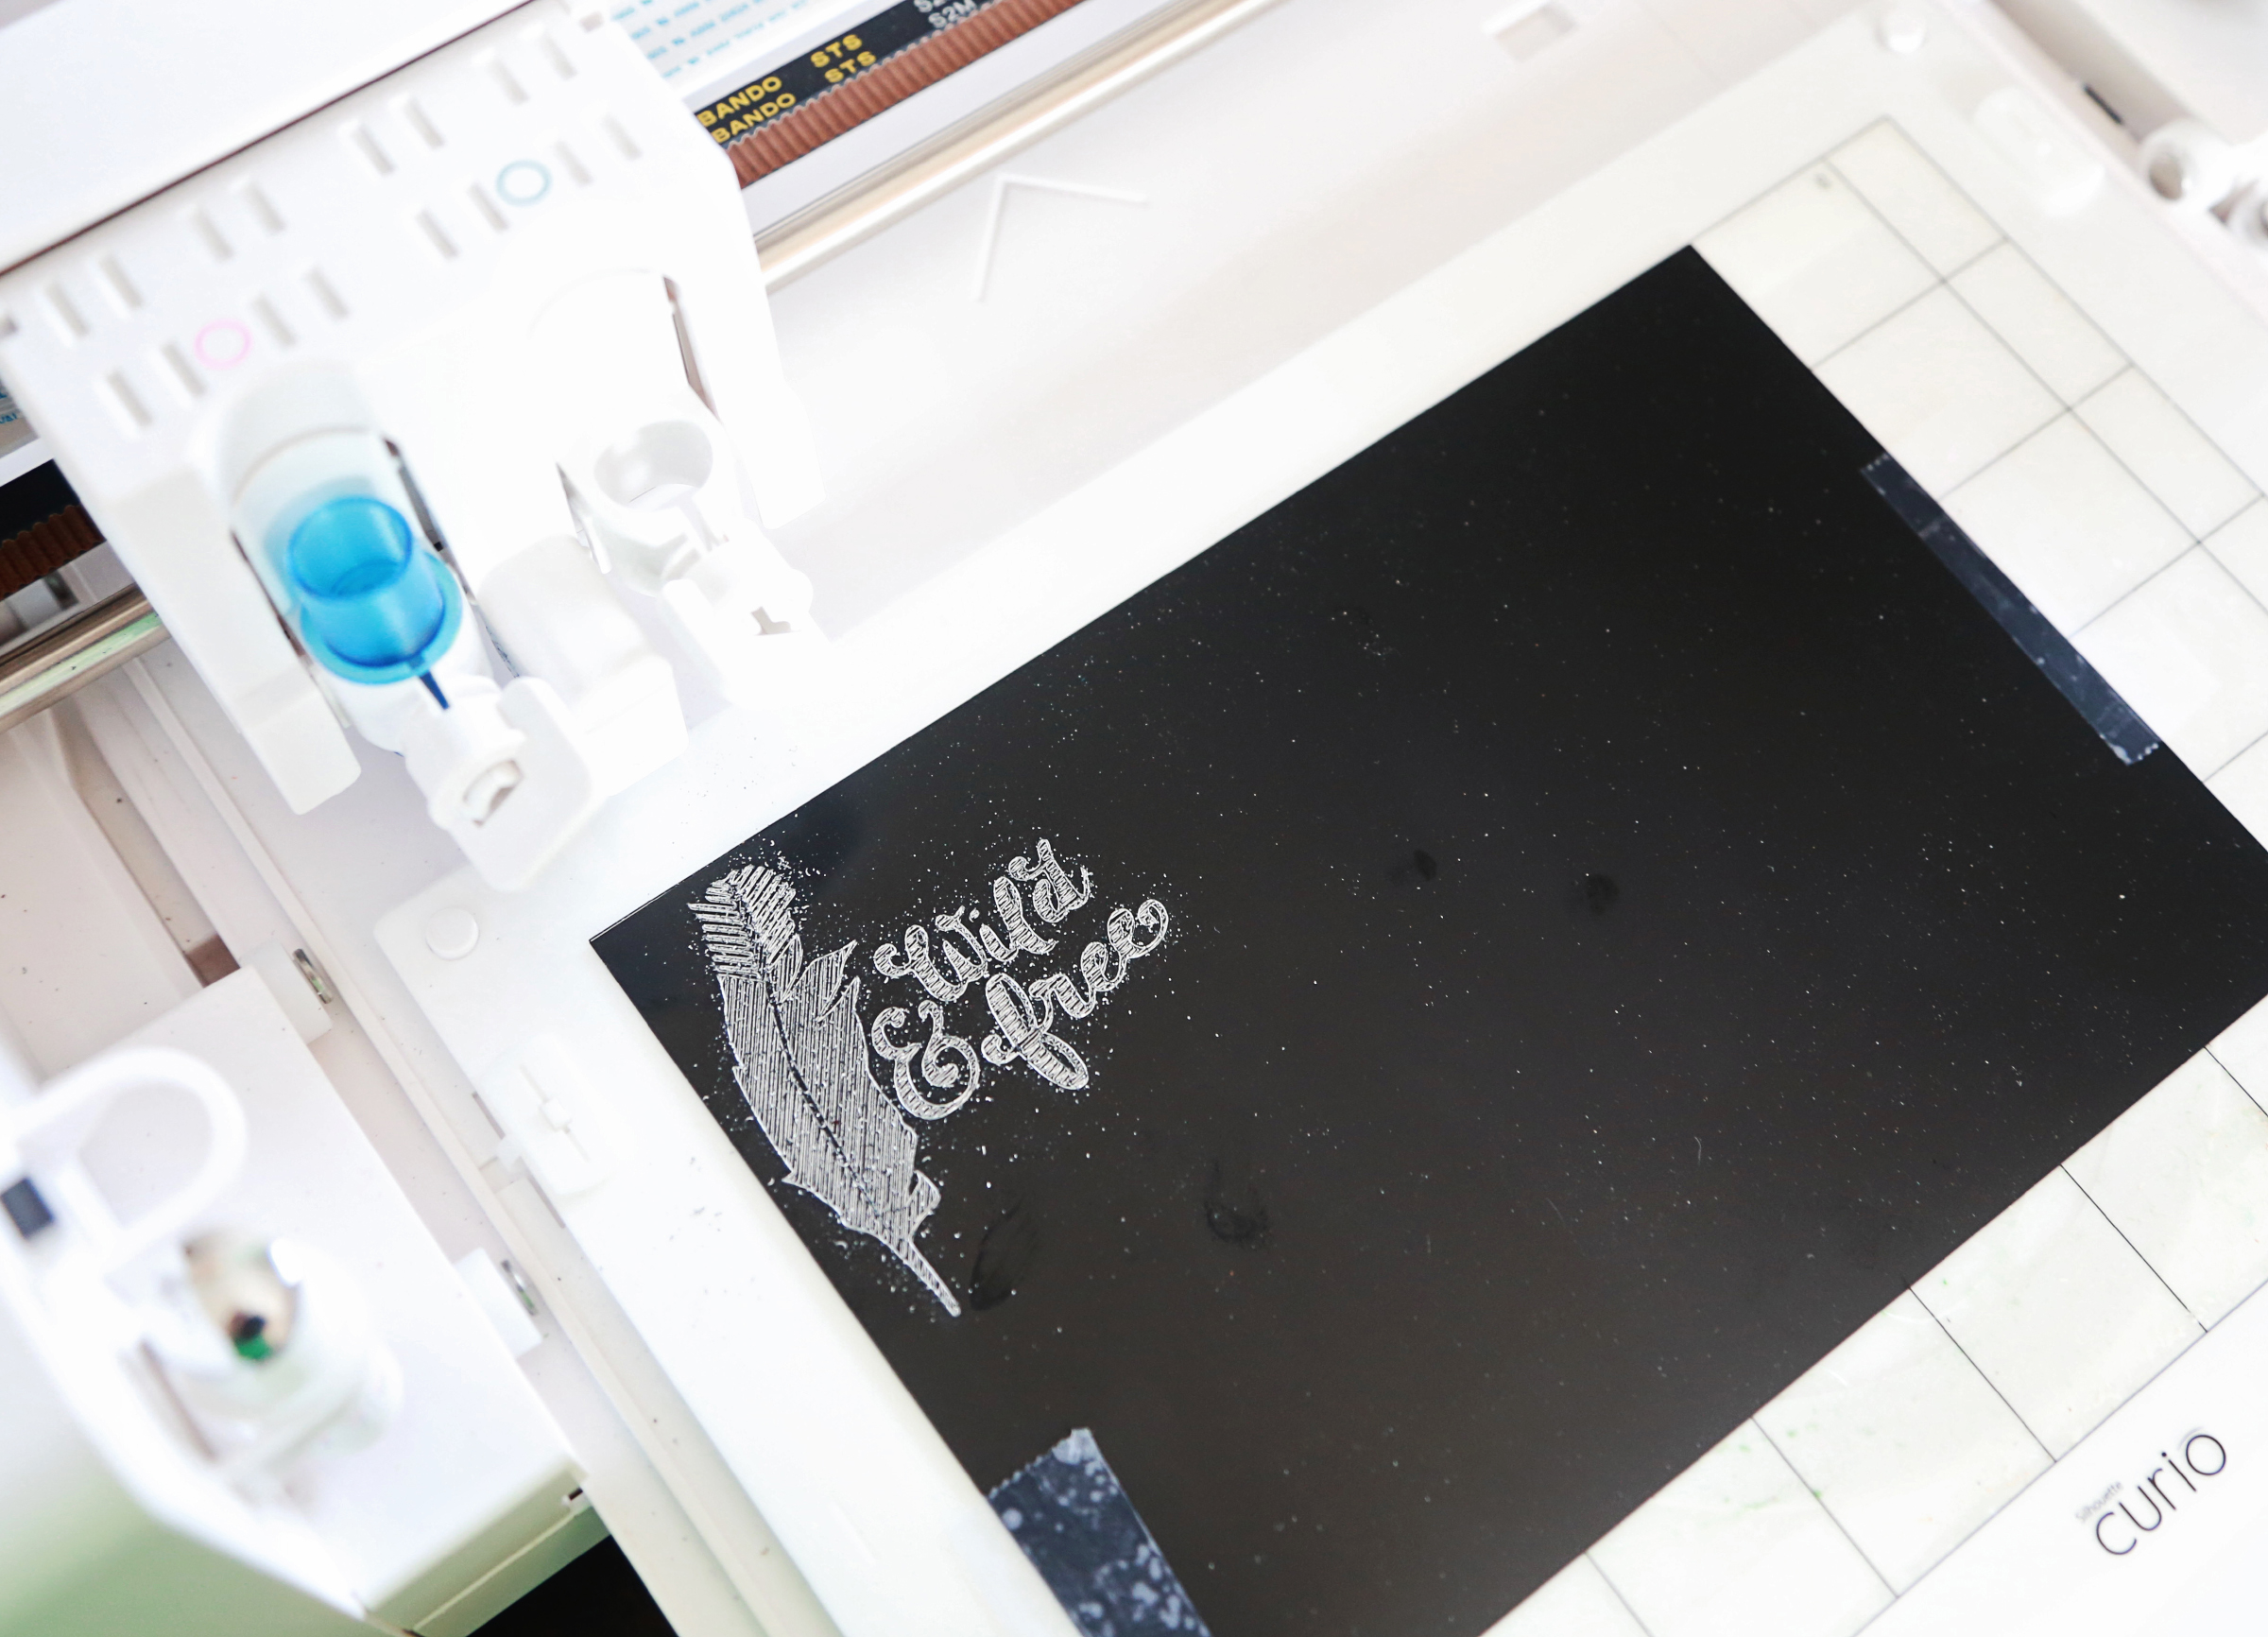
Then send to the Curio to etch.
As you can see in the image below, I taped down the sheet onto the mat with just some regular Scotch tape to prevent the metal from moving during the etching process. Also, I don’t know how other people get the metal dust off the sheet but sucking it up with my shop vac seems to work great for me.
Now off to the mom cave.
STEP THREE: CUTTING & SMOOTHING
So my husband bought me this BladeRunner by Rockwell last Christmas (because I would rather have tools than shoes) and it’s basically a jigsaw turned upside down to make a table saw.

Before you cut the metal etching sheet make sure you have a metal cutting blade on your jigsaw, safety glasses, and a mask that covers your nose because little pieces of metal dust will be flying around and you don’t want to breathe that in.
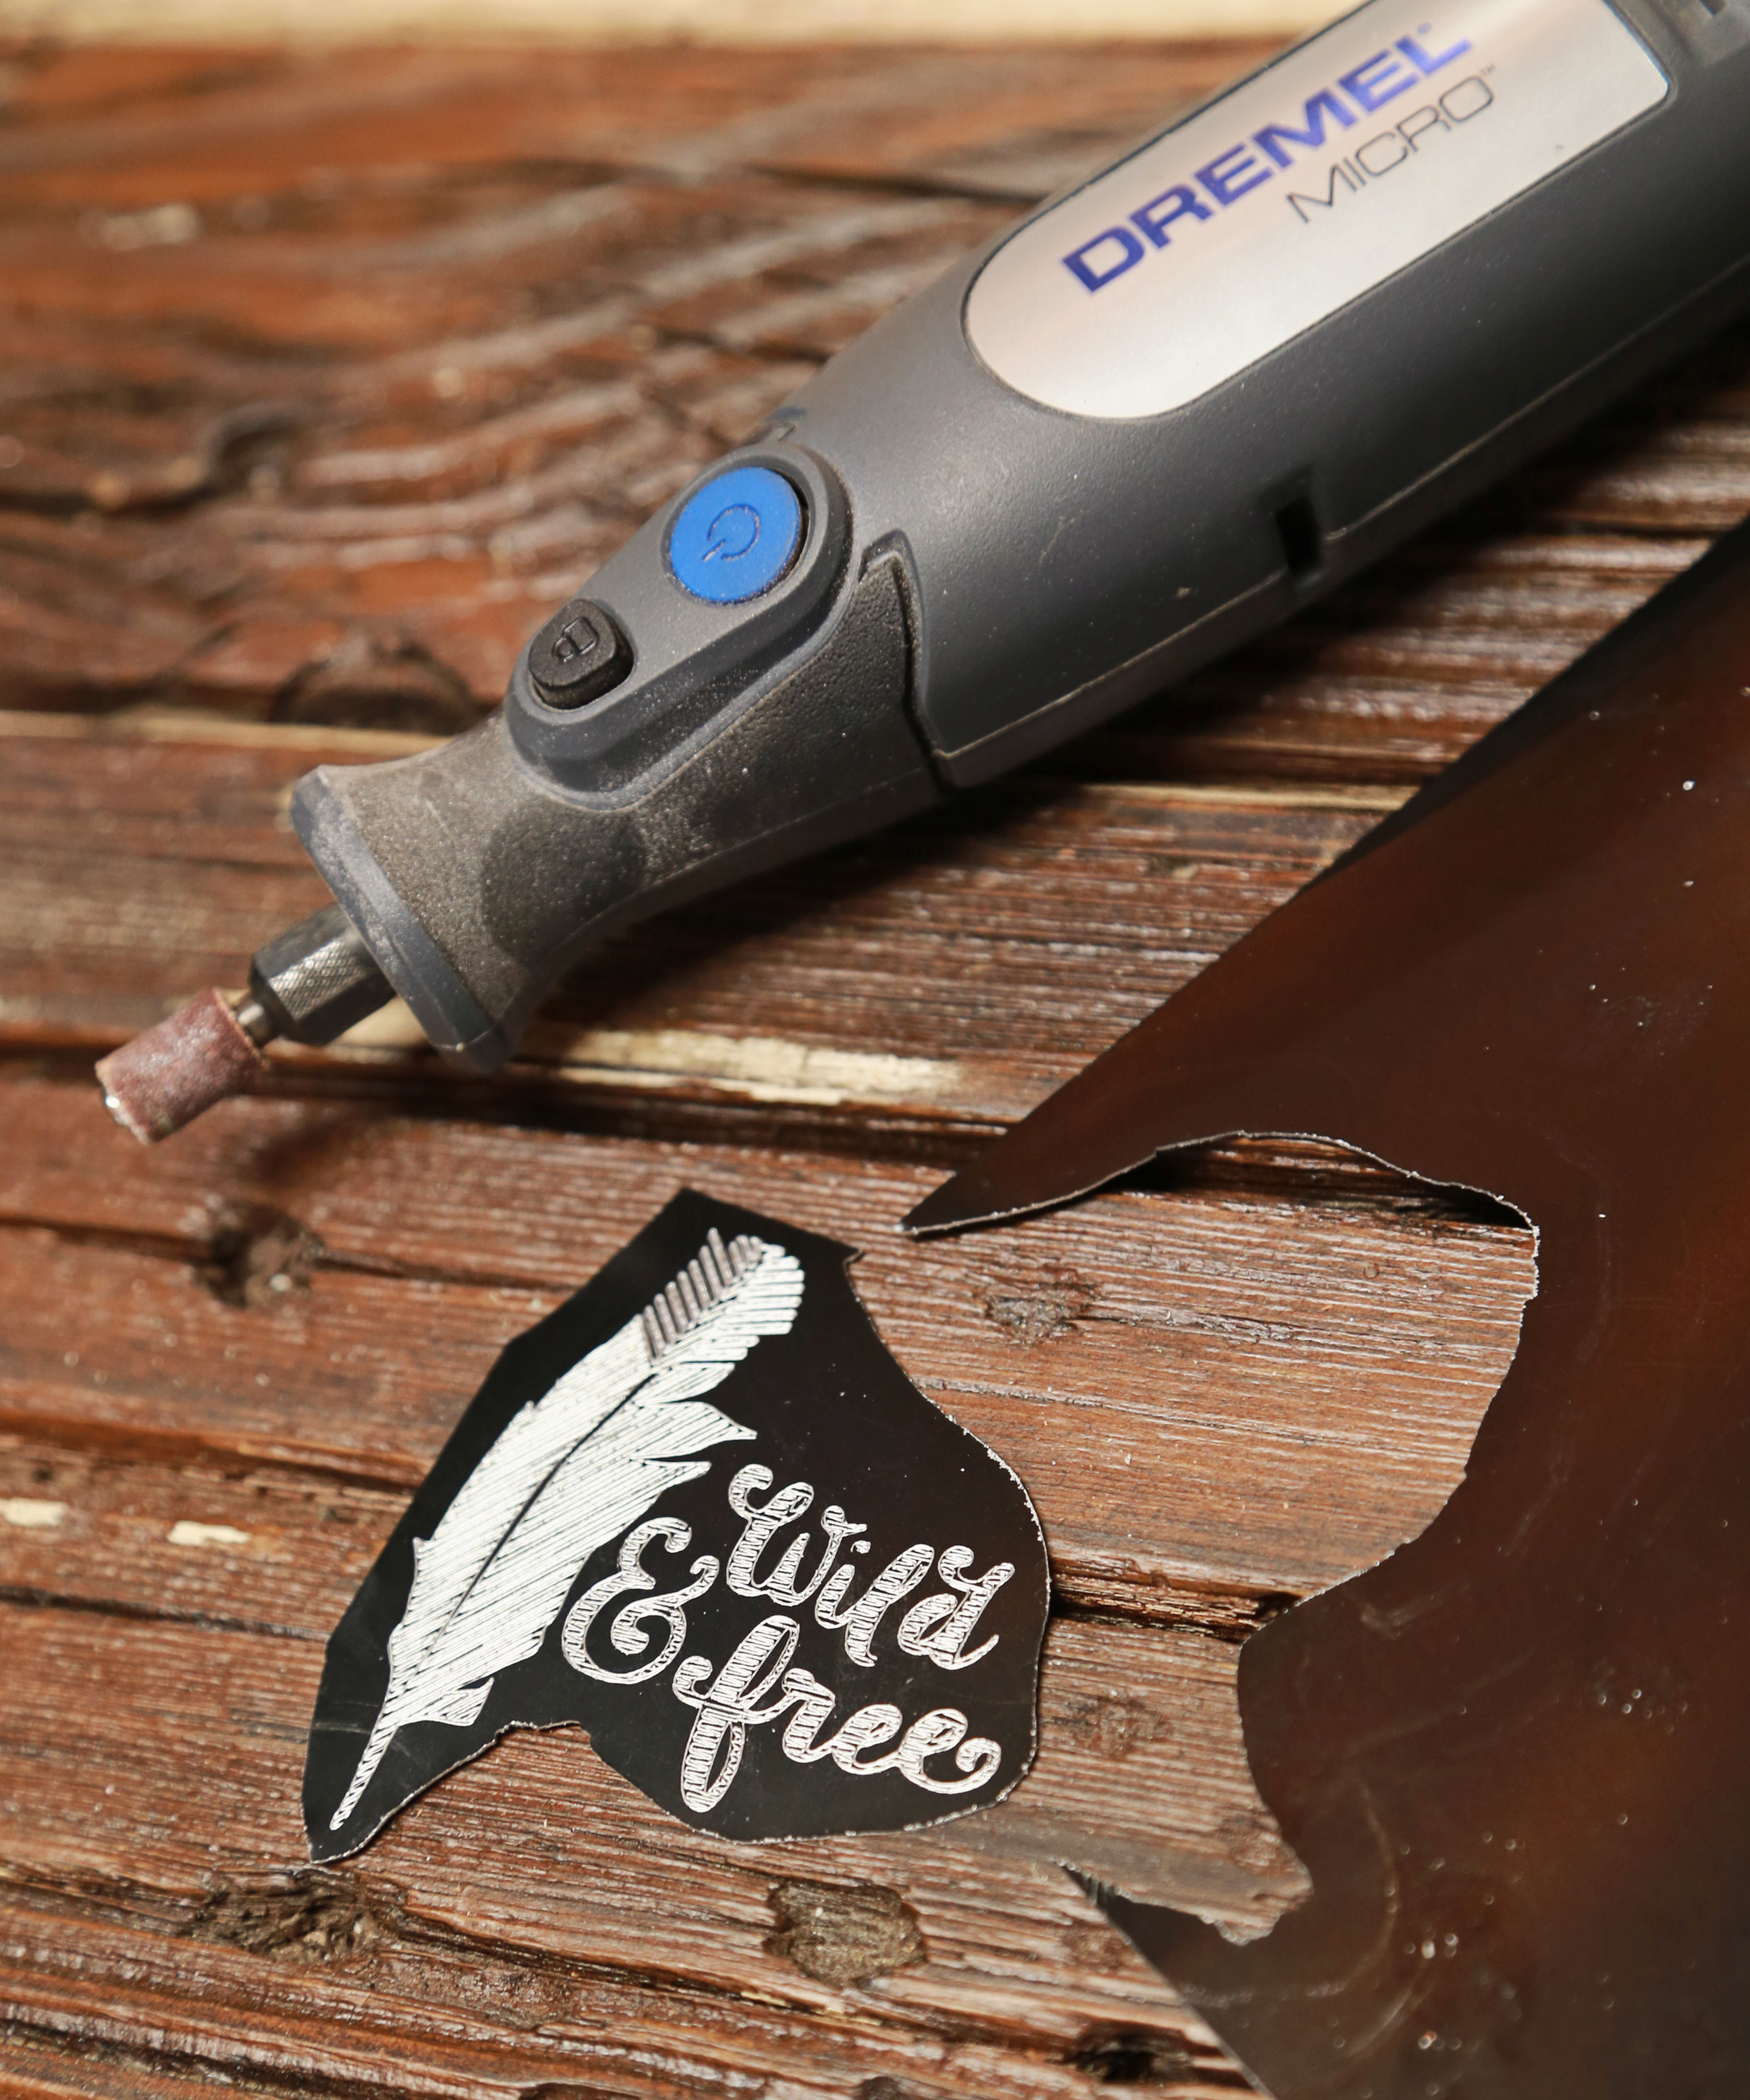
I basically just made a rough cut getting as close I can get to my shape. It looks kind of raggedy right now but I’ll be able to shape and smooth the edges with my Dremel Micro (another tool I can’t live without).
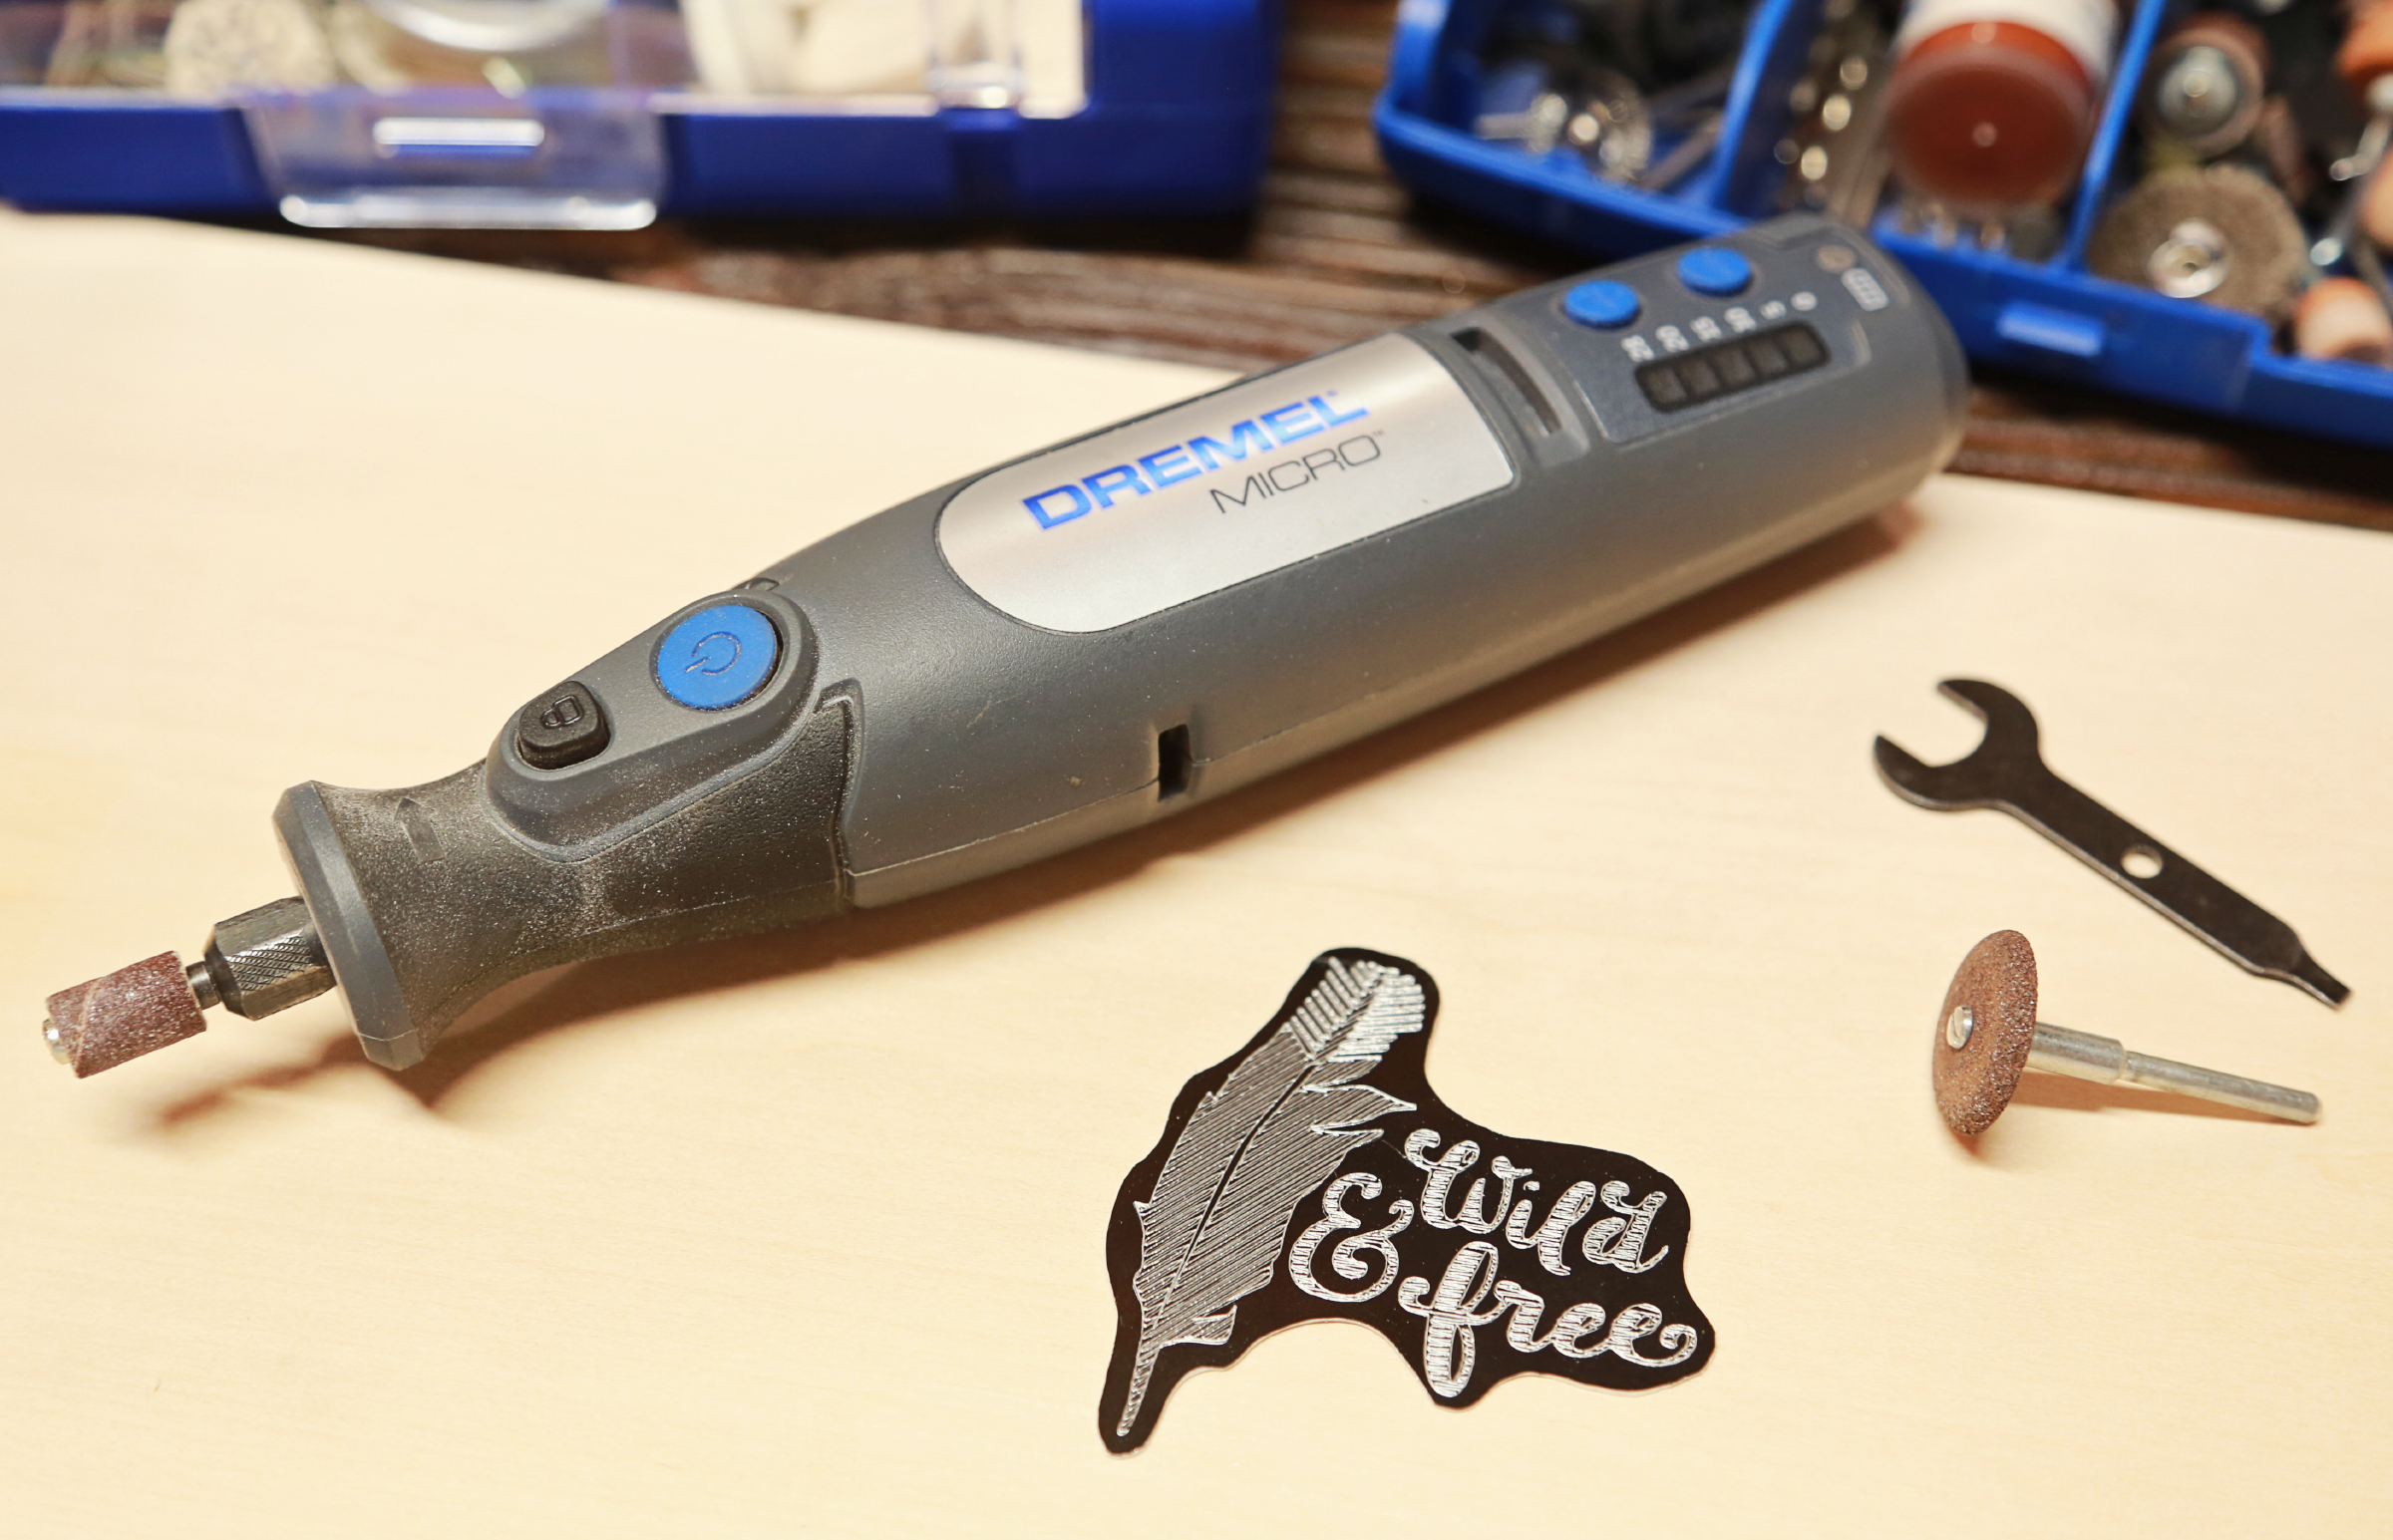
Here I used the grinding wheel to shape around the word and feather and then used a fine grit drum sander to smooth out the edges. Then you can cut your skewer down to the size you want and hot glue your mini metal sign to the top of the skewer.
My succulent looks amazing now.
I hope I gave you some good insights about the Curio (and there’s probably a lot more I can show you but this isn’t the Top 20 List.)

Annie W
May 13, 2016
Very cool projects Kathi…love the etched tag for your planter!
Kathi Arbiso
May 16, 2016
Thanks so much, Annie! 🙂
Charlene P
May 13, 2016
I want a curio now !! So many cute ideas and possibilities !
Kathi Arbiso
May 16, 2016
You won’t be disappointed 🙂
Kelly Wayment
May 14, 2016
Great Curio projects, Kathi! I love how you use the Curio to put down a template for lettering or burning by hand.
Kathi Arbiso
May 16, 2016
Thank you, Kelly! They were such fun projects to do.
Cari
May 14, 2016
Wow!! Awesome job and amazing projects!!!
Kathi Arbiso
May 16, 2016
Thank you, Cari!