
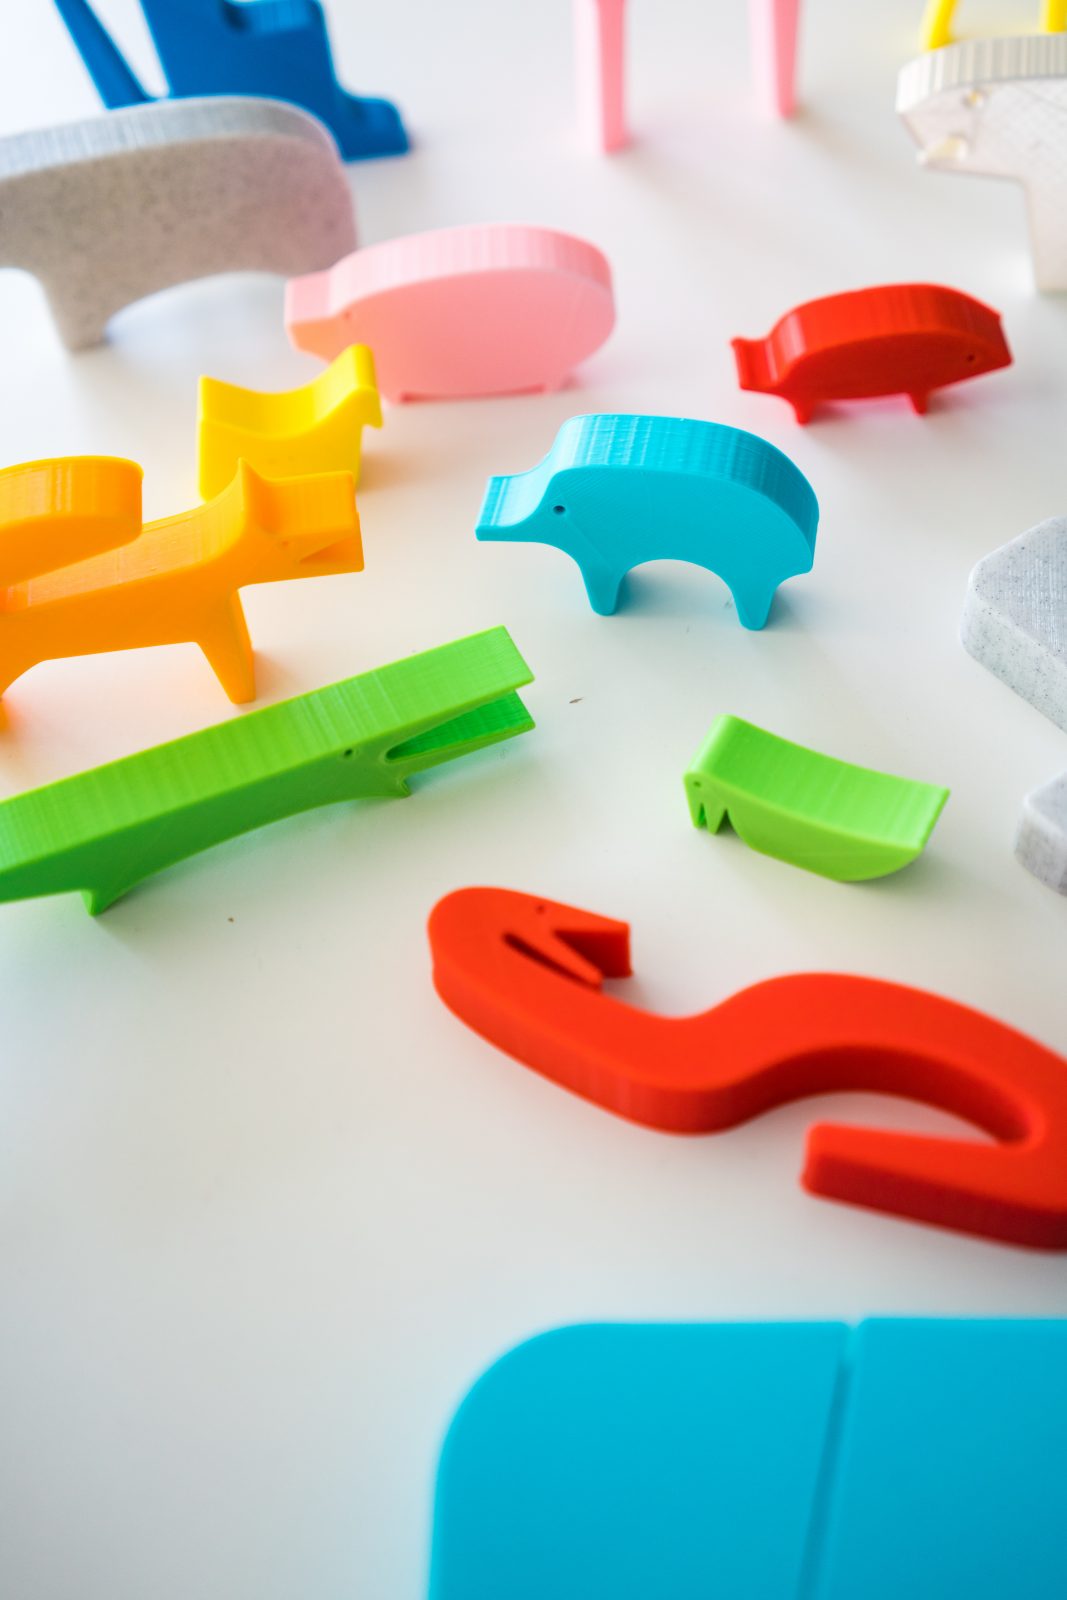
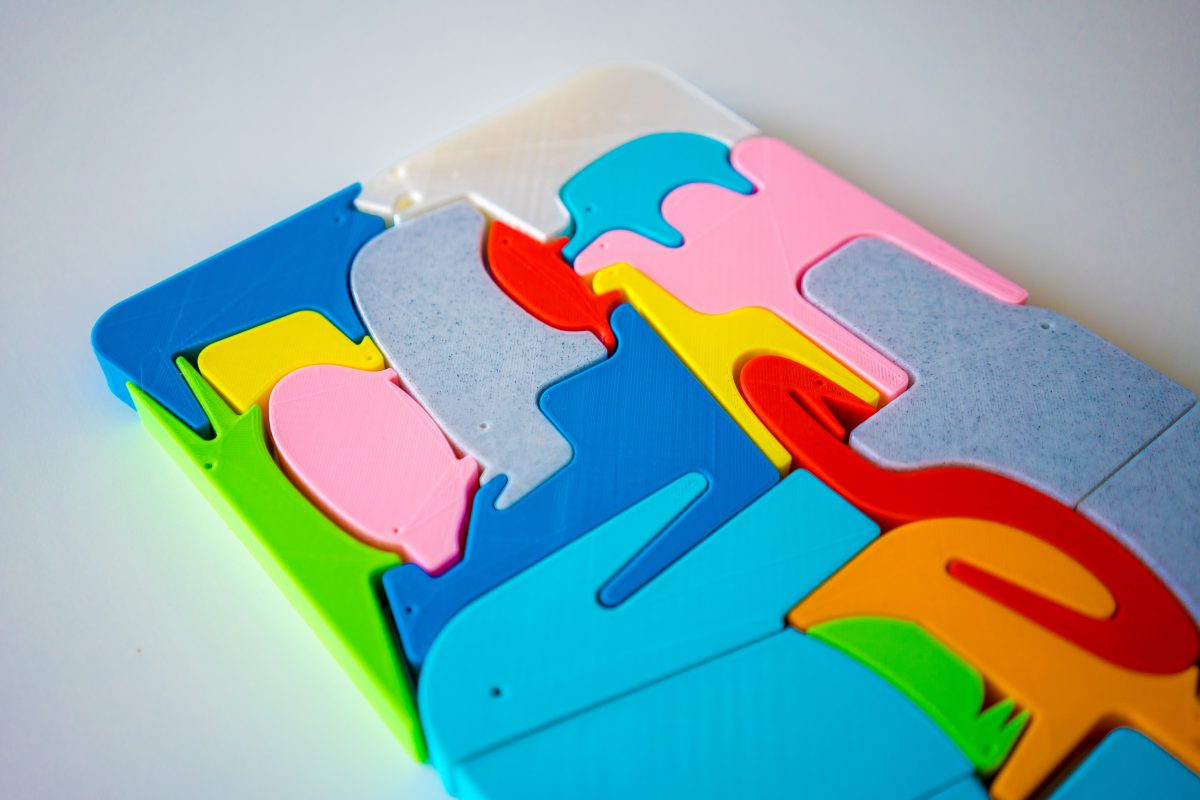
If you have a little one at home, this project is perfect to keep their little hands occupied! We 3D printed a bunch of different colored animals that all fit together into a little puzzle! Let your imagination run wild!
Supplies Needed:
- Silhouette Alta® 3D Printer
- Silhouette 3D™ Software
- PLA 1.75 mm Filament in multiple colors
- Animal Puzzle File from Thingiverse
Step One: Formatting the 3D Files
For this project, we’re using a free third-party design file. The Silhouette 3D™ software allows you to import designs from other websites, which is awesome! So we’re going to show you how to do that.
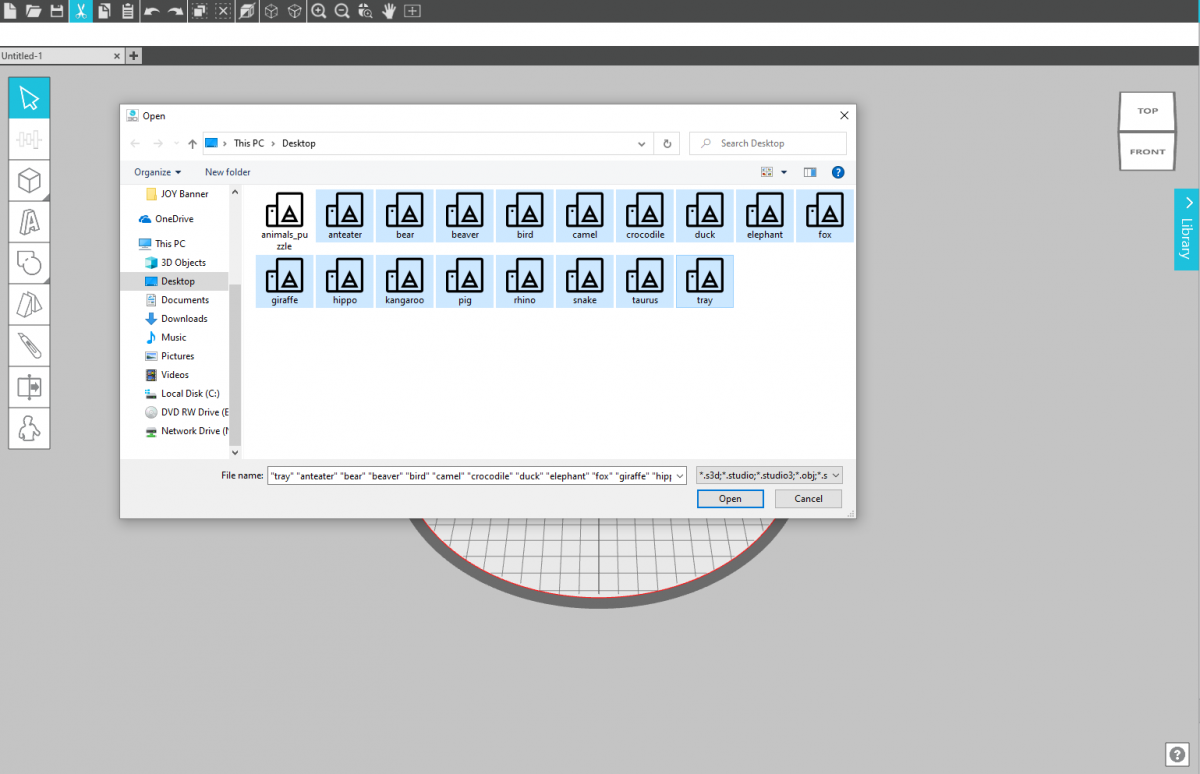
1. First, download the Animal Puzzle File. It should come in a .zip file format, each animal with its own file. Once downloaded, you can open these files in Silhouette 3D™.
2. Click File > Open and then select all the animal files at once. This will ensure that they all maintain their same scale relative to one another when imported into the software. If you don’t import them all together, and rather individually, each file will be resized to fit the dimensions of the Alta printing bed. This will not allow them to fit together appropriately for the puzzle.
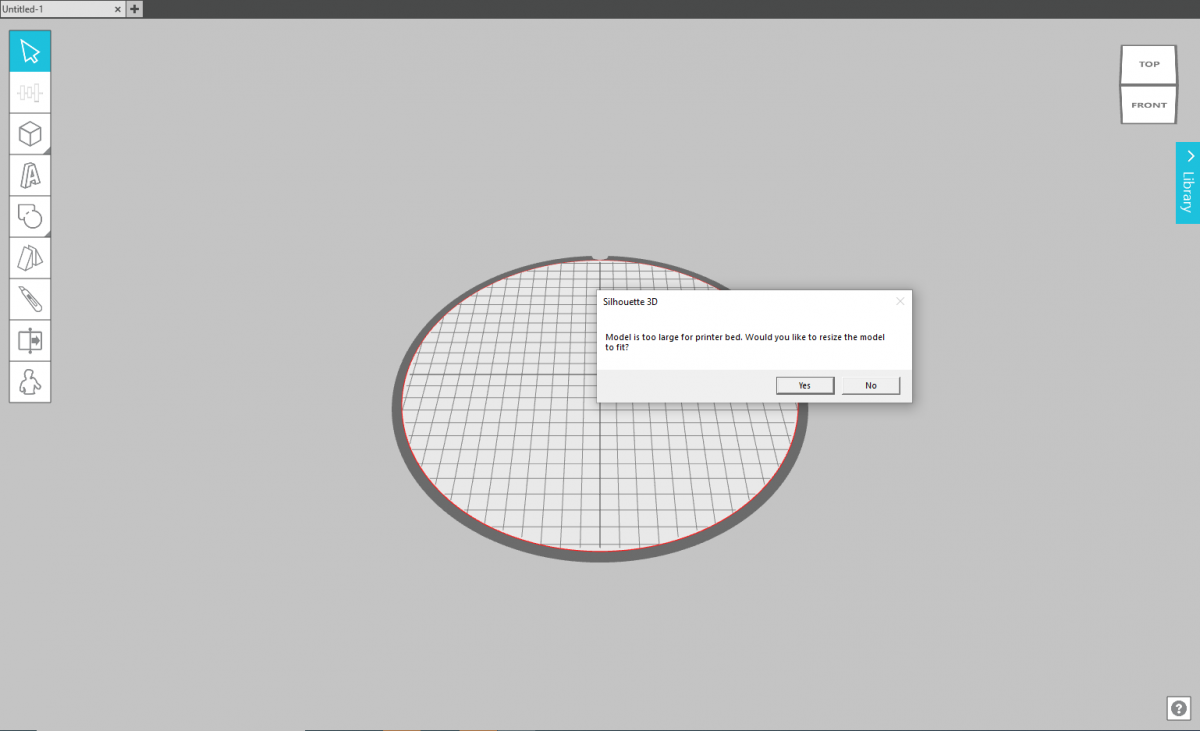
3. Once you select all the animal files and select Open, a pop-up will appear saying the files are too large and asking to resize them. Click yes, as all the files will resize but maintain their scale relative to one another.
4. Then all your files will import into the software! They will all be stacked on top of each other to begin with, so just separate them apart within the software.
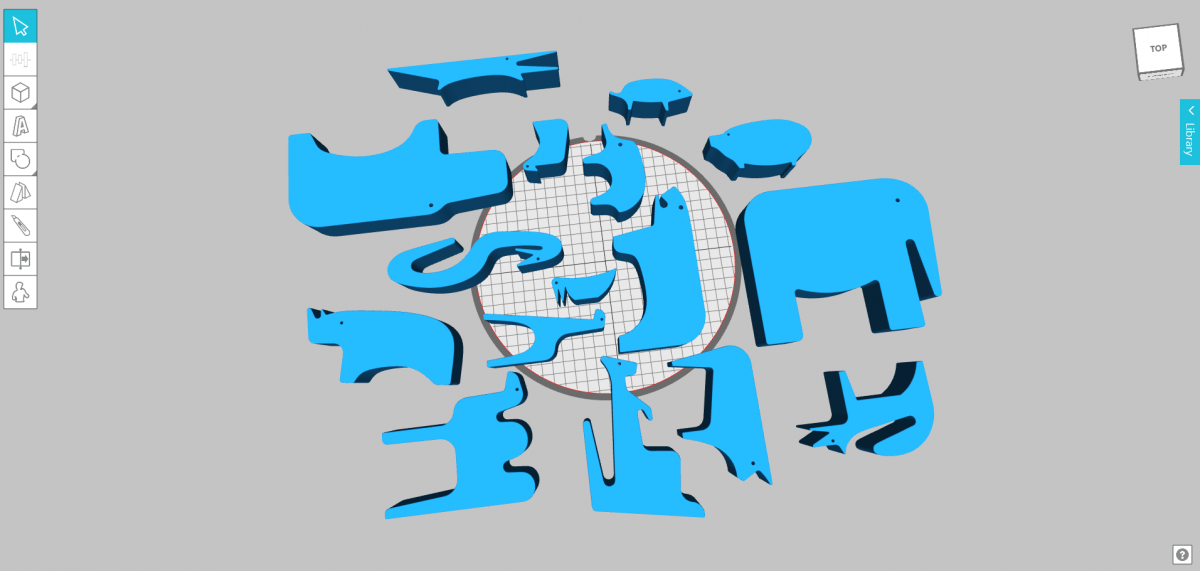
5. All the animals should have the same height now. If you want to adjust the measurements of the animals, select them all and then adjust them all together so they remain scaled appropriately.
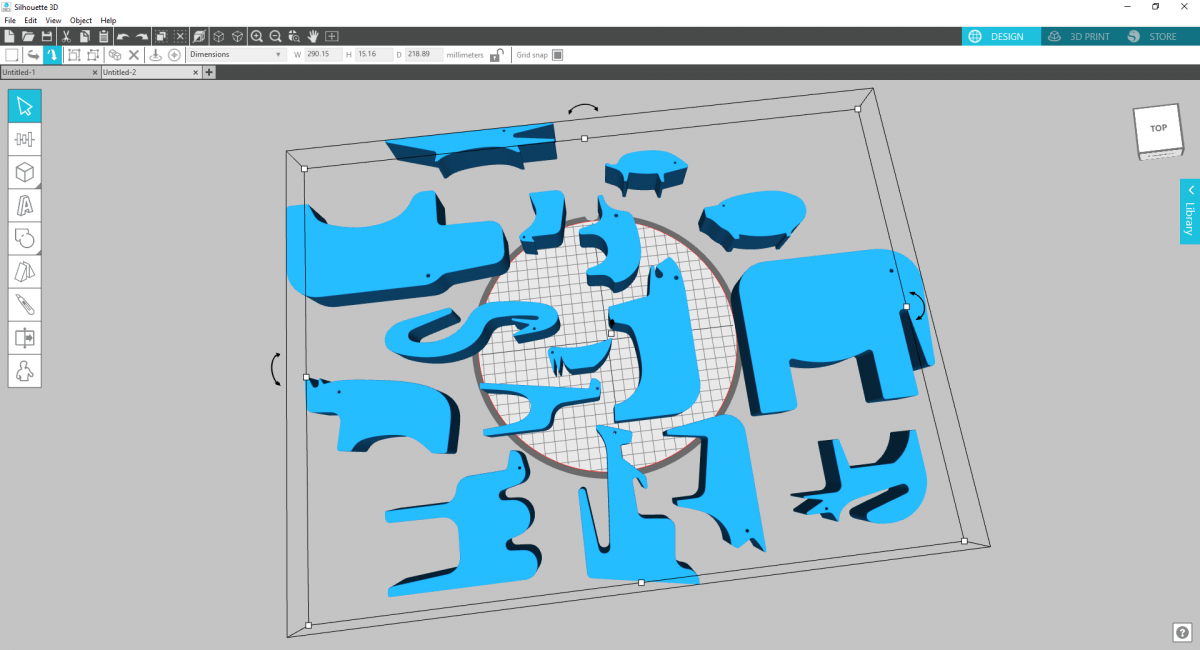
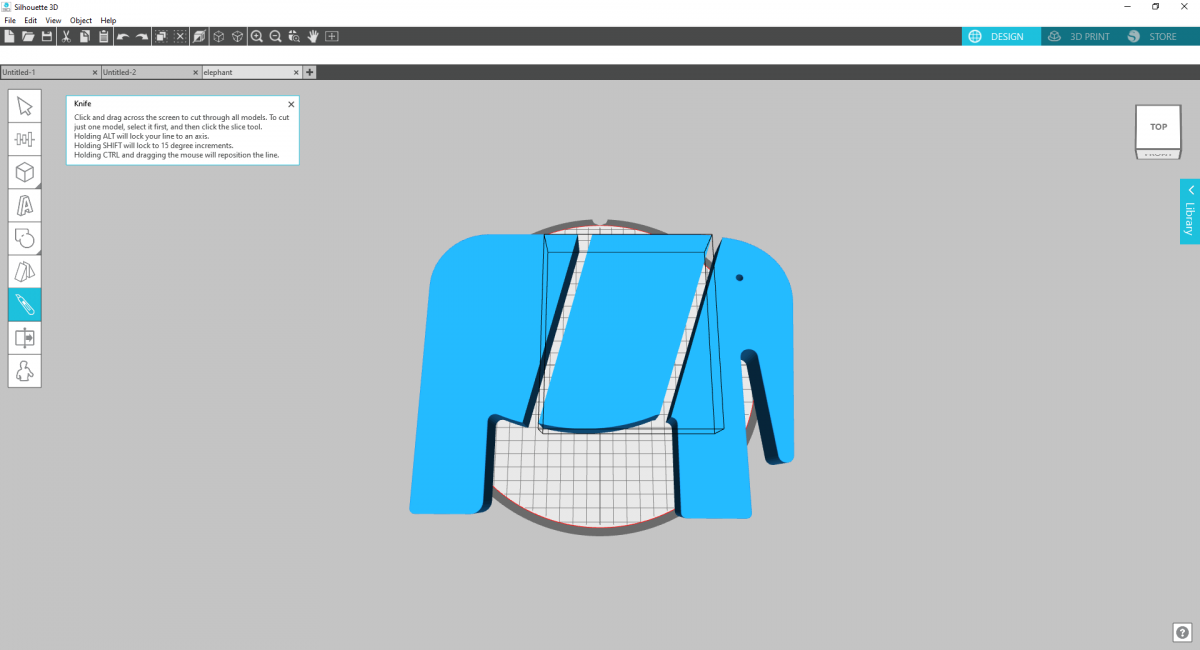
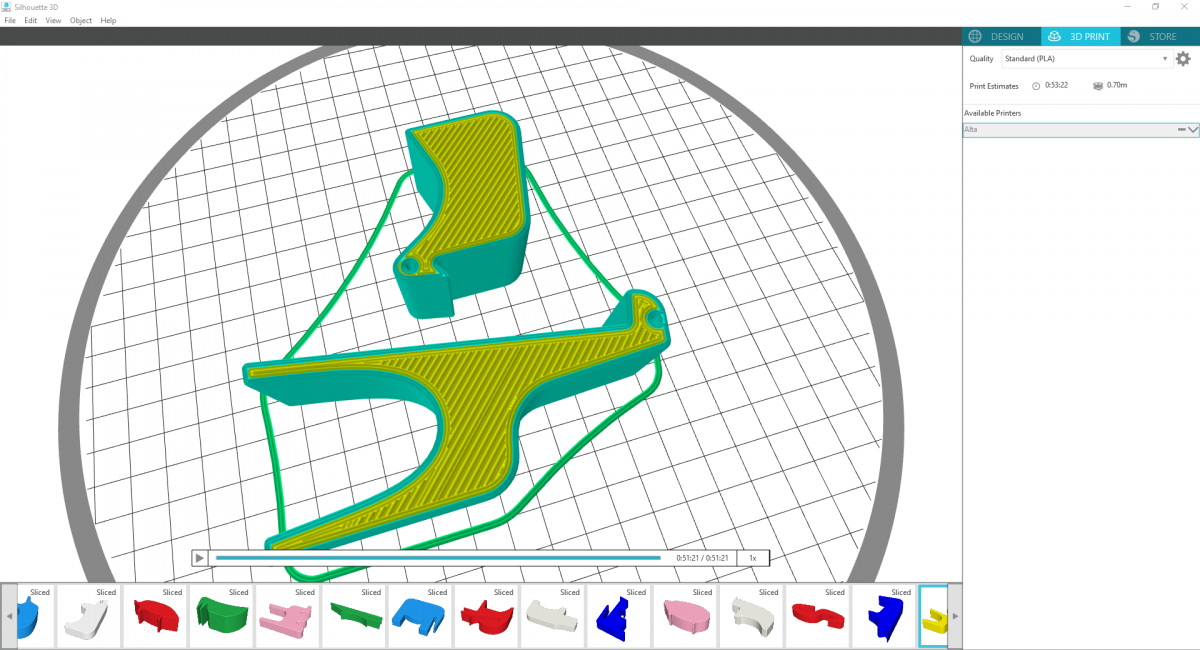
6. We adjusted the height of our animals to 15 mm. The thicker or larger your animals, the longer they will take to print. We increased the dimensions of our animals a bit, so the Rhino and the Elephant were larger than the print bed could handle. To solve this, we sliced the animals into 2 or 3 pieces using the knife tool so each piece could print separately.
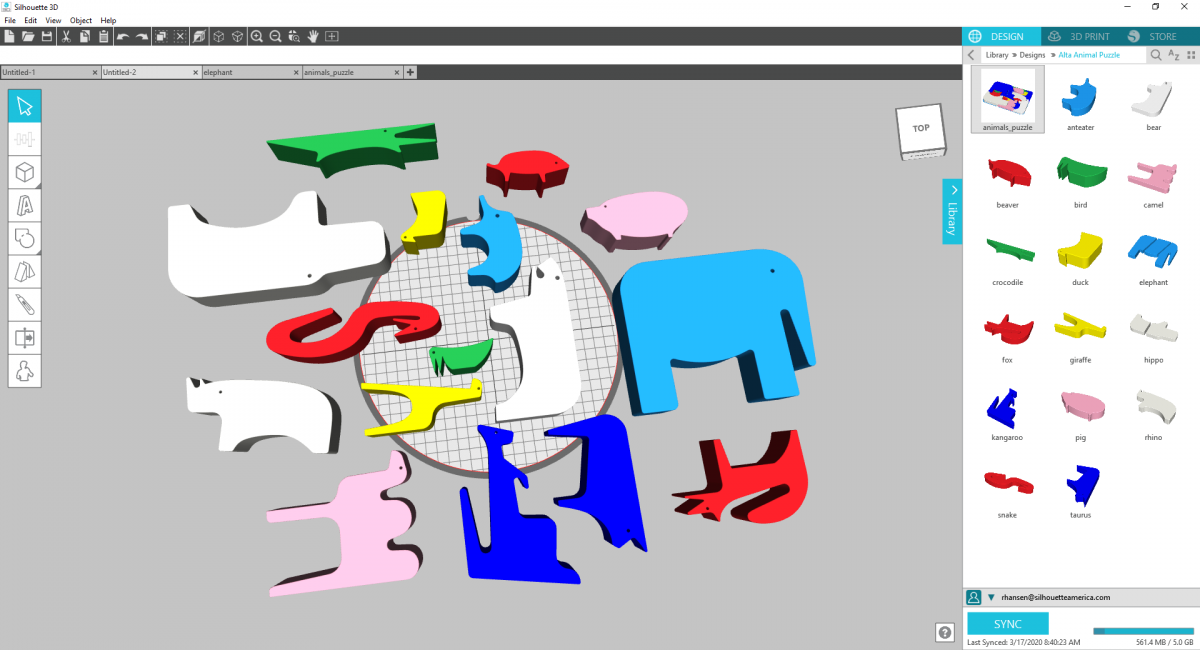
7. Then decide which color you want to print all your animals! Use the color tool to change each color to get an idea of what filament you want to use to print.
Step Two: Printing the Files
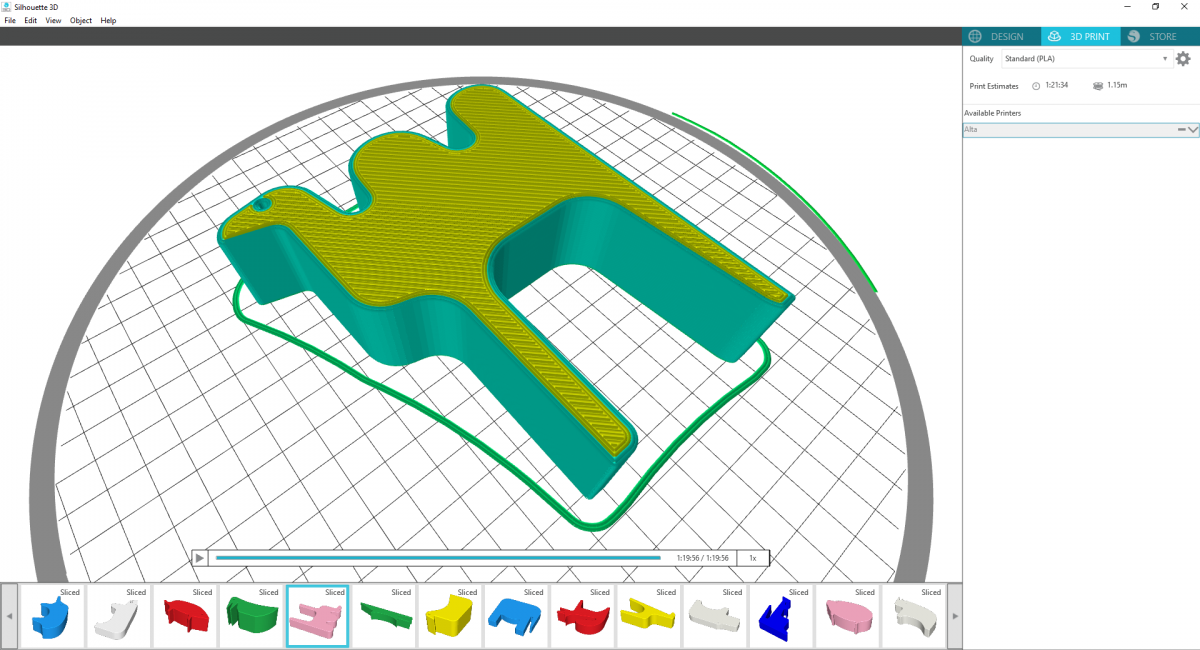
1. When you click 3D print, all the animals will be sliced (which means the software plans out the printing process your 3D printer will follow) and prepared to print! If there are multiple animals you want printed in the same color and you can fit both on the print bed at the same time, you can group them together by selecting them both, right-clicking, and select “Group.” Then click 3D Print, and they should be able to print together, which will save you some time.
2. If you need help knowing how to set up your Alta Printer, check out this video for step by step instructions! And if you want to know more about the Silhouette 3D™ Software, we have tons of resources to help you learn!

Print out all your animals and let your little ones imagination run wild!
 3D Printed Cupcake Topper Picks
  Create a Custom Vase with the Silhouette Alta® Plus
Kelly Wayment
March 24, 2020
That’s cool!
Emily
April 18, 2020
What do you do with the animals that you had to slice to fit? Did you glue them together or use them in pieces?