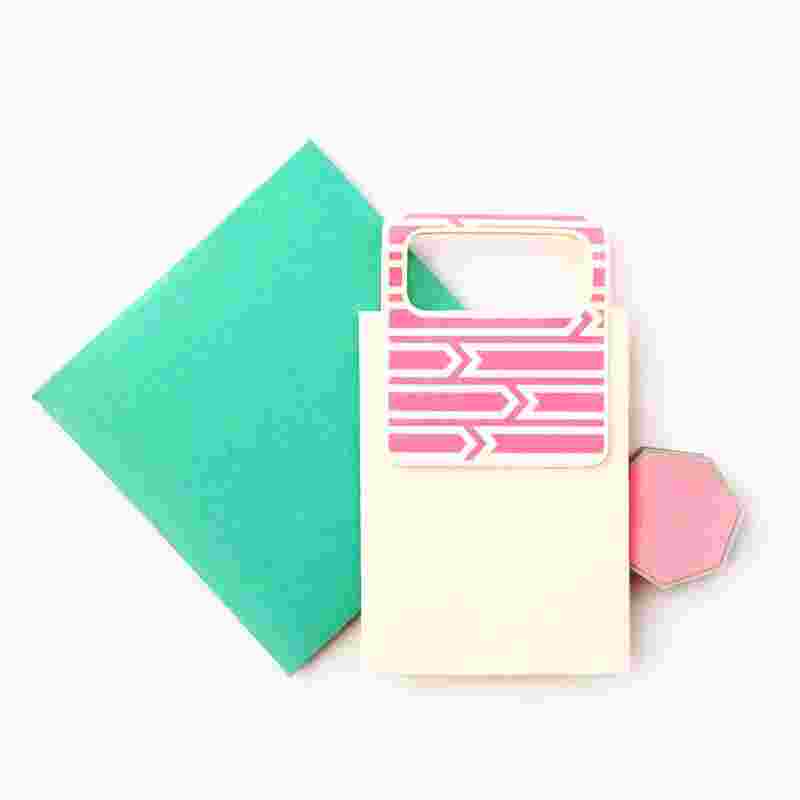
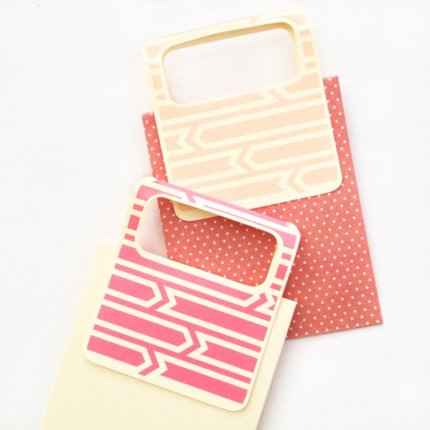
Sometimes your treat bags just need an extra touch, and with Silhouette’s arrow design, we have ourselves a project. These little handles are perfect for little and not-so-little hands. Pair them up with treat bags, and you have yourself a sweet little bag waiting to filled with goodies.
Supplies Needed:
- Silhouette CAMEO® or Silhouette Portrait® or Silhouette Curio™
- Silhouette Cutting Mat
- Silhouette Cutting Blade
- Silhouette Studio
- Cardstock
- Glue
- Design ID #63951
Step One: Create the Handle Shape
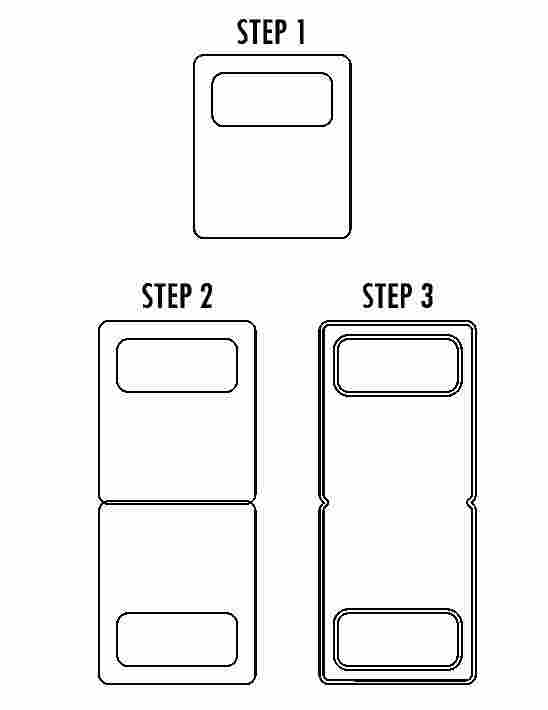
- Open the Arrows shape in Silhouette Studio, and put it to the side. Start creating the handle shape by making one rounded rectangle within another and make them a Compound Path (top image).
- Then make a mirrored copy of the original shape (with a small overlap).
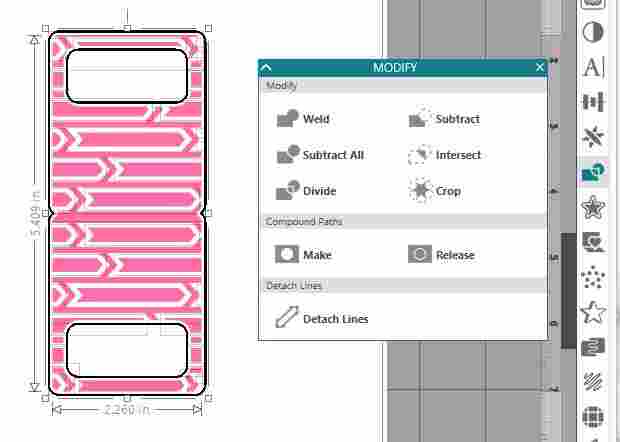
- Weld the 2 shapes together (bottom right image) and use the internal offset to create a border.
- I colored, resized, and duplicated my image so that it would be big enough to fit over my internal offset.
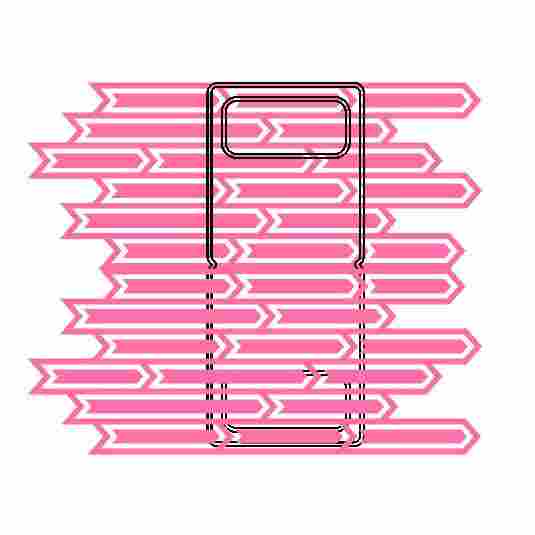
- By placing the internal offset over my pattern and cropping, I was able to shape the pattern so that it would fit within my original handle shape. I then grouped everything together (the cropping leaves the shape in little pieces).
Step Two: Print & Cut the Design
- Use the Print & Cut feature. Remember you MUST add registration marks in order for your design to be cut correctly. To add these registration marks, select the Page Setup icon on the tool bar on the left-hand side of the page.

- Once your handles have been printed, place the paper onto your cutting mat and load into your machine. Set your machine’s cut settings within the Send window in Silhouette Studio® and adjust your blade if needed.
- After the handles are cut, adhere them to treat bags that are just a little larger than the handles. Let them dry and the treat bags are complete!
Elizabeth Barnett
February 16, 2018
doesn’t work – with the solid ends joined, you can’t put anything between the sides! … the two handle ends are what should be joined.