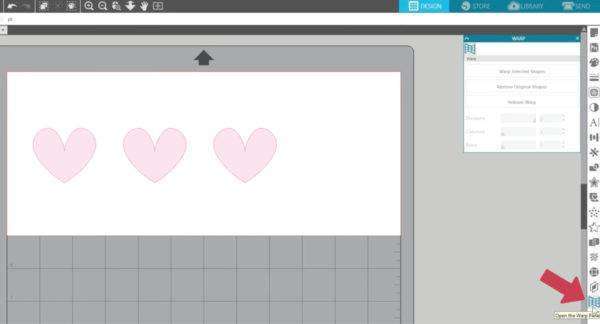
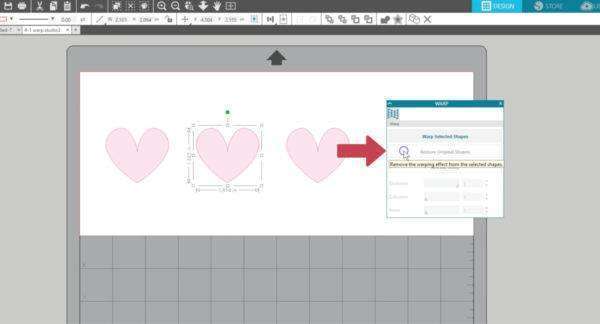
Silhouette Studio® 4.1 introduced a basic Warp Tool for users of Designer Edition and higher. The Warp panel can be accessed near the bottom of the panels on the right. If your screen is small, look for an arrow to pull out more options. The Warp Panel looks like a warped grid.
Let’s look at what it does to a heart shape. Select your shape, choose “Warp Selected Shapes,” and you’ll see a grid with adjustment nodes appear over your shape.
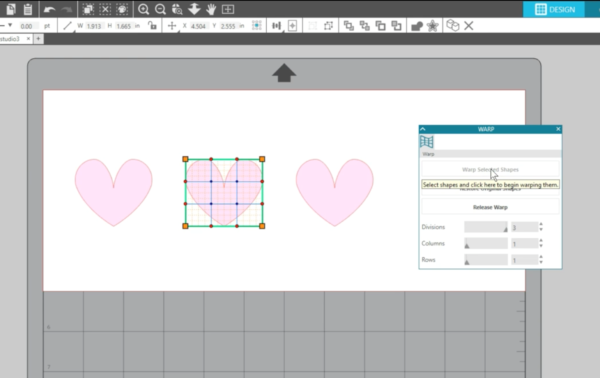
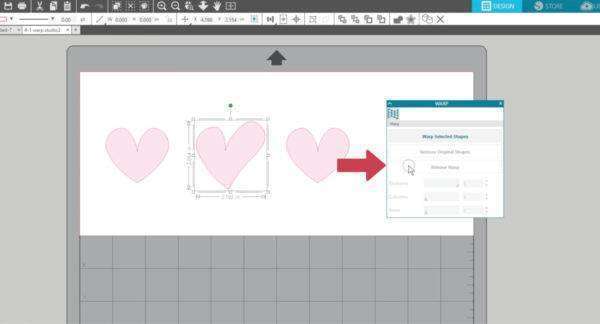
Drag these handles and nodes to stretch and reshape your design. All of these colored squares and circle nodes can be dragged for manipulation.
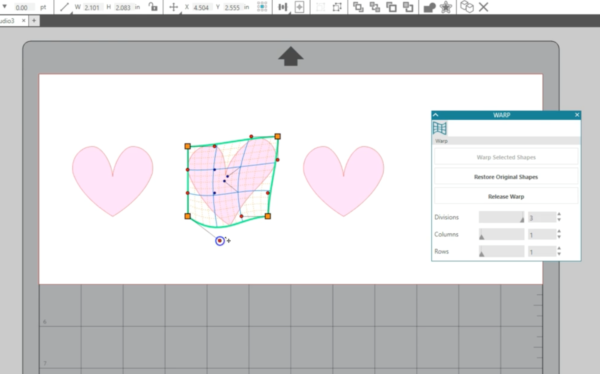
“Restore Original Shapes” puts your design back to the way it was before applying a warp.
“Release Warp” converts the warped shape to standard cut lines and removes the ability to edit that warp any further.
You can create more or fewer nodes by adjusting the Divisions, Columns, and Rows.

You can use this basic warp tool on any shape or text if you have the Designer Edition or higher of Silhouette Studio®, so have fun with it!