
My name is Chad Boender, and I am a kindergarten teacher and author of a blog called Male Kindergarten Teacher. Every year I try to come up with a cost-effective, fun, and creative parent gift for my students to make. I try to make something that parents will cherish for a lifetime and students will look back on each year to remember the great times they had in school.

Today, I am excited to share how I created this fun and easy Christmas ornament with Silhouette Studio® and a Silhouette machine. Let’s grab our supplies and get started!
Supplies Needed:
- Silhouette CAMEO® or Silhouette Portrait® or Silhouette Curio™
- Silhouette Studio®
- Silhouette Cutting Mat
- Silhouette Cutting Blade
- Silhouette Matte Vinyl – Light Green
- Silhouette Transfer Tape
- 4 inch x 4 inch canvas
- Red/Green/White Twine
- Acrylic Paint
- Gold Foil Stars
- Hot Glue Gun
- Sharpie Marker
- Design ID #1516
Step One: Set Up The Design
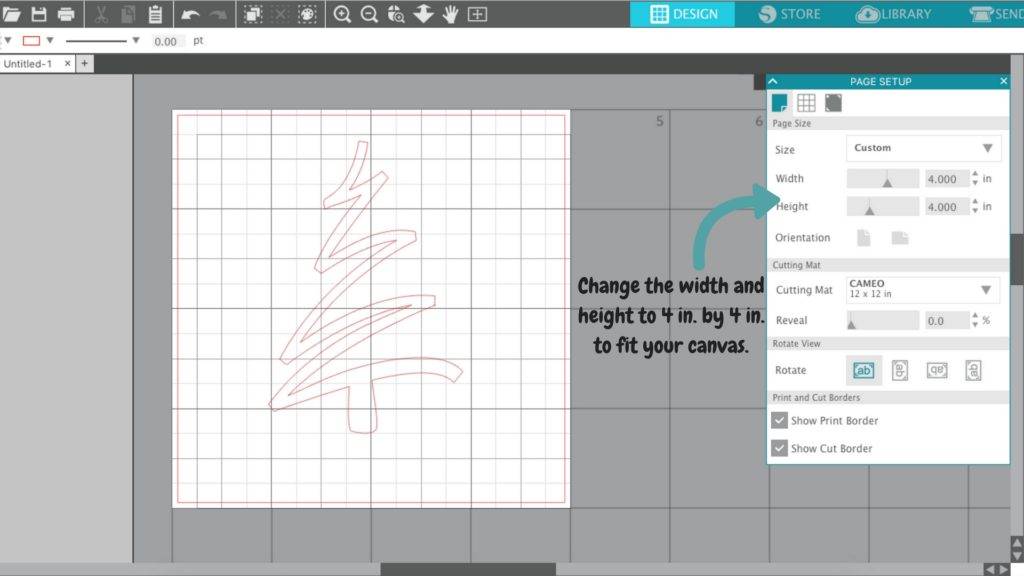
- Select the Page Setup panel (this icon can be found on the toolbar on the right-hand side of your page) and adjust your page to 4 inches x 4 inches. The page size can be adjusted based on the size of your canvas.
- Open Design #1516 (tree image) in Silhouette Studio® by locating it your library.
- Arrange the design in the center of the 4 x 4 inch page.
Step Two: Cut The Design
- Place a 4 inch x 4 inch piece of light green vinyl onto your cutting mat.
- Load the cutting mat into your machine.
- In Silhouette Studio®, select the Send tab in the top right-hand corner. Select the “Vinyl, Matte’” cut setting, and click Send. (Remember that if you don’t have an Autoblade, you will need to adjust your blade depth manually.)
- Your machine will cut out your design onto your vinyl.
- Once your machine has cut out your design, remove the pieces from your cutting mat.

- Weed away unnecessary parts of the design.
- Place the Transfer Tape over your design to help move your design over to the canvas.
- Slowly peel away the white backing from the vinyl.
- Align your design on your 4 x 4 in. canvas. Once you have it in the position you would like, rub the vinyl on the canvas. Use your scraper tool to help adhere the vinyl.
- Slowly peel away the transfer tape to reveal your finished design.
Step Three: Assemble Your DIY Ornament Craft
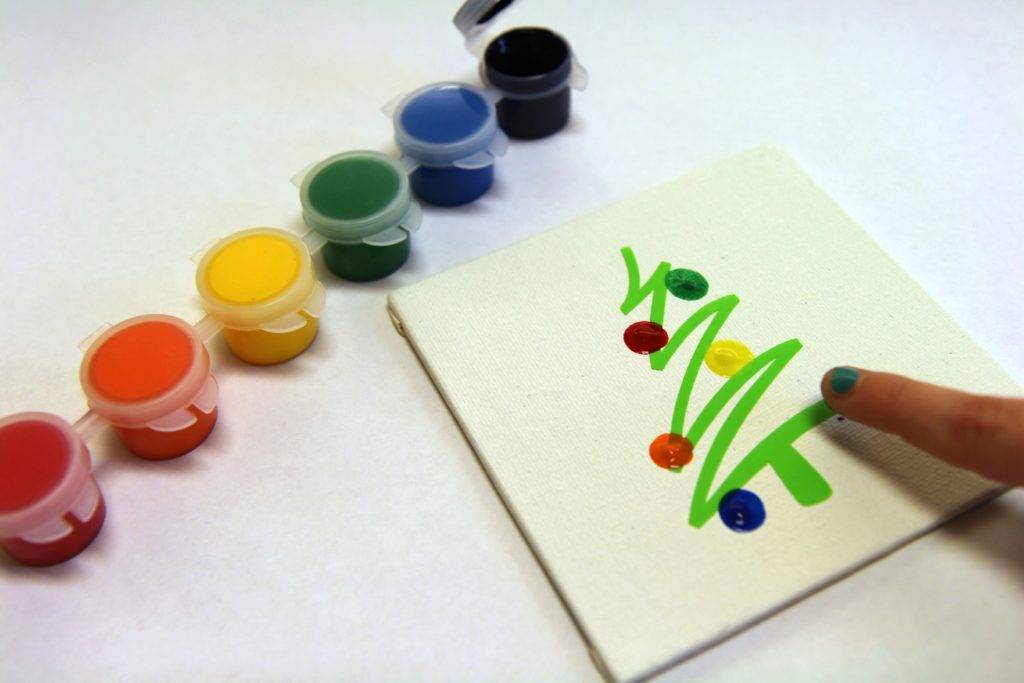
- Using a variety of colors of acrylic paint, have your students use their fingers to decorate their tree to their liking.
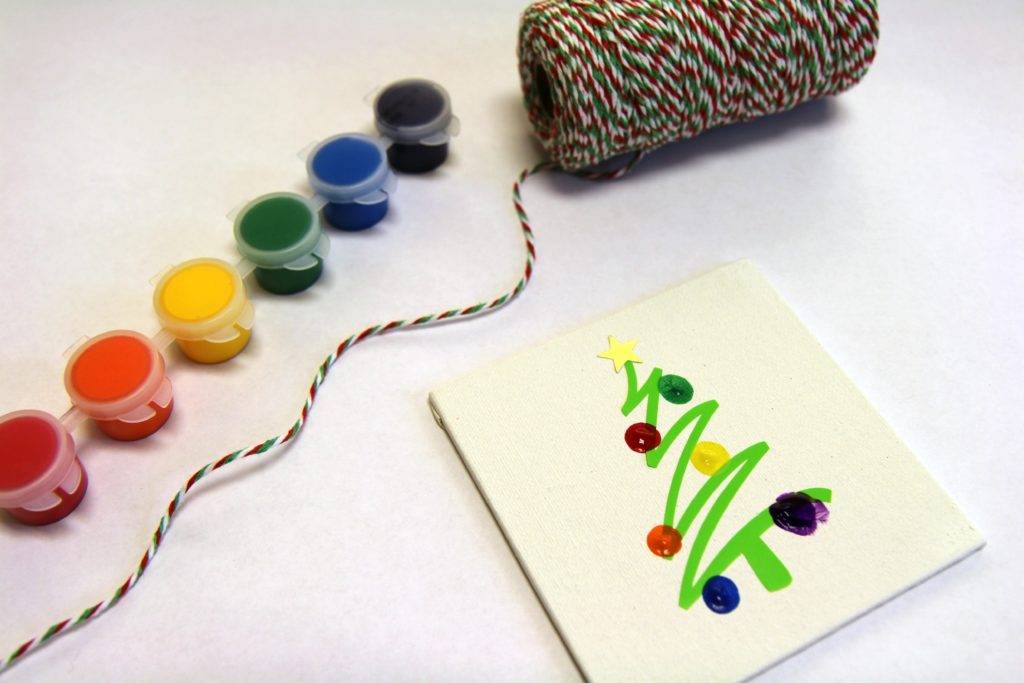
- Add a gold foil star to the top of the tree. Using red, white, and green twine, hot glue the ends of the twine to the back of your canvas.
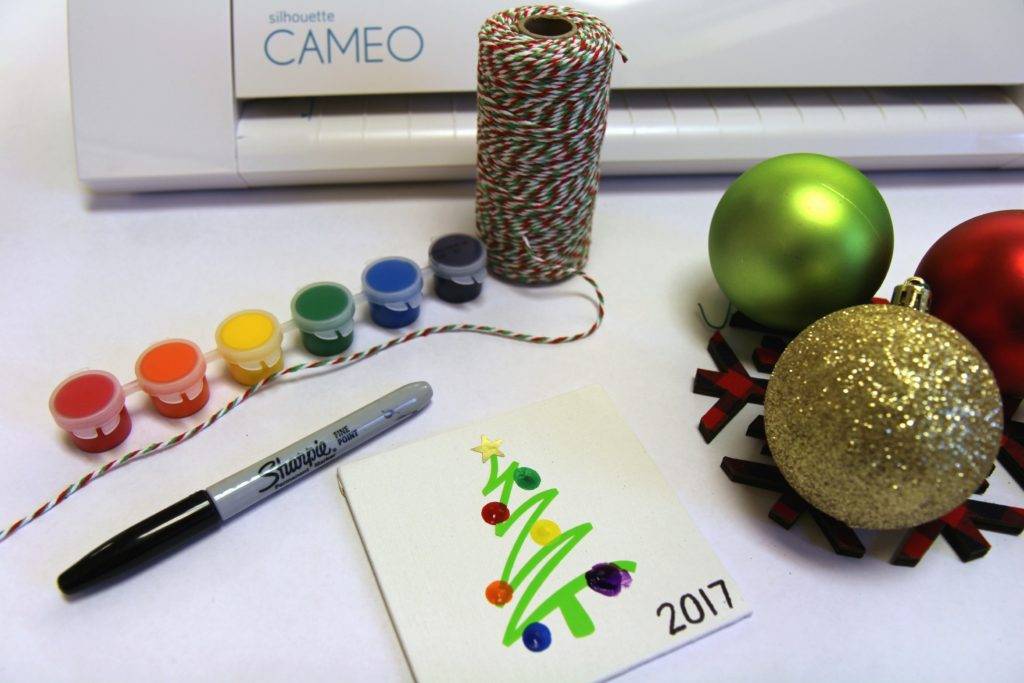
- Personalize your canvas with a Sharpie marker by adding the year or ‘Merry Christmas’ to the front of your canvas.
What kind of classroom crafts, bulletin boards, or activities would you like to see?