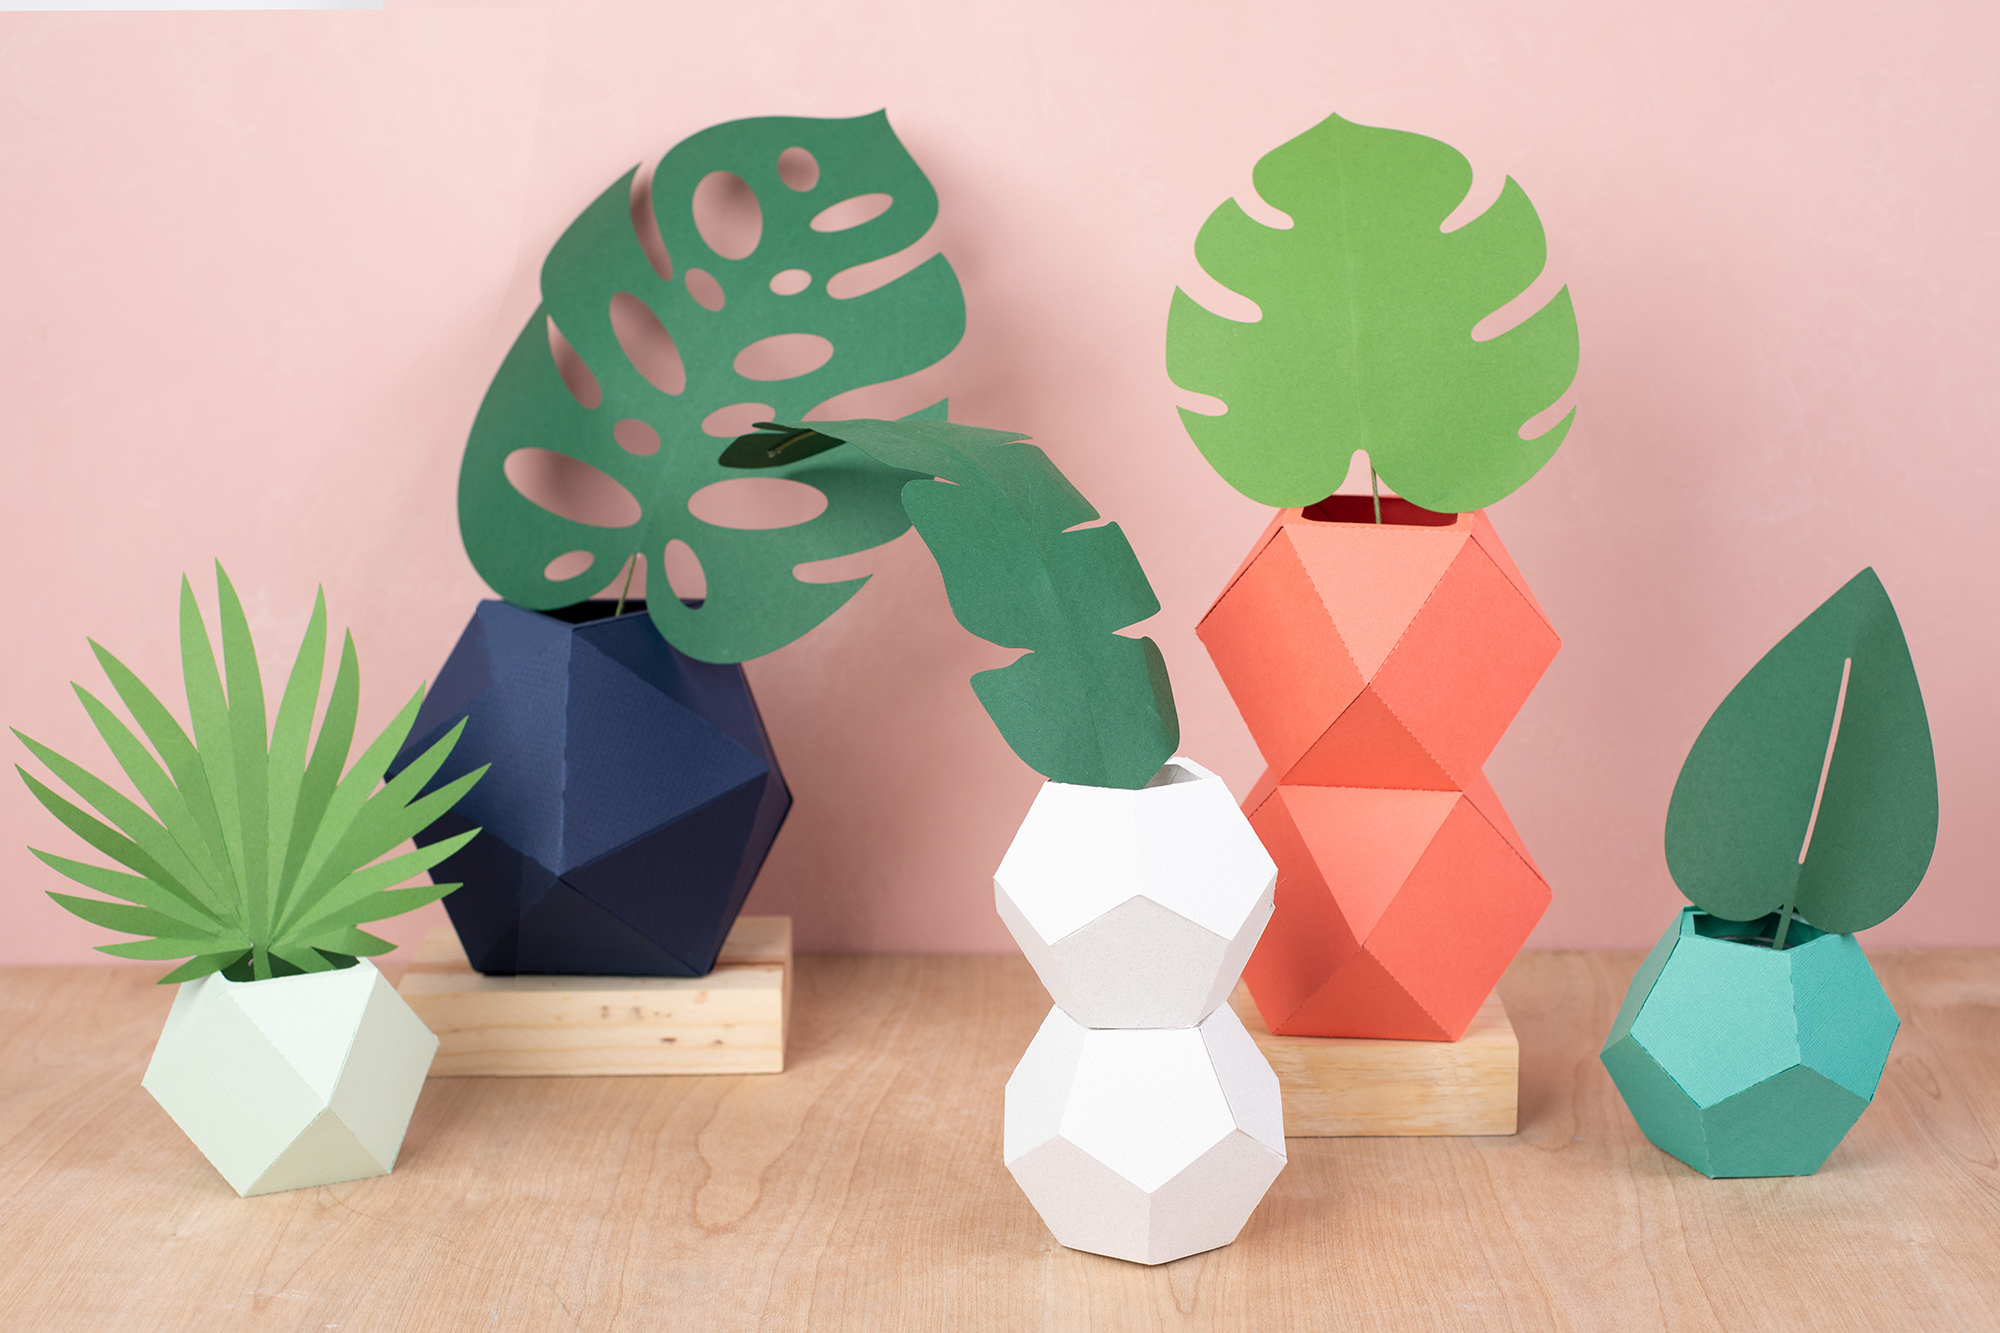
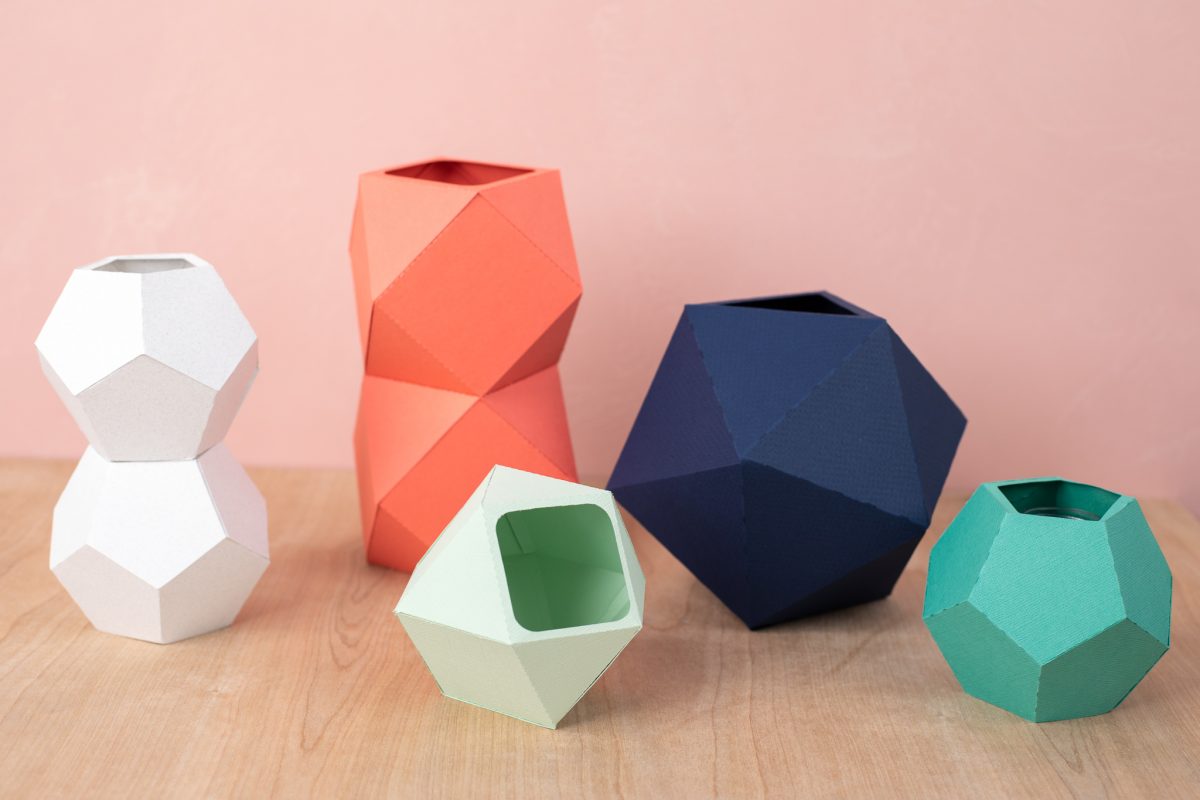
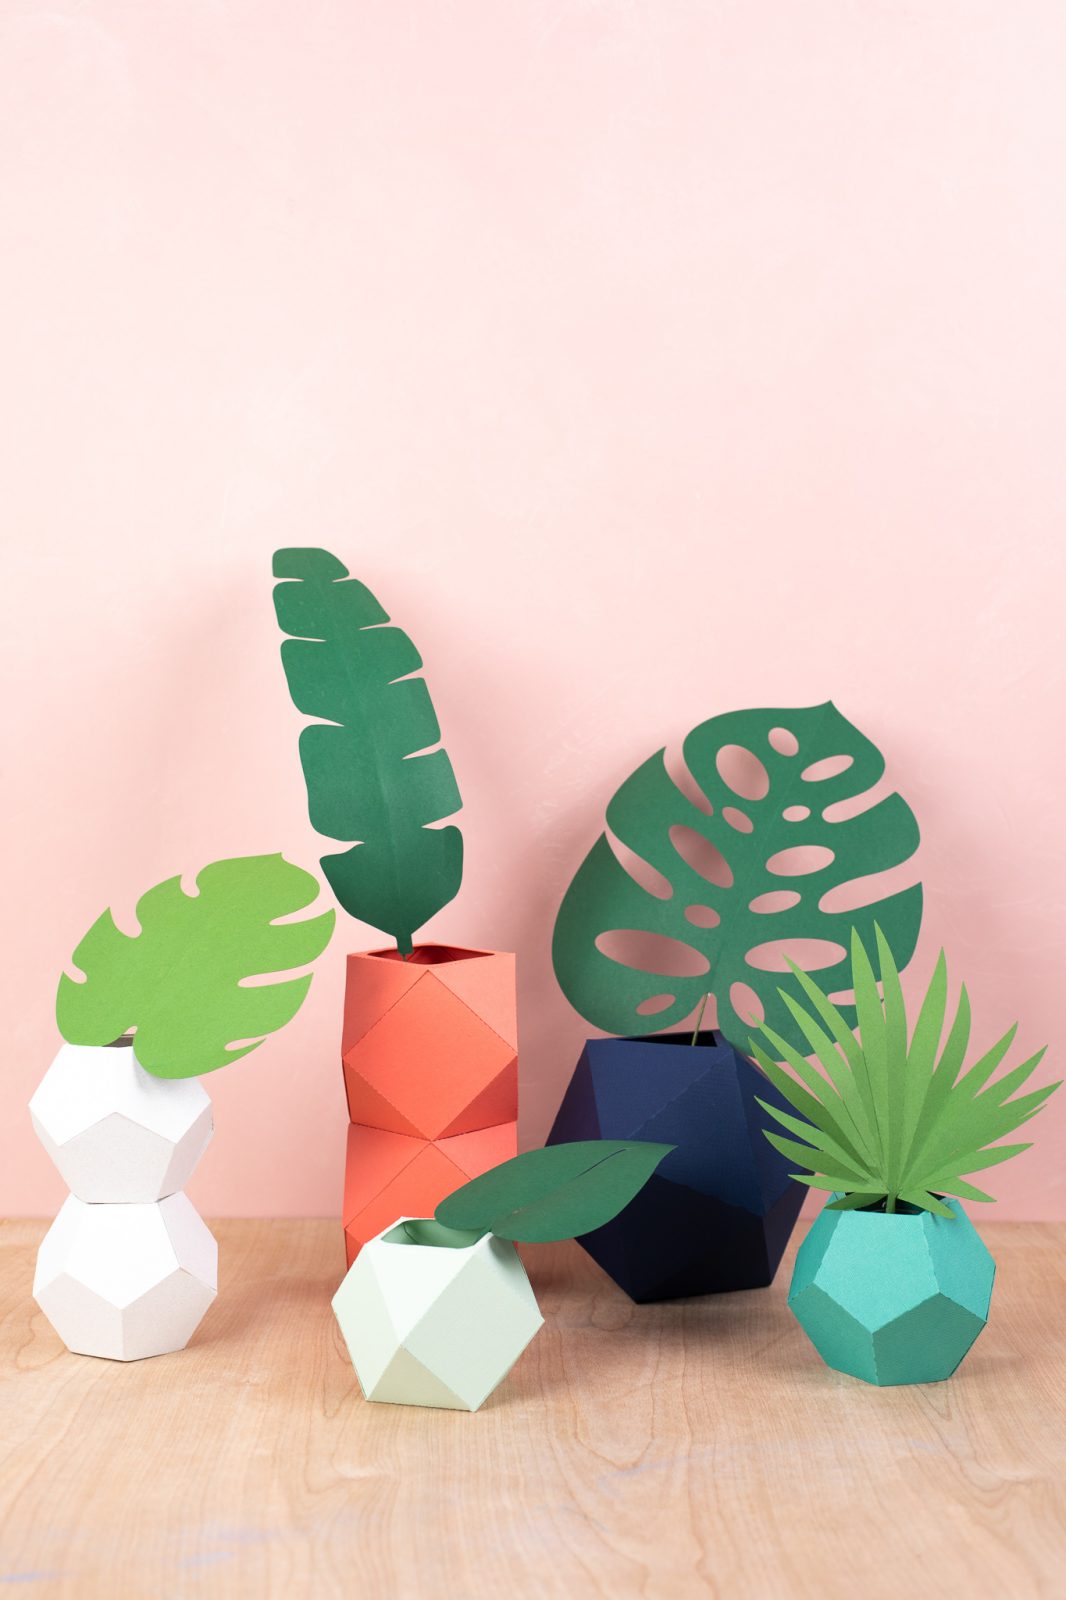
No one would ever guess these abstract vases are made out of paper! With these 3D geometric templates, you can create a variety of vases by adjusting the size and stacking multiple shapes together! Place a glass vase inside if you want to use real flowers, or skip the water and just use paper like we did here!
Supplies Needed:
- Silhouette CAMEO®
- Silhouette Studio®
- Silhouette Cutting Mat
- Silhouette Cutting Blade
- 12″ by 12″ cardstock or 12″ by 24″ cardstock for larger vases
- Hot glue gun
- Design ID #43047 (Large blue vase), #42605 (small blue and double-stacked gray vases), and #256123 (small mint and double-stacked coral vases)
*For the paper leaves, we used Design ID #83618, #83624, and #200510.
Step One: Formatting the Vases
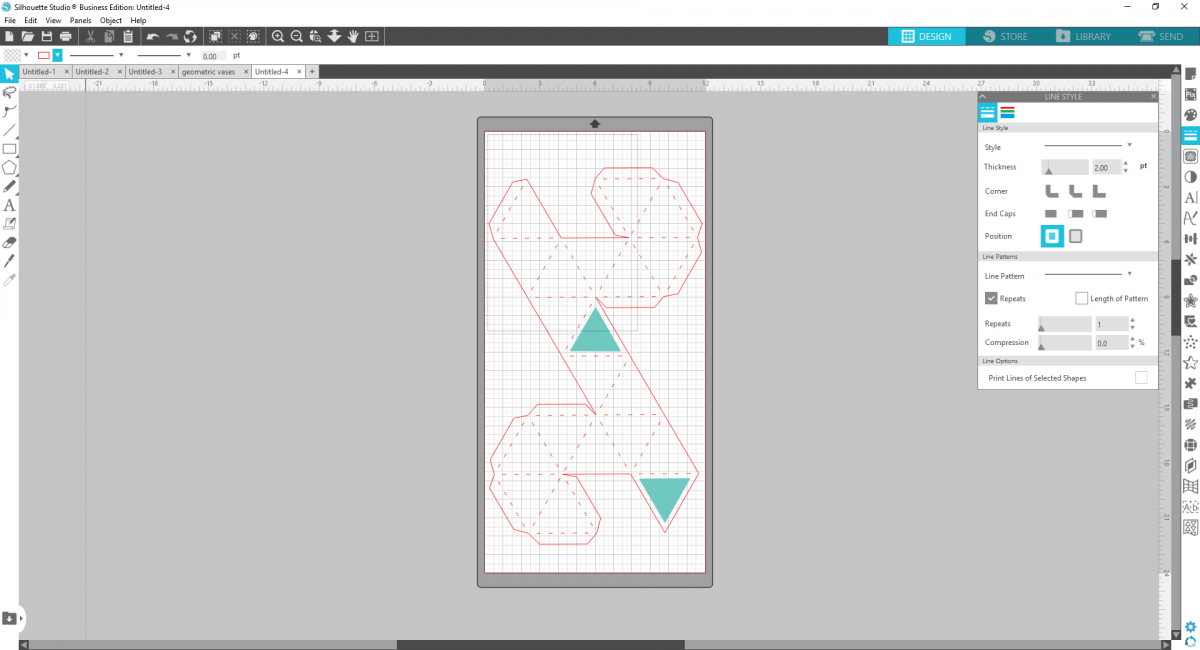
1. For the first vase, insert Design ID #256123 into Silhouette Studio. Delete the plant portion of the design or set it to the side if you’d like to use it later!
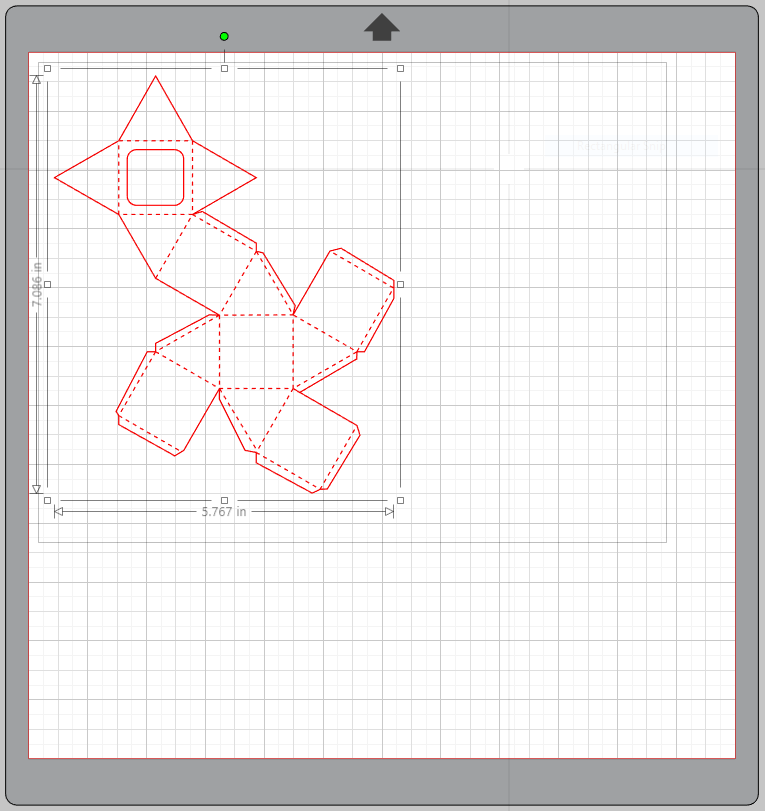
2. For this vase design, we’re going to use only one shape, so this design is all set as is! Just adjust the shape to your desired size. For our mint vase, we sized the shape to as large as we could on a 12-by-12 mat.
3. If you’d like to make a vase with two shapes, like the coral colored one in the photo, increase your paper and mat size to 12″ by 24″. Duplicate the vase shape to start. Adjust the shapes to your desired size. We sized ours as large as 12″ by 24″ would allow. To get them to fit, flip the second design horizontally and vertically.
4. For one of the vases, we need to add an additional opening so that when stacked, there is a continuous opening. To do this, ungroup the design and duplicate the small square with rounded edges.
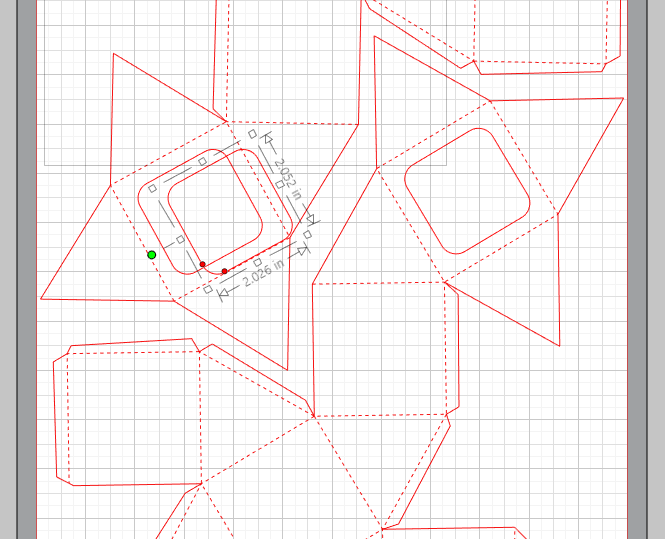
5. Then move that square to the base square of one of the vase shapes, like in the photo below.
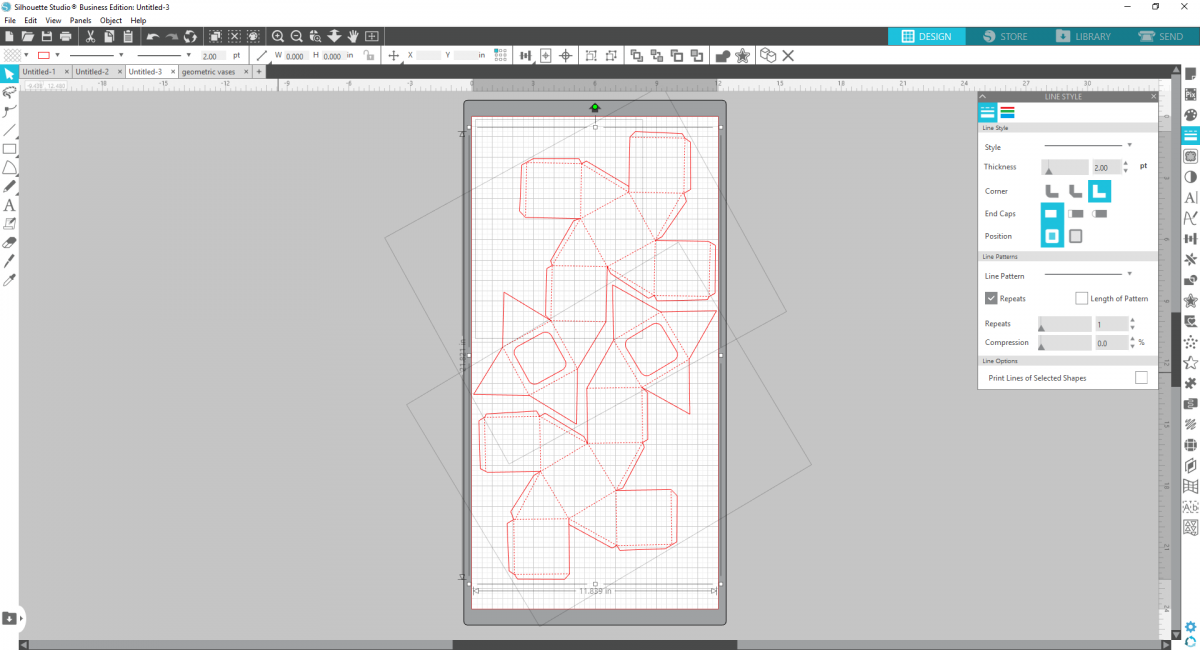
6. Send to your machine to cut! Make sure you’re using the appropriate material in your cut settings.

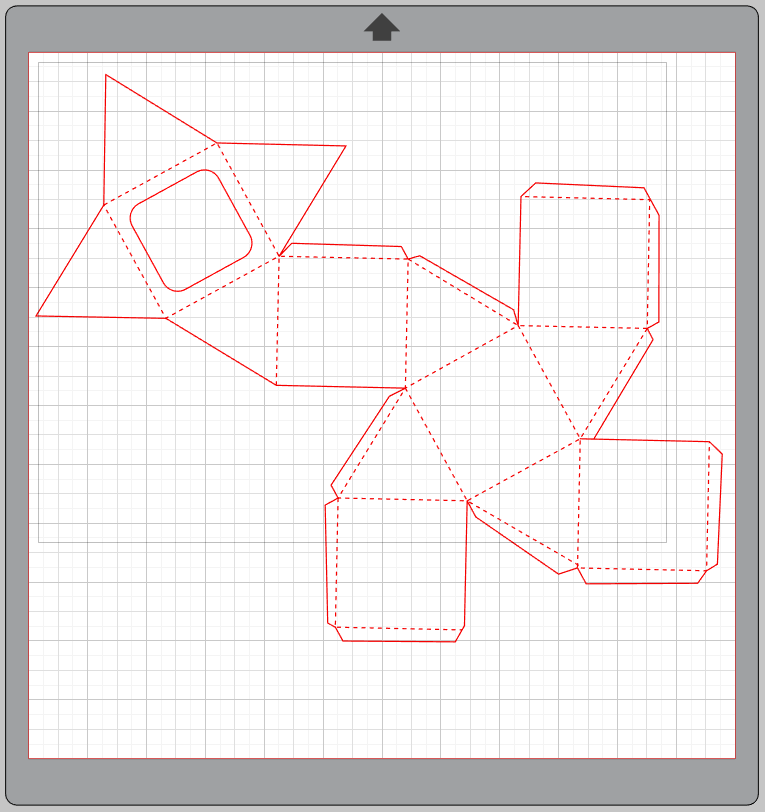
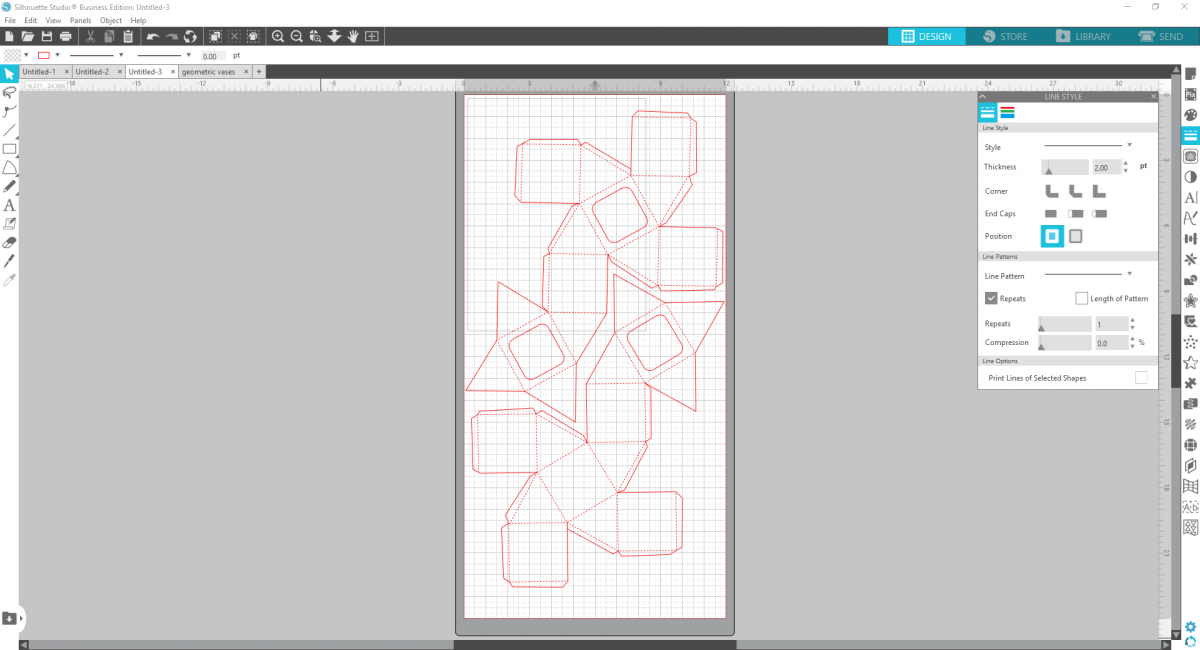
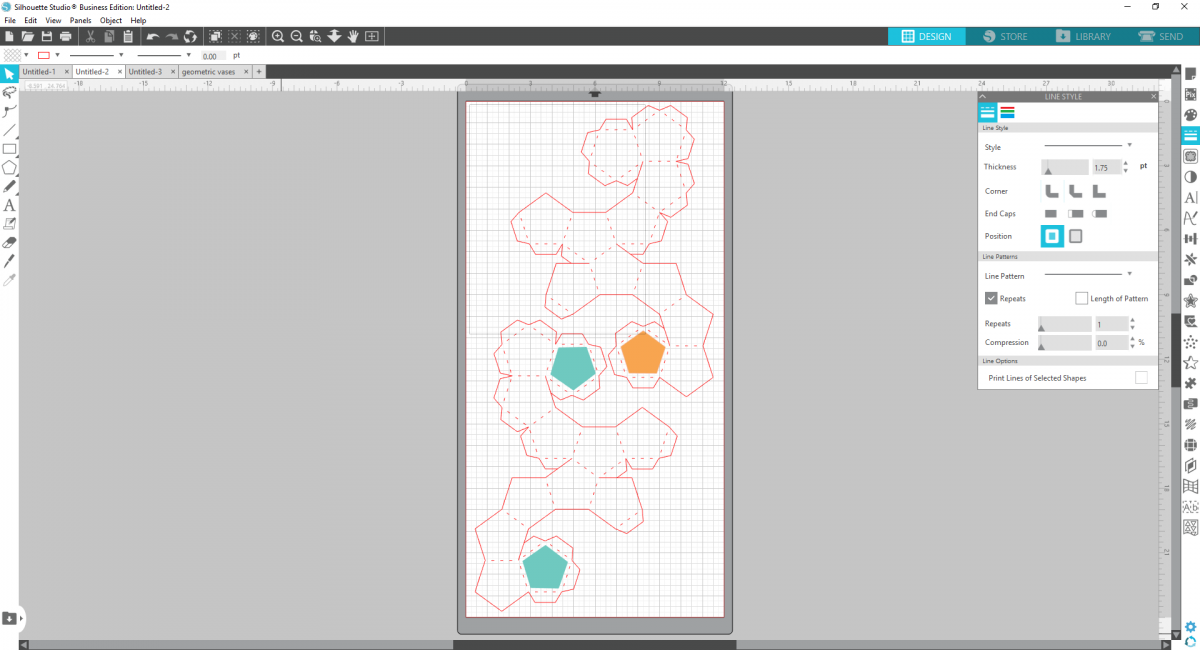
7. For the other vase shapes, you’ll use the same process except you’ll need to add a shape to make the openings in your vases. Use the Flexishape tool or the Polygon tool to create a pentagon slightly smaller than pentagon on the vase. For a vase with just one component, add one opening (see the orange shape). With a vase with two components add two openings to the second shape (see the blue shape).
8. For the large triangle vase, size the template as large as you can on a 12″ by 24″ mat and add a triangle slightly smaller that the design. Use the shape tool to create that and place the triangle at the far end, as shown.
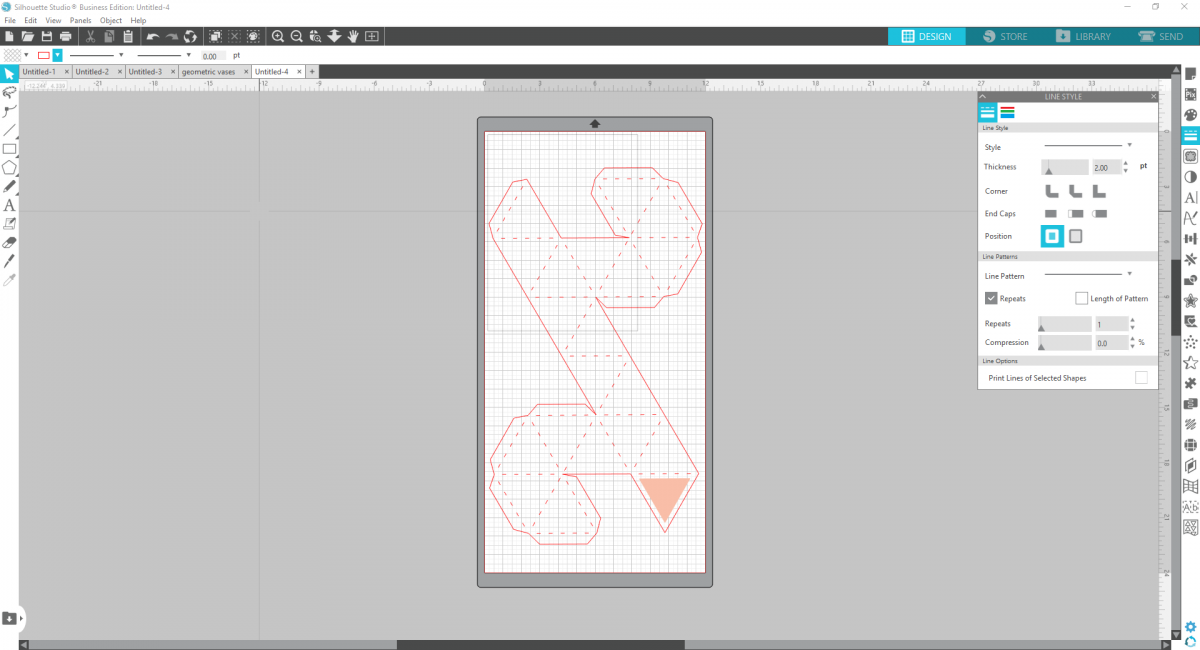
9. If you want to do a stacked triangle vase, add another opening to your template for the second component, as shown below.
Step Two: Assembling the Vases
1. Once you’ve cut out your paper pieces, you’re read to start assembling! Below we have two pieces you’ll need for a stacked vase: One with one opening, another with two.
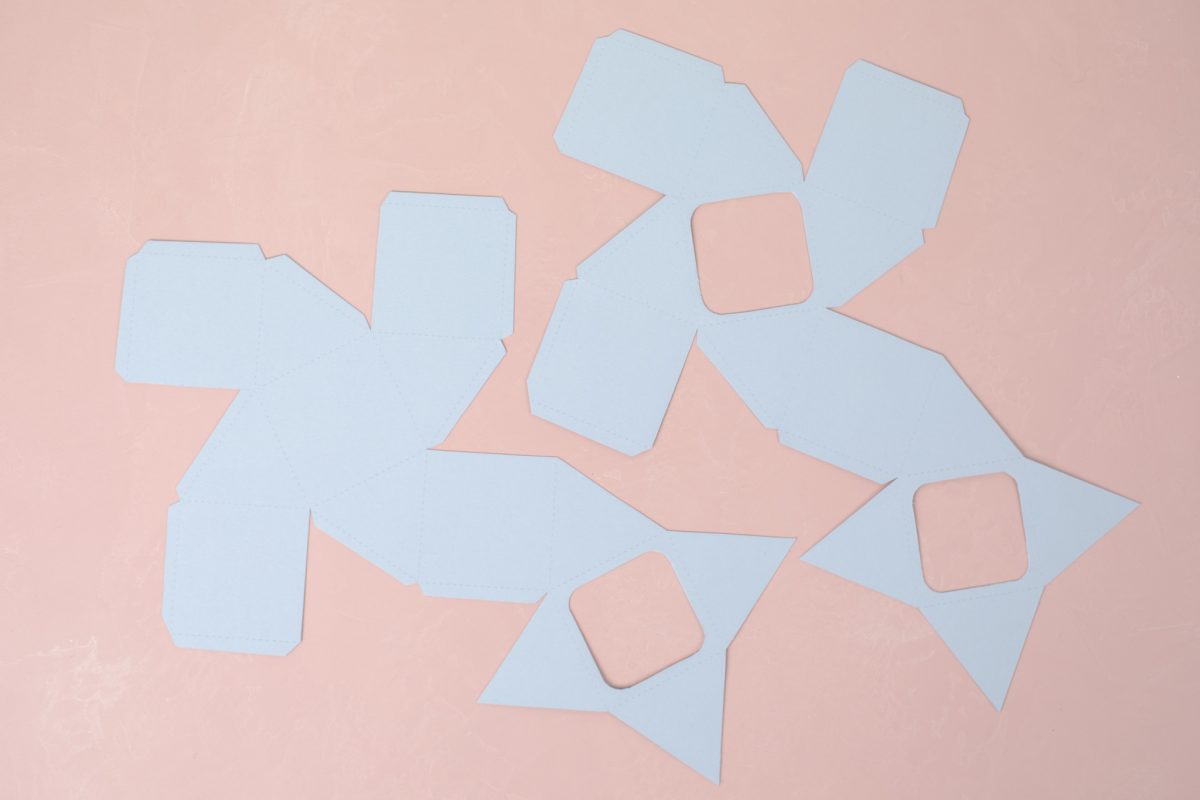
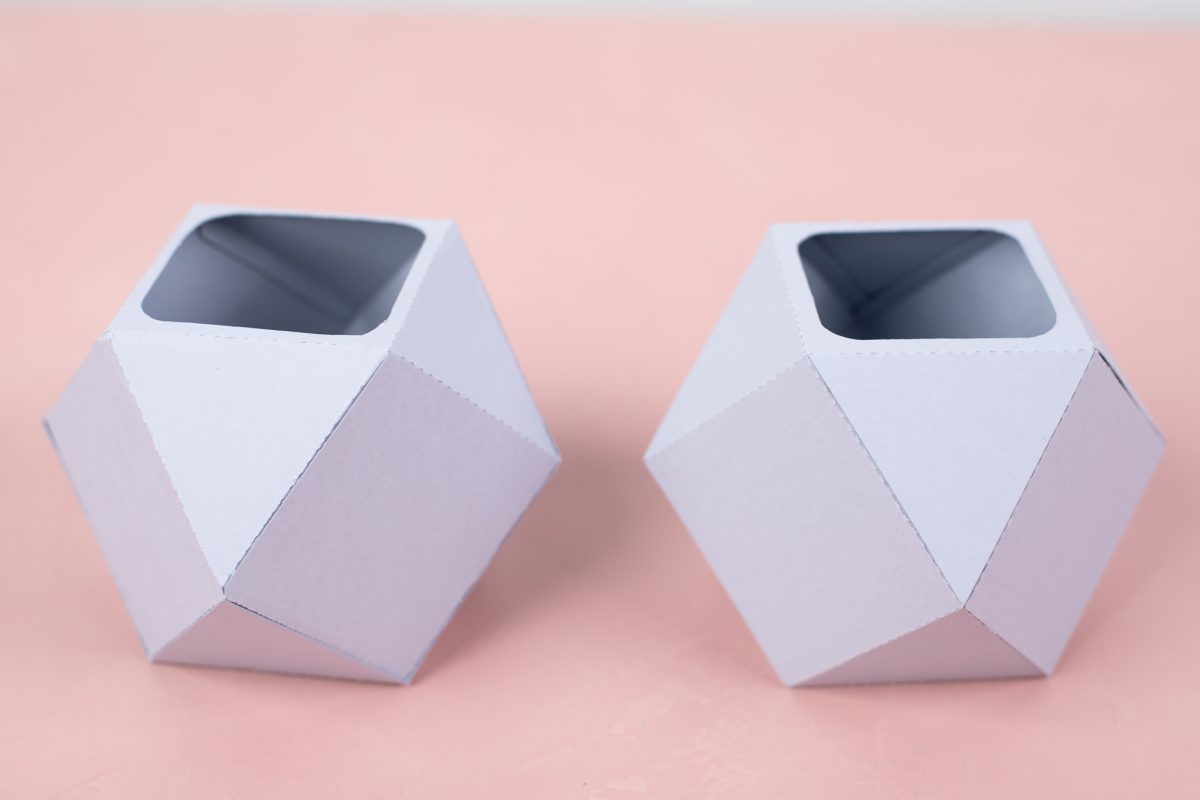
2. Fold along the score lines.

3. Then glue the sides together using the tabs and a hot glue gun.

4. Do this for both pieces.
5. Then glue the vase with two openings directly on top of the vase with one opening.
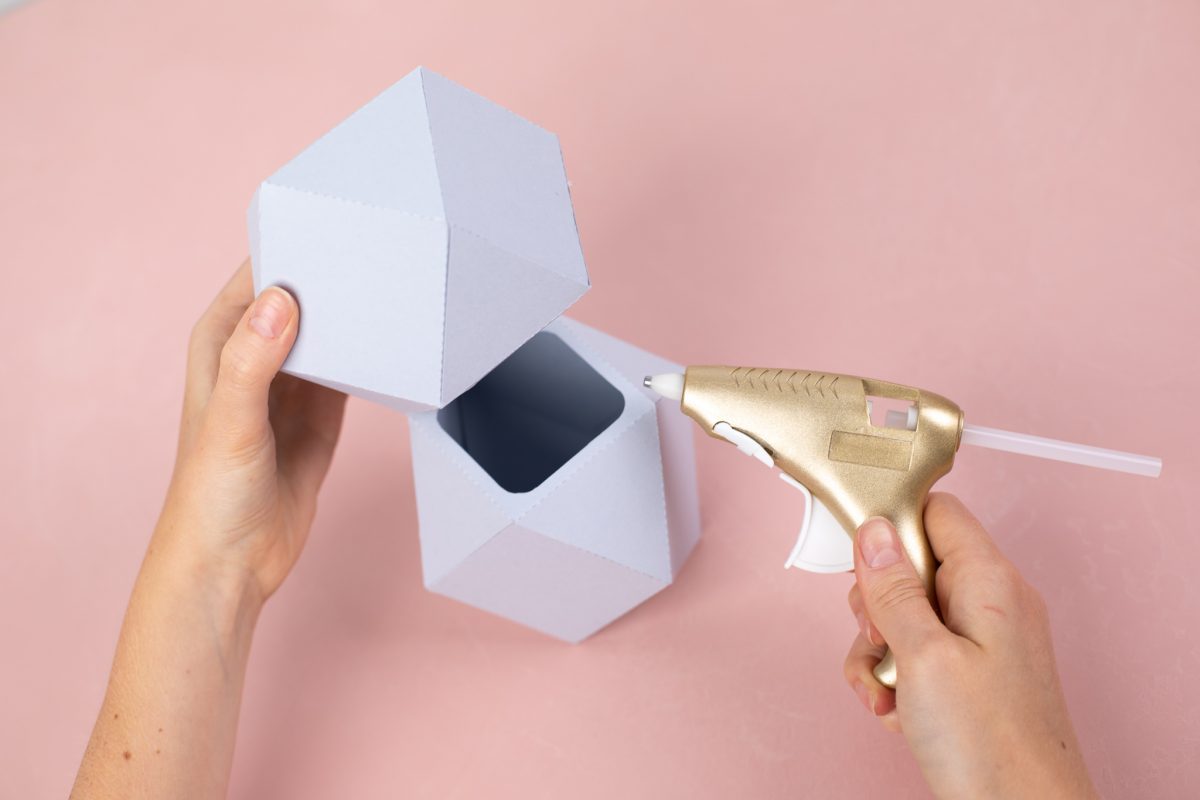

6. Insert a glass vase inside if you want to use fresh flowers, or just fill with paper flowers or foliage!
7. Play with size and shape to get the look you want!
 Hedgehog DIY Bookmark
  Quick Spring Welcome Sign
Robyn
July 18, 2019
Would you please list the design numbers of the plant leaves that were used. Thanks
Silhouette
July 18, 2019
Absolutely! The post is now updated with those links.