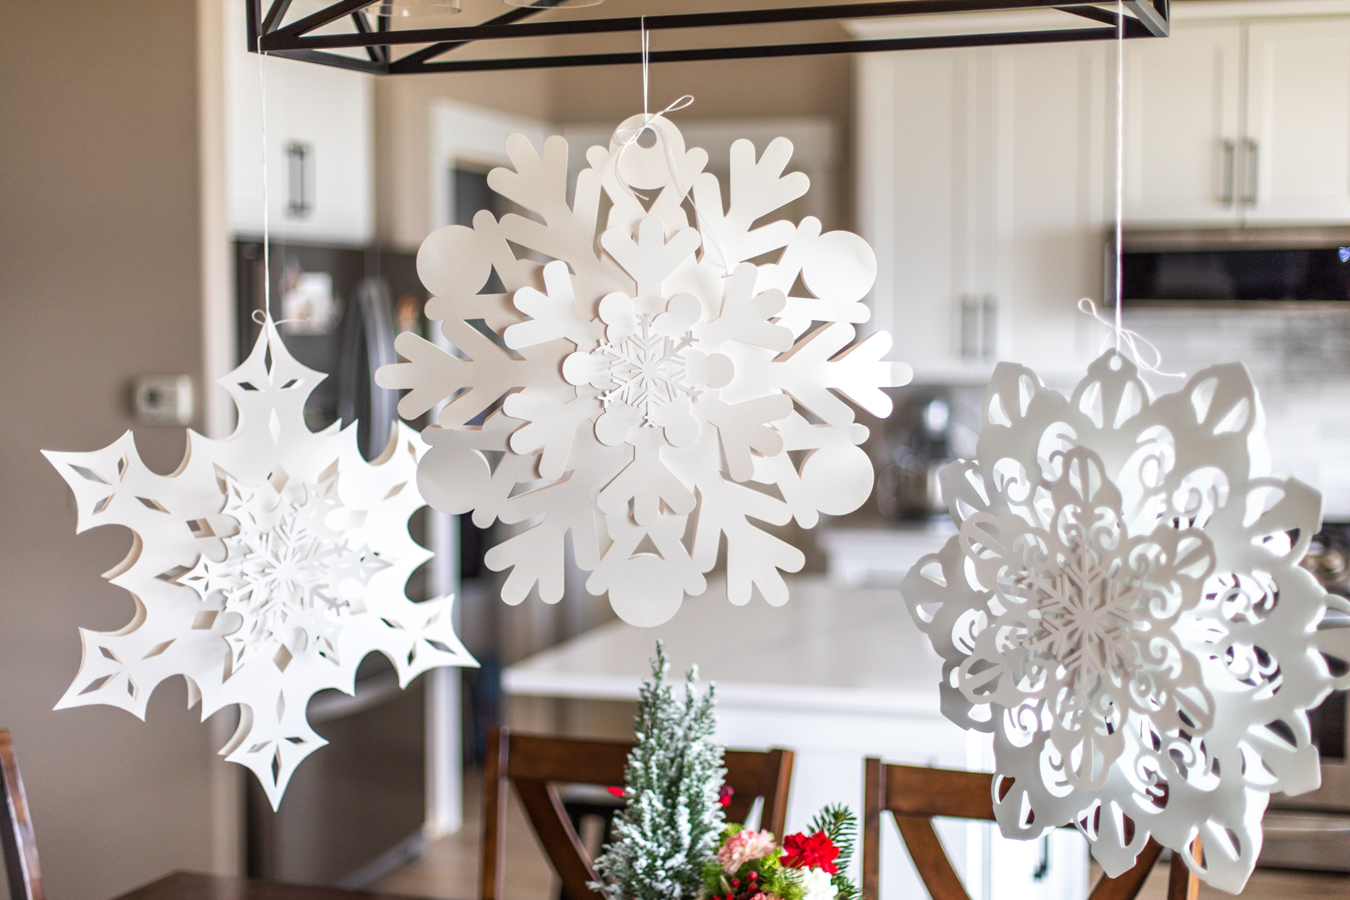
Holiday crafting has been in full swing at my house, and I want to share how I made these giant 3D snowflakes using poster board and the Silhouette Cameo® Pro. You can find poster board in all kinds of stores, so it’s an inexpensive way to try cutting paper on your Cameo Pro. And the results are impressive! This is a great winter-decor project that can stay up after Christmas.
Supplies/Tools:
- Silhouette Cameo® Pro
- 24” Cameo Pro cutting mat – Standard Tack
- Cameo 4 Autoblade
- White poster board (22” x 28”)—approximately 3 sheets per giant snowflake
- Hot glue gun
- Foam adhesive squares
- Design ID #309060, #309061, #15852, and/or #36161
Step One: Design
1. In Silhouette Studio®, open a snowflake design (I’m using Design ID #309060 in this example) and resize the entire design so that the largest shape is about 21 inches wide. Make sure all pieces are selected, and click and drag a corner handle.
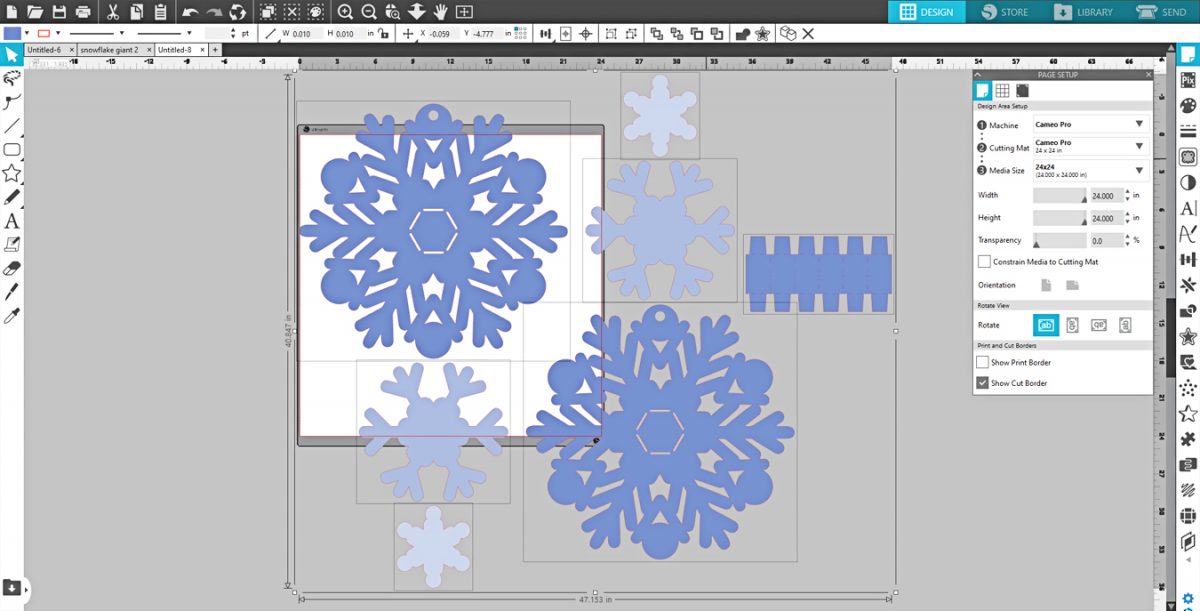
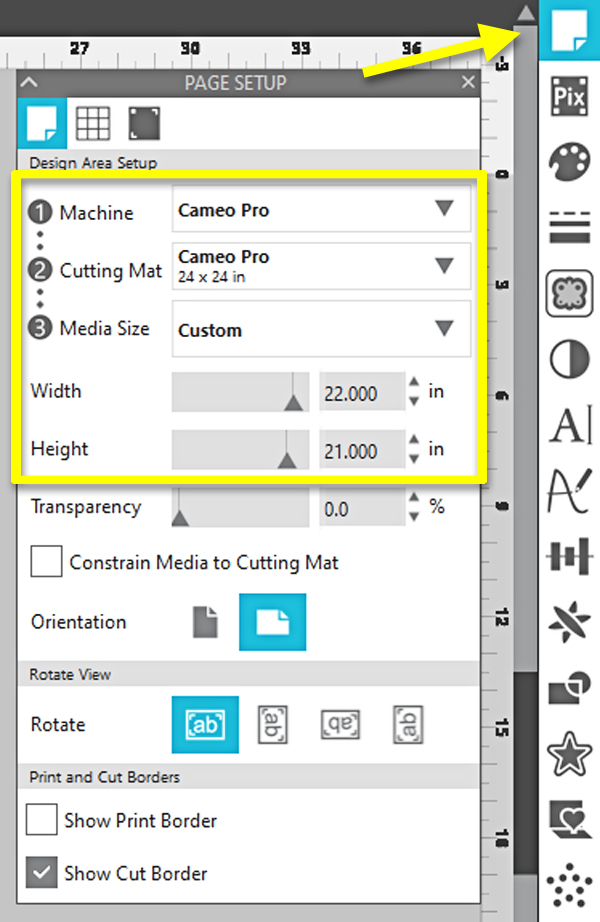
2. Set up the Page Setup panel as follows:
- Machine = Cameo Pro
- Mat = Cameo Pro, 24 x 24 in.
- Media Size = 22 in. Width x 21–24 in. Height
3. Ungroup if necessary, and move smaller pieces off to the side of the virtual mat.
Tip: Objects outside your virtual mat’s cutting area will not be cut until you place them on the virtual mat.
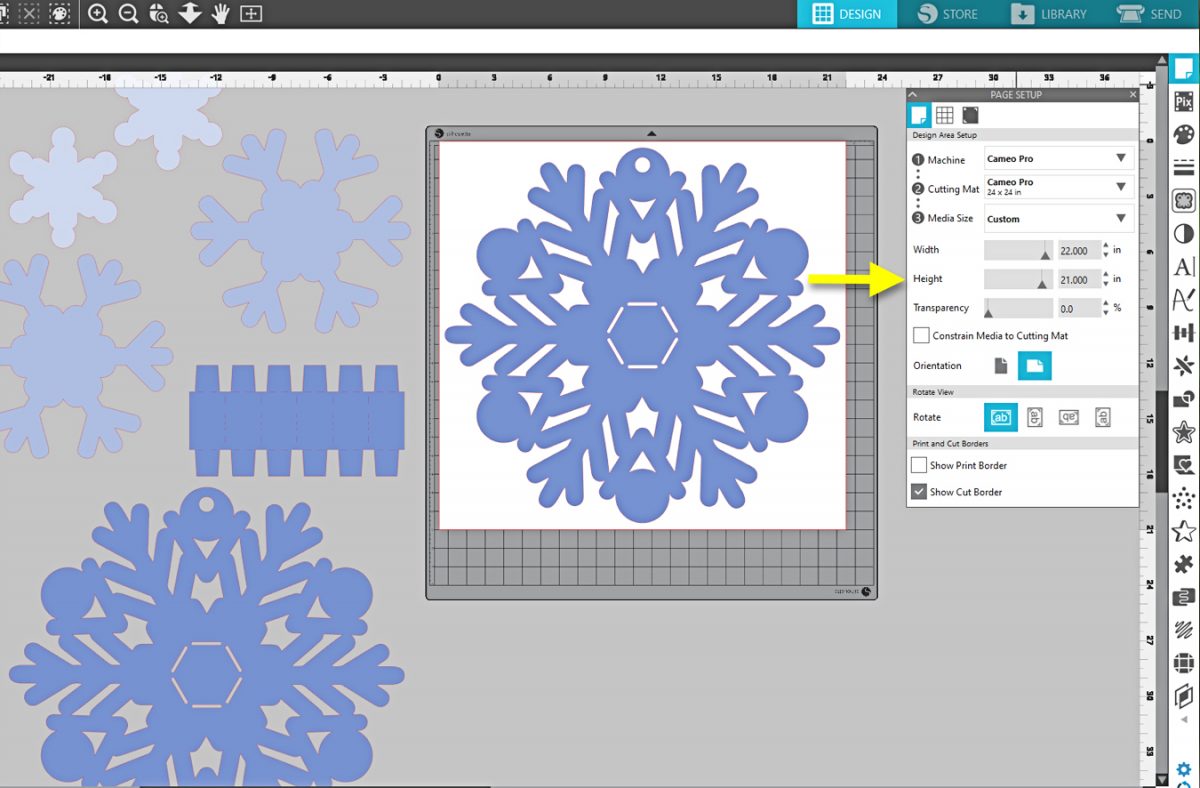
4. Center the largest snowflake on the virtual mat and reduce the media height as necessary (in the Page Setup panel) to avoid wasting paper. This is the size you’ll trim your poster board down to before placing it on the mat.
5. If you have never cut your poster board before, open a smaller snowflake (Design ID #36161) to use as a test cut to dial in your cut settings.
6. Choose one snowflake and resize it to fit in a corner of your page where it doesn’t touch the large snowflake. Depending on your large snowflake design, the small snowflake may need to be between about 4.5 to 6 inches wide.

Step Two: Prepare to Cut
1. In the Send tab, make sure your Cameo Pro is selected and connected (either via USB or Bluetooth). Also lock your AutoBlade in carriage 1.
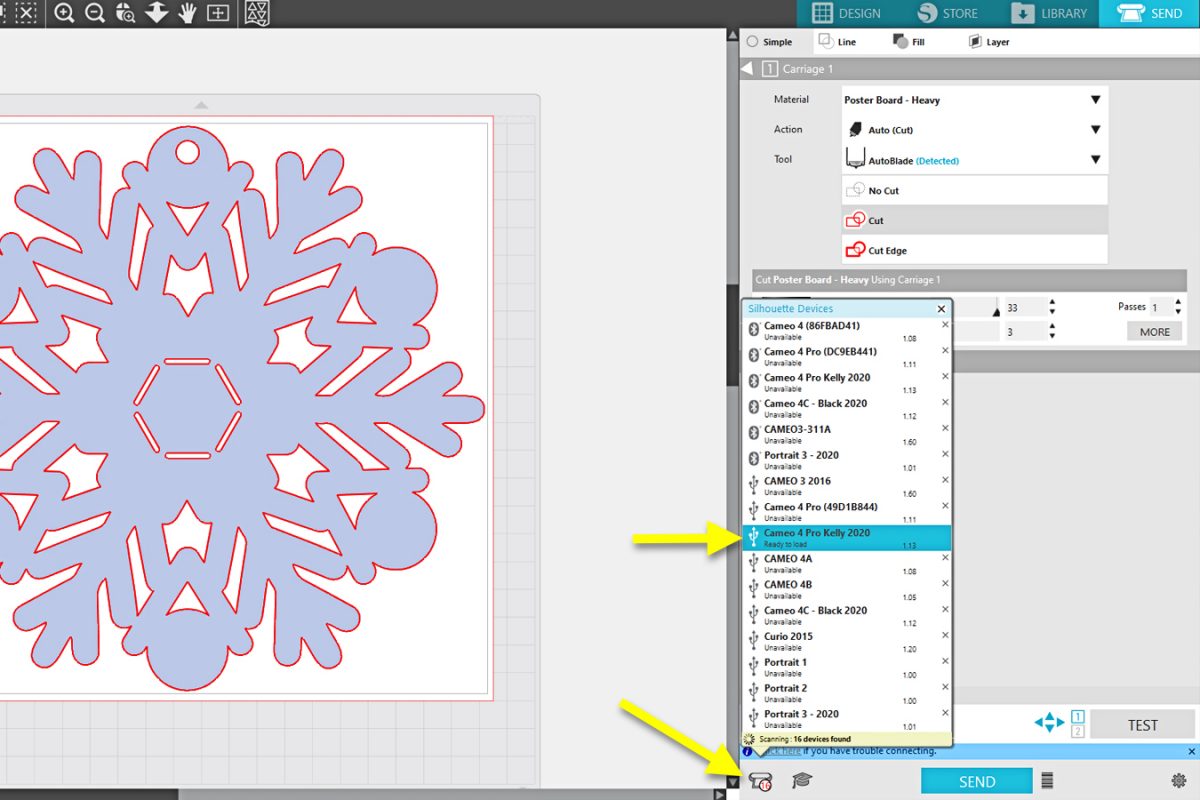
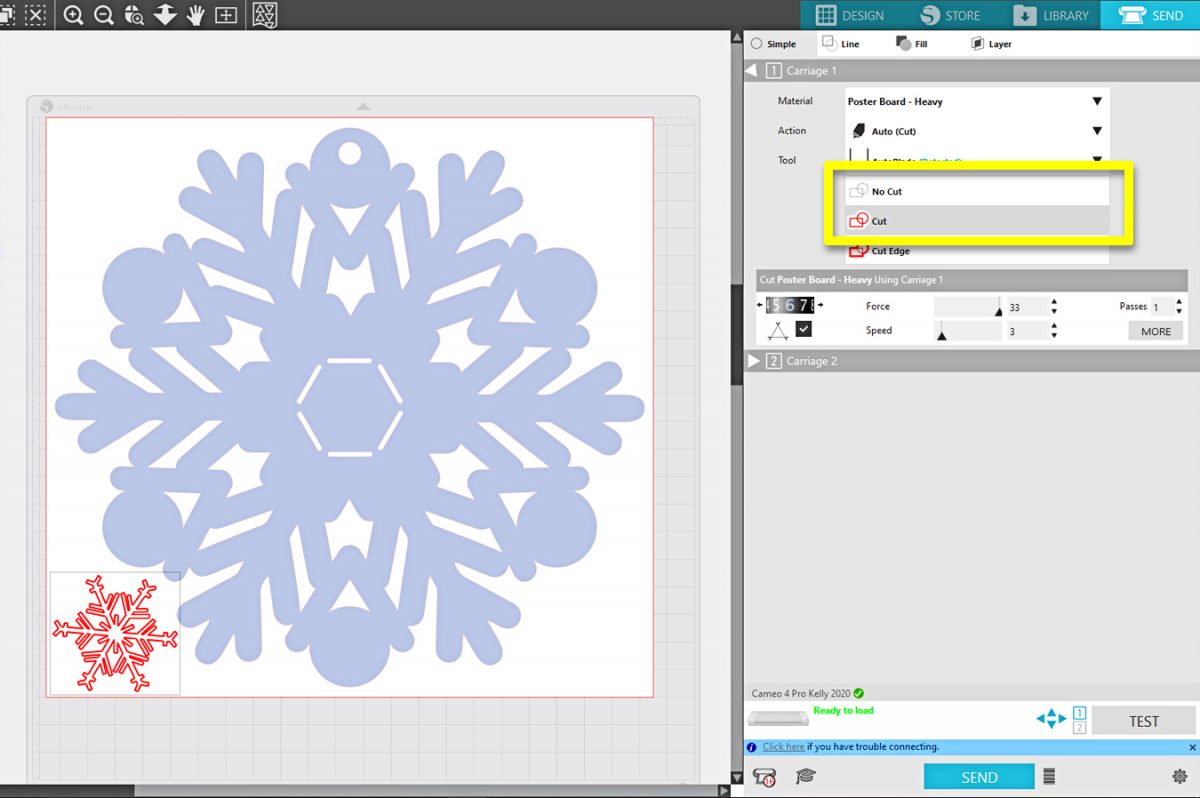
2. Turn on/off the cut lines on your page depending on what you want to cut.
- For the small snowflake test cut, select it and choose Cut.
- Select and set the other snowflakes to No Cut.
- Verify bold-red cut-preview lines show for exactly the shapes you want to cut. For our test cut, we only want the small snowflake in bold red lines.
3. Choose any paper type and adjust the settings as follows for poster board:
- Blade 6, Force 28–33, Speed 3, Passes 1, Line Segment Overcut = enabled
- Note: I’ve created a custom material setting because I intend to use it frequently. The Force setting depends on the thickness of your poster board and the sharpness of your blade. From the Dollar Store and Walmart, I used Force 30. From a pack of “heavyweight” poster board, I used Force 33. From a very thin pack I bought online, I only needed Force 28. A new blade may be able to cut with less force.
- We’ll do a test cut on Force 30 with the small snowflake first to see how the settings work before cutting the rest of the large snowflakes.
- Once you know your settings work for your particular poster board, you can write it down or create a custom cut setting so it’s always available in Silhouette Studio®. Future test cuts with that particular poster board may not be necessary.
Step Three: Cut
1. Trim your poster board down to the same size you had it set up as in Step One. For this first large snowflake, my poster board is 22 in. x 21 in.
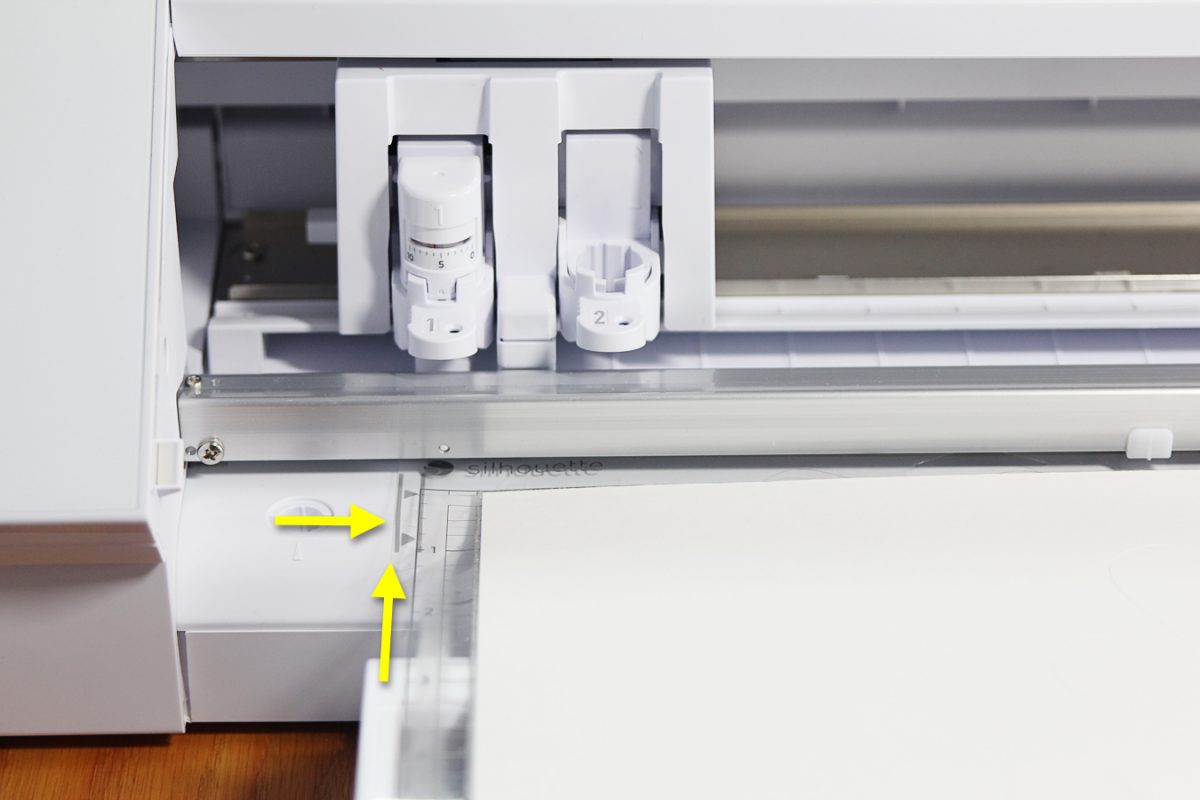
2. Place your poster board glossy-side down on your 24-inch cutting mat so it looks the same as in the preview. Its left edge should be only on the adhesive portion of the mat, leaving the left 1/2 inch of the mat’s grid exposed. The top edge of the paper should align with the top grid line on the mat.
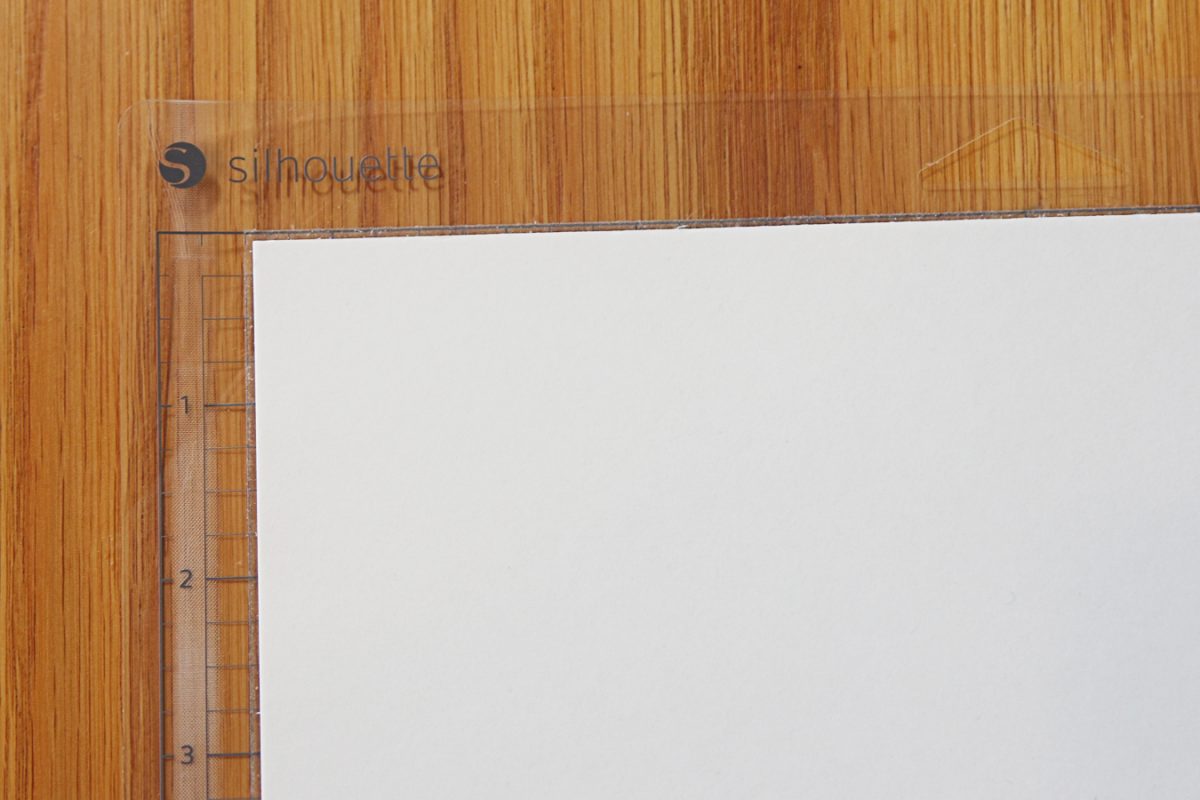
Tip: Any time you are using media smaller than 24 inches wide on the Cameo Pro mat, you’ll only place your media on the sticky portion of the cutting mat. It’s very important that your media size in Page Setup is accurate when working with the Cameo Pro 24-in. cutting mat so the design placement is correct. (If your media is 24-in. wide, you’ll align the media with the left grid-edge of the mat.)
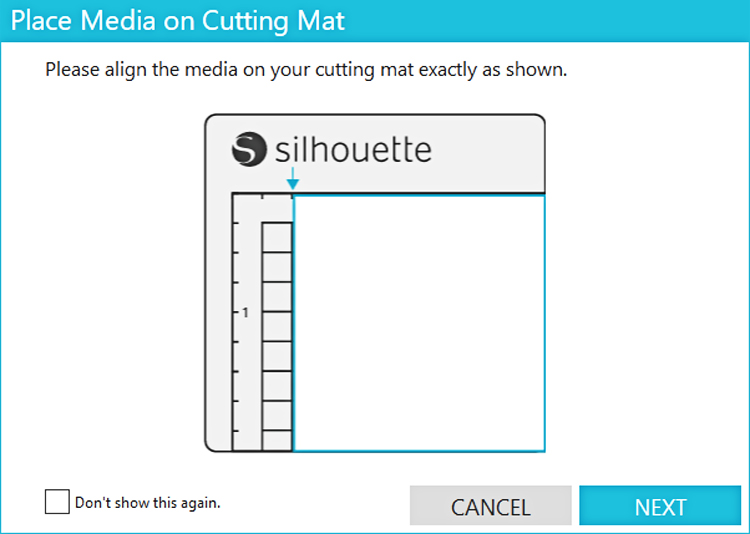
3. Load the poster board on the mat into your Cameo Pro with the left edge of the mat aligned to the left-most guide line. Be sure to use the full support system and have flat space in front of and behind your machine so the 24-inch mat is supported during the entire cut.
4. Click Send in the Send tab, and it will cut the design(s) showing in bold red.
5. Unload your mat and carefully remove the snowflake. Adjust your settings deeper or shallower as necessary as described in Step Two. If you adjust your settings, move the test snowflake to another corner to try again. Remember, only the shapes showing in bold red will cut, so you can either move the test design around on the page or use the Cut/No Cut buttons to choose which shapes on your page will cut any time you click Send.
6. When ready, turn off cut lines on the small snowflake, turn on cut lines for the large snowflake, load your mat, and Send the large snowflake to cut.
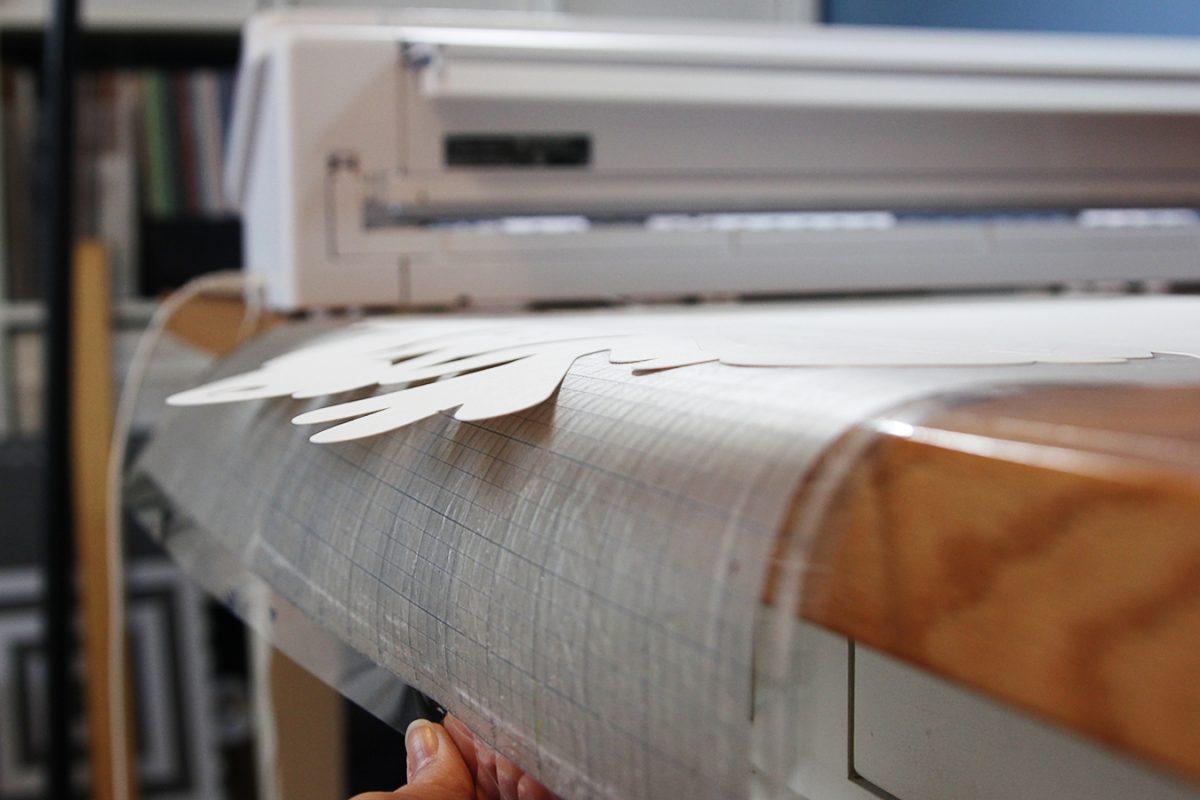
7. To remove cutouts from a sticky mat, flip your mat upside down and peel the mat away from the paper instead of peeling the paper away from the flat mat. Alternately, you may wish to drag the mat downward over the side of your work surface to help release the paper as the mat bends away from it. You may find a spatula tool or a scraper tool to be helpful in prying pieces away from the mat. Be patient with these giant snowflakes; it may take a while!
8. Trim down a new piece of poster board and send the large snowflake a second time. (You may want to flip the design horizontally first, but this snowflake is fairly symmetrical and can just be cut as-is.)
9. Back in the Design tab, set your media size to 22 in. Width x 24 in. Height and arrange the remaining snowflake pieces onto the final page. (Move used pieces off to the side or delete.)
10. If you have not already successfully cut at least two small “test” snowflakes, try and find room to cut some on this page for extra layers on the final giant snowflake.

11. Trim down your poster board to 22 in. x 24 in., load, and send to cut the final pieces.
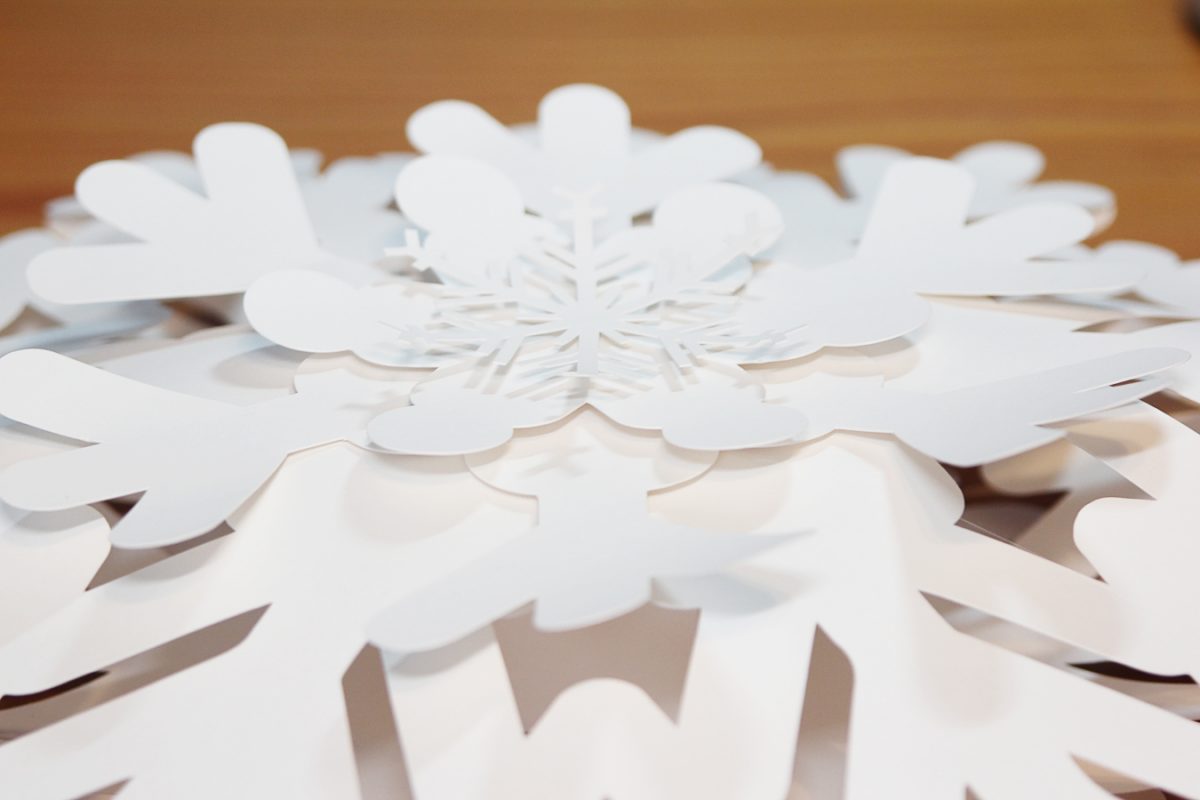
12. Your final count of snowflake pieces when finished should be two of each size from the original snowflake design, one hexagon 3D connection piece, and two of each smaller snowflake to add enough pretty layers at the end for extra detail.
Note: If only one side of your giant snowflake will show, you would be fine with 2 large snowflakes, one hexagon 3D connection piece, and one each of the smaller layers.
Step Four: Assemble
1. This 3D Classic Snowflake design and this 3D Elegant Snowflake design already have an assembly tutorial by the designer here on her blog. I’ve only made a few adjustments, explained below.
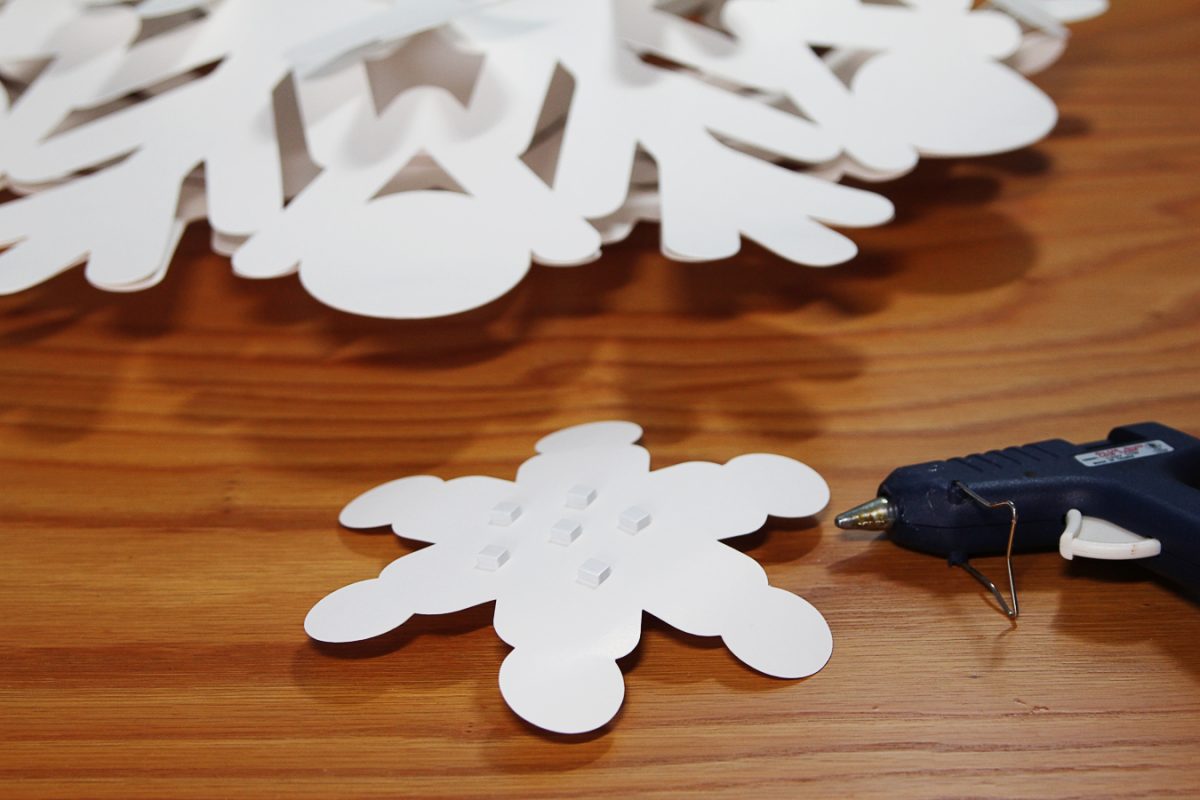
2. Because I’ve scaled these up so large, I chose to use hot glue instead of liquid white glue for speed and strength.
3. When attaching the upper snowflake layers, use foam adhesive squares to give additional dimension.
All done! I’m including this next picture so you can see how large it is!
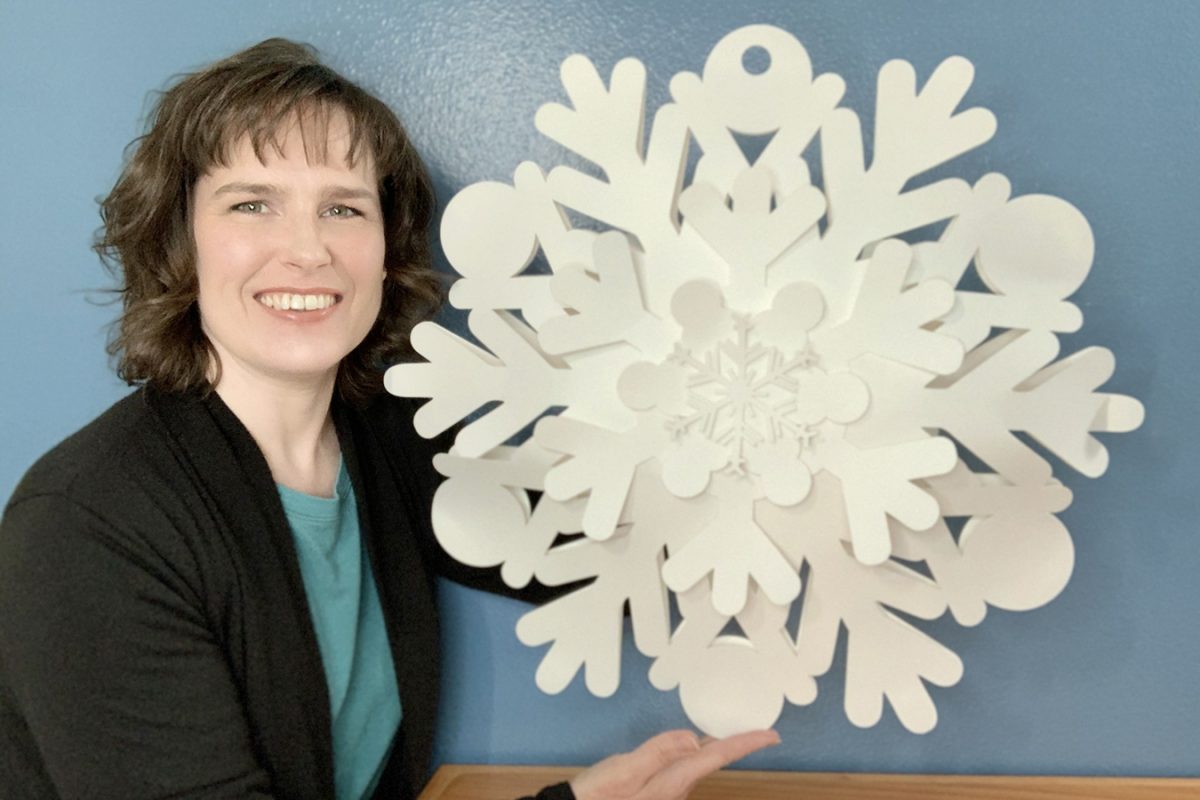
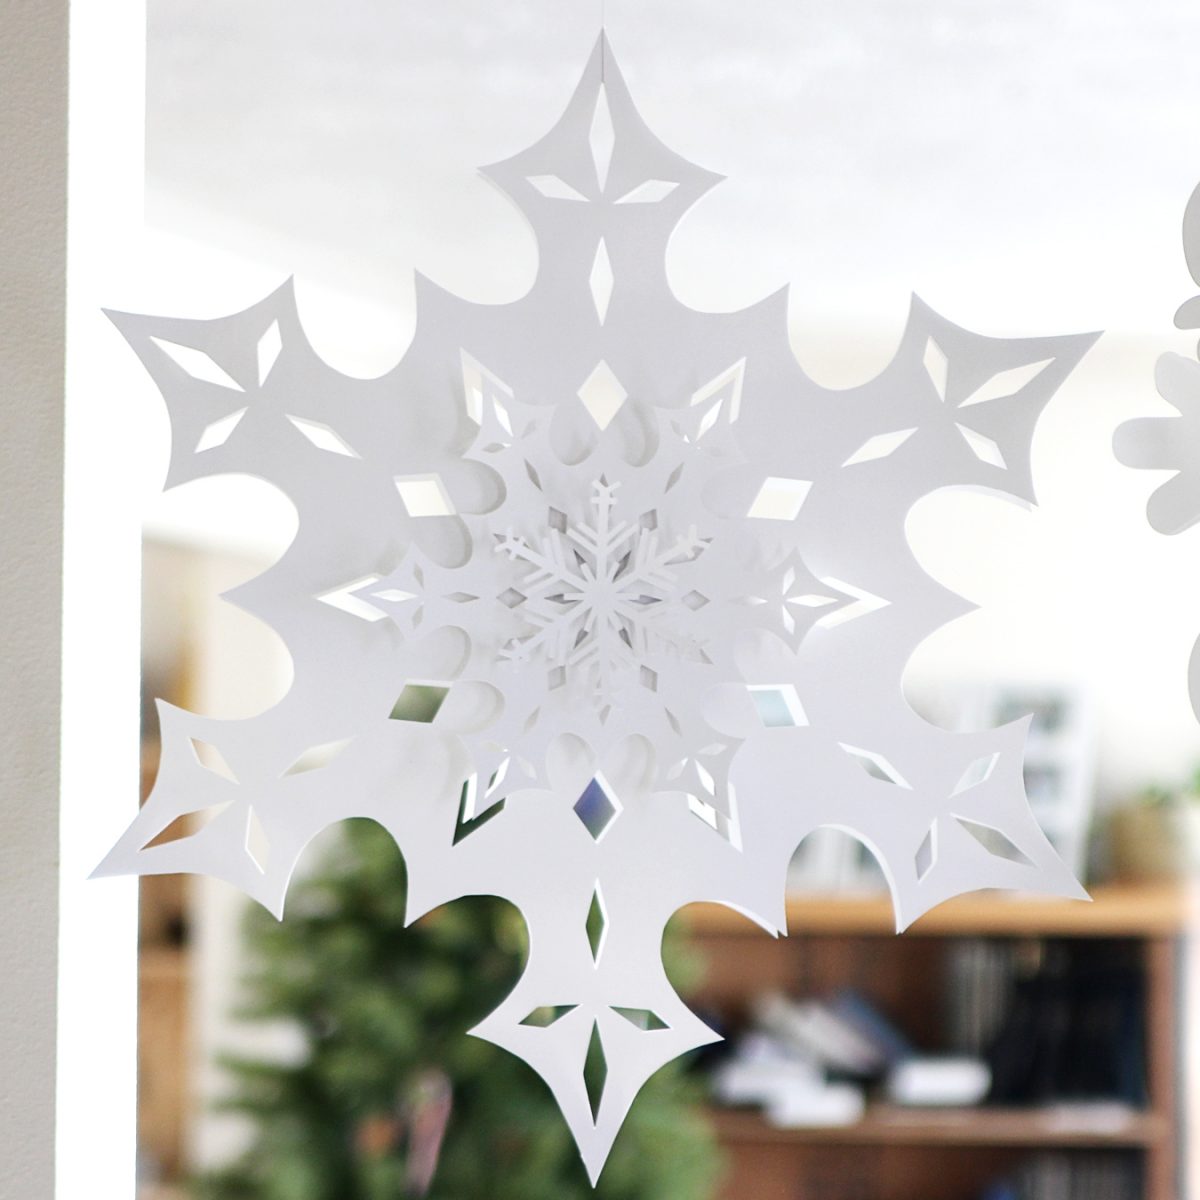
You can use other 2D snowflake designs to create this same layered effect. Just make two of the largest layer as big as you can fit on your poster board and use a connection piece like the one in this tutorial. Then layer smaller versions of the same or different snowflakes until you’re satisfied with the look. For the snowflake below, I used Design ID #15852 in two sizes and the same small “test” snowflake from Design ID #36161.
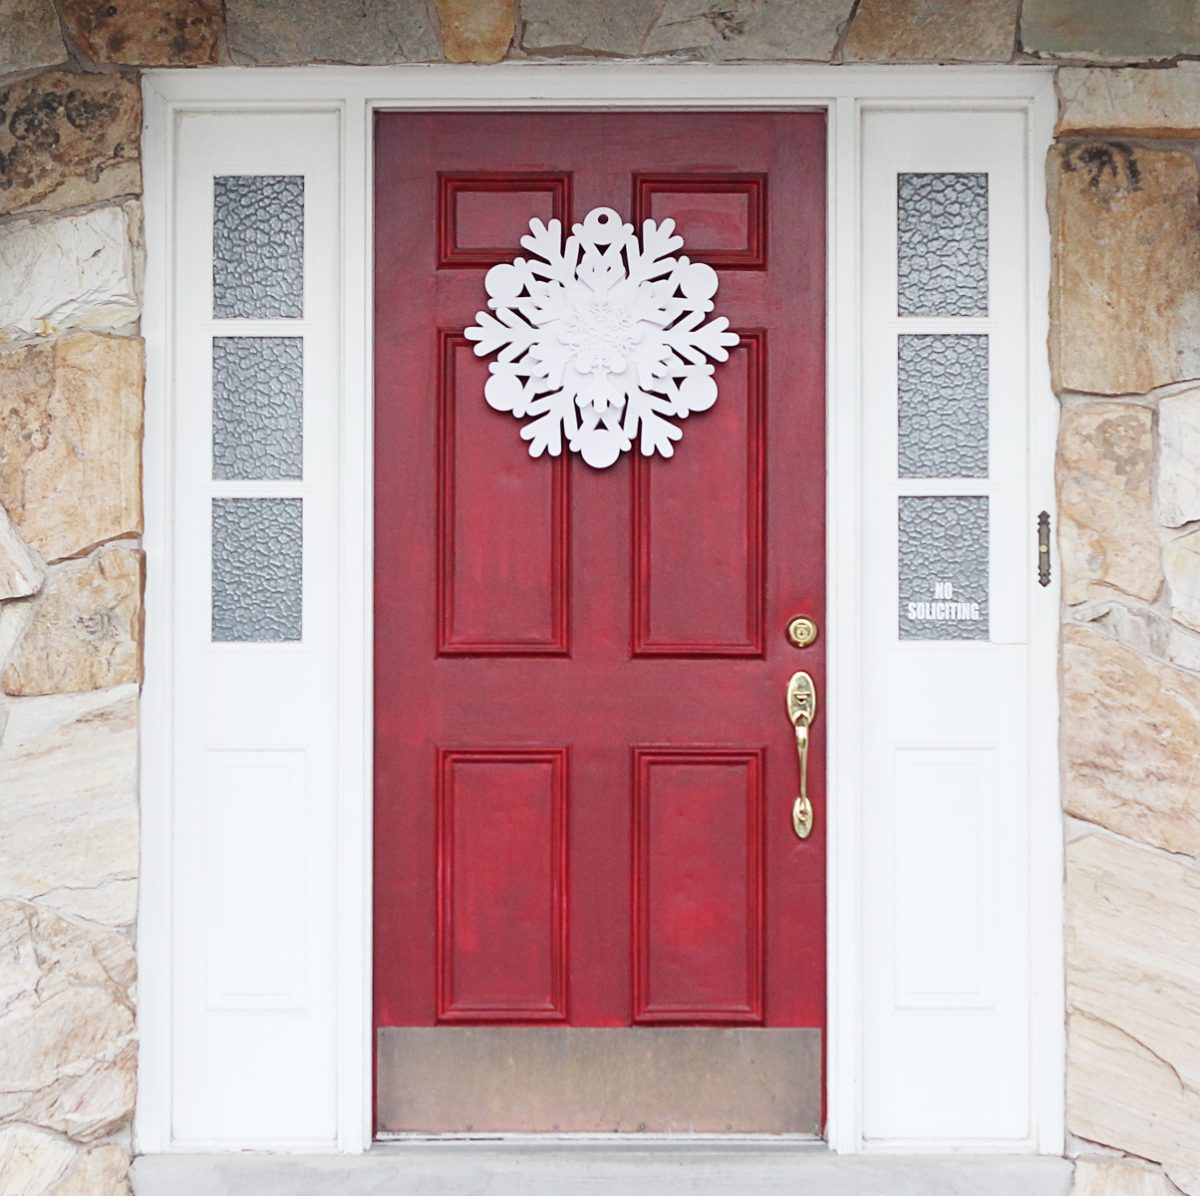
Place these giant 3D snowflakes on walls or doors, or hang from the ceiling to really impress with your paper-crafting skills!
I hope you’re as excited as I am to work more with poster board for giant paper crafts on the Cameo Pro.
 Get to Know the ES Mat
  Layered Card with PixScan
Karen Reeves
December 29, 2020
These look great. Thanks for sharing. I will have to try these with my 12” cameo for next year.