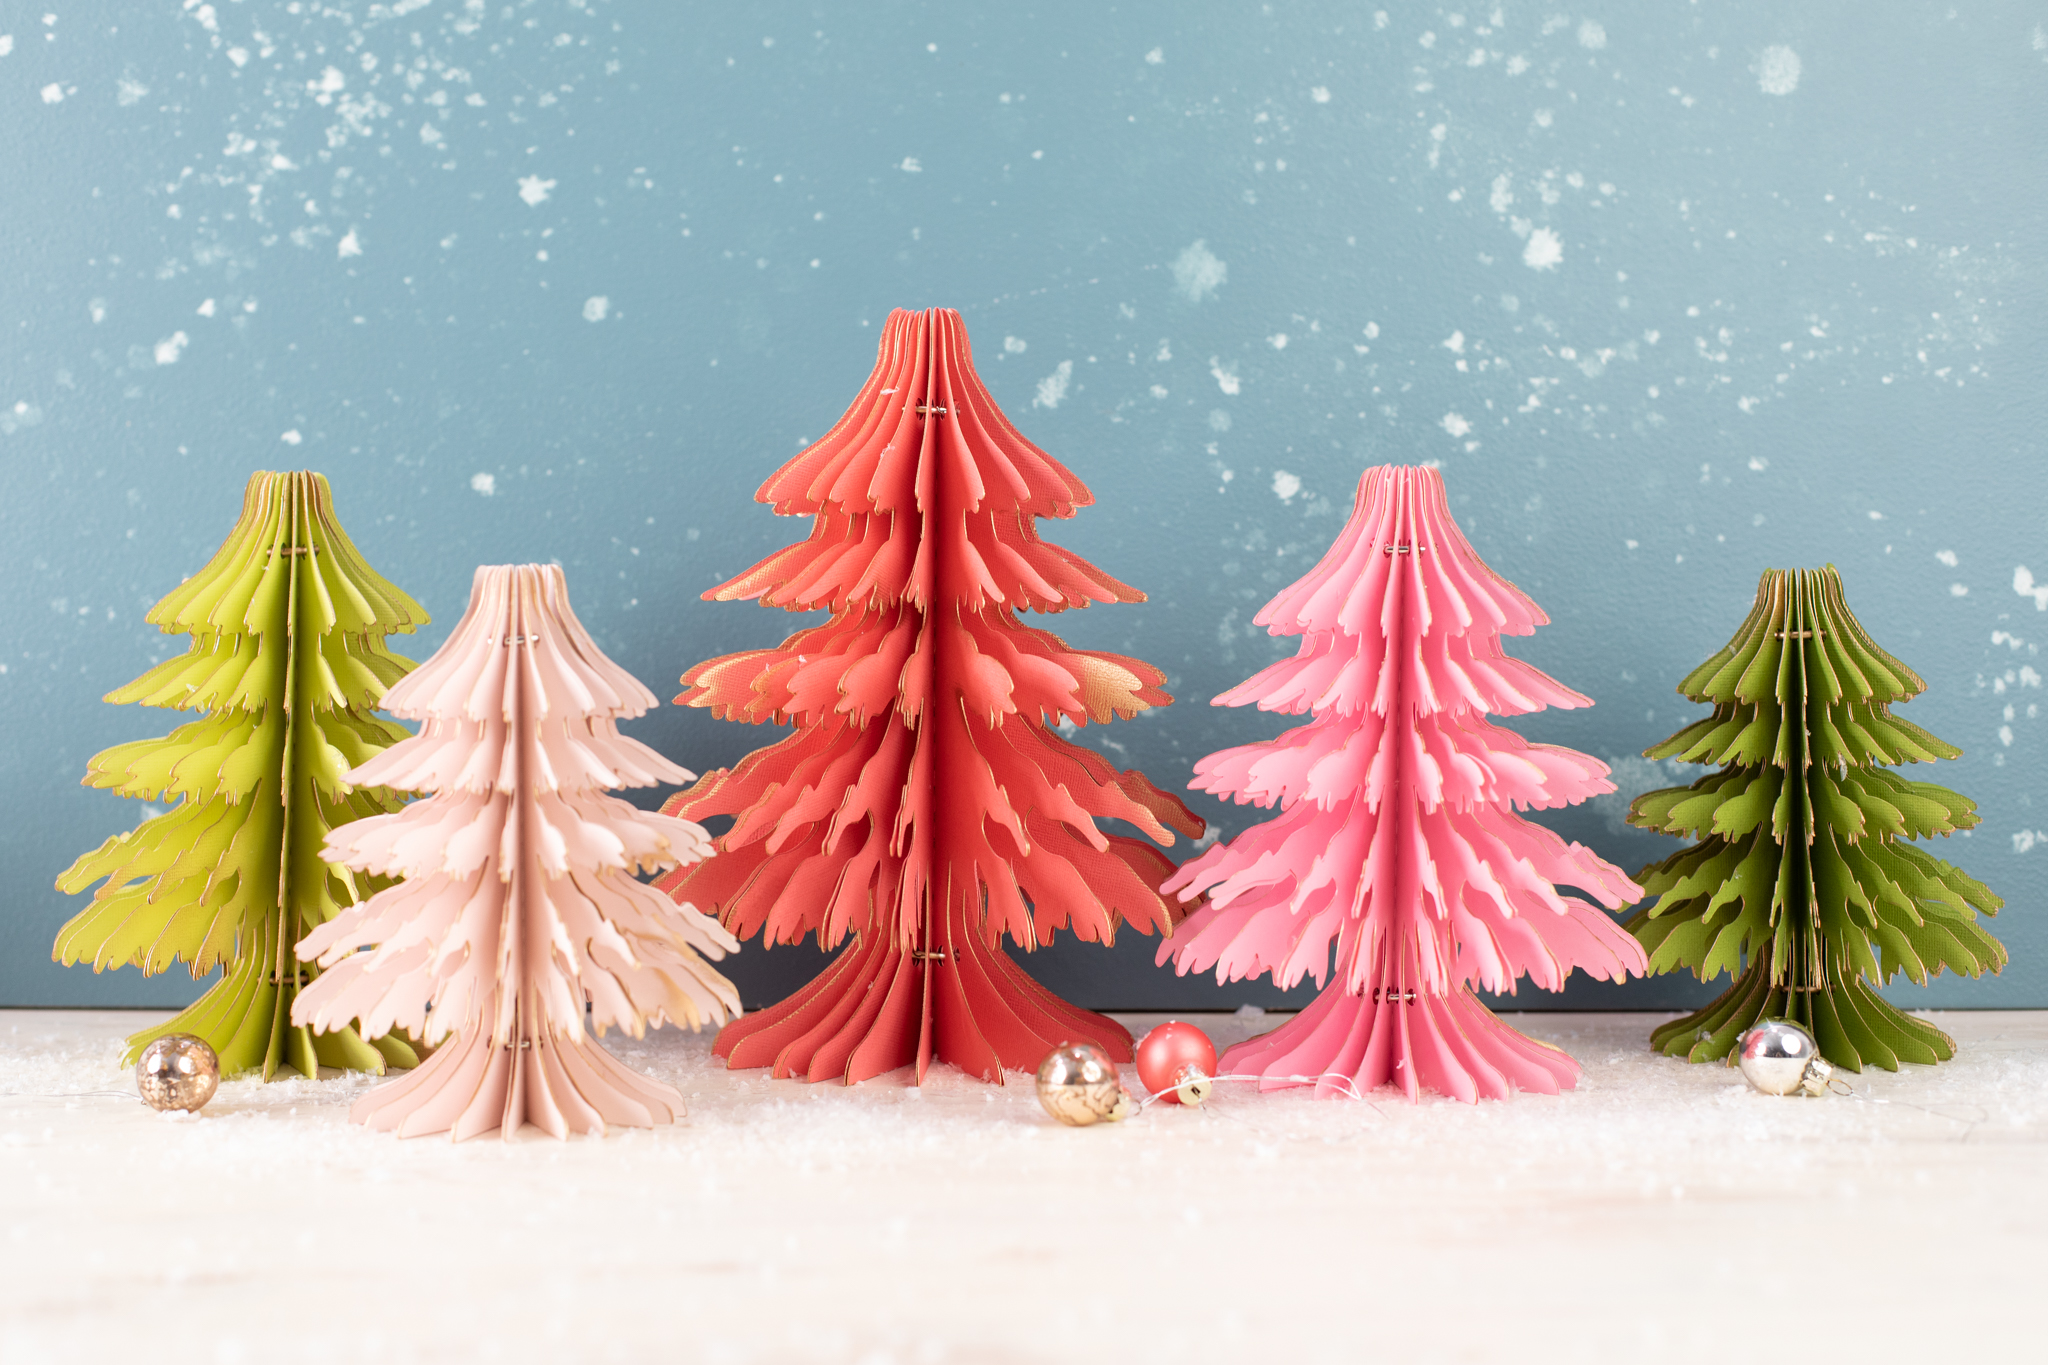
Flocked, bottlebrush, faux, fresh—the variety of Christmas trees is unending! So we’ve decided to add our own DIY version to the mix! These gilded paper trees are so simple to assemble but make such a statement when clustered together among your holiday decor! All you need is cardstock, gold spray paint, and book rings!
Supplies Needed:
- Silhouette Cameo® or Silhouette Portrait®
- Silhouette Studio®
- Silhouette Cutting Mat
- Silhouette AutoBlade or Silhouette AutoBlade for Cameo 4
- Cardstock in various shades—11, 7, or 5 sheets of 12-by-12-inch sheets depending on what size tree you want to create.
- Gold spray paint or marker
- Book rings; two, 1-inch rings for each tree.
- Design ID #33277; 3D Winter – Snow Tree by Alaa’ K

Step One: Formatting the Design
1. Insert the design into Silhouette Studio®. Select the design, right-click it, and select “Ungroup” to ungroup the trees. Delete all of them but one. We’re going to modify the design slightly and then make duplicates of it.
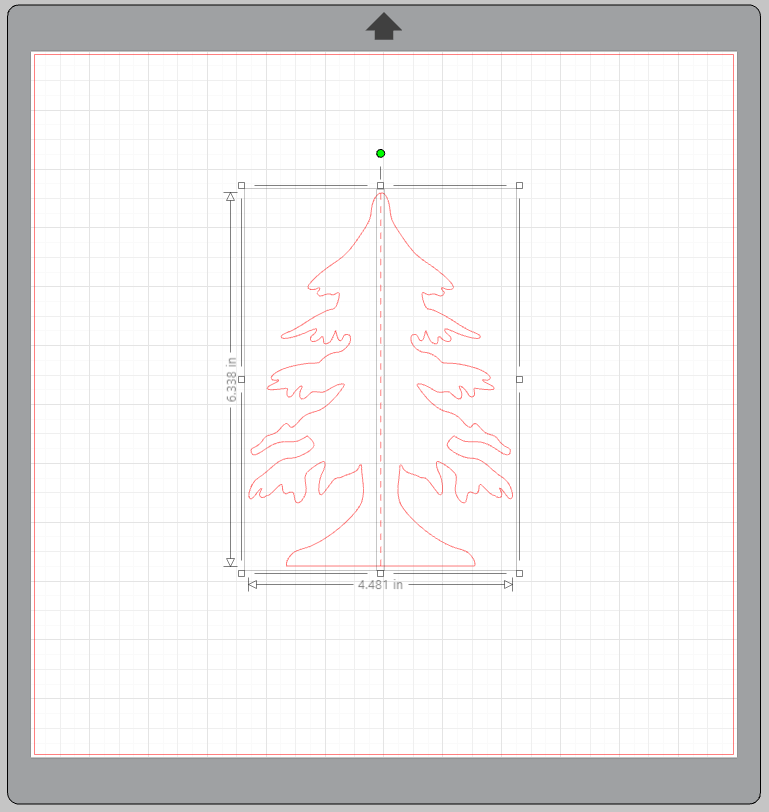
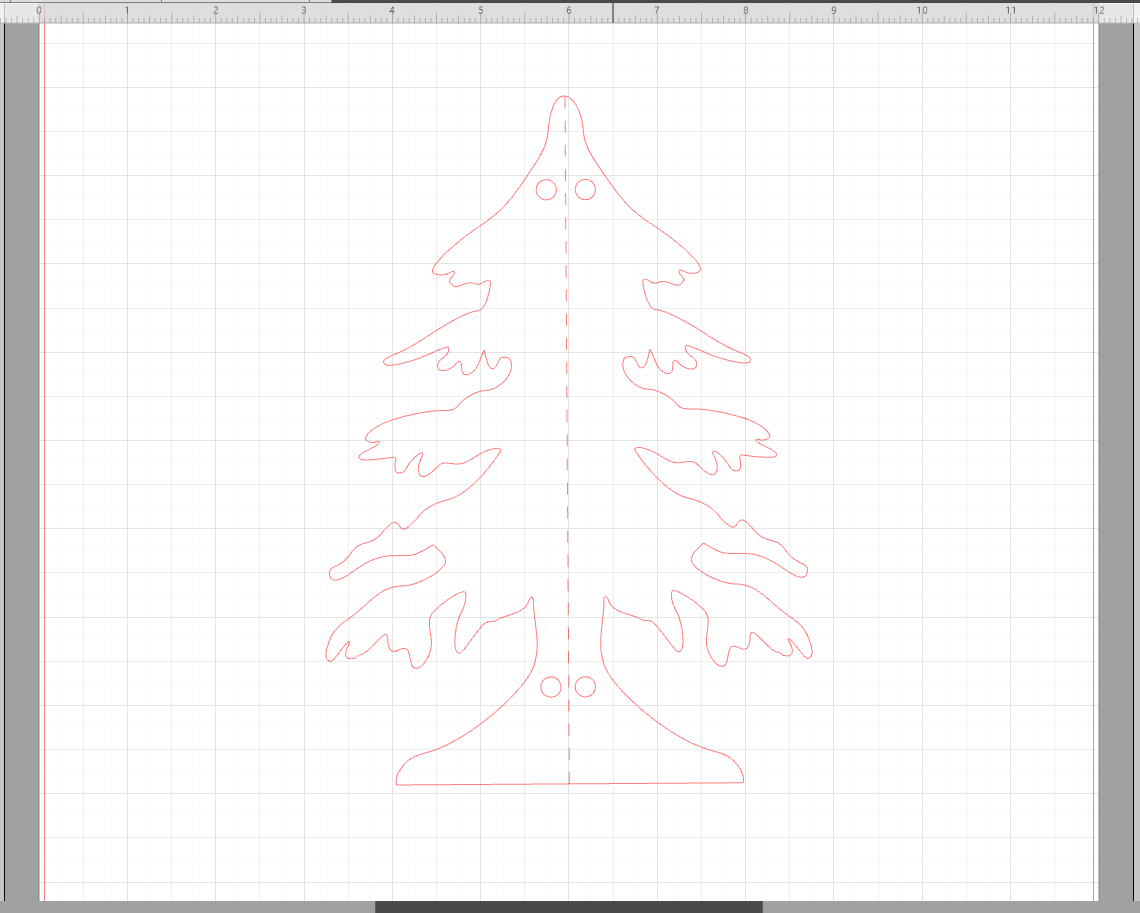
2. First increase the size to about 7.8 inches tall. Then using your Drawing Tools, create a 4 small circles about .3 inches in diameter. Position two circles near the base of your tree on either side of the score line, and the other two circles near the top of the tree, and align them with the lower two.
Tip: Use the Align Tools at the upper toolbar to assist with this!
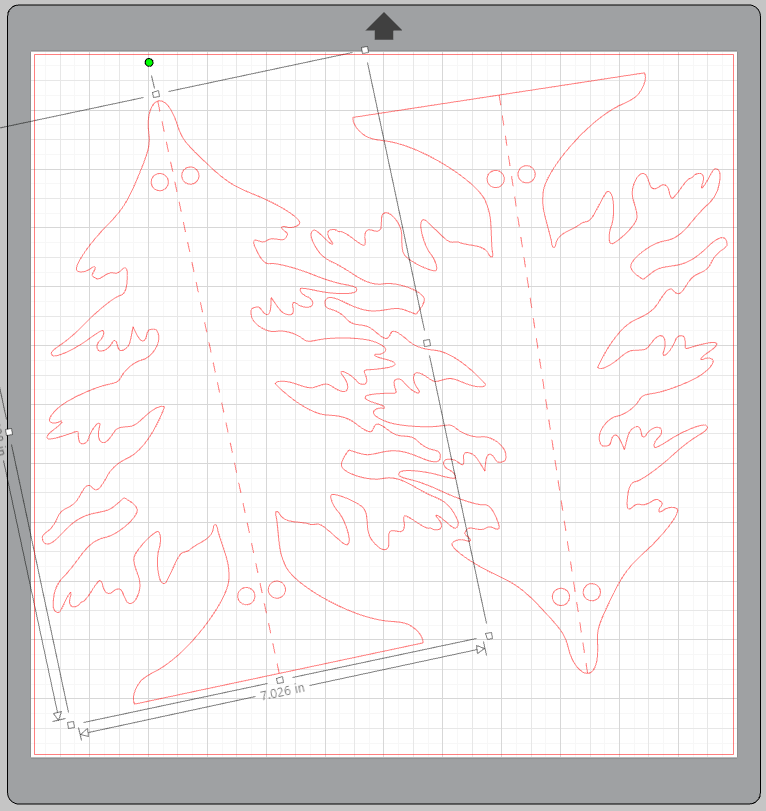
3. Now select all the components of your tree and group them together by right-clicking and selecting “Group.” Then duplicate the tree to fit as many as you can onto one sheet of paper. I was able to fit three trees onto a 12-by-12 inch sheet of paper.
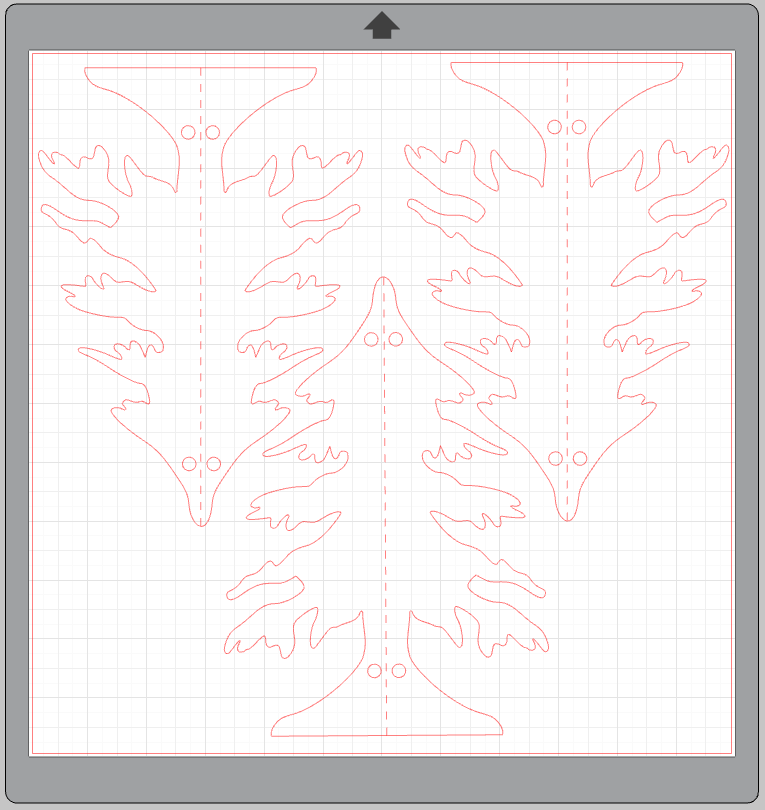
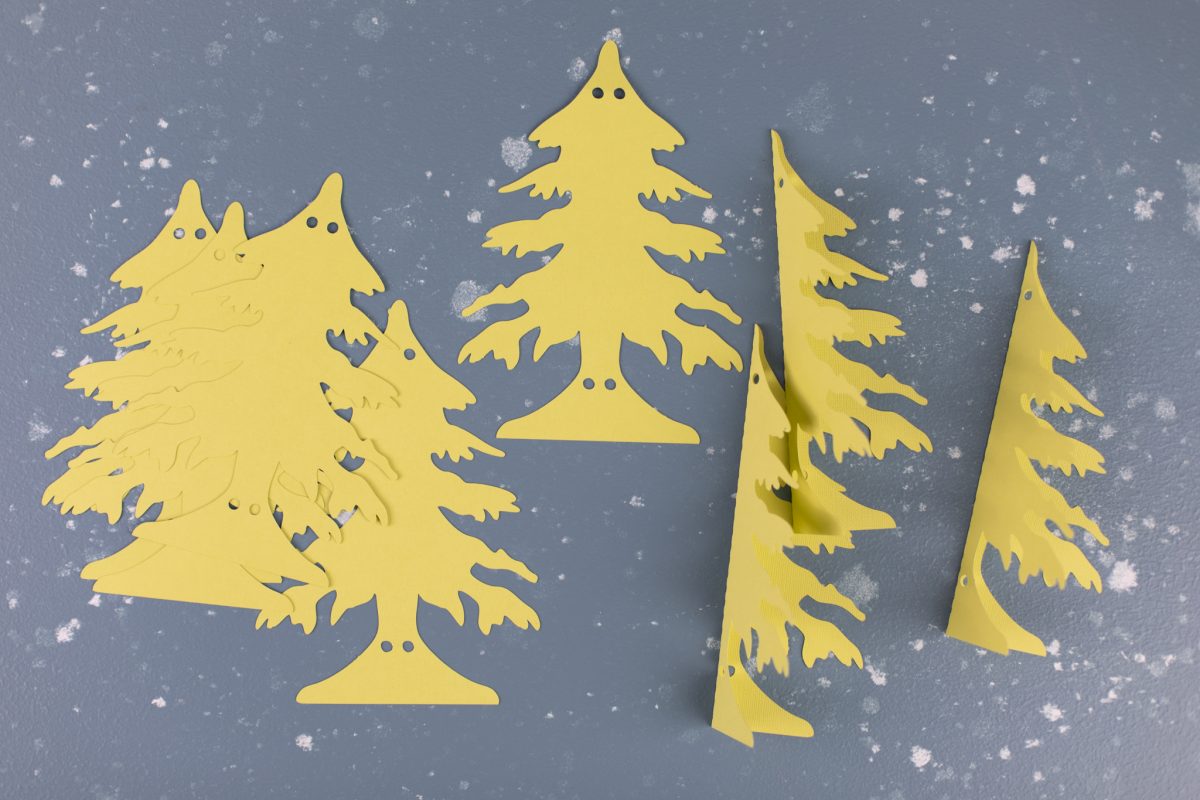
4. For each finished tree, I cut 20–22 tree pieces. So for the above, medium sized tree, you’ll need to cut 7 sheets of 12- by-12-inch cardstock (3 trees x 7 pieces of cardstock = 1 medium-sized tree).
5. For the small tree, decrease the tree size to 6.5 inches tall. You should be able to fit 4 on a sheet of 12-by-12-inch cardstock, so cut 5 sheets to get 20 trees (4 trees x 5 pieces of cardstock = 1 Small sized tree).
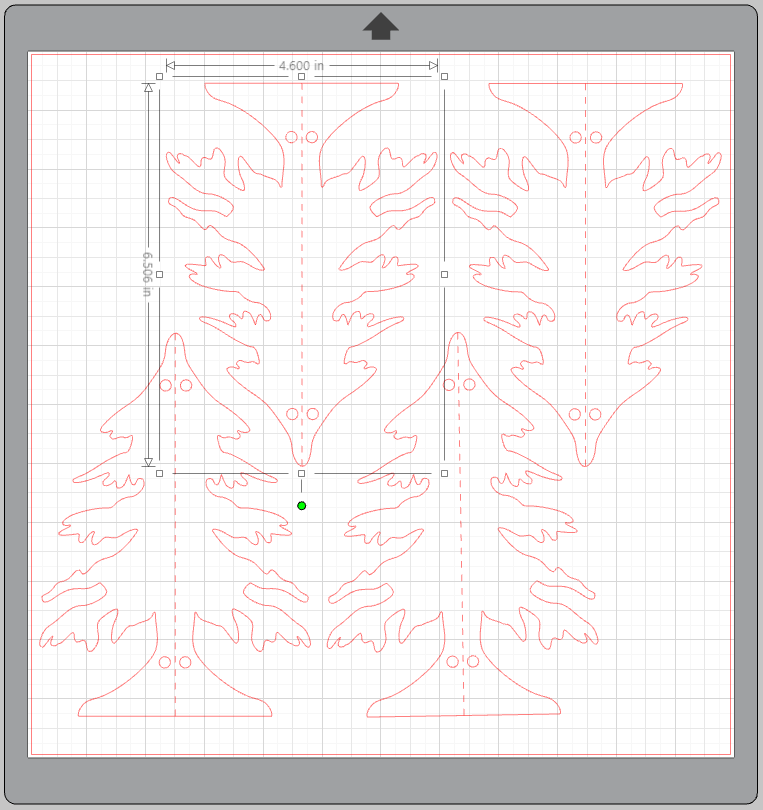
6. For the large tree, increase the tree size to just under 10 inches tall. You can fit 2 trees onto one piece of 12-by-12 inch cardstock if you rotate the trees a bit. Cut 10 to 11 sheets of trees to get 20–22 trees (2 trees x 11 sheets of cardstock = 22 trees)
You can certainly do this project on a Portrait or use letter-sized sheets of cardstock, you will just need a few more sheets of paper for each tree!
Step Two: Assembling the Trees
1. Once all your trees are cut, fold them down the middle along the score line.
2. Once all your trees are folded, stack them together, aligning their edges. Then use binder clips or clamps to firmly hold the folded trees together. Thread a book ring through each of the holes.
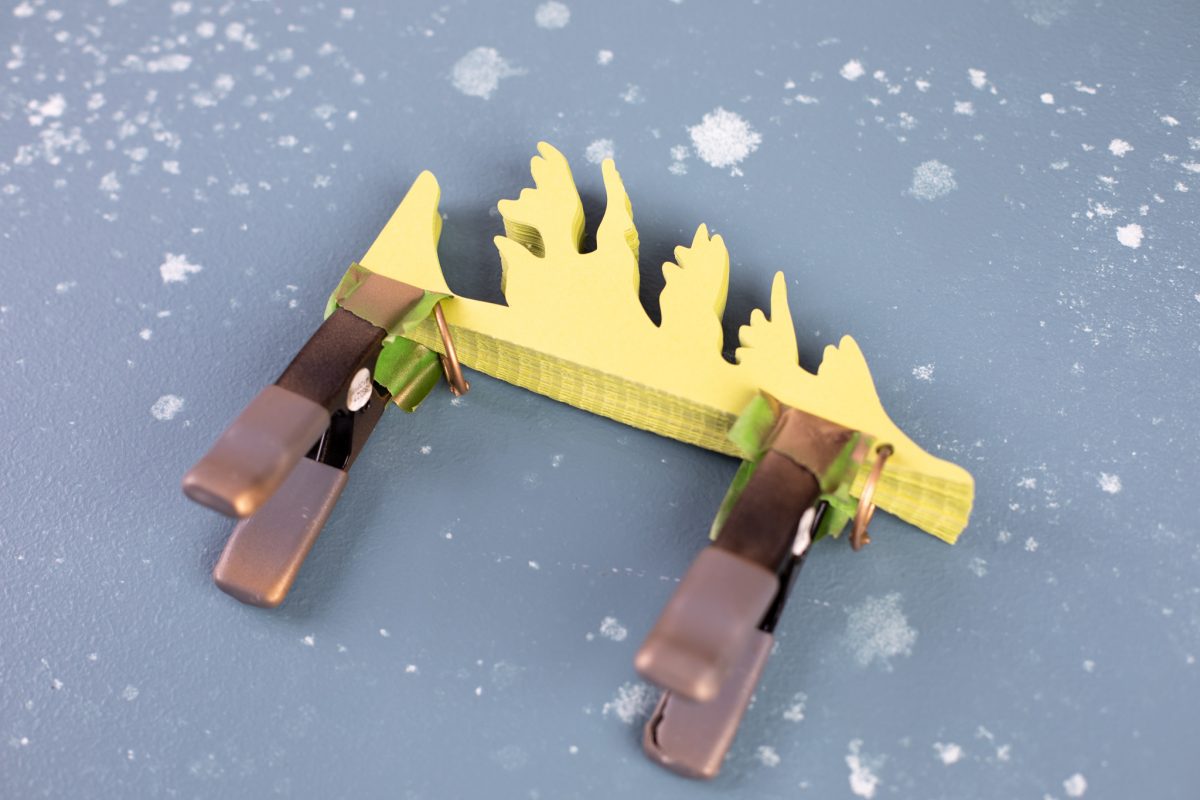
3. Now use gold spray paint or a hold pen to coat the edge of the tree limbs and give them a gilded appearance. Let the trees dry.

4. Once dry, remove the clamps and evenly disperse the tree limbs.

5. Make a whole forest and and customize your trees with different colored cardstock!

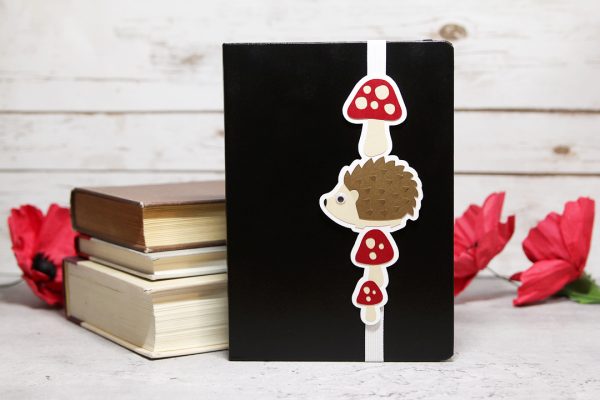 Hedgehog DIY Bookmark
  Quick Spring Welcome Sign
CJA Doornenbal
December 10, 2019
Ik wil kerstboom patroon hebben
Daisy
December 14, 2019
Wonderful