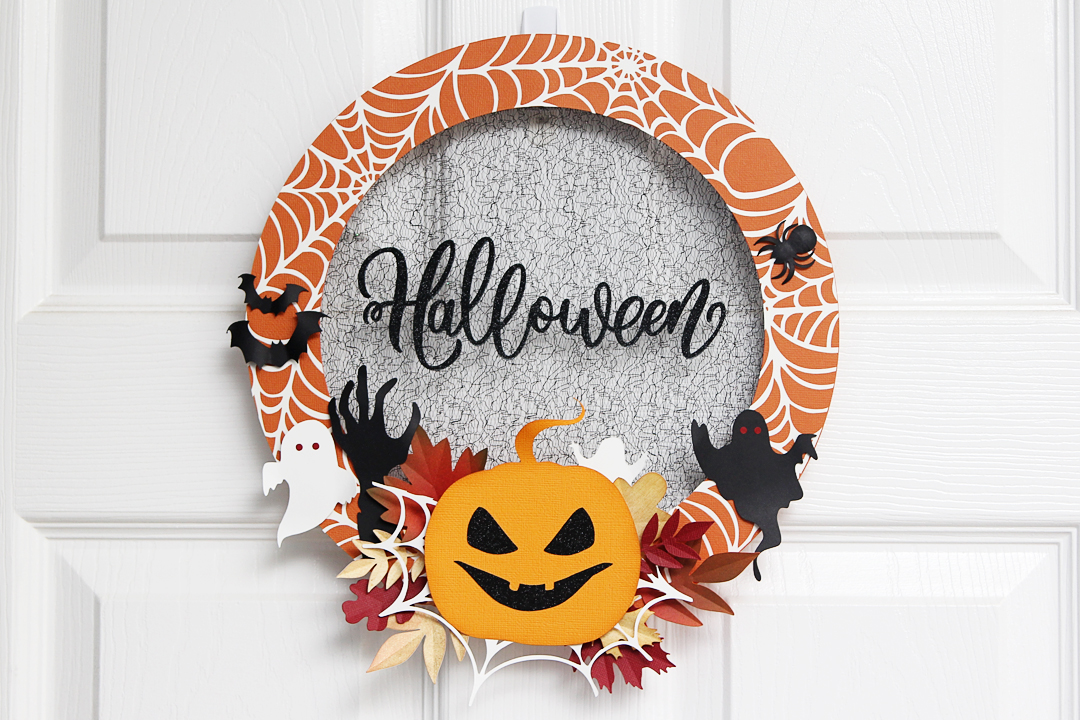
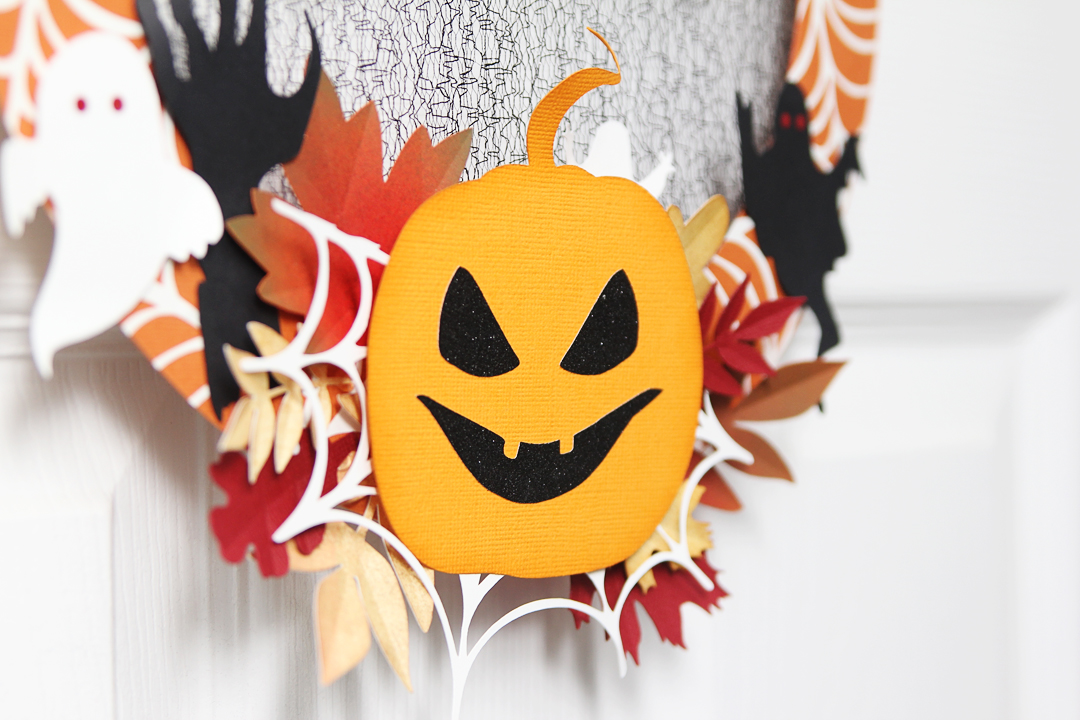
Here’s a festive Halloween project to make with your Silhouette Cameo®! This is technically a card design, but the Silhouette Studio® software makes it simple to resize the design to be larger so we can turn it into Halloween wall décor, instead.
I used a combination of chipboard, cardstock, fabric, and vinyl in this project because I like texture and wanted to use scraps of various materials. However, you could make the whole project from cardstock. You can use any Cameo model to create this project.
Supply List:
- Silhouette Cameo® 4
- Silhouette Studio® Basic Edition
- Blade
- Cameo Cutting Mat
- Chipboard
- White Vinyl
- Black Glitter Vinyl
- Red Vinyl
- Transfer Tape
- Tulle fabric – 12 in. x 12 in.
- Embroidery hoop – 10 in.
- Cardstock – various sizes and colors of your choice
- Inkpad or spray paint – various colors (optional)
- Adhesive – tape runner, glue dots, and hot glue
- Hook Tool
- Scraper
- Design ID #384637 by Your Magic Line
Step One: Prepare Design
In Silhouette Studio®, open the Halloween Card design. Zoom out so you can see all of the pieces at once.

Because we’re creating a wall hanging and not a card, we don’t need the card pieces at the bottom of the page. Go ahead and delete the double-circle card base.
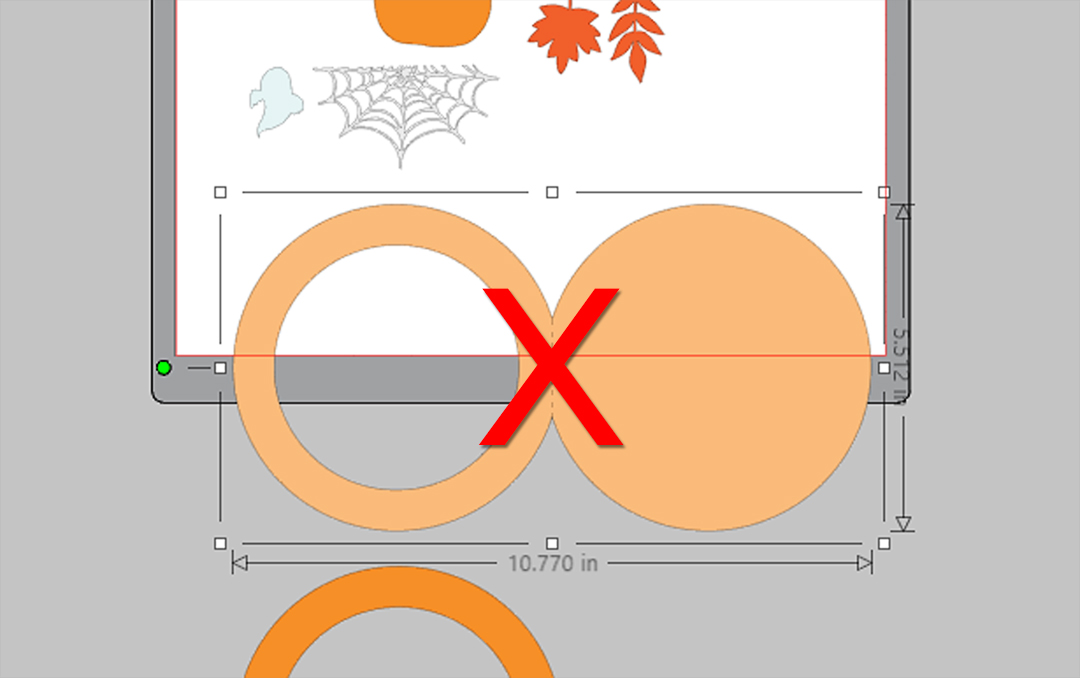
Drag your mouse to select all the other pieces on the page and choose Center on the Quick Access Toolbar (QAT) to bring them all inside the largest circle. This will make resizing everything easier.
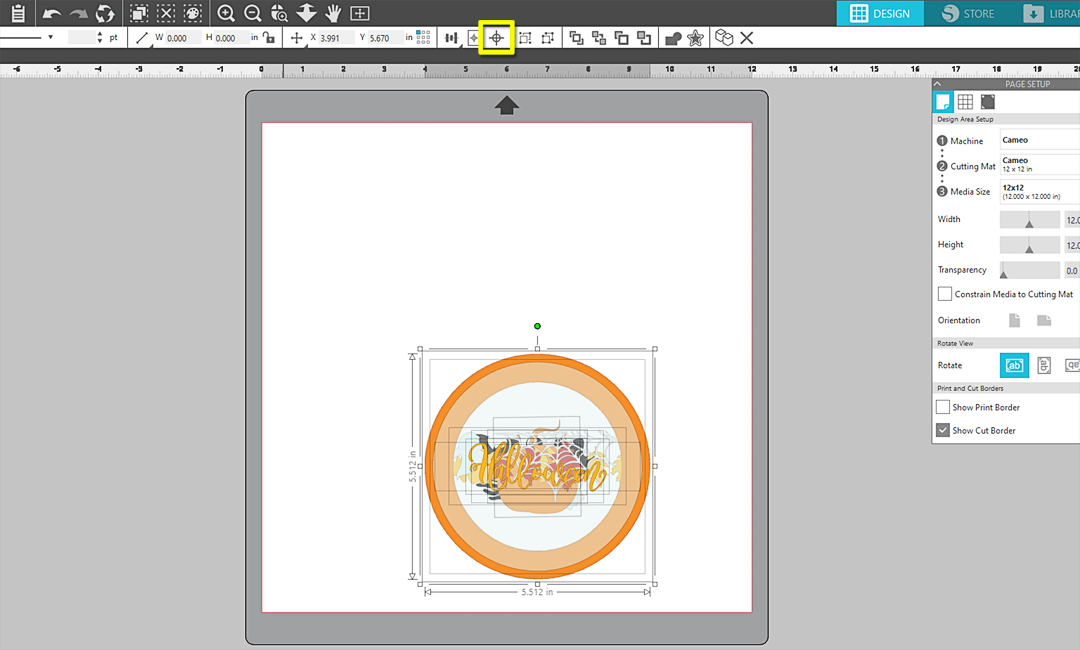
With all of the pieces still selected, group the design by right-clicking and selecting “Group.” Lock the aspect ratio for Scale on the QAT and input 11.75 in. for either measurement. This will make our largest circle 11.75 in., and the other pieces will be scaled properly to match the new size.

Step Two: Cut Pieces
To cut all of the pieces, ungroup them and move everything to the side of the virtual mat. Then, place one color from the design at a time onto the virtual mat and select the appropriate cut settings for each material in the Send Panel.
Tip: When I’m cutting a lot of pieces like this, I usually start with everything on one side of the virtual mat, then move it to the other side once I’ve cut it so I know which still needs to be cut.

Because I am cutting a lot of pieces out of several different materials, I found it helpful to create a list of which elements to cut out of my different colors and media.
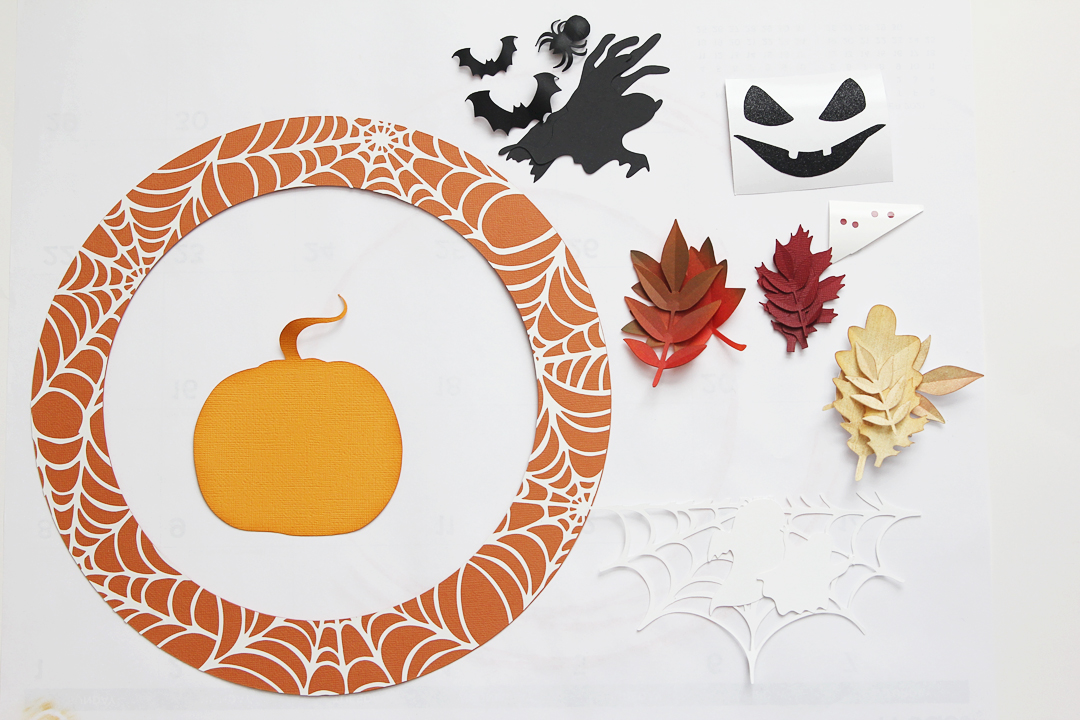
- Cut the large orange ring from chipboard.
- Cut the large orange ring again from orange cardstock.
- Cut the spiderweb ring from white vinyl. The design has an extra ghost in this color that I ungrouped and cut later from white cardstock with the half spiderweb and other ghost.
- Cut the red ghost eyes from red vinyl. Ungroup them from the pumpkin face first.
- Cut the half spiderweb and two white ghosts from white cardstock.
- Cut the leaves and pumpkin from various colors of red, yellow, and orange cardstock. Ungroup the pieces and rearrange them to fit your scraps of cardstock.
- Cut the black pieces from black cardstock.
- Cut the pumpkin face from black glitter vinyl.
- Cut the Halloween phrase once from black cardstock and once from black glitter vinyl.
As you cut out your pieces, be sure to check the settings in the Send Panel and confirm that you’re cutting your materials with the right settings. You may want to perform a few test cuts to make sure the default settings will cut cleanly through each material before you start creating your project pieces.
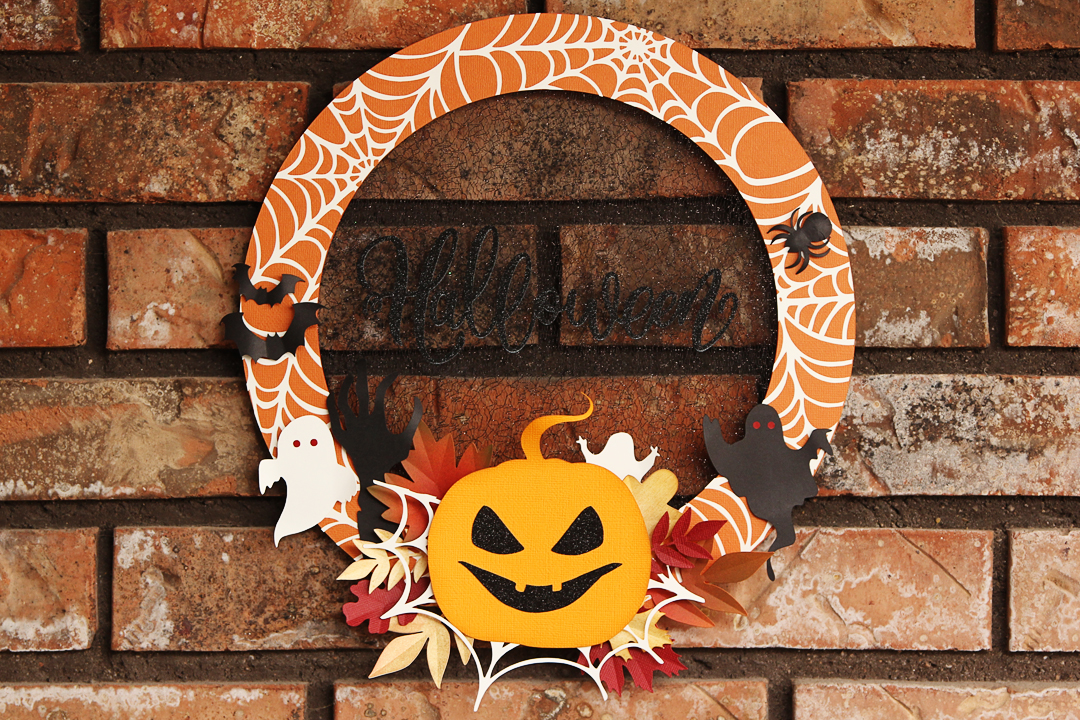
Note: These are all suggested colors and materials. For the Halloween phrase, I recommend considering the background where this finished wreath will be hung. As you can see, a brighter color would contrast better than black if I were to place this against a dark background, like this brick wall.
Step Three: Color and Assemble Pieces
Begin by attaching the orange cardstock ring to the chipboard ring. Use a dry adhesive like a tape runner so you don’t get any warping or lumps.
Next, weed the white spiderweb vinyl using your hook tool. Apply the design to the orange cardstock ring with a 12 x 12 in. piece of transfer tape.
Tip: I find it helpful to use the transfer-tape backing underneath the weeded vinyl after it has been pulled from its own backing. The transfer tape backing can help you place the design correctly before pressing it all down against the cardstock ring if it is transparent enough.
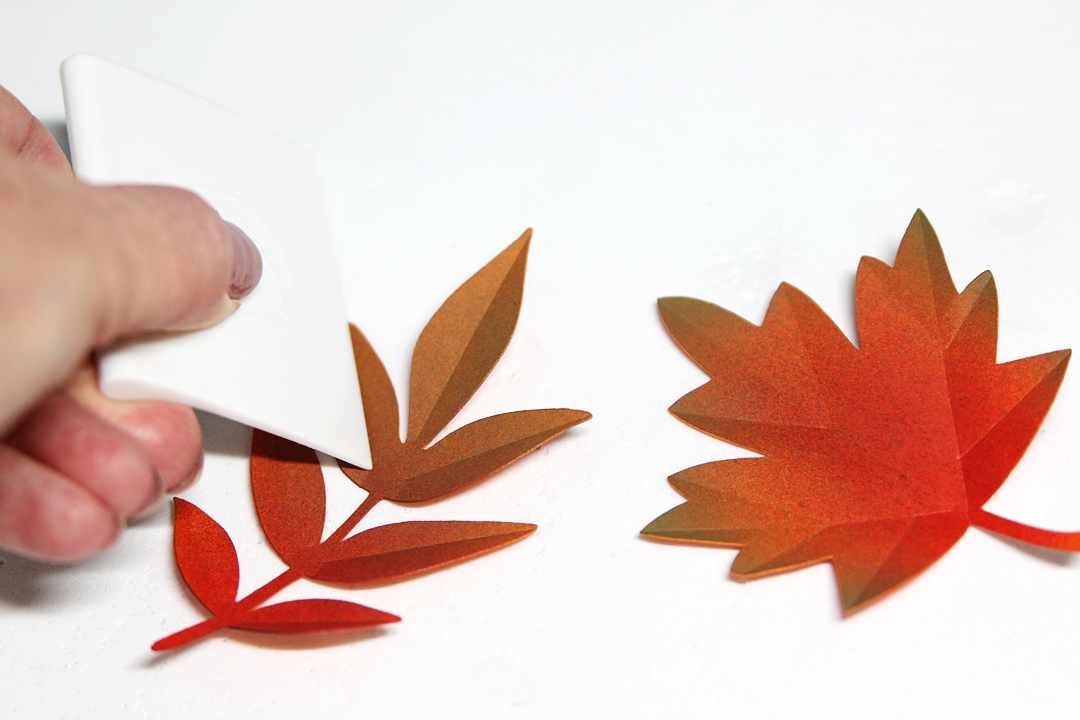
As an optional step, you can add color and dimension to your cutouts. This isn’t necessary to create the final project, but I like to take a little extra time to add depth to 3D projects like this wall hanging.
You can add color by sponging on ink from an inkpad to the edges of the leaves and pumpkin, or lightly mist with spray paint to add color variation. Add dimension by using the Silhouette scraper tool to press indentations for leaf veins against a soft background like a mouse pad, and use a scraper tool or your fingers to shape the spider legs and bat wings.
Now, we need to add our tulle to the embroidery hoop. Unscrew the top of the hoop to separate the two rings and place your 12 in. square of tulle on top of the smaller inner ring. I found some fancy tulle that looks like a spider web. Then, place the outer ring with the hardware back onto the inner ring so the tulle is held in place. Screw the piece at the top of the hoop until it is tight.
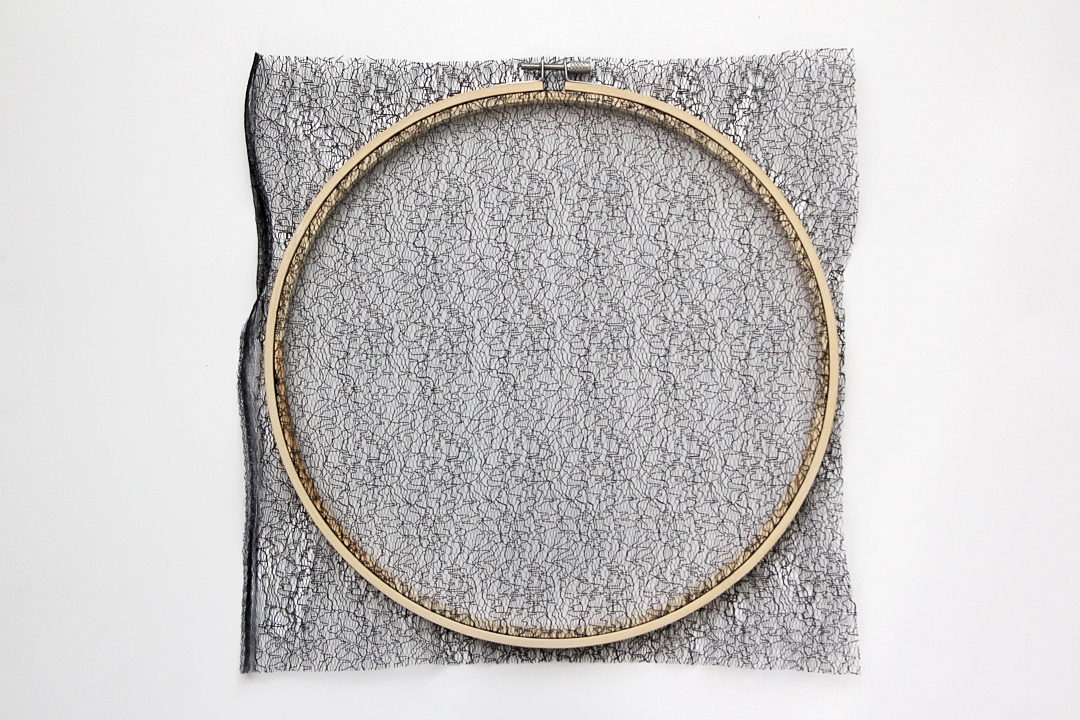
Pull the tulle snug and hot glue the fabric into place on the back of the hoop. Trim the excess tulle to about 1/2 in.; the orange ring will hide the extra tulle. Next, hot glue the embroidery hoop the back of the orange chipboard ring.
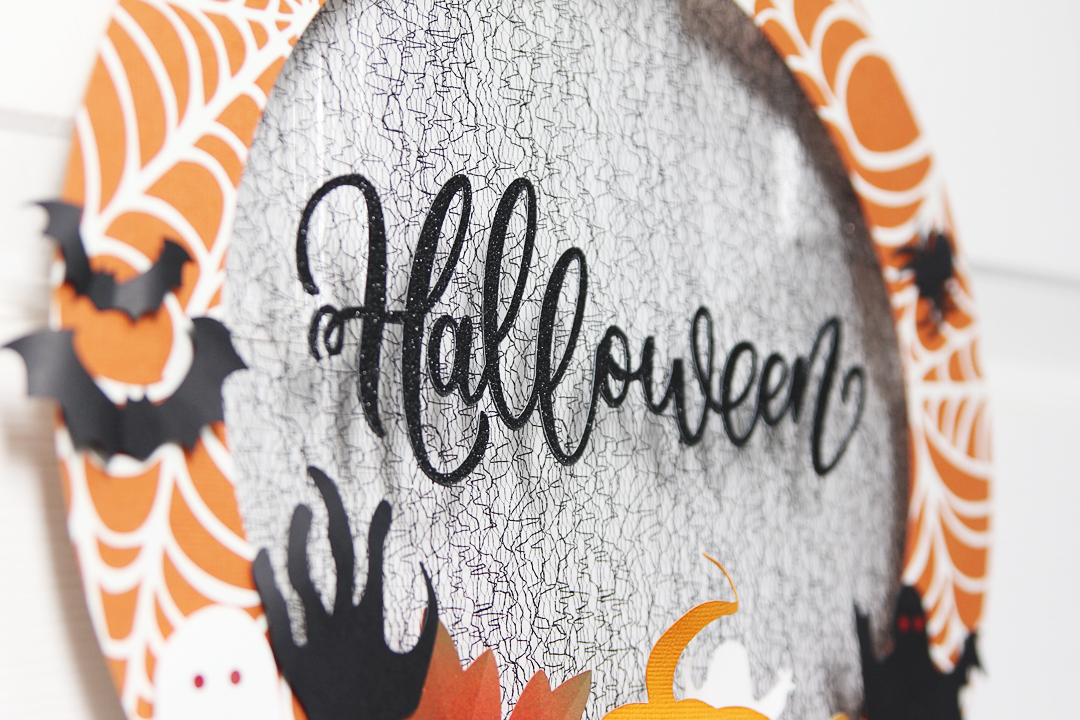
Position the colored cutouts so they are clustered generally at the lower third of the ring, then use glue dots or hot glue to attach each of the elements once you’re happy with the placement.
Finally, apply the glitter vinyl phrase to the matching cardstock phrase with transfer tape. This can be secured with hot glue from the back side of the tulle. Now you’re ready to hang this on a wall or door for your festive Halloween season!
 Get to Know the ES Mat
  Layered Card with PixScan
Leslie
October 18, 2021
Thanks for the good instructions! It never dawned on me to put vinyl over cardstock letters, fab!
Kelly Wayment
October 29, 2021
I’m glad you like that tip! 🙂