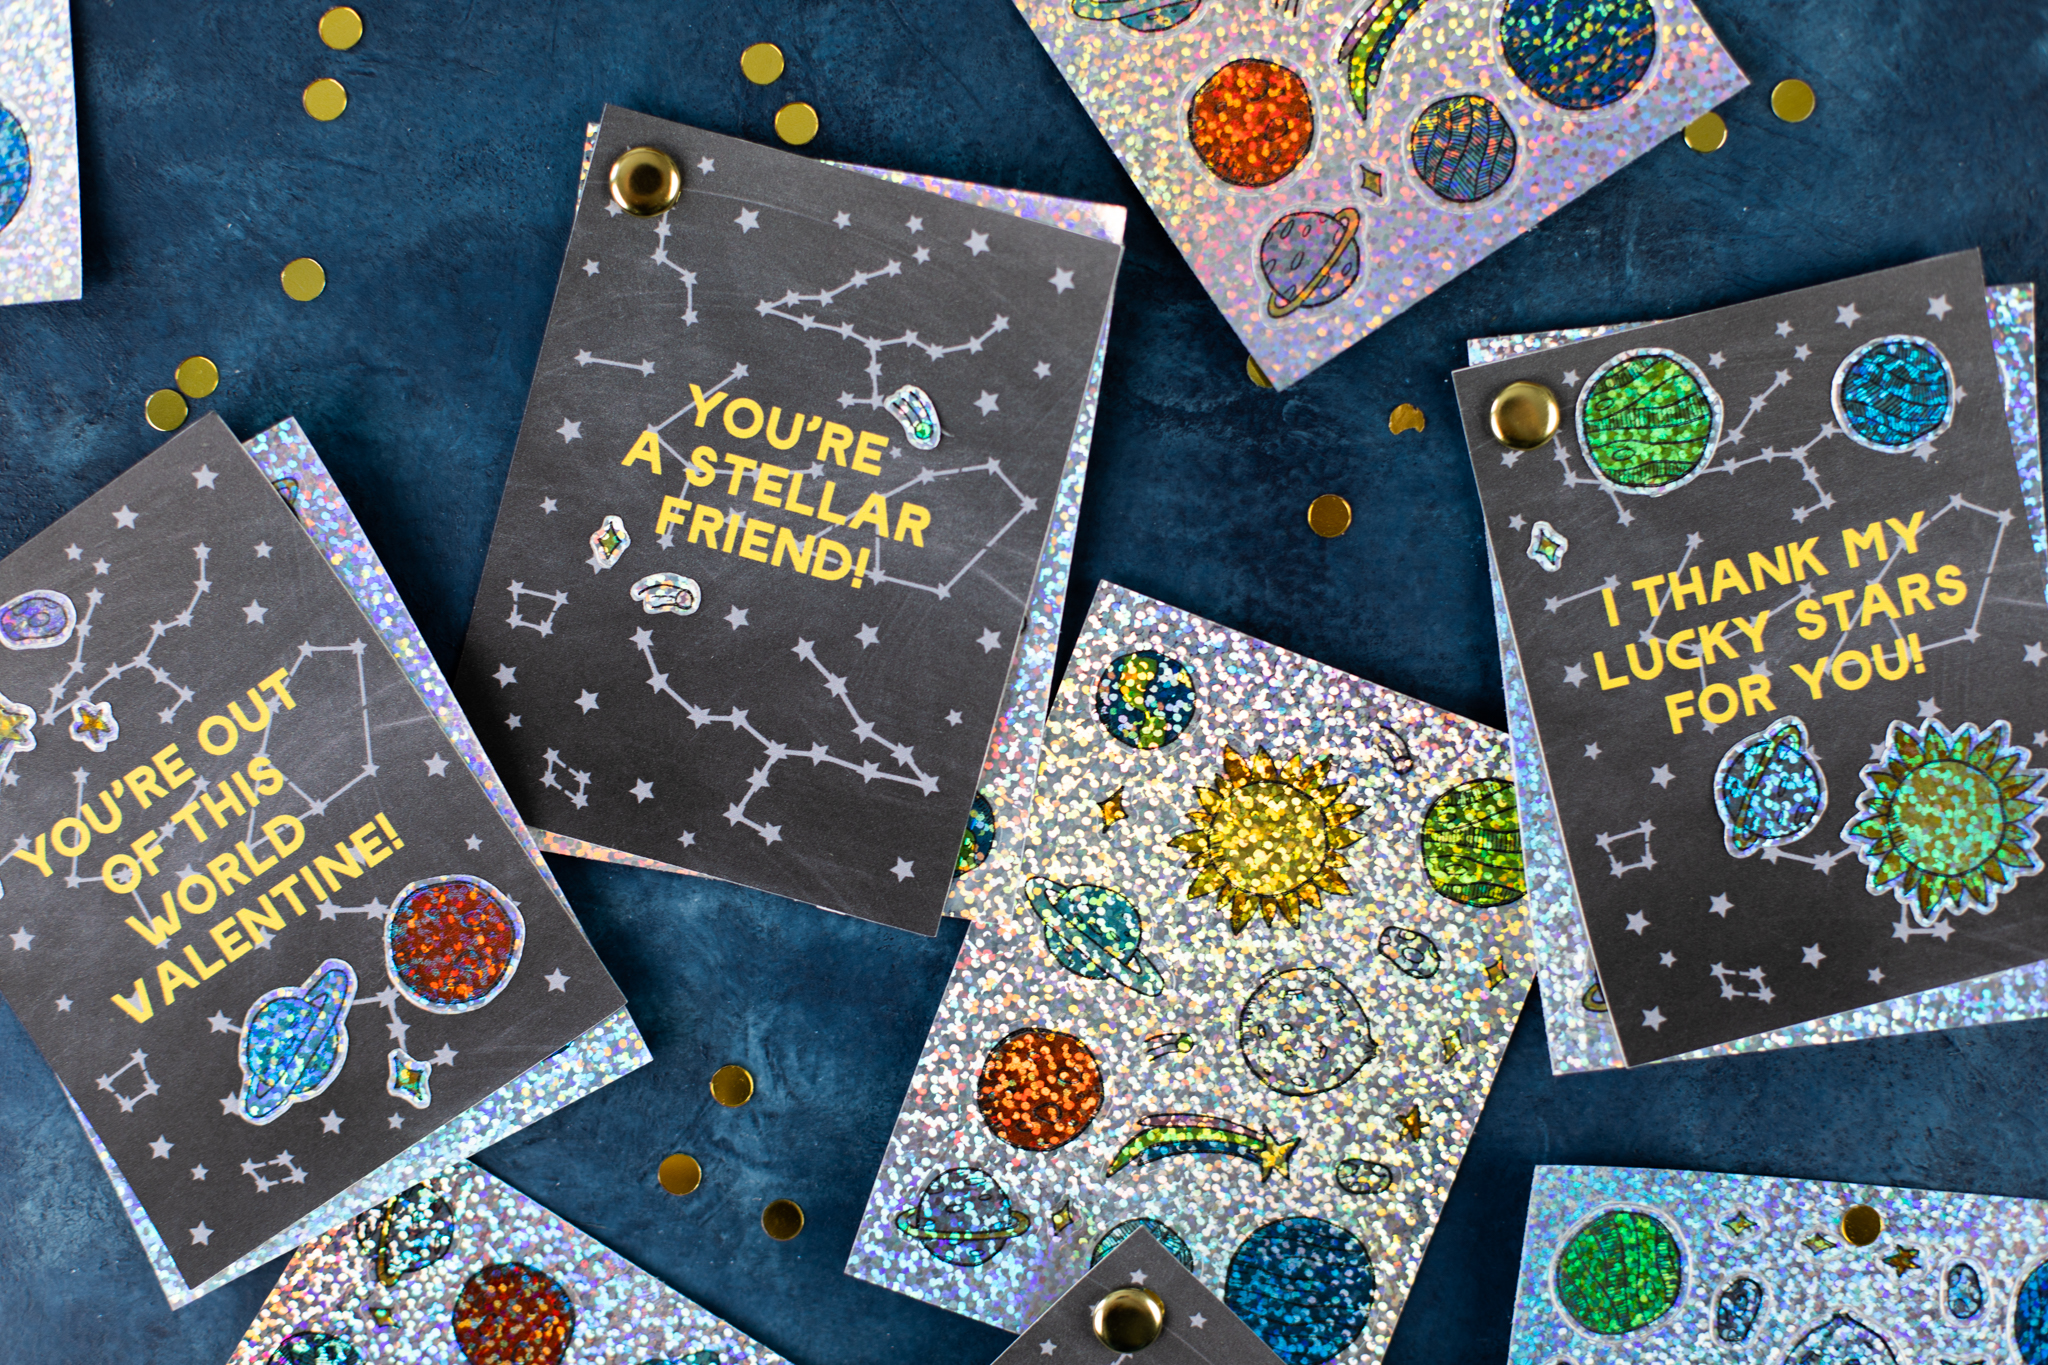
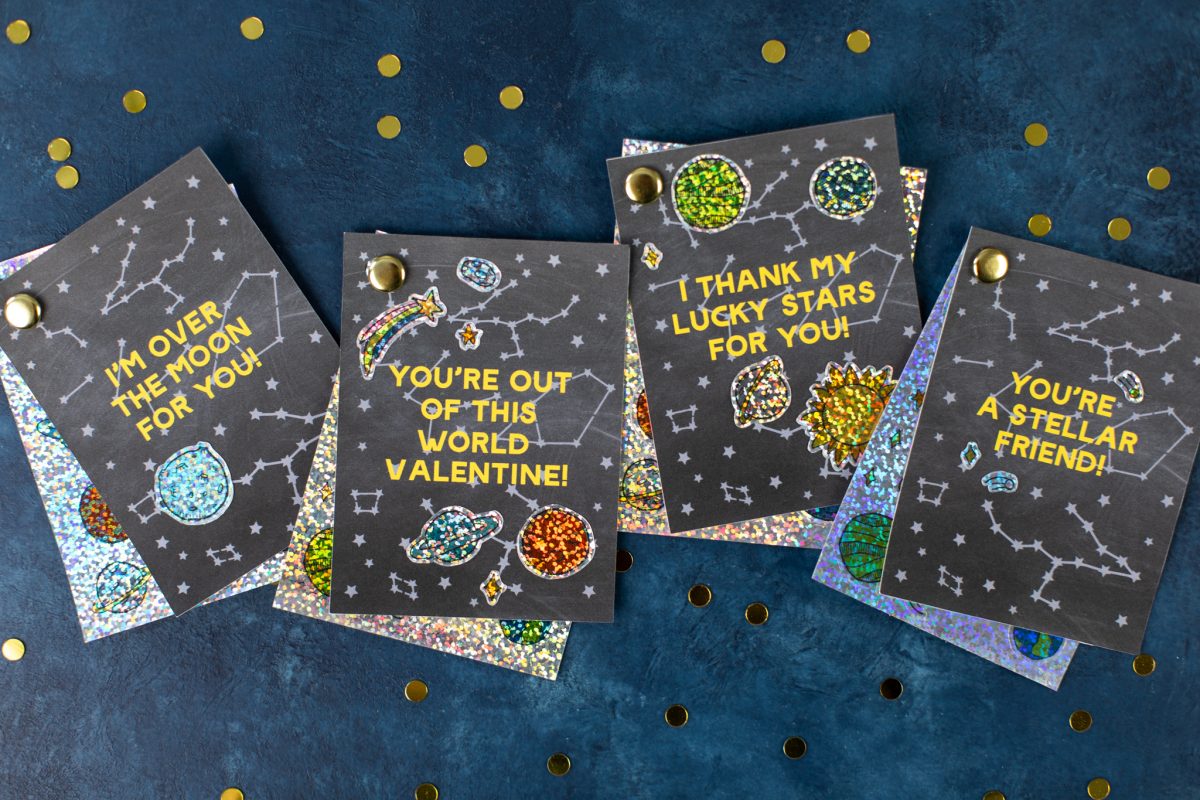
If you’re still deciding what to do for your child’s valentines this year, here is an cute and easy option for your space-loving sweetie! Small constellation cards are coupled with planet stickers for a candy-free valentine, perfect for classrooms.
Supplies Needed:
- Silhouette Cameo® or Silhouette Portrait®
- Silhouette Studio®
- Silhouette Cutting Mat
- Silhouette AutoBlade or Silhouette AutoBlade for Cameo 4
- Holographic Dot Sticker Sheets
- Cardstock
- Small star brads, or other fasteners
- Design ID #300571 for Planet Stickers, #56470 for Constellation Card, #307809 for Font, and #38385 for the Chalkboard Pattern
Step One: Preparing the Card
1. Insert the constellation cards, ungroup the design, and keep the 3-inch-by-4-inch size. Set the media size to 8.5 inches by 11 inches and turn on the registration marks.
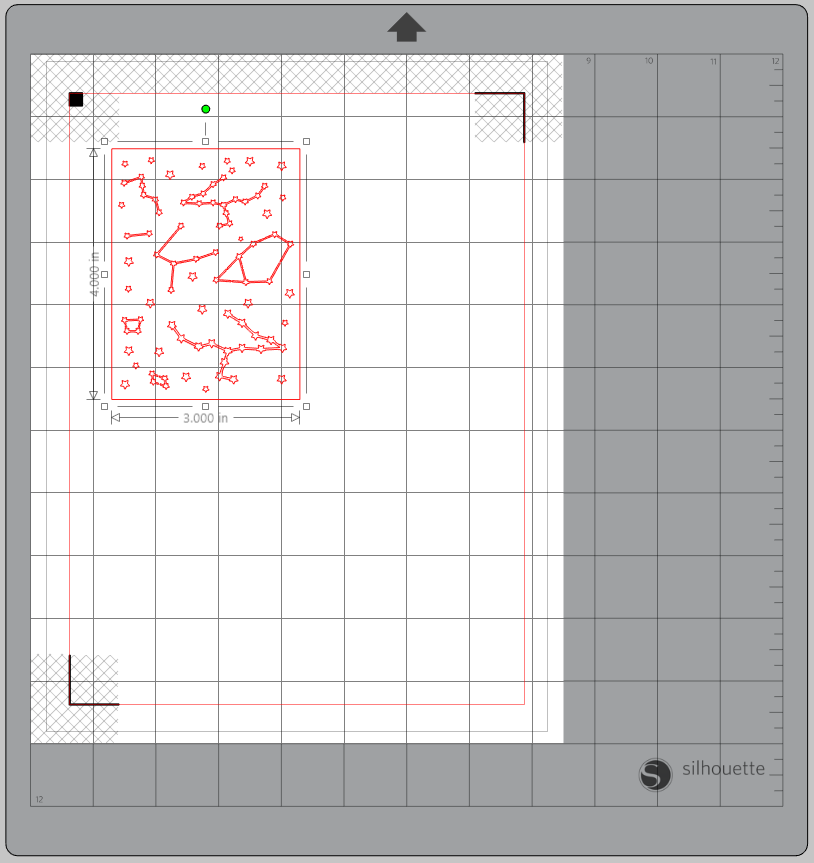
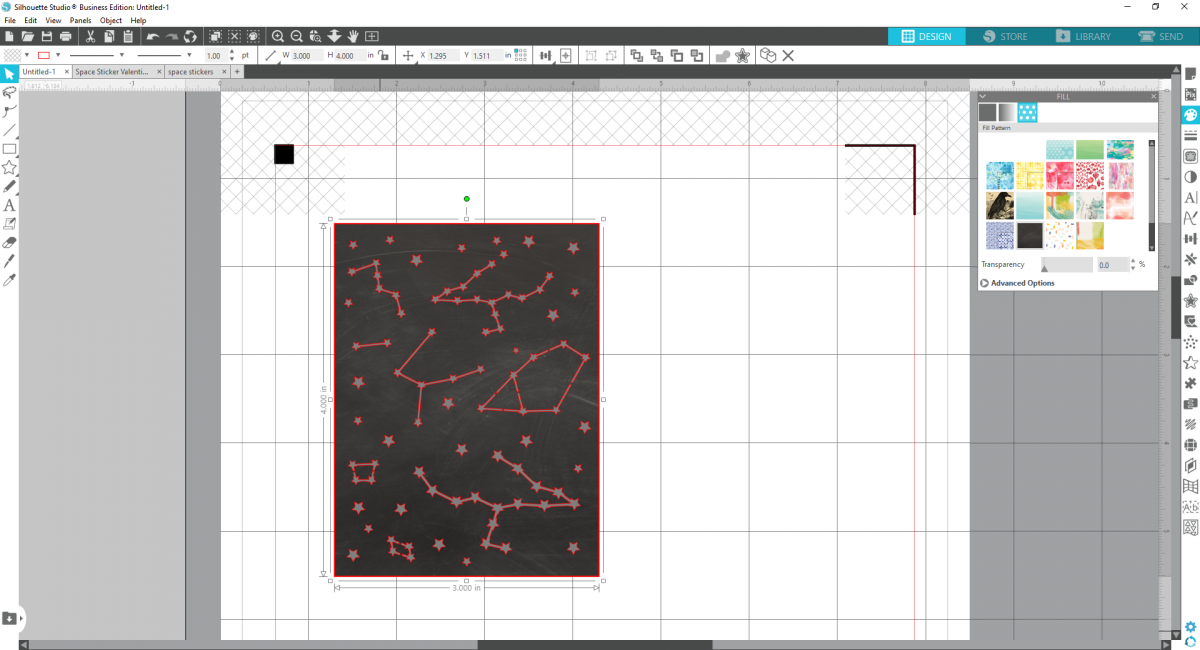
2. Right-click the design and select “Release Compound Path” so that all the elements are separate. Then select all the constellations and fill them with a light gray color. Then select the background and fill it with the chalkboard pattern.
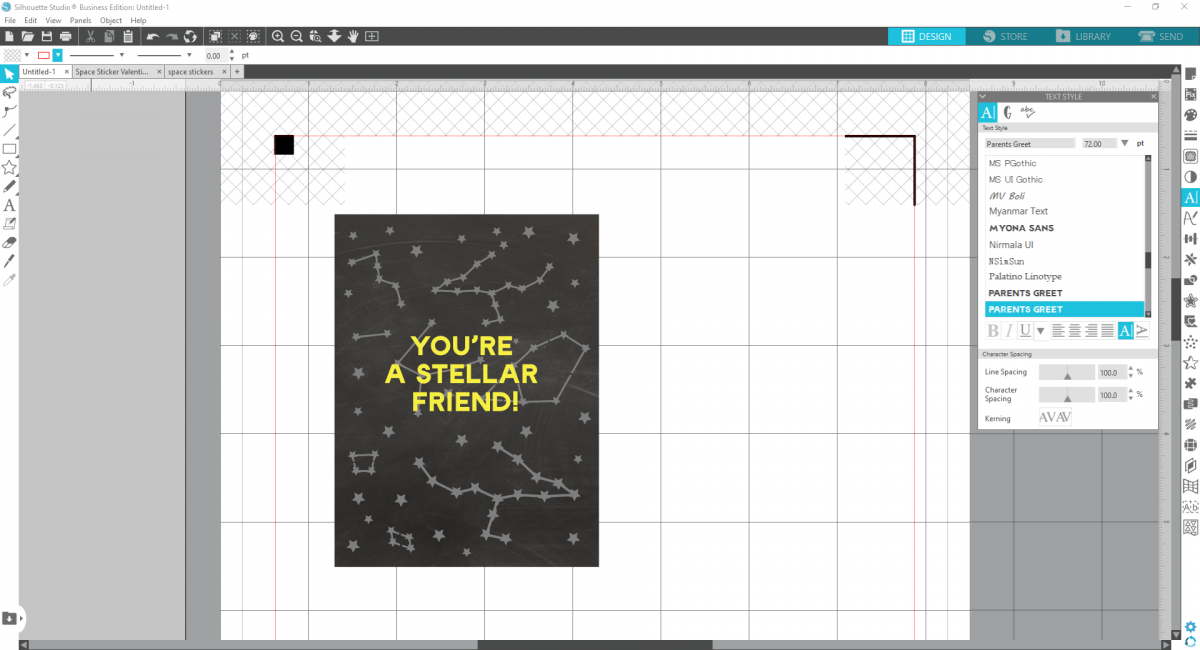
3. Select all the components and group them together. Now create a text box with any space or Valentine’s Day puns you can think of! We used: “I’m over the moon for you,” “I thank my lucky stars for you,” “You’re a stellar friend,” and “You’re out of this world Valentine!” Change the font to “Parents Greet,” the font color to yellow, and the size to 22.85, and then center the text on the card.
4. Now duplicate the card so you can fit 4 cards on the page, and adjust the text as you wish! Print your valentine cards on white cardstock.
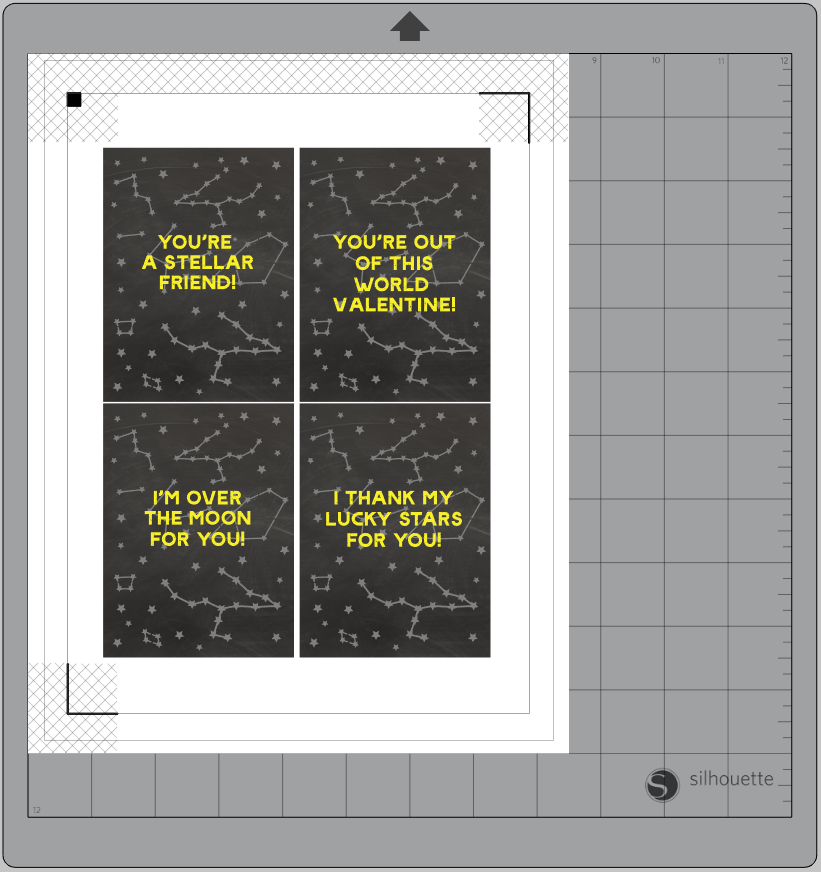
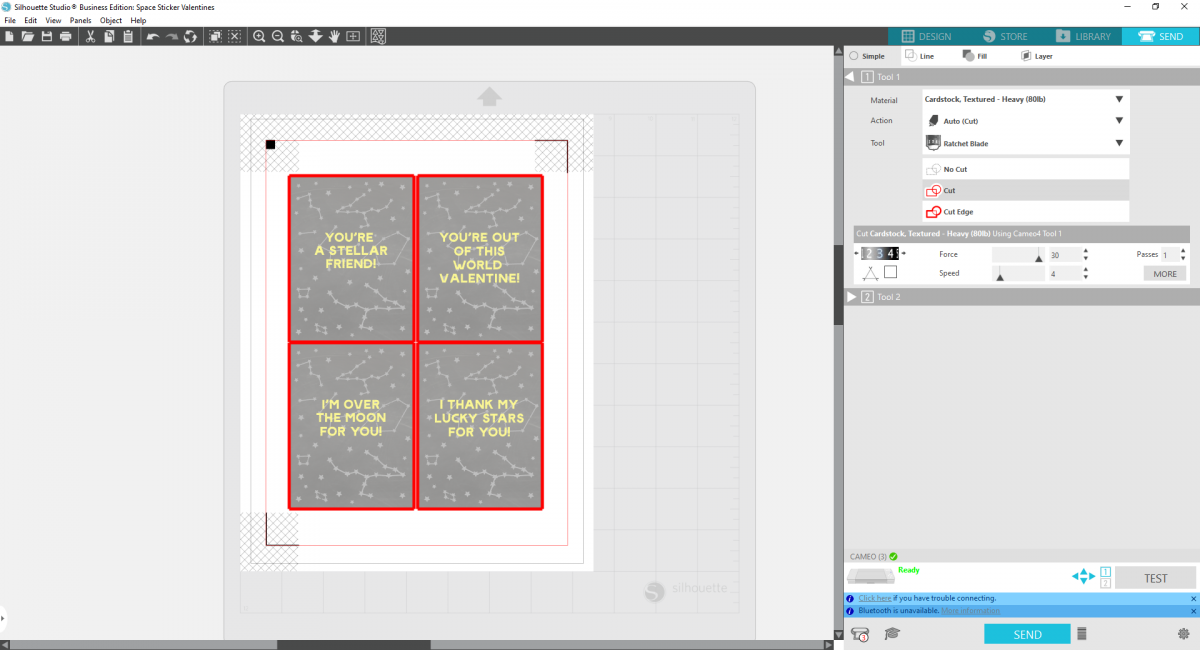
5. Load the printed page onto your cutting mat and load the mat into your machine. Cut along the edges of each card to create individual valentines.
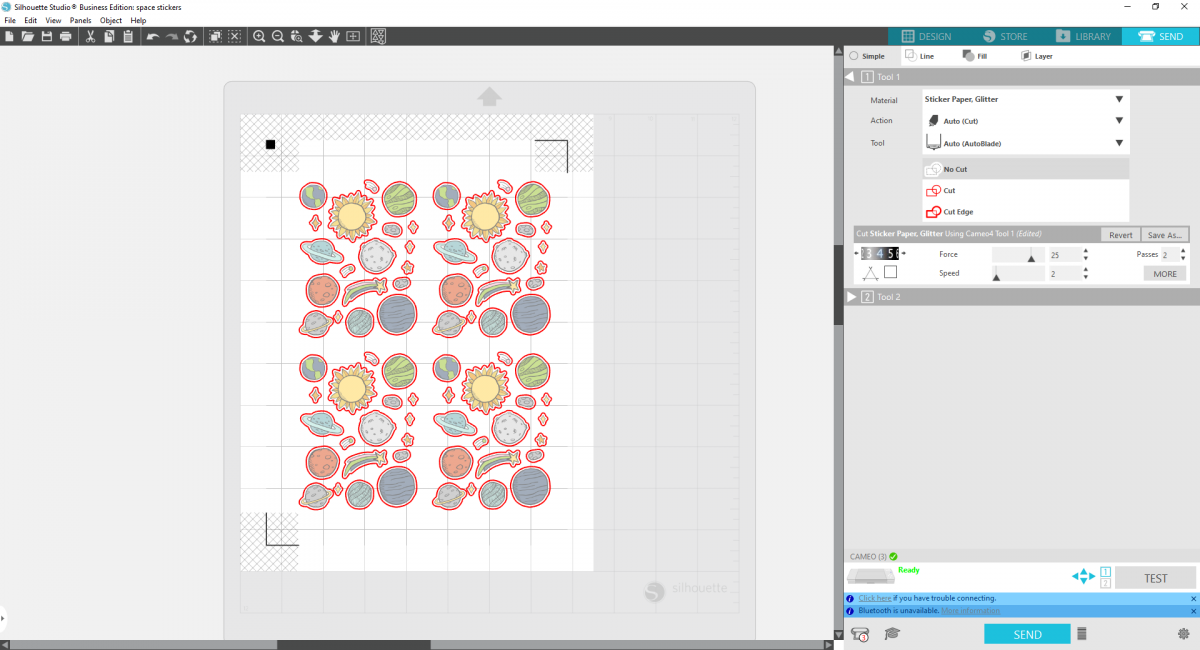
Step Two: Preparing the Stickers
1. To create the mini sticker sheets, open the space sticker design in Silhouette Studio®. Keep the media size set to letter and the registration marks turned on.
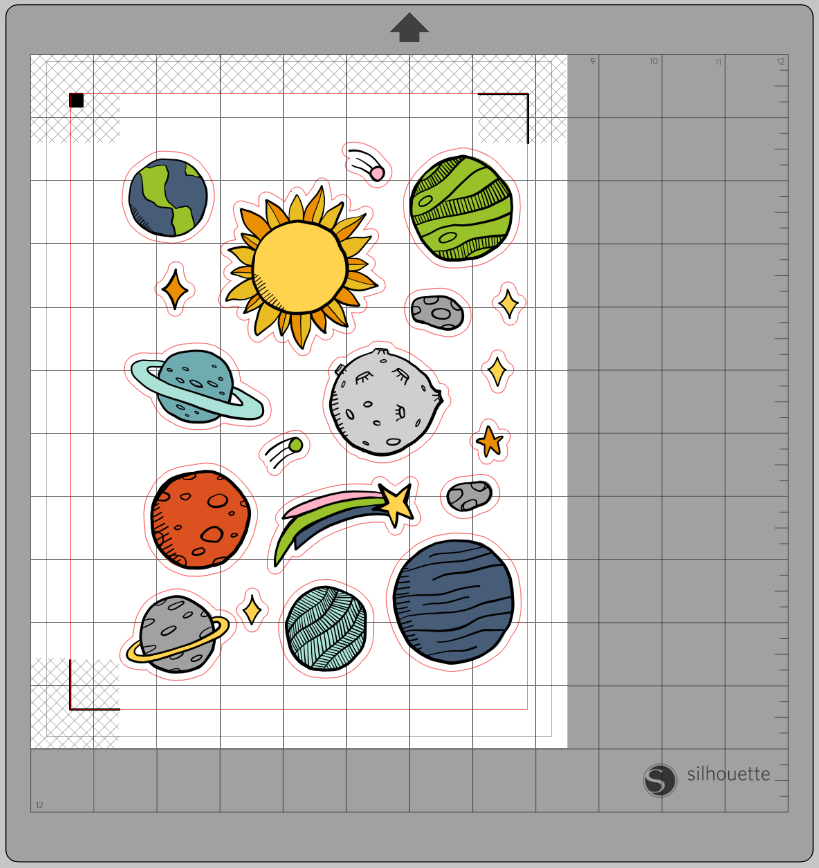
2. Size down both pieces of the design files (that is, both the illustrations and the cut lines) to measure approximately 2.7 inches wide by 3.7 inches tall. Duplicate the stickers so you have four mini sheets on the page.
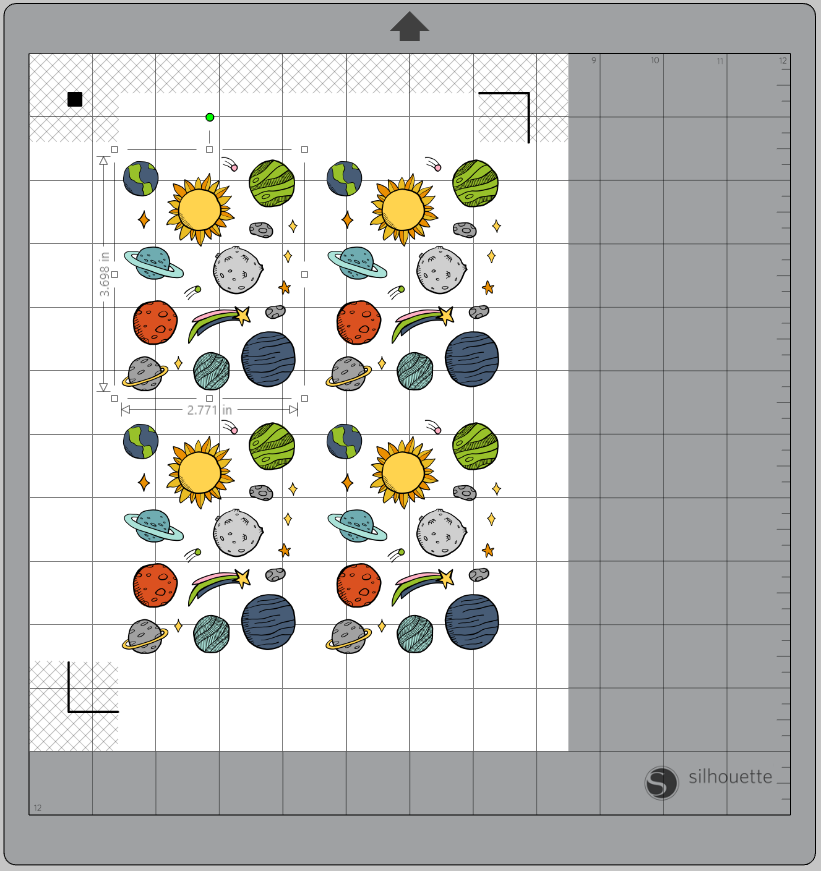
3. Print out on the holographic dots sticker paper. Then place the paper on your mat and load the mat into your machine. The holographic dots sticker paper is thicker than other sticker paper, so I like to increase the blade depth to 4, the force to 25, the speed to 2, and the passes to 2.
Step Three: Assembling Your Valentines
1. Cut the printed sticker sheets into 4 mini sheets. Then layer each sticker sheet under a printed valentine card.
2. Fasten the card and the sticker sheet together by punching a small hole in the corner of both parts and using a small star brad to keep the two pieces together.
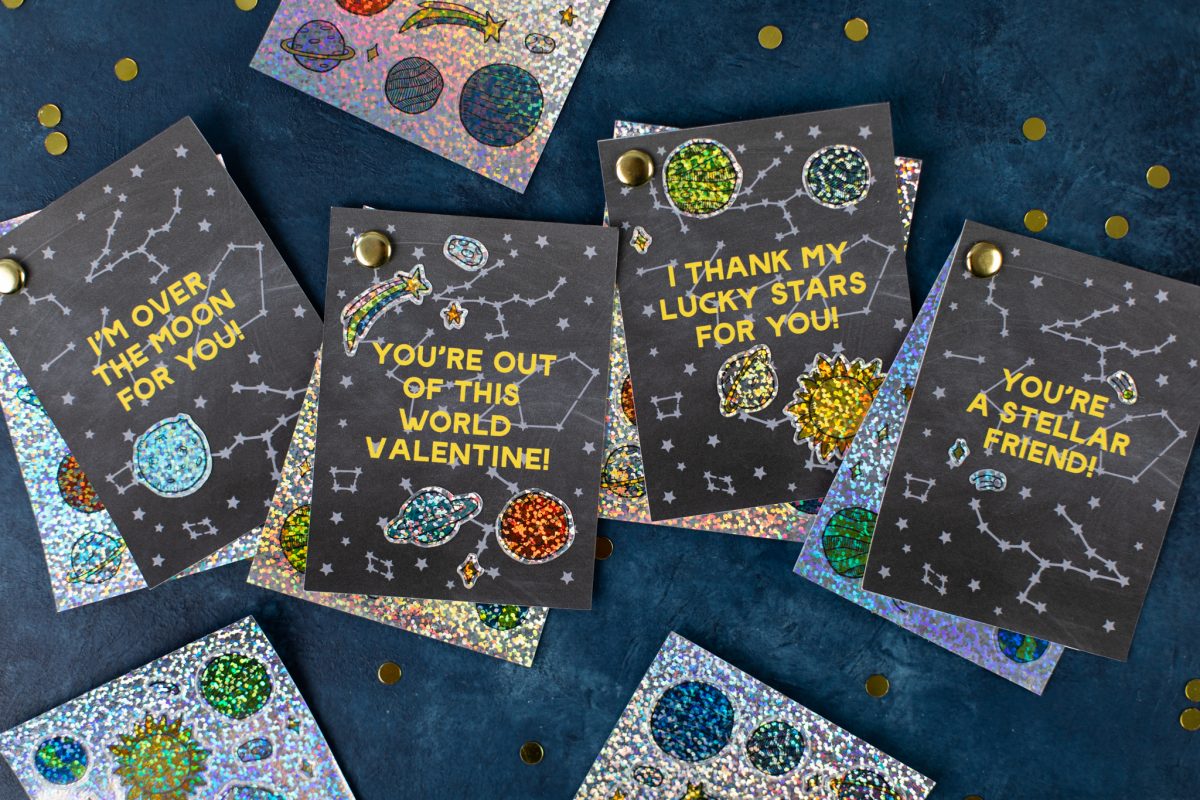
3. Kids can decorate the cards with the stickers or use them however they want!
 Fish Valentines to Share
  A Sweet Delivery: Box & Chocolate Pretzel Bites
Tracy Suzuki
February 8, 2020
What kind of printer do you use to print? I have tried the holographic & holo dots sticker paper and my print always does out dotty. The fill is not solid and looks terrible on the solid holographic sticker sheet. Please advise, so far I’m very disappointed in this expensive sticker paper purchase.
Silhouette
February 10, 2020
We would recommend the use of an inkjet printer. As for make and model, we do not have any specific information or recommendation to relay. This would be up to your personal preference for what printer brand you might like. We can relay that internally within our company, we primarily use Canon and HP printers.
Ann
February 11, 2020
Cool