
Would you like an easy-peasy Valentine’s Day card and envelope tutorial? Your wish is our command! Below you’ll see just how effortless it is to make your own valentines using the right Silhouette supplies and your printer.
Supplies Needed:
- Silhouette Cameo® or Silhouette Portrait®
- Silhouette Studio®
- Silhouette Cutting Mat
- Silhouette Cutting Blade
- Printer
- Silhouette White Sticker Paper
- White Cardstock
- Glue
- Design IDs #343004, #41748, #179350
Step One: Print & Cut Designs
1. Open Unicorn Valentine Card design (Design ID #343004) in Silhouette Studio®. You will note that there are crosshatched areas on three corners of your workspace. Make sure that your design does not overlap into the crosshatched area or else your Silhouette will have trouble reading your registration marks. Once your design is ready to go, print the design on white cardstock by clicking on the Print icon in Silhouette Studio®.
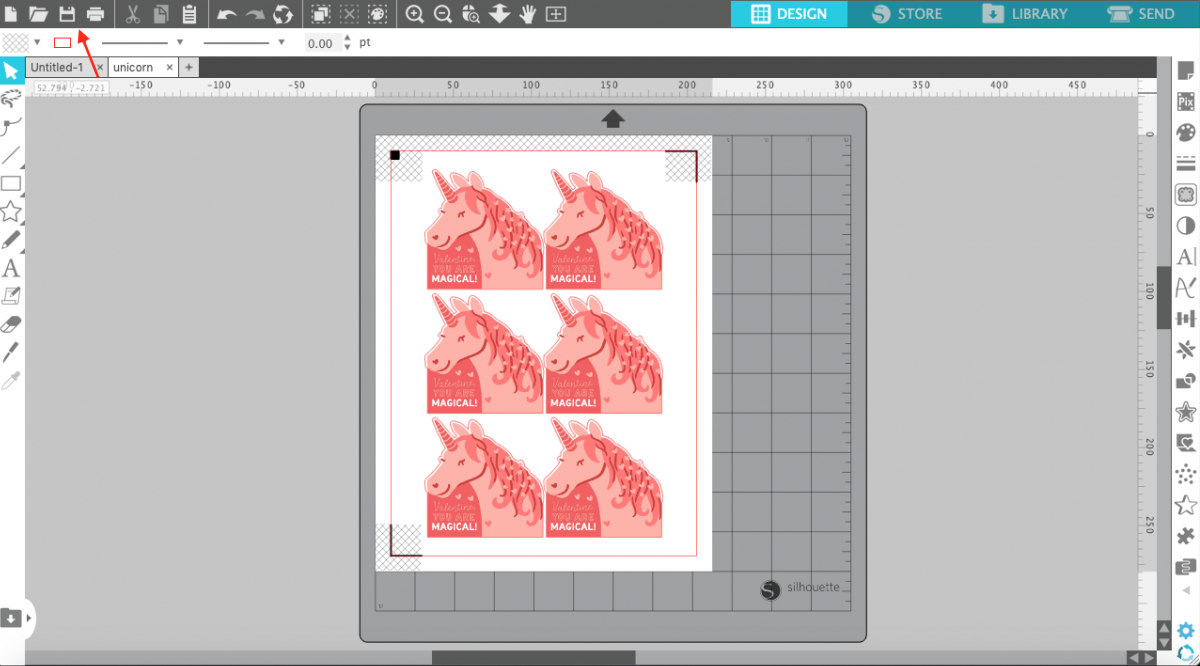
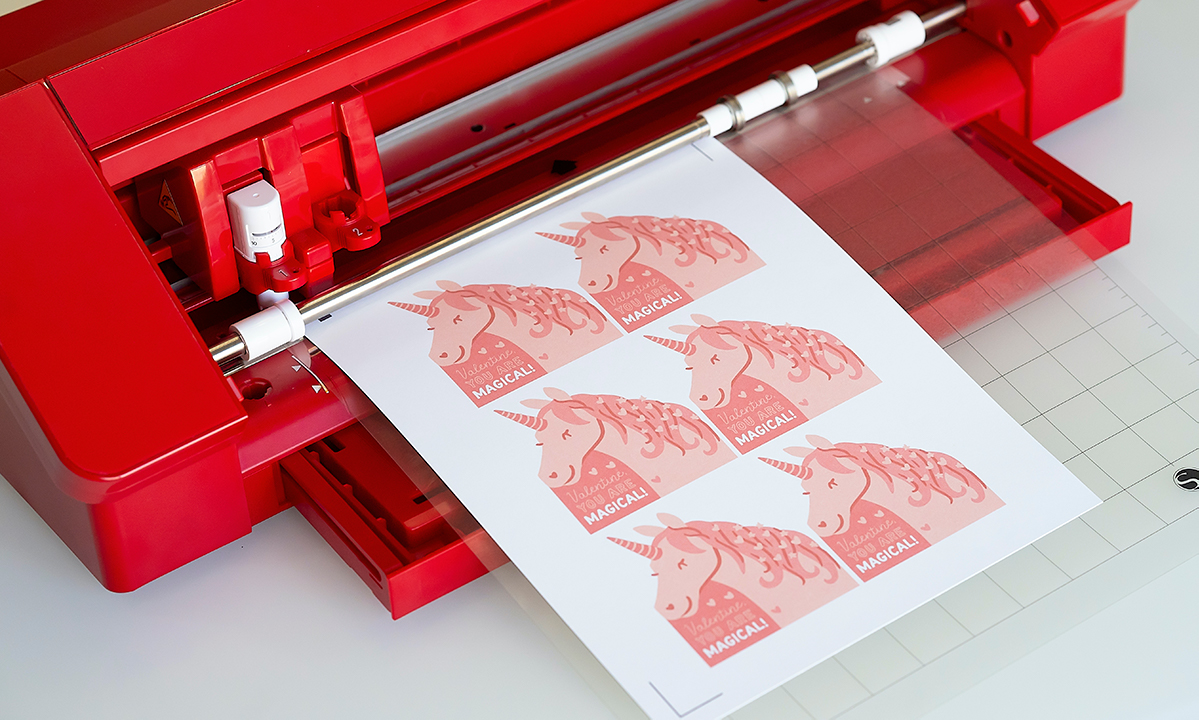
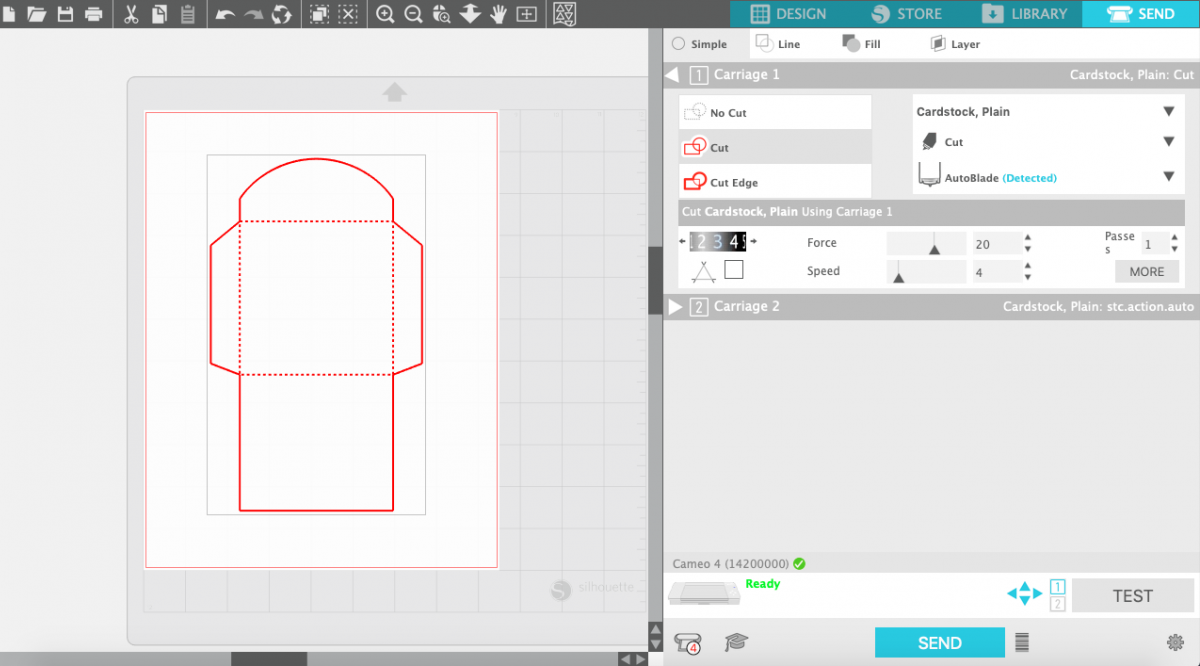
2. Place the printed sheet on your cutting mat and load the mat into your Silhouette machine.
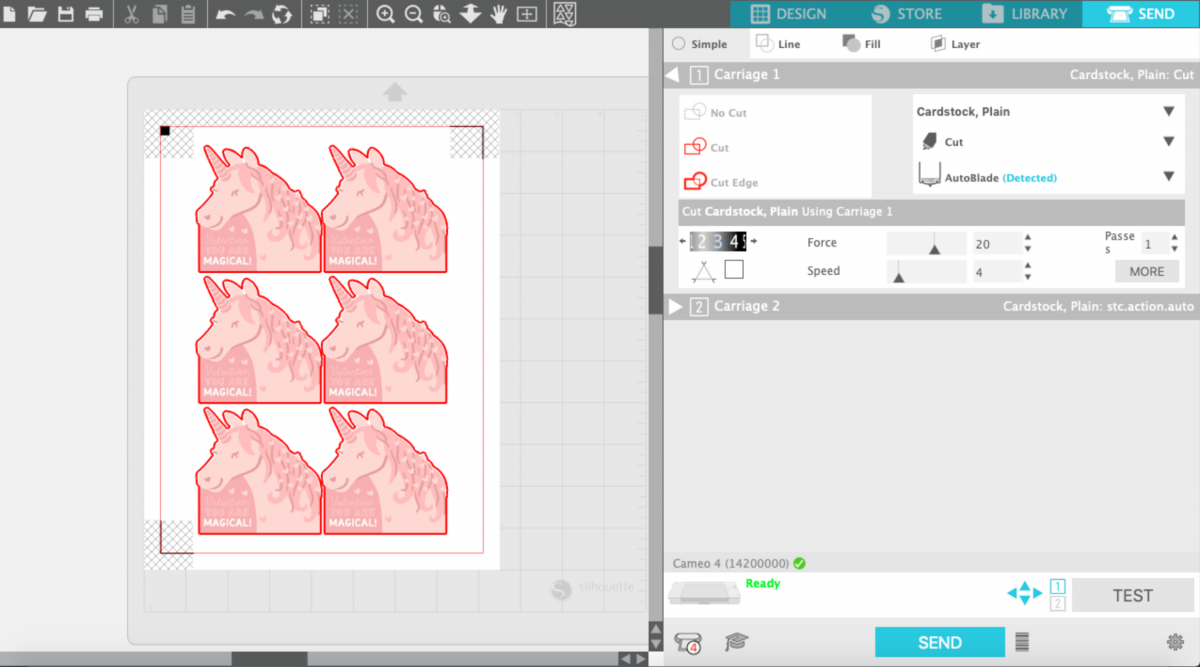
3. Select “Cardstock, Plain” from media list in the Send tab. Click “Send,” and your Silhouette will begin scanning the page for the printed registration marks. After the registration marks are found, the Silhouette will proceed to cut as usual.
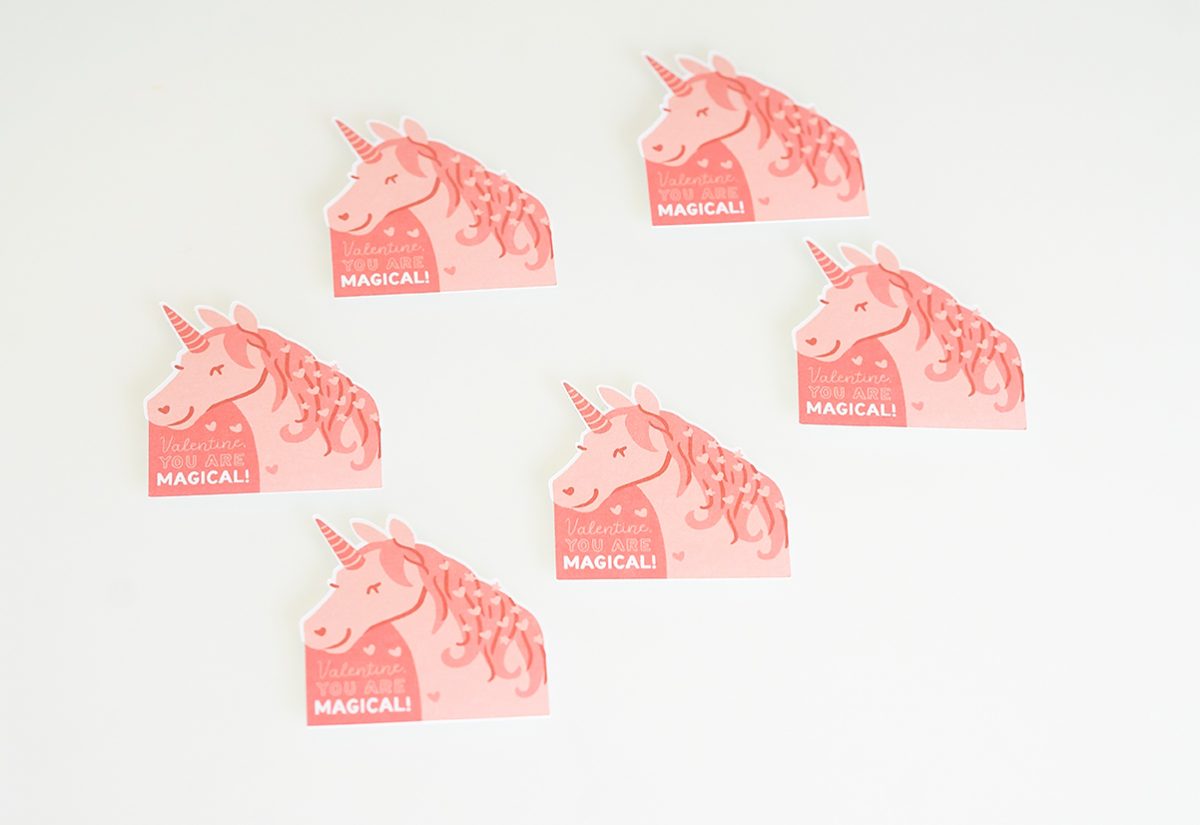
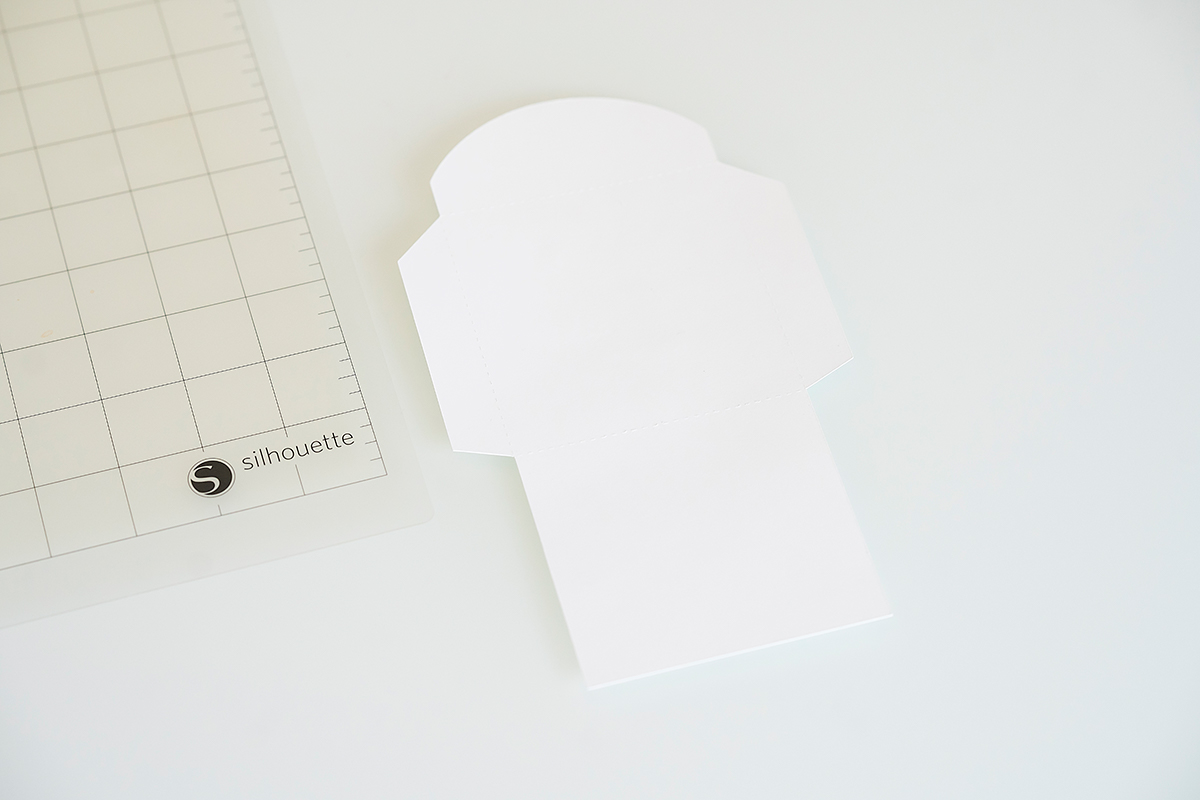
4. After cutting the designs, remove the designs from the cutting mat.
5. Open Curvy Square Envelope design (Design ID #41748) in Silhouette Studio®. Resize design so that the Unicorn card will fit envelope.
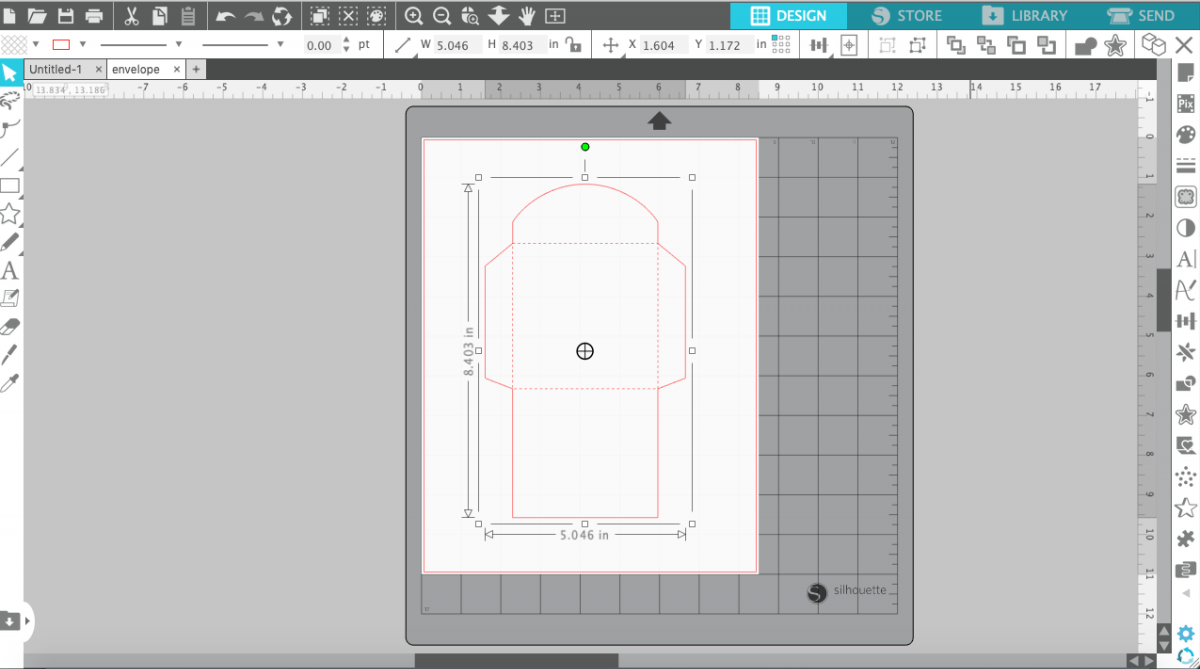
6. Place white cardstock sheet on your cutting mat and feed it into your Silhouette machine. Select “Cardstock, Plain” from media list in the Send tab and click “Send.”
7. After cutting the designs, remove the designs from the cutting mat.
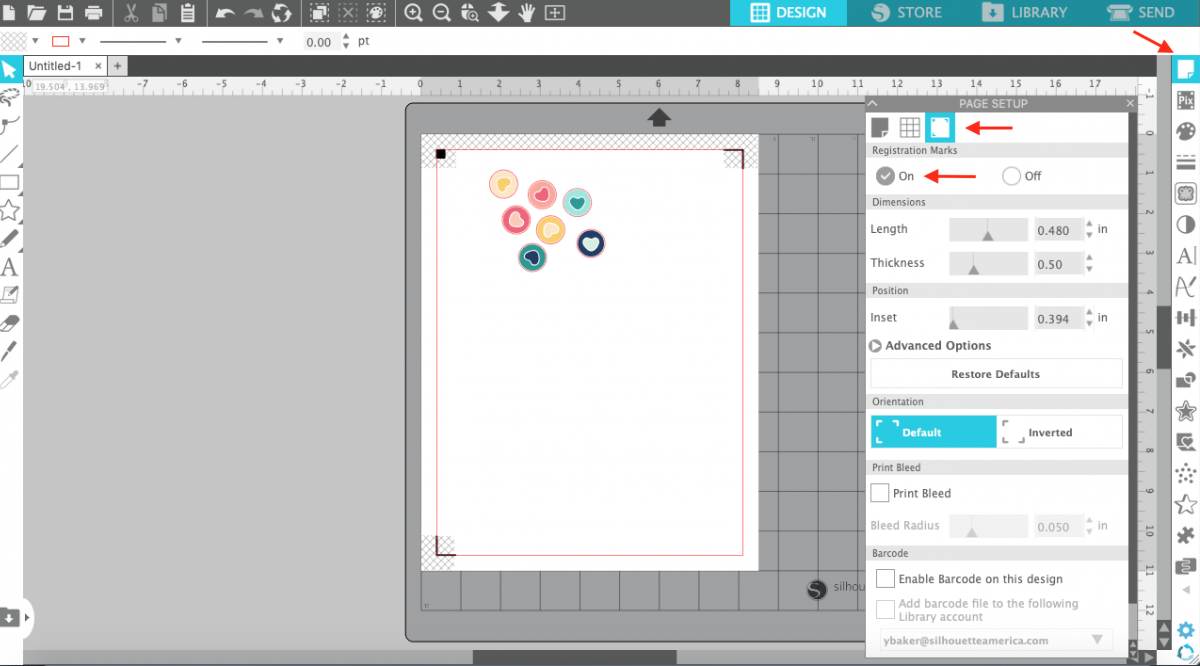
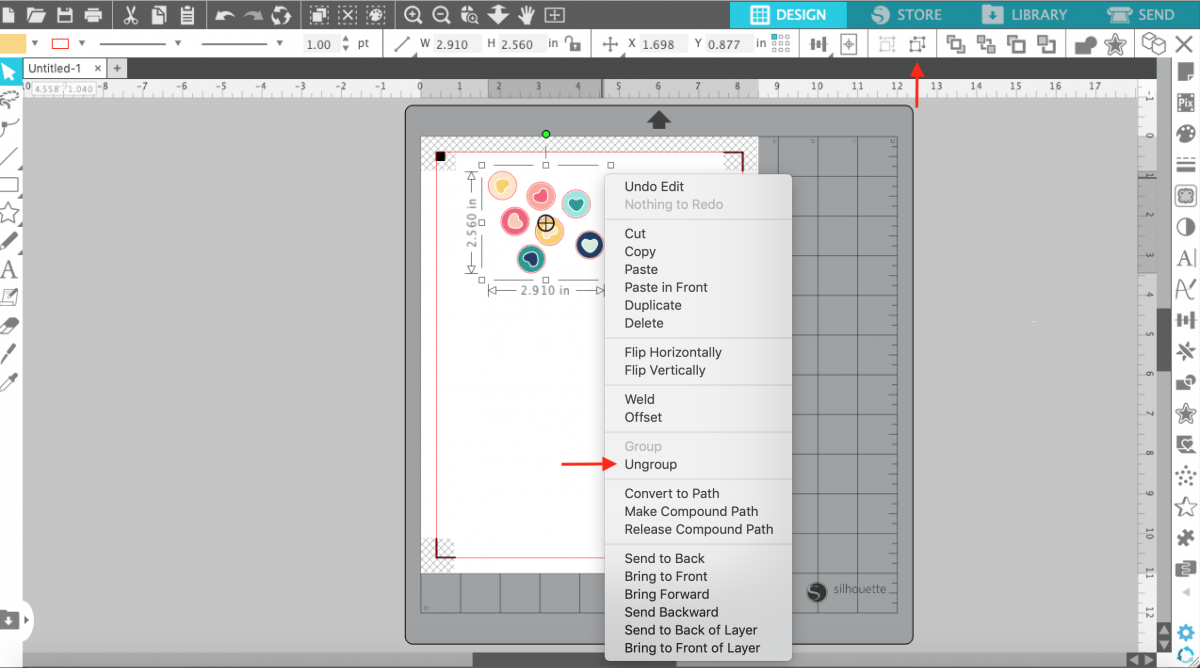
8. Open Heart Candy design (Design #179350) in Silhouette Studio®. As this design is a Print & Cut design notification window will pop up asking about turning on registration marks. Click “Continue” and registration marks automatically will be added to your design. If such notification window doesn’t pop up, you can add registration marks by opening the Page Setup panel then click on the Registration Mark icon and click on “ON” button.
9. Ungroup the design. To ungroup, select the object and either click the Ungroup icon, which is located along the top left-hand side of the screen, or right-click and select “Ungroup.”
10. Resize the design to the size of stickers for your envelope. In order to resize your design, you will need to select it and then drag in the outer corners.

11. You can color the stickers by picking the colors in the Magical Unicorn Card design by using the Color Picker tool from the Fill panel. Ungroup all layers of the heart design. Select the object you want to fill first. Then open the Fill Color panel and select the eyedropper. Hover over the image you want to pick the color from. Do you see the small box with the color sample that appears? This will show you a swatch of the color you can select. Once you have the color you want in the box, stop moving the mouse and click.
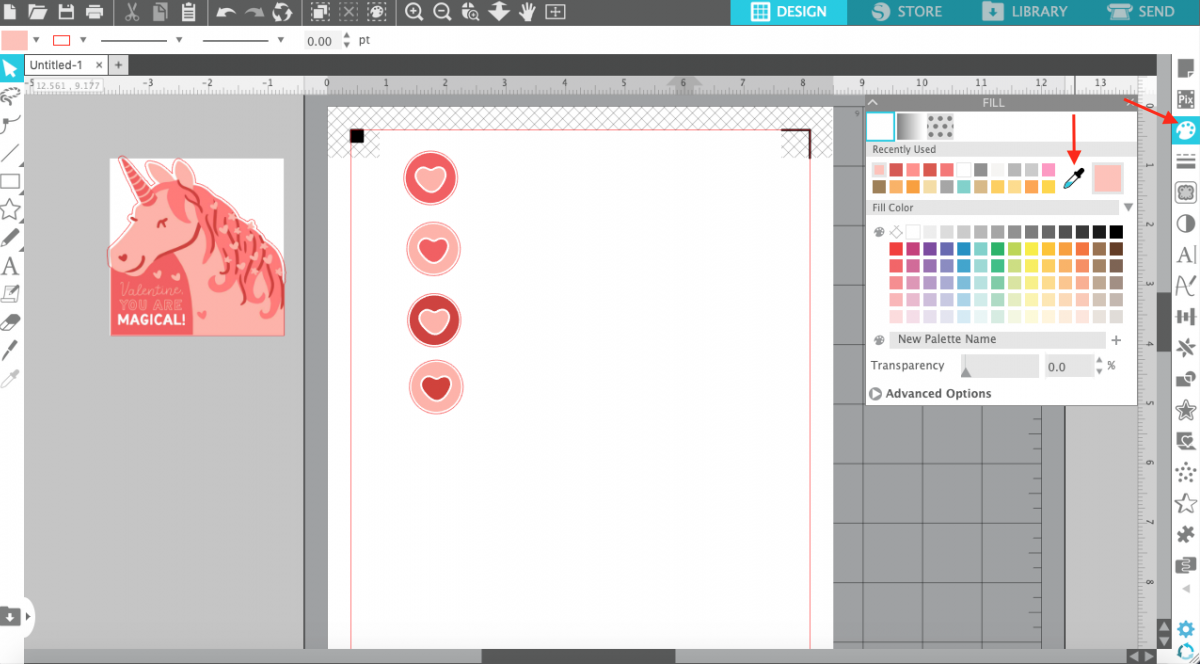
12. To replicate the design throughout the page, use the Fill Page option in the Replicate panel.

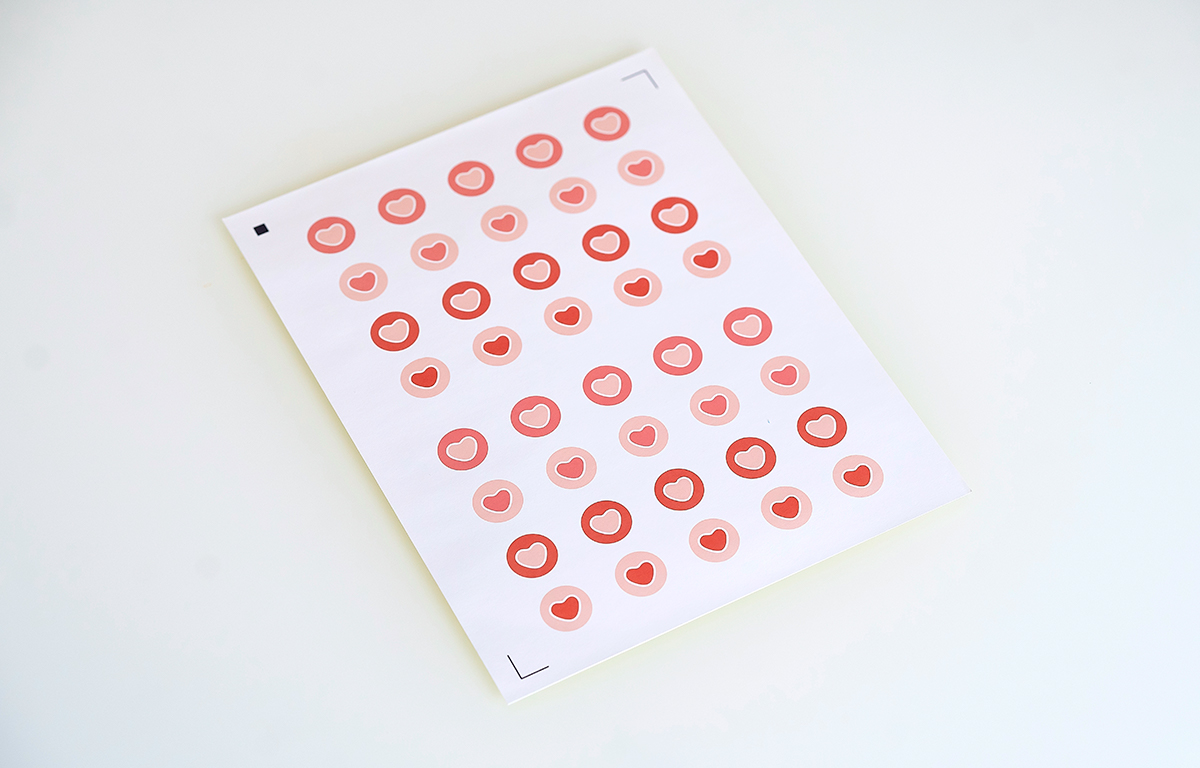
13. Once your design is ready to go, print your design on white sticker paper by clicking on the Print icon in Silhouette Studio®.
14. Place the printed sheet on your cutting mat and feed it into your Silhouette machine.
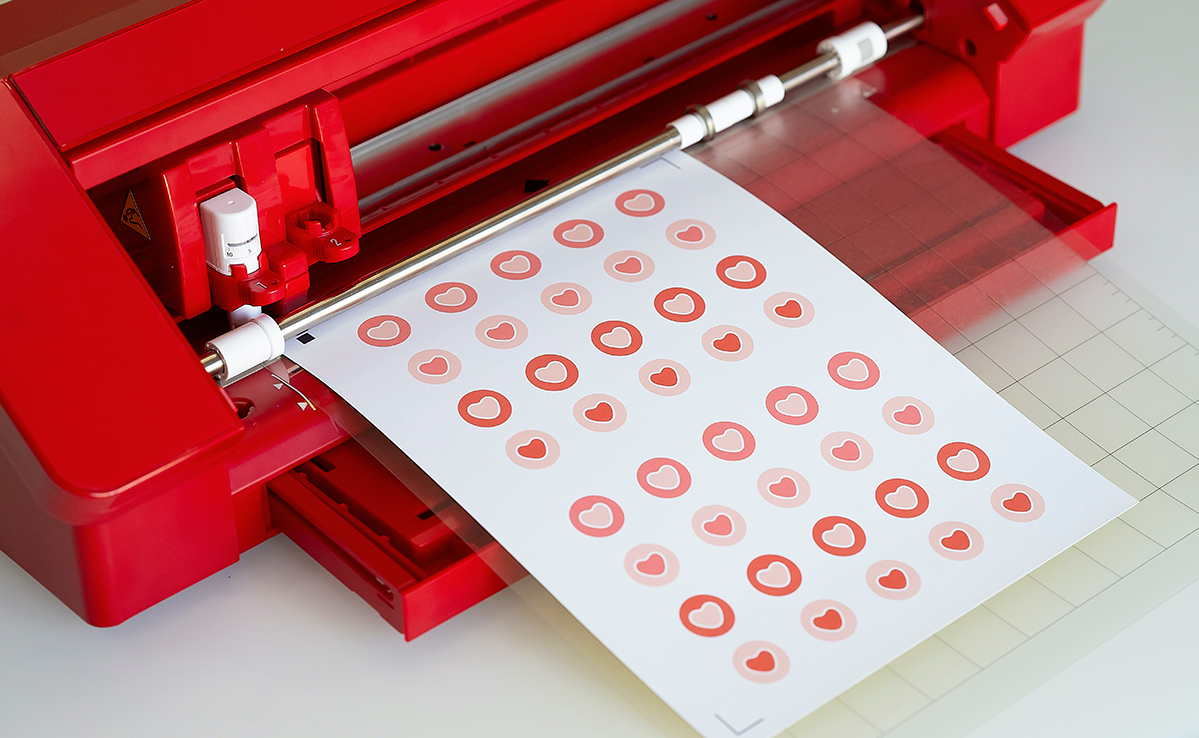
15. Select “Sticker Paper, White” from media list in the Send tab. Click “Send,” and your Silhouette will begin scanning the page for the printed registration marks. After the registration marks are found, the Silhouette will proceed to cut as usual.
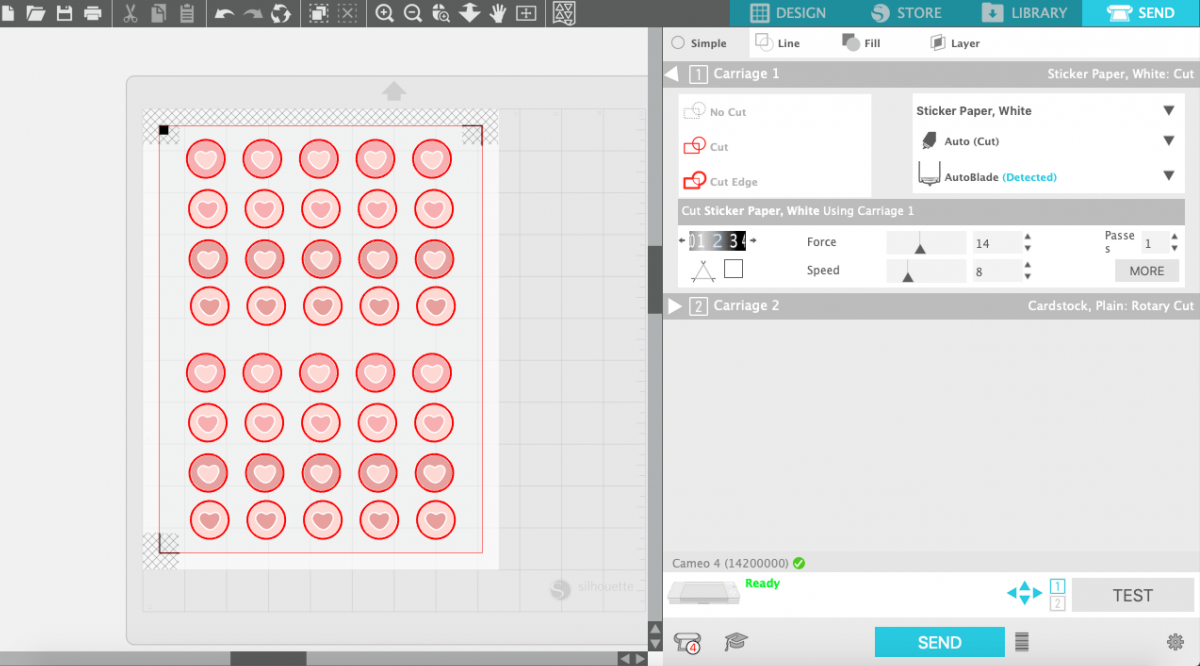
16. After cutting the designs, remove the designs from the cutting mat.
Step Two: Assembling the Project
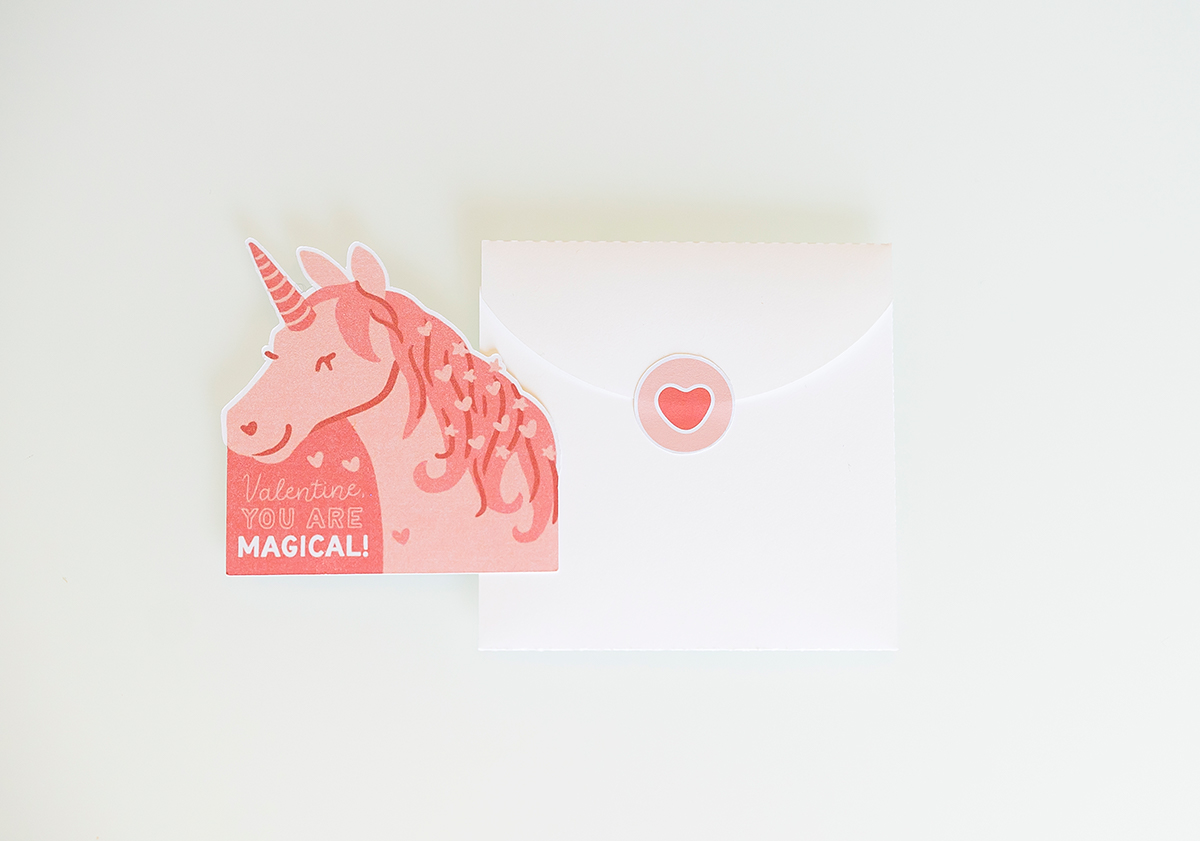
1. Fold the perforated lines of the envelope and glue the tabs. Place Magical Unicorn card in the envelope and seal with sticker.
Danielle
February 10, 2021
This came out really nice and it’s not to hard to complete for beginners!