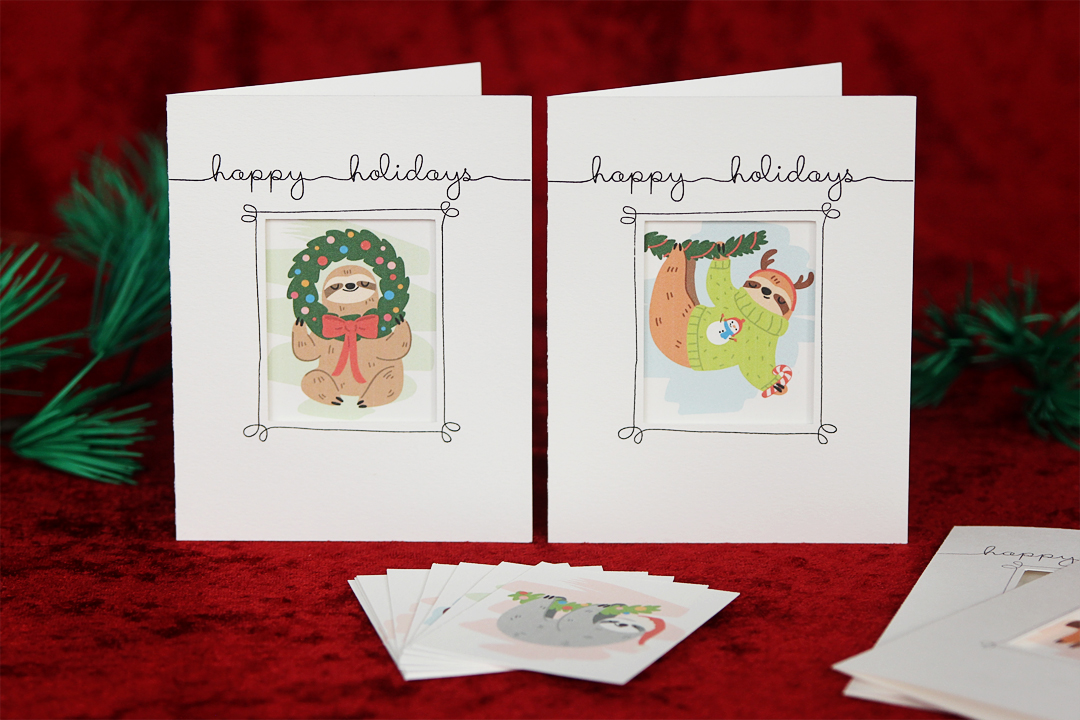
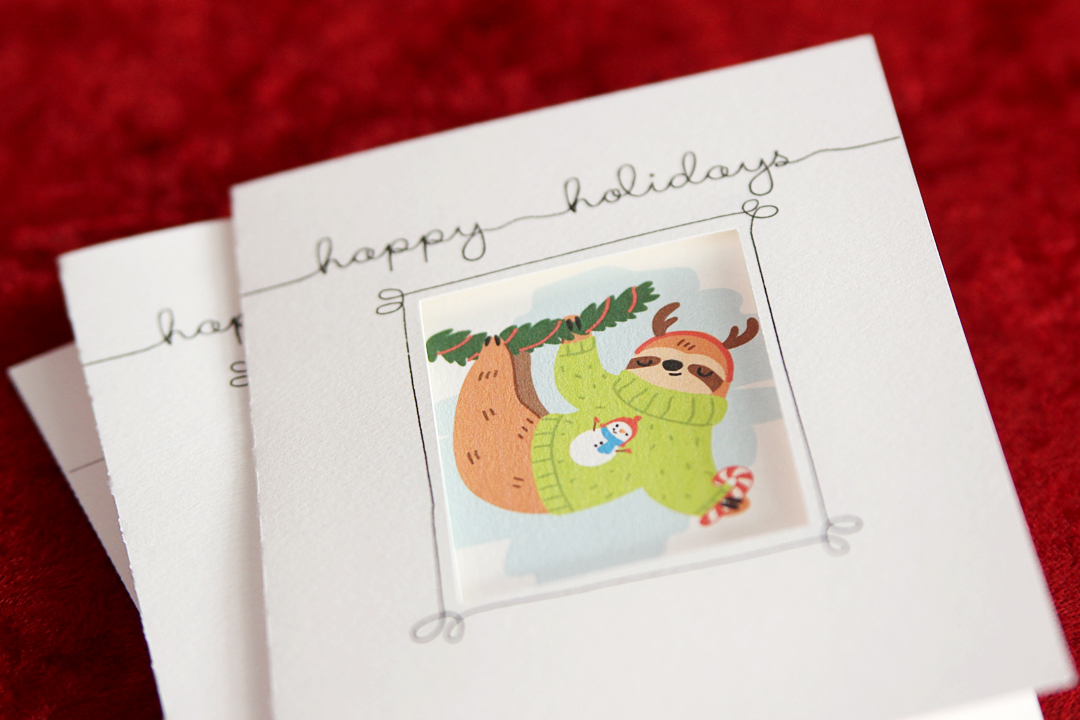
In today’s tutorial, we’re going to do a little designing in Silhouette Studio® to create these customized window cards. These have sketched elements and Print & Cut elements, as well. I’ll walk you through each step so you can make cute sloth Christmas cards like mine, or you can change the elements to suit your needs for any occasion.
Supplies:
- Silhouette Cameo®
- Silhouette Studio®
- Cutting mat and Autoblade or other 1mm blade
- Watercolor paper (9 in x 12 in, 90 lb, cold press)
- Sketch pen (and blue adapter, if necessary)
- Foam adhesive
- Design ID #309127 by La La Shiba
- Design ID #393147 by Sophie Gallo
- Design ID #203620 by Rivka Wilkins
- Design ID #42397 by Emilee Stucky
Step One: Create Window Card
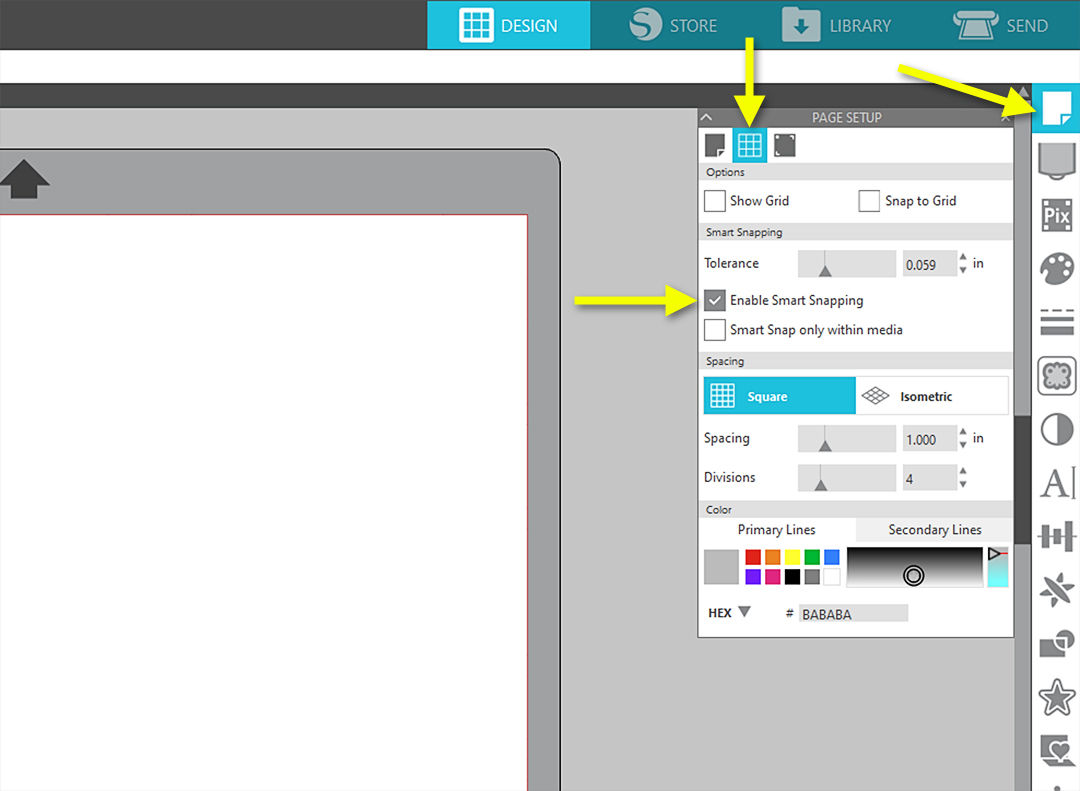
In Silhouette Studio®, set your Page Setup as follows:
- Machine = Cameo
- Feed Type = Manual
- Cutting Mat = Cameo 12 x 12 in.
- Media Size = Custom (input 12.0 in. width and 9.0 in. height) to match the watercolor paper
Note: You do not have to use 9 x 12 in. watercolor paper and can use plain cardstock instead. If you are using letter-size paper, you can only fit one card base per page. I like the watercolor paper because it has a nice texture, and I can fit two cards per page.
On the second tab of the Page Setup Panel, check the box to “Enable Smart Snapping.” This helps while designing to align objects easily, and you can uncheck the box later if you don’t want to use it.
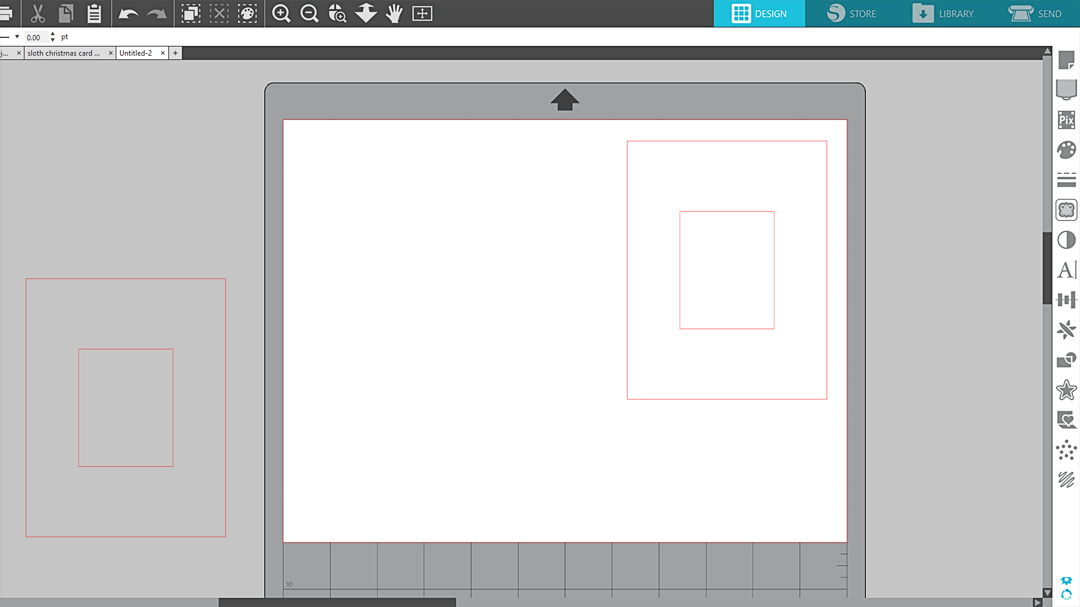
Draw a rectangle and input the dimensions as 4.25 in. width x 5.5 in. height (use the Scale option and unlock the aspect ratio before inputting).
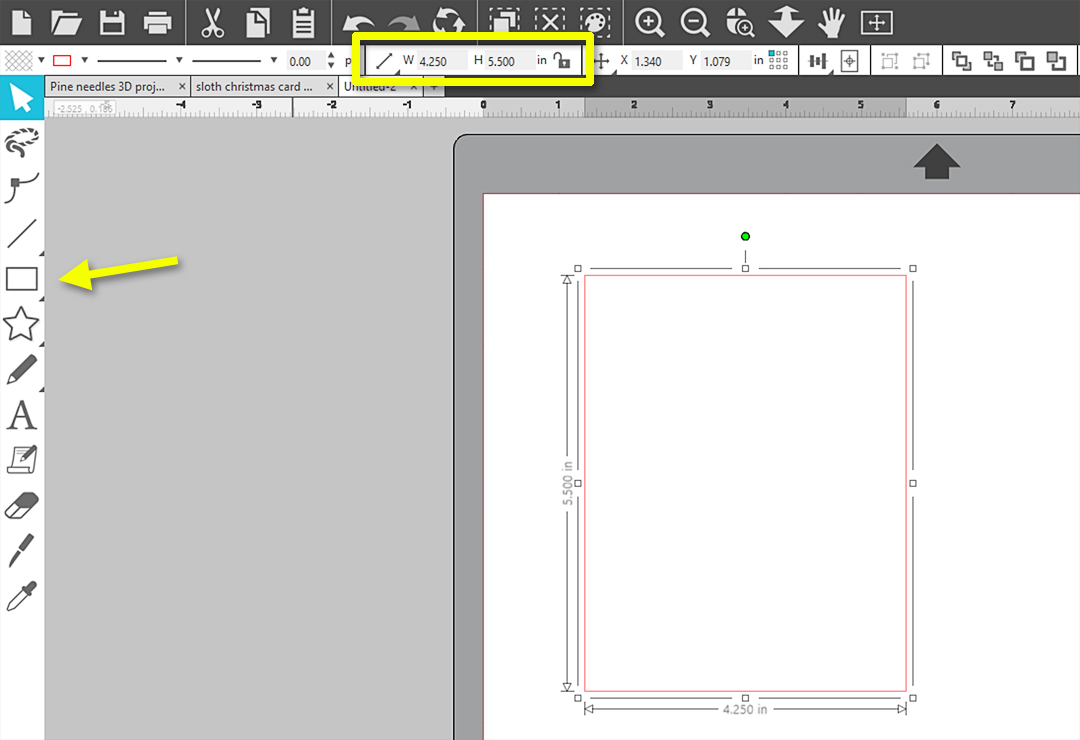
Draw another rectangle and input the dimensions as 2.0 in. width x 2.5 in. height.
Select both of those rectangles together and choose “Center” alignment on the Quick Access Toolbar.
Make a copy of the rectangles and drag off to the side by holding your Alt (or Option key for Mac) while left-clicking and dragging a copy away from the original.
Group the copy that is selected.
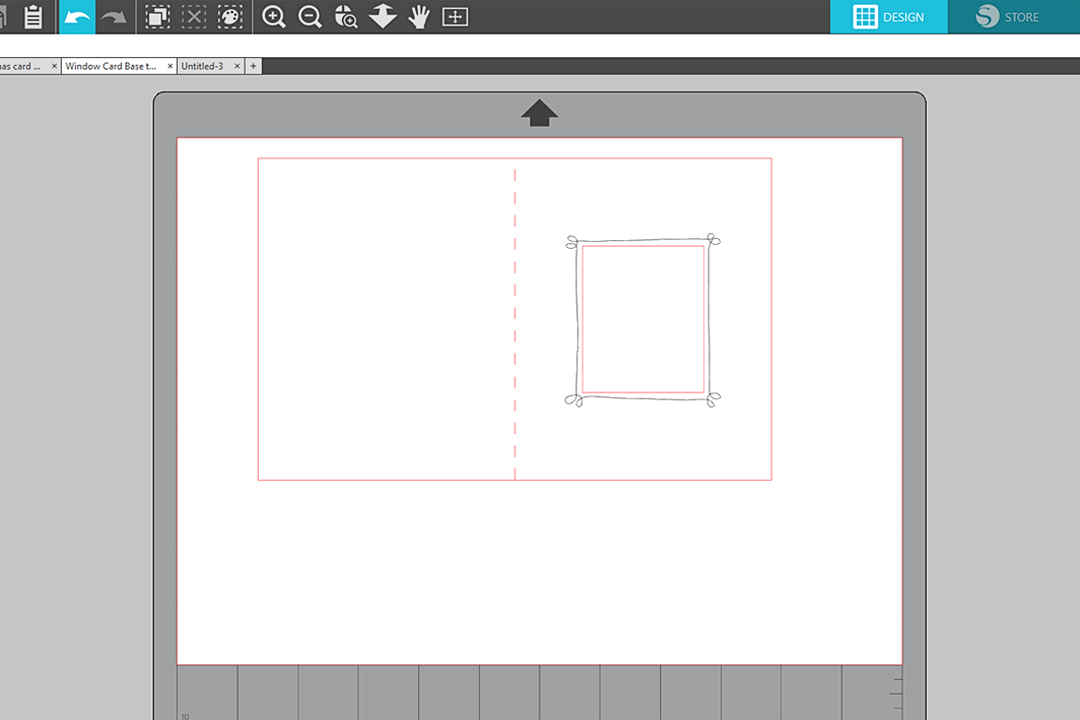
Move the original rectangles over towards the right side of the virtual media. Your screen should look similar to this:
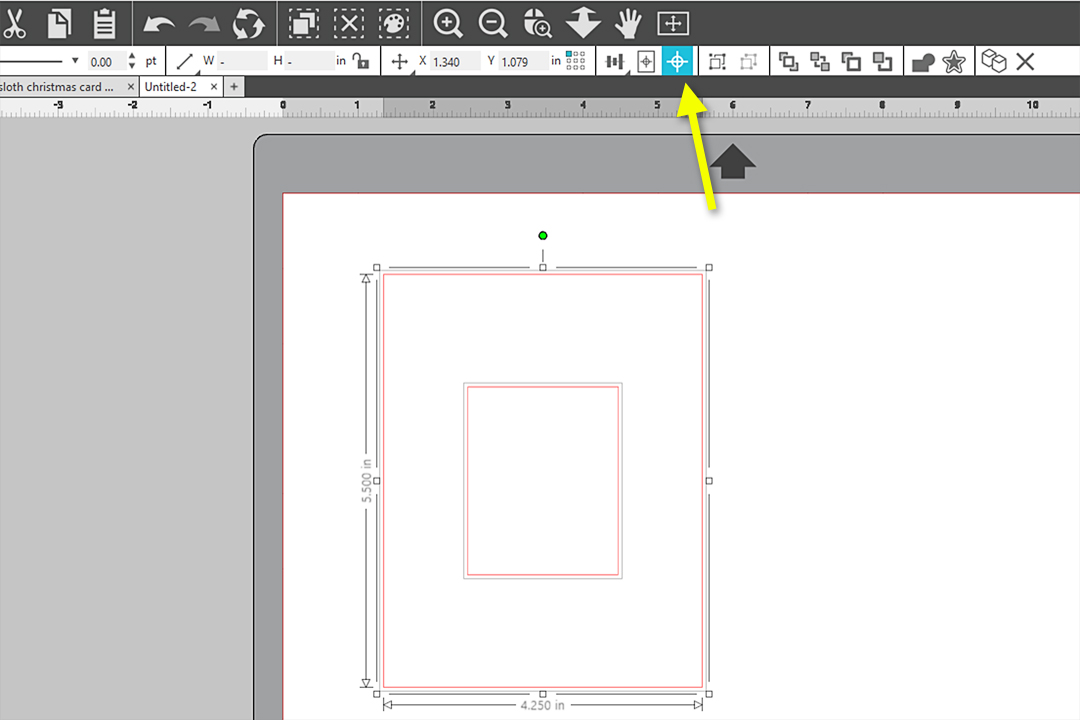
Drag the grouped copies down below the original rectangle. We want them directly in line with each other. If you’ve enabled Smart Snapping, you should see temporary blue lines show up at the left and/or right edges as they “snap” into position as perfectly aligned.
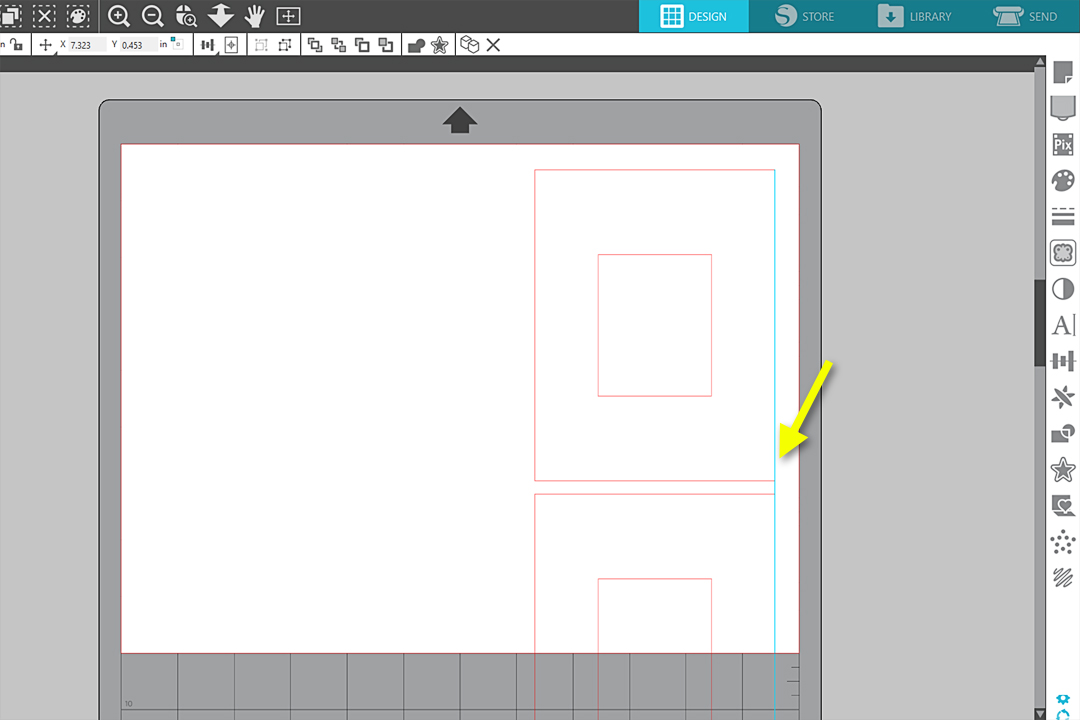
Click and drag the left edge of the ungrouped top large rectangle off towards the left, stretching the width out to about 8.5 in. Then finish off the exact dimensions by inputting 8.5 as the width in the Scale section of the Quick Access Toolbar.
At this point, the right edge of the large rectangle may shift out of place. You can drag it back in place to be perfectly aligned with the rectangle copy below by dragging it with your mouse until you see the blue lines snap the right edges together again. Watch for a horizontal blue snap line in the top rectangle as well, showing that the smaller rectangle is also vertically centered.
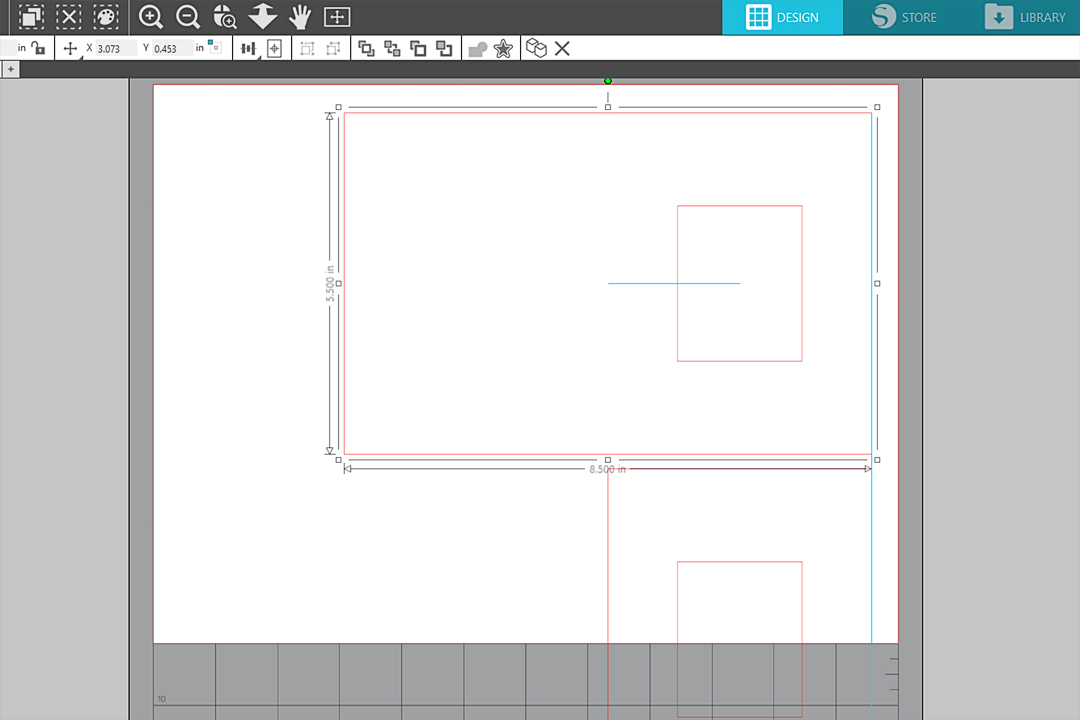
Note: What you really want here is the smaller rectangle to remain vertically centered within the large horizontal rectangle, while keeping that smaller rectangle horizontally centered only within the right half of the larger rectangle. It’s the window to our card base, once we fold the card in half. There are other ways to get there, but this works well for me.
Draw a vertical line (hold Shift while drawing) in the center of the large wide rectangle, about 5.5 in. tall.
While the line is selected, choose a dashed line style from the Quick Access Toolbar.
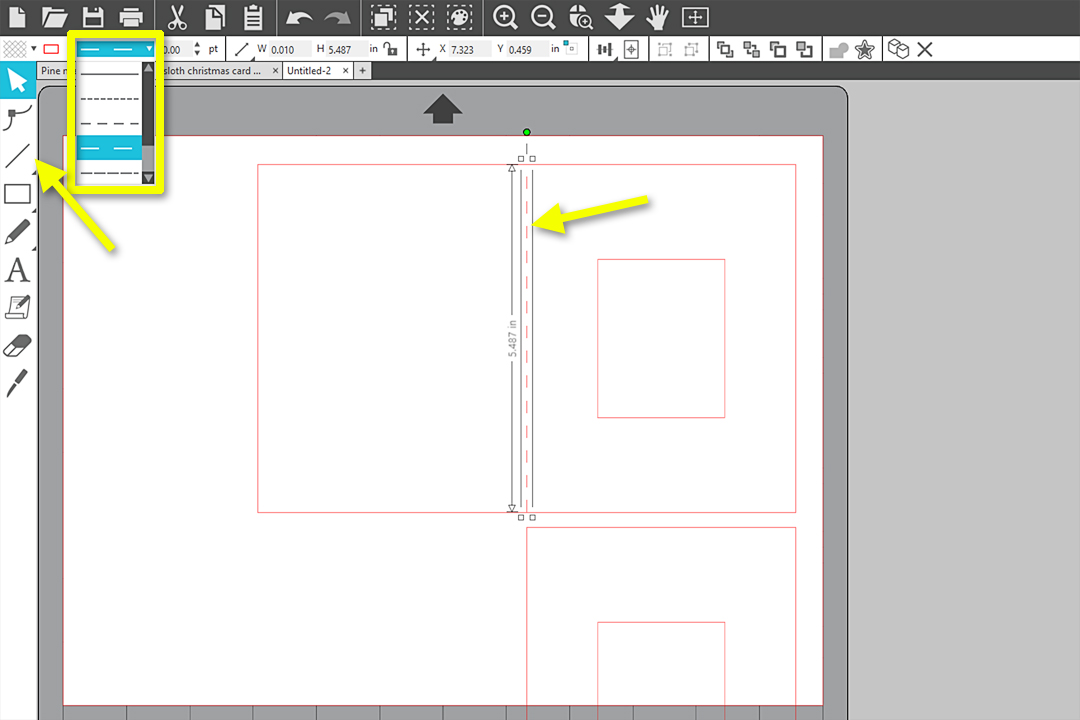
Use the Smart Snapping lines to drag the dashed line so it’s centered both vertically and horizontally within the large card base.
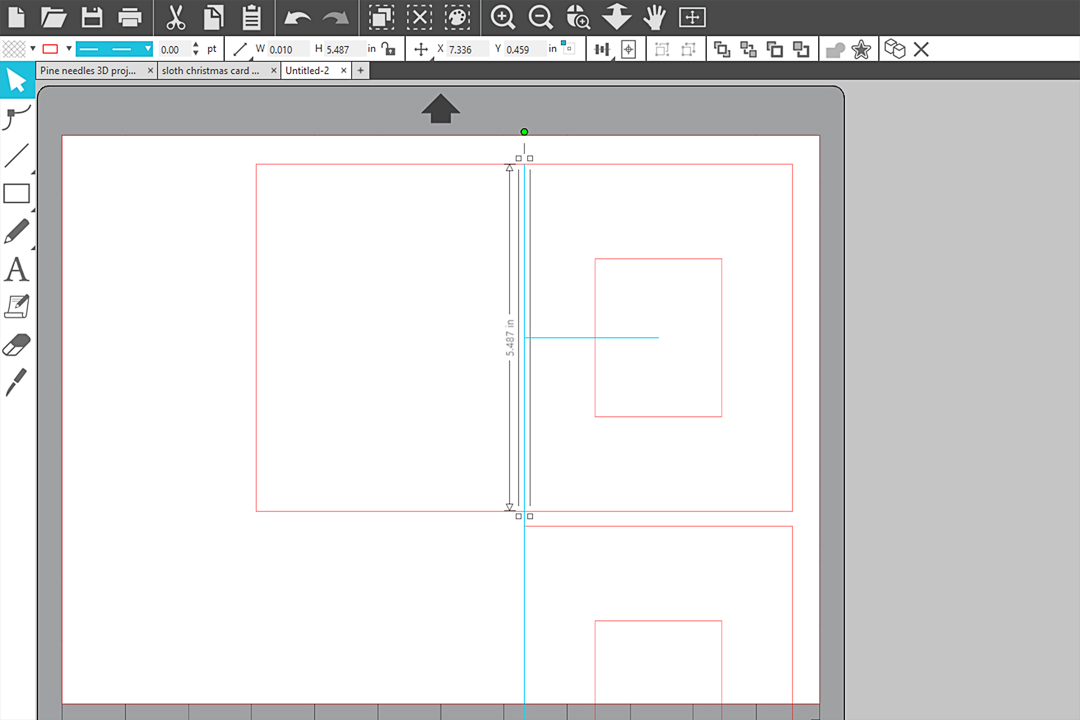
When you’re sure everything is aligned, select the lines and rectangles for the card base (do not include the lower reference rectangles), and Group them all. Now you have a window card base!
Draw another rectangle that is 2.5 in. wide x 3.0 in. high. This will be the piece that gets glued behind the window, to which we’ll add a Print & Cut design.
Save this design to your Library (Ctrl + Alt + R for Windows, or Cmd + Opt + R for Mac) as “Window Card Base” so you never have to go through the work to design this from scratch again!
Step 2: Create Print & Cut Design
To decorate the plain rectangle that will sit behind the window opening, first make a copy of the 2.5 in. x 3.0 in. rectangle. (Right click > Copy)
Open a new document, then paste the rectangle. (Right click > Paste)
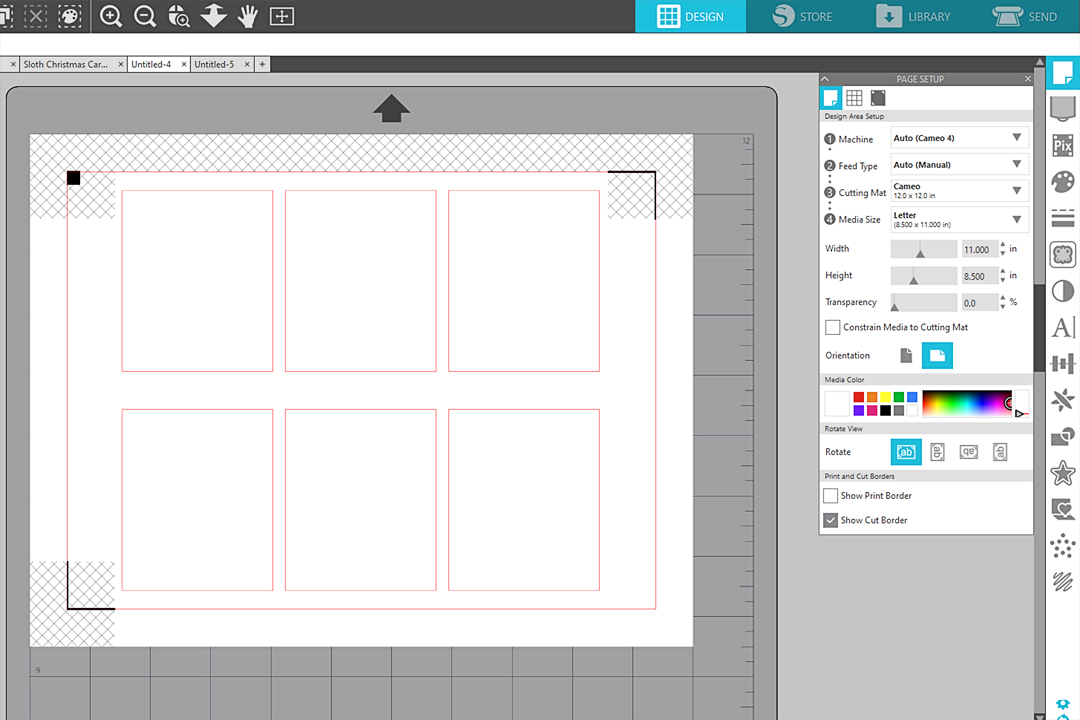
Set your Page Setup as follows:
- Machine = Cameo
- Feed Type = Manual
- Cutting Mat = Cameo 12 x 12 in.
- Media Size = Letter
- Horizontal page orientation
- Check the box for “Show Cut Border”
Turn on Registration Marks (hotkey letter M on keyboard)
Fill the page with six rectangles by selecting the rectangle and pressing Ctrl (or Command) + Shift + F
Note: For the next steps, you can choose any design to Print & Cut to peek through the window card, but you may need to make adjustments depending on how the design was made.
Open the Christmas Sloth Stickers design.
Ungroup them twice so you can separate the images from their outer cut edges.
Drag all the sloth images into one pile, select them all, and choose “Center” from the Quick Access Toolbar.
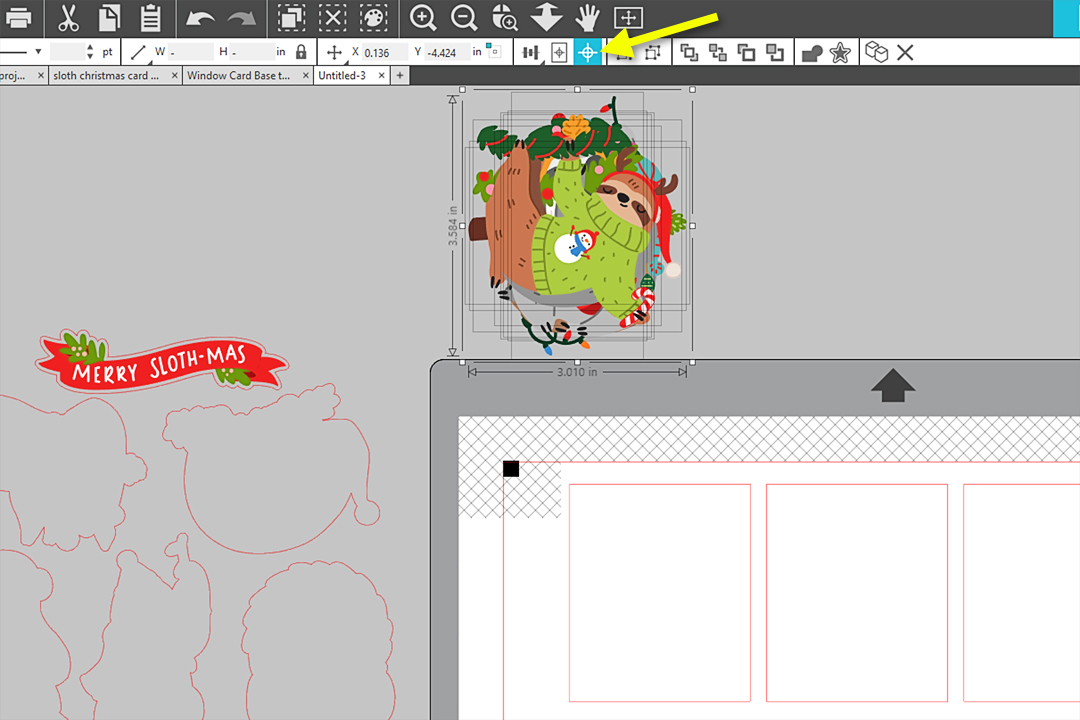
Drag a corner handle and resize the entire group smaller so the width is approximately 2.2 in. This ensures that the widest image is only slightly wider than the window size on the card base. It’s OK for a small amount of the design to be hidden, but we want to see most of it.

Open the Brush Strokes design.
Choose one or more brush stroke designs you like, then resize smaller so the width of each brush stroke design is just under 2.5 in. wide. You don’t want the width or the height to extend beyond the boundaries of the rectangles on this Print & Cut document.
Recolor the brush strokes by selecting them, then choosing a different fill color. I went with a light color so it doesn’t detract from the main sloth design.
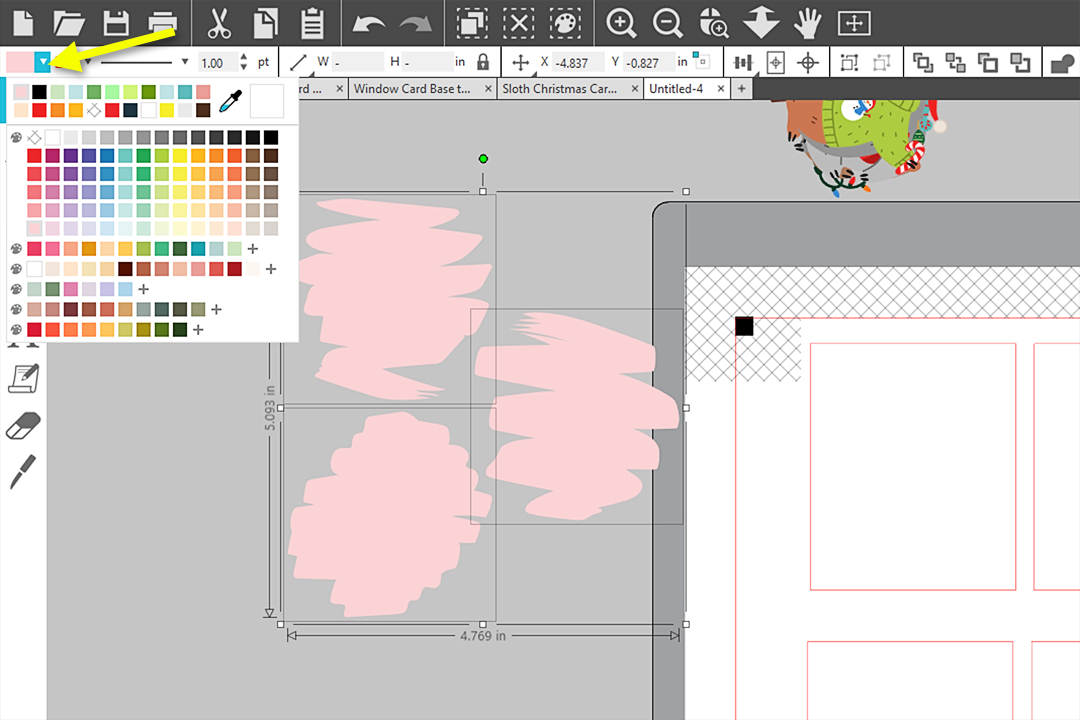
Make more copies as necessary to total six brush strokes, and center one brush stroke within each rectangle.
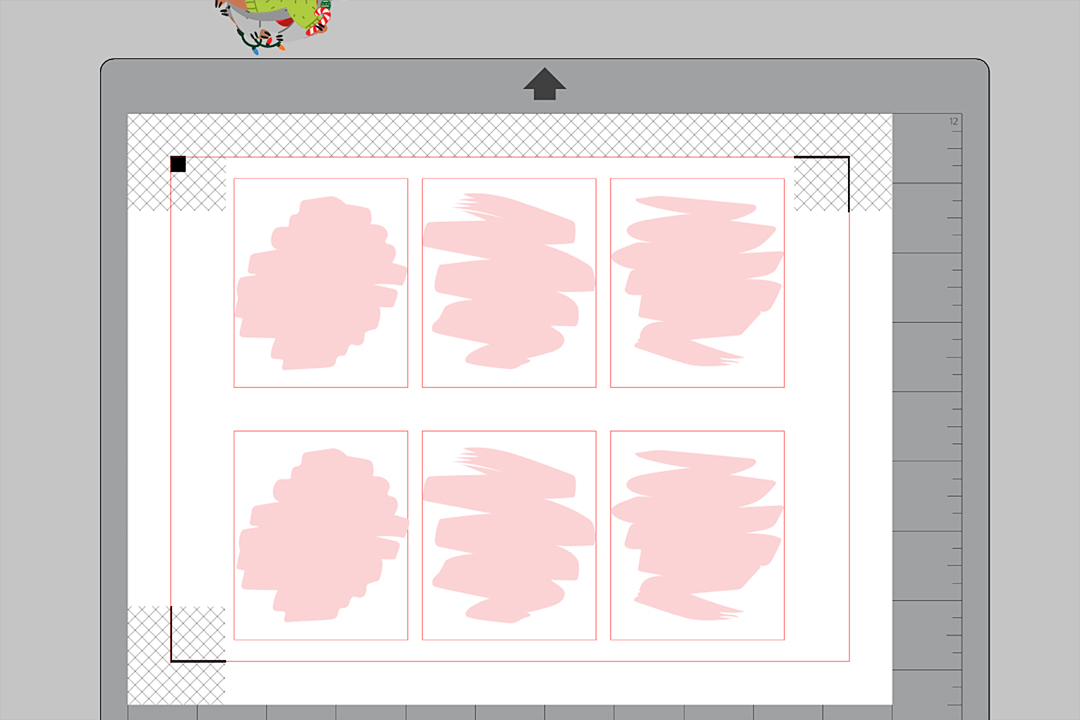
Select all the brush strokes (hold Shift while clicking individually) and choose “Send to Back” on the Quick Access Toolbar.
Choose your favorite six sloth designs and drag one to the top of each brush stroke design.
Select each rectangle grouping (rectangle, brush stroke, sloth) and choose “Center” on the Quick Access Toolbar.

At this point, you can adjust any of the elements like position, rotation, or brush stroke color so it looks good to you.

Once all six designs are ready, make sure no colors on the page are overlapping the crosshatch areas, and verify all the rectangle cut edges are within the page’s red cut boundary.
Step Three: Print & Cut
Go to the Send Panel.
Select all the designs on the page and choose “Cut Edge” so only the outer rectangle will cut.
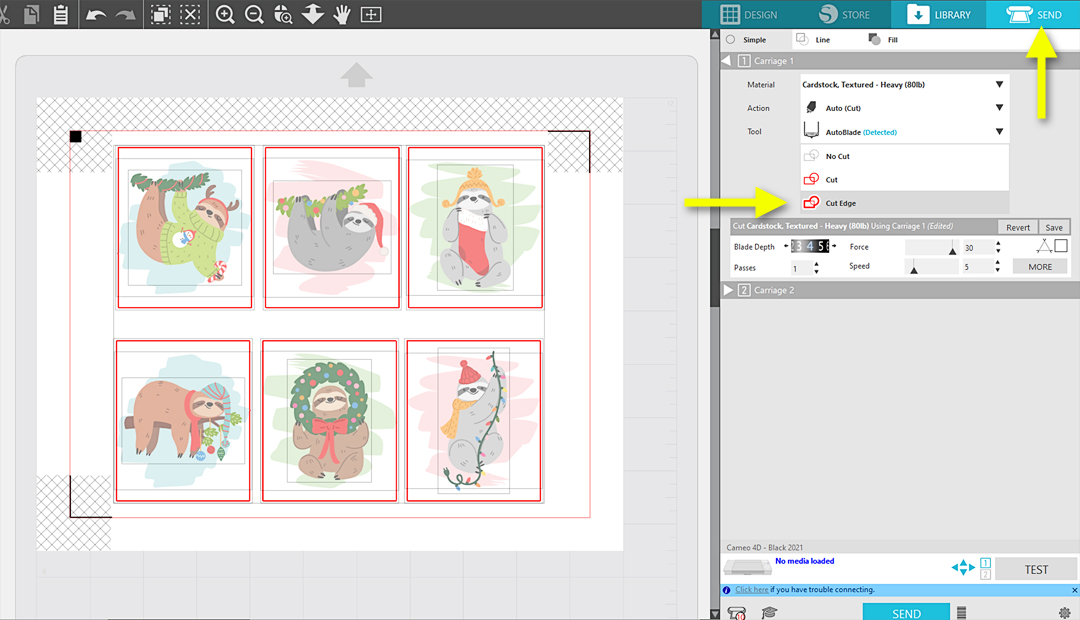
Select your material based on the paper you are using and adjust based on your test cuts. The 90 lb. watercolor paper I used is like a medium-weight cardstock, so that’s a good starting point for your test cuts.
Trim down your watercolor paper to 8.5 in. x 11 in. to fit your home printer.
Print onto the textured side of your watercolor paper.
Load the printout onto your cutting mat in a horizontal orientation to match the software screen.
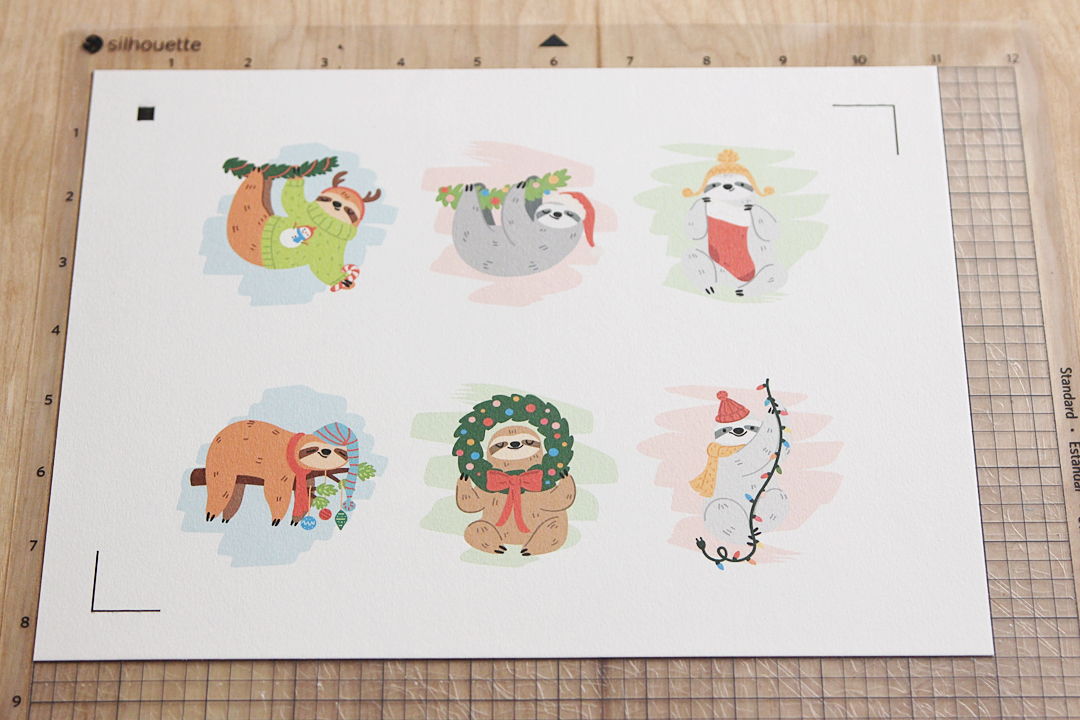
Send to cut when ready.
Save the sloth cutouts for later.
Step Four: Create Sketch Designs
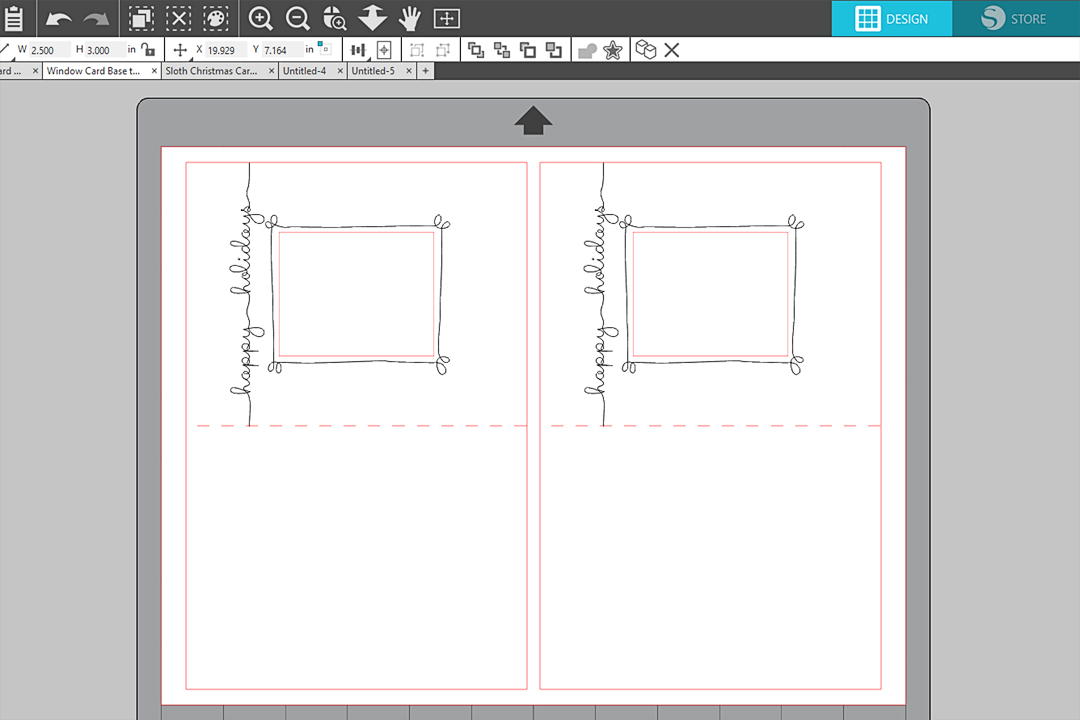
Go back to the window card base document in the Design Tab.
Move the extra pieces off the page so all you have is the wide card base on your virtual mat.
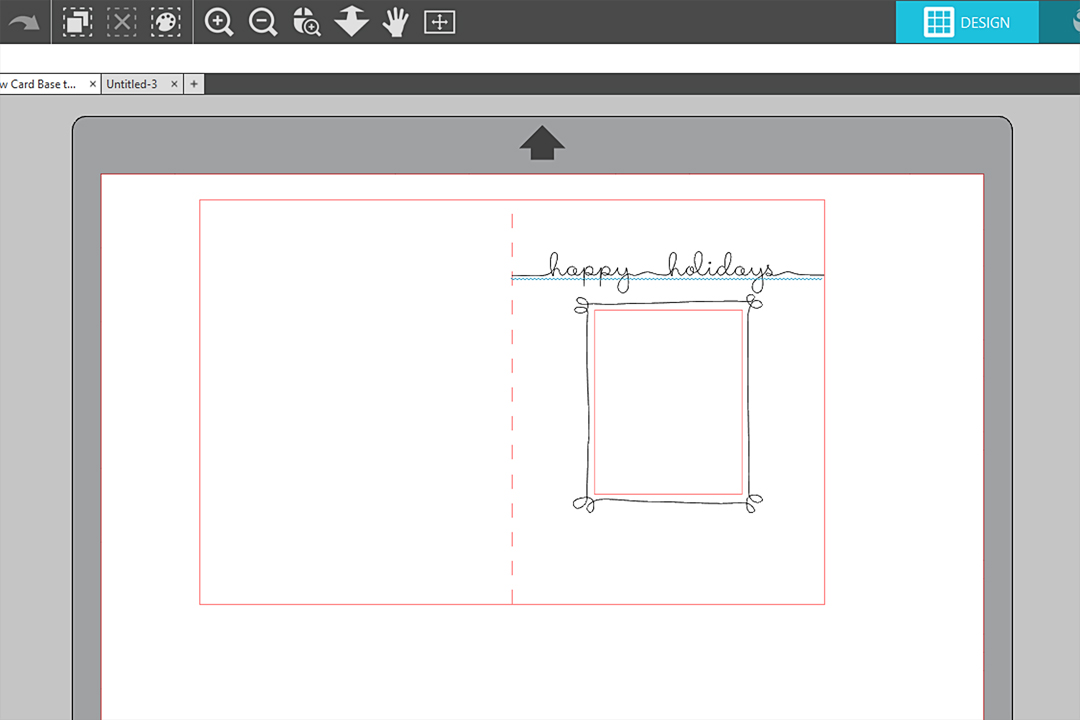
Open the Swirl Border Sketch design and change the line color to black.

Ungroup the designs and drag the rectangular swirl border over to the card window.
Rotate the swirl border 90 degrees (drag green rotation handle while holding Shift key) so it’s oriented vertically like the window.
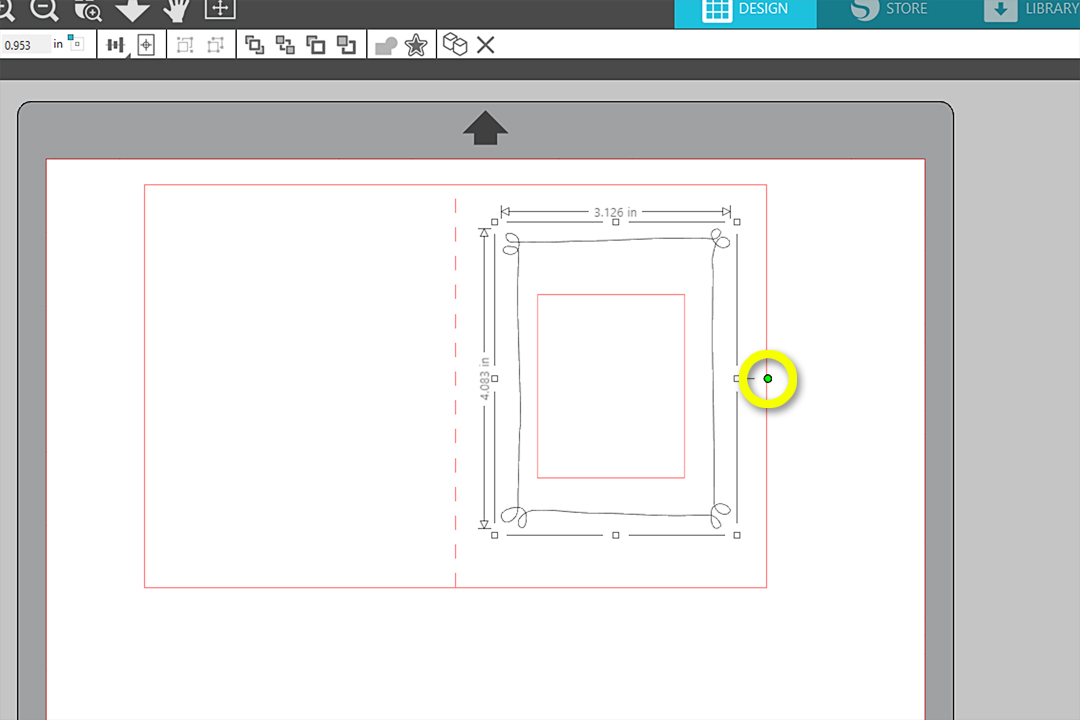
Resize the swirl border so it’s just slightly larger than the window opening. It’s OK on this design to drag side handles instead of corner handles. A little stretch from the original won’t be noticeable on this design.
Select your text tool on the left, click on the page, and type 4HAPPy51HOLIDAYs7
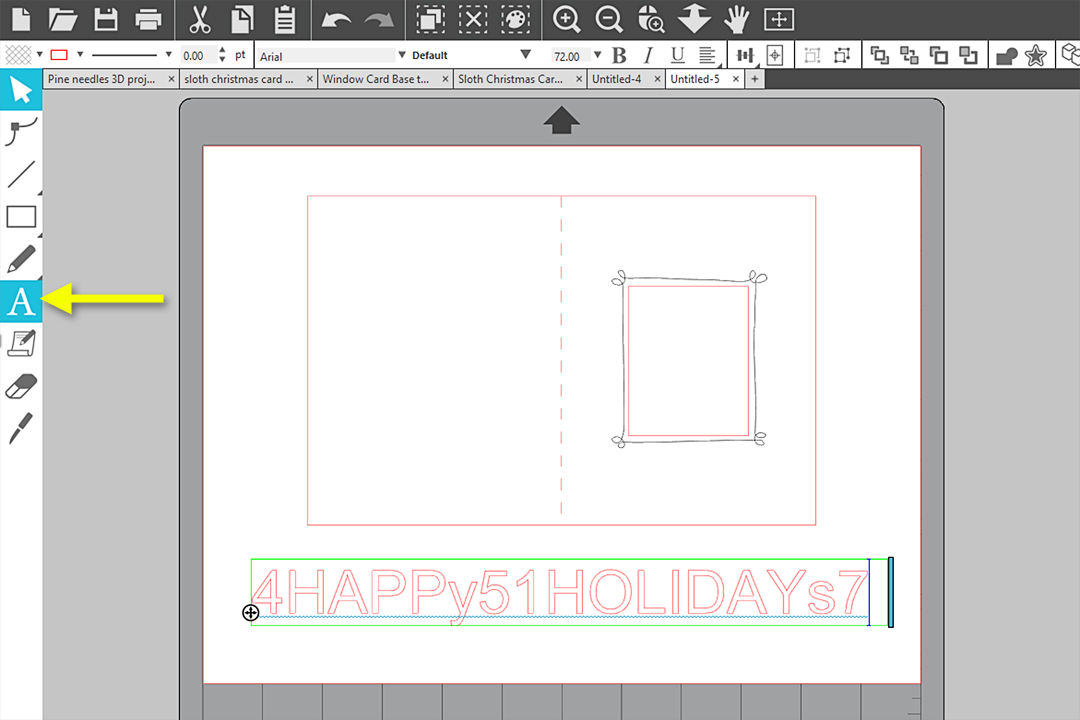
Click off to the side to exit text-edit mode, then click the text once to select.
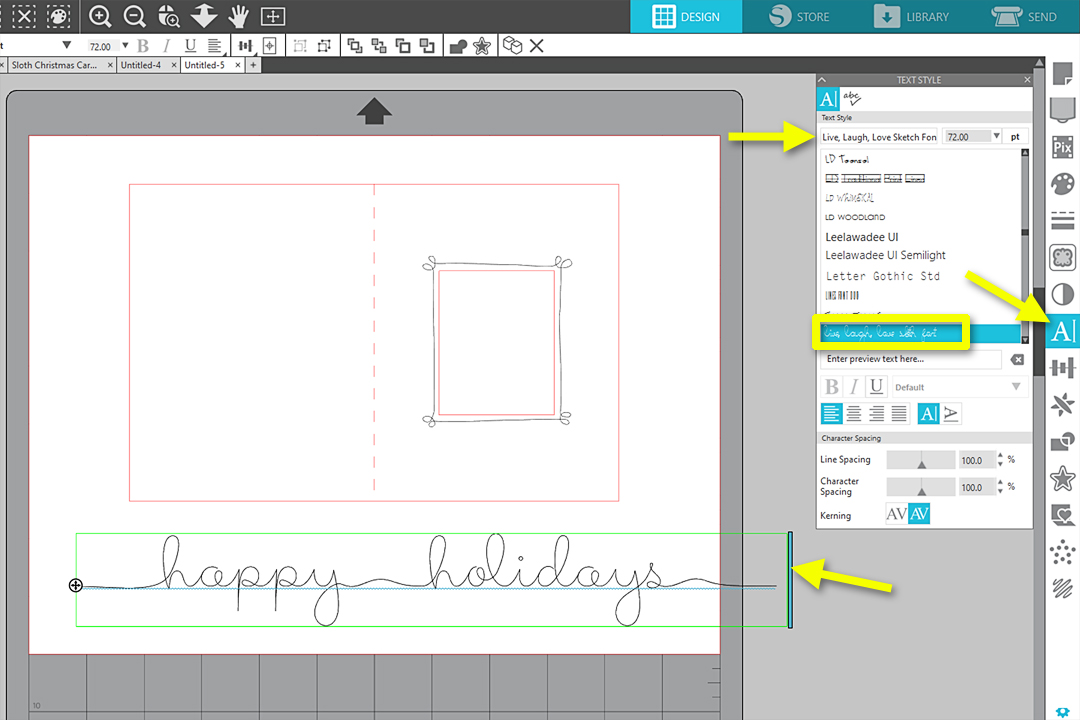
Set the line color to black, and select the font Live, Laugh, Love Sketch Font. (The specific text I had you type gets the extra glyphs for this font. If you want it to say something different or choose other glyphs, you can play around with it.)
If the line breaks into two lines, double click the text to enter text-edit mode, and drag the blue bar to the right until all the text is on a single line.
Click off to exit text-edit mode, and resize the text with a corner handle until it is just under 4.25 in. wide.
Drag the text up above the window and swirl frame.
Group it all together, rotate it 90 degrees left, and make a duplicate so two card bases fit on the page.
Step Five: Sketch then Cut Card Base
Go to the Send Panel.
Choose the Line Tab to cut by line color. You’ll see the sketch elements turn black to match their line color, and the cut elements remain red.
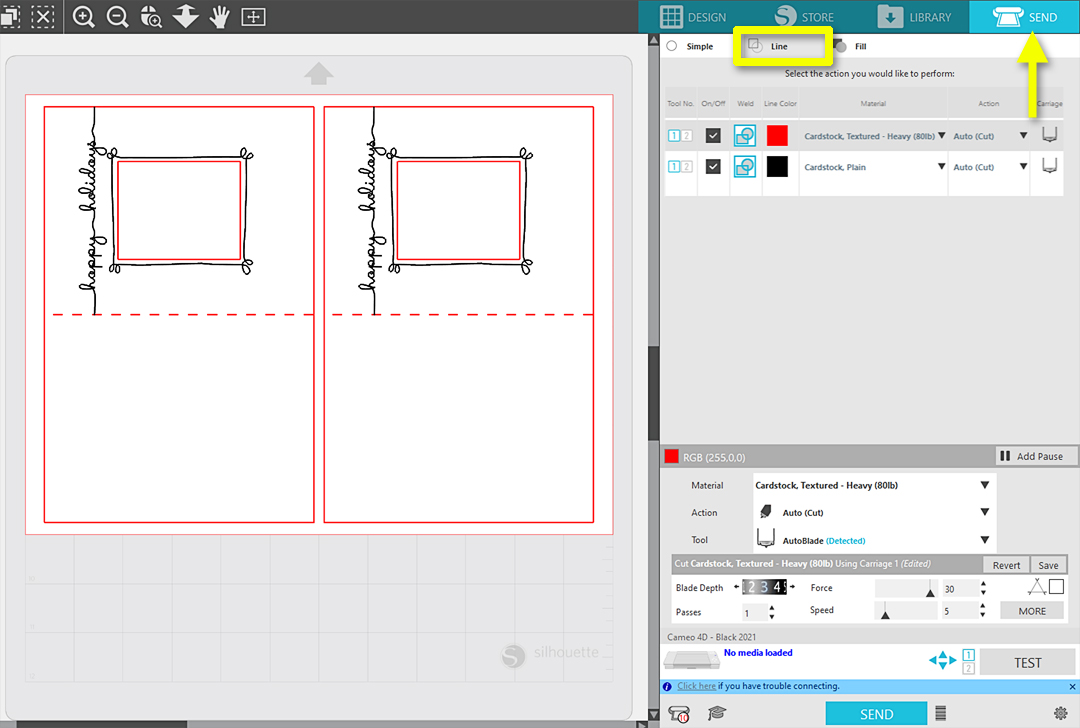
Uncheck the red line color’s selection box so only the black will sketch.
Insert a sketch pen (or other pen in an adjustable pen holder) into your Silhouette machine and select the black line color by clicking on the black square. Change the Action to Sketch, if necessary. Make any other adjustments as needed to the sketch settings on the black line color.

Place your 9 x 12 in. watercolor paper on your cutting mat, load it into the machine, and Send to sketch.
Do NOT unload your mat when it’s done sketching.
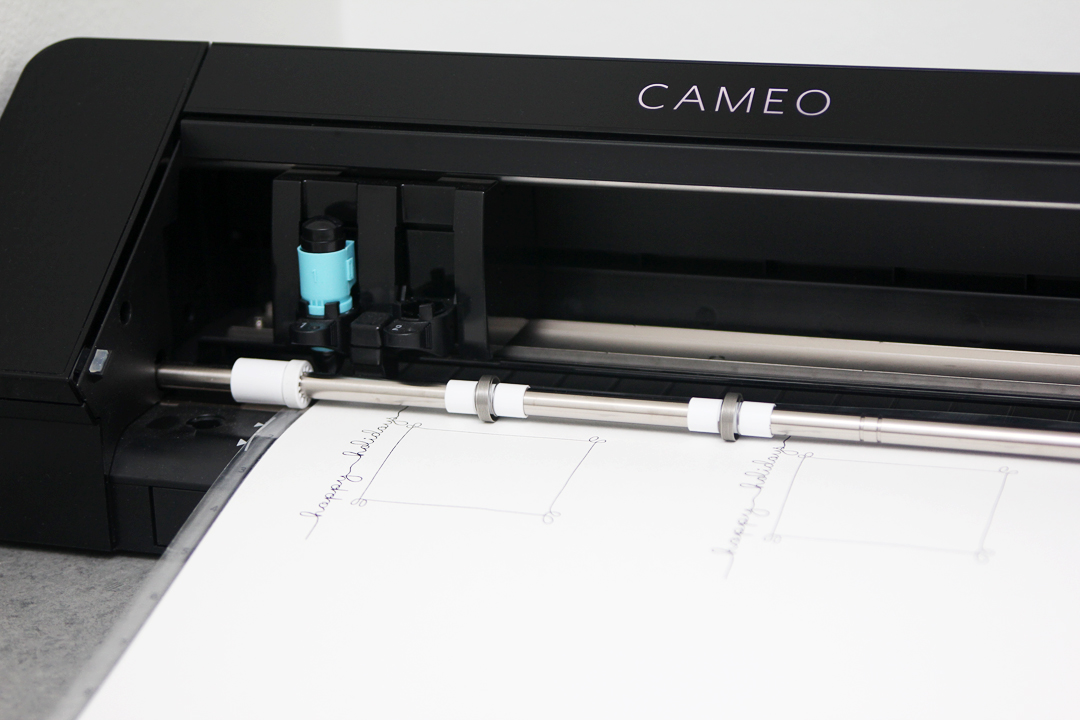
Remove the sketch pen and put in a blade.
In the software, uncheck the black line color’s selection box, check the red line color’s selection box, and select the red line color by clicking on the red square.
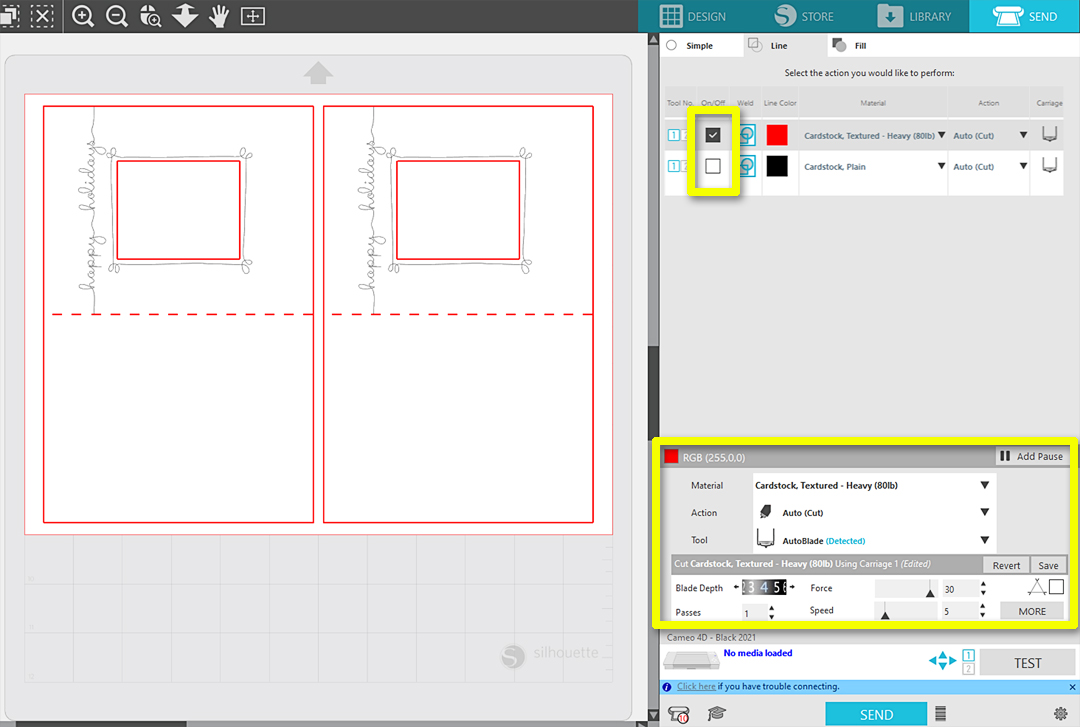
Adjust your settings as necessary for the watercolor paper based on your test cuts, and Send to cut.
Repeat these sketch & cut card bases until you have enough to match the printed sloth pieces.
Step Six: Assemble Card
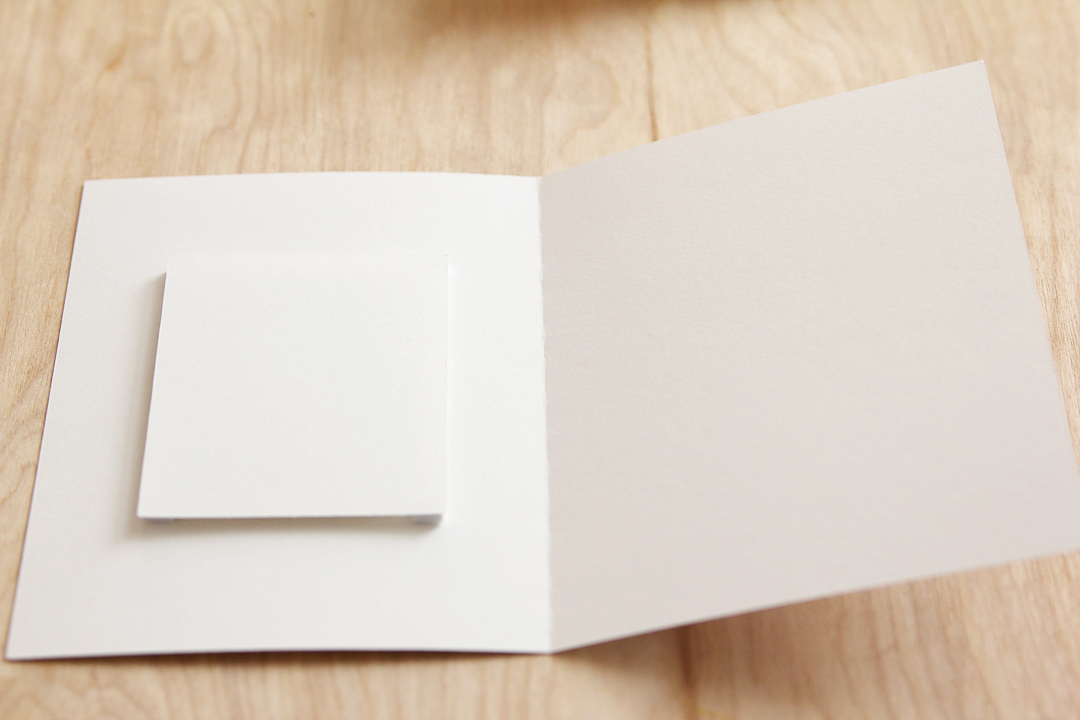
Unload the mat, remove the sketched card base, and fold on the perforated line.
Trim down foam adhesive dots if they are too large, and place one on each corner of a sloth cutout, on the printed side.
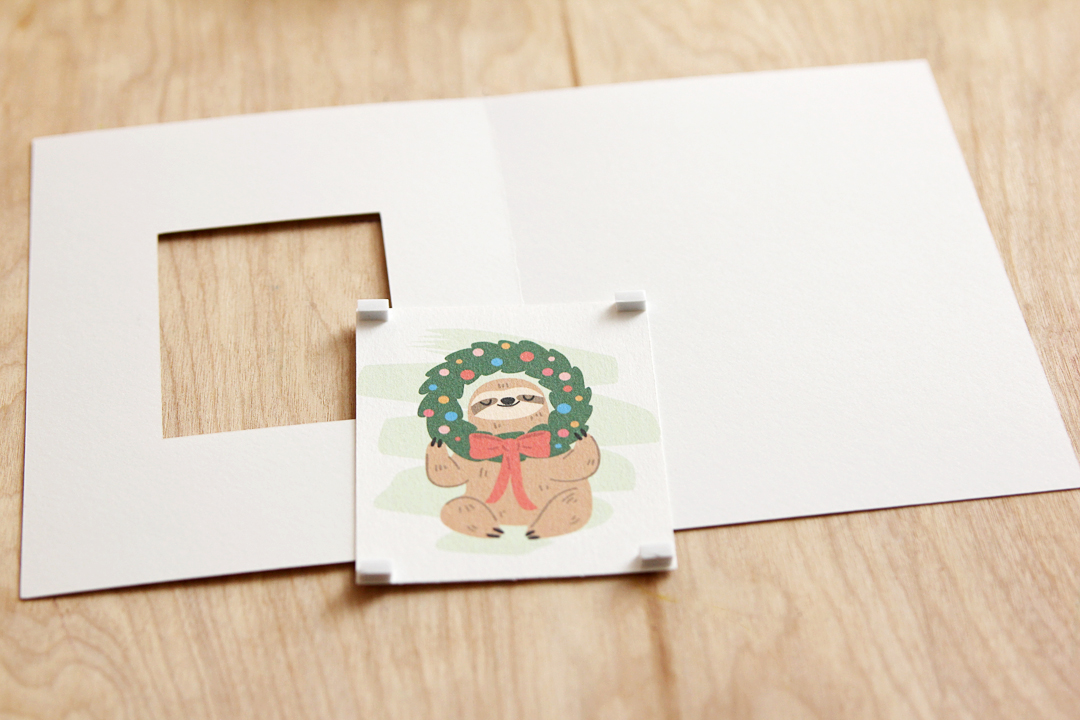
Position the sloth cutout behind the window so the printed image will be visible through the window.
Now that you’ve done the design work up front, you can print and sketch and cut as many cards as you need for the holidays!
 Get to Know the ES Mat
  Layered Card with PixScan
Erika Alvarez
November 25, 2022
Darling cards! Thanks for the detailed instructions.
Kelly Wayment
November 28, 2022
You’re welcome! So glad you like them!
Dan McElroy
February 3, 2023
Thanks Kelly. I adapted these and created Lunar New Year cards and valentines. They turned out great! Lots of different exposure to Cameo capabilities in this little project: sketching, cutting, print & cut. Your instructions broke everything down really well.
Kelly Wayment
February 4, 2023
Thank you, Dan! I’m so glad to hear it, and happy you were able to adapt it for yourself! That’s always my goal. 🙂