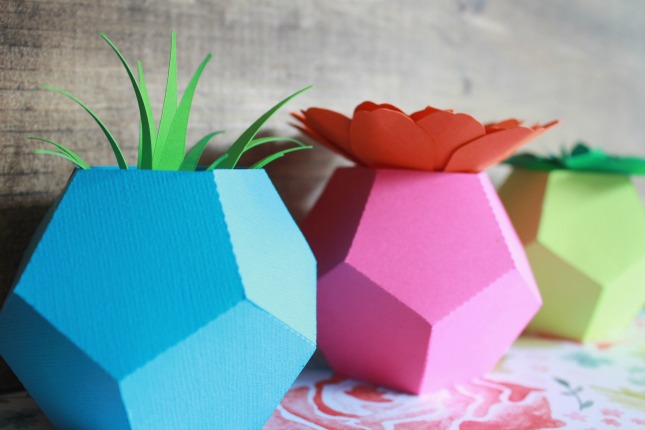
Hi crafty friends! Silhouette ModelMaker™ is Silhouette’s newest software that was released last month! It is an amazing software that is used to teach students about design, math, architecture, and so much more. It is also a fun software for crafty folks like you (and me!) to create unique and modern geometric projects. Today I am going to show you how to make a super simple and modern mini planter to add a pop of color and design to your home.
Things you will need:
- Silhouette ModelMaker™ software
- Silhouette CAMEO® machine
- Cardstock
- Glue
Step One: Designing Your Shape In The Silhouette ModelMaker™
In the ‘preferences’ tab, you find a drop-down menu that has a ton of options to customize the tools available for use in the software. The first thing I noticed was the software was pre-set to centimeters. I wanted it to be in inches so I adjusted it in the software and clicked ‘OK.’ Now every time I open the software it will be set to inches. I left all of the other settings the same but feel free to play around with the settings and adjust accordingly. The preferences menu is very easy to navigate!
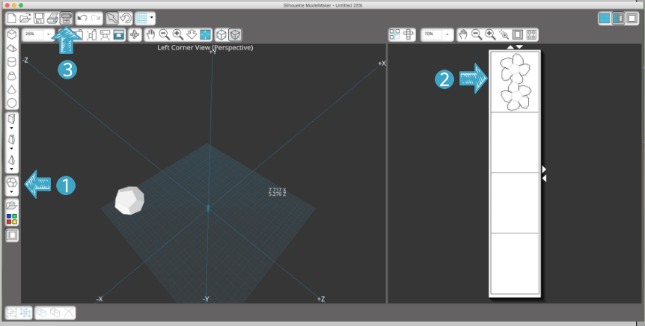
Above is a screenshot of the overall look of the software. The split part on the right of the screen is called the output window and the part on the left where the grid is shown is called the edit window. The edit window is where you draw and create all of the shapes in its true geometric form and the output window shows the design in its 2D form in which it will be cut.
For the planters, I decided to use a dodecahedron shape (12 sides) because I loved the way all the sides gave the mini planters an instant modern look.
In order to access the dodecahedron shape, click on the shape icon as shown with the label 1 below and click on the ‘dodecahedron’ tab when the dropdown menu appears. You will now be able to simply drag your mouse across the grid on the edit window. Drag until you have the size shape that you want. I chose to make my planters just big enough to fit on one page, as shown in the output window above in label 2.
Step Two: Cutting Your Shapes
Like with all new software, icons can be a bit tricky to navigate in the beginning. I admit I had a hard time finding the simple ‘cut’ button during my first go around. Therefore, I have circled the ‘cut’ option above for you so look no further!
For a great tool to help you navigate and learn all of the amazing things that Silhouette ModelMaker™ can do, check out the entire software manual that comes with the software here.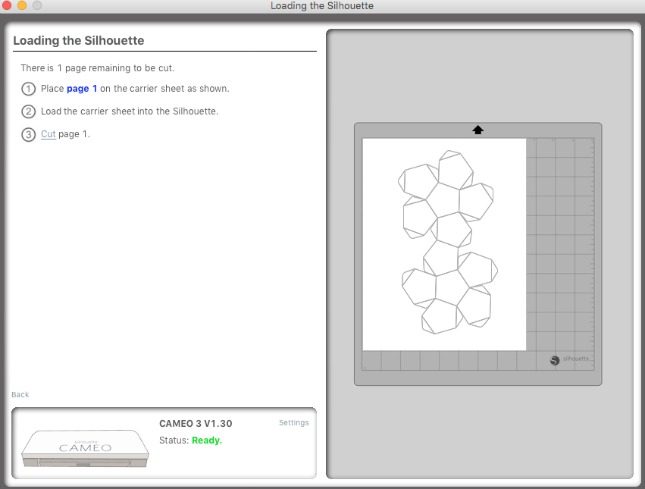
Once you click on the cut button, you will be directed to the cut window. This window shows you where to apply your materials on your mat, so that they cut properly. Be sure to turn your machine on and once you do, it will automatically connect and show a status of ‘ready’ in the bottom box area. Once you have placed your cardstock on the mat, you can load it into your machine and watch the magic happen. One of my favorite features about Silhouette ModelMaker™ is that the software automatically places the perforation marks for you so that you can easily fold and assemble your project.
*Note* Silhouette ModelMaker™ software has the cut settings pre-set for cutting cardstock. If you are cutting another material like chipboard, you will need to adjust the settings manually by clicking in the settings option in the bottom box.
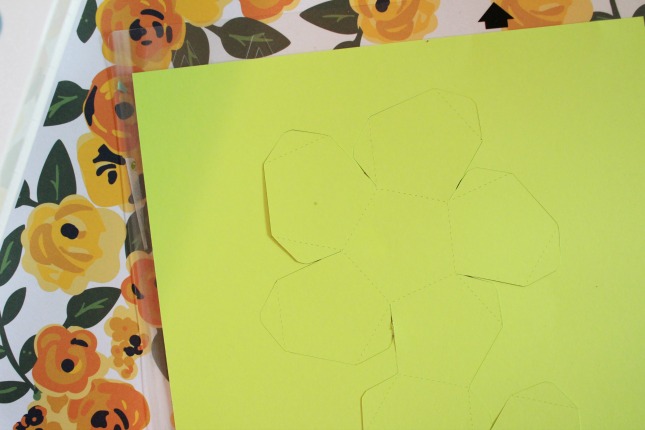
It is hard to capture on camera, but if you look closely, you will see all of the perforated lines on the shape.
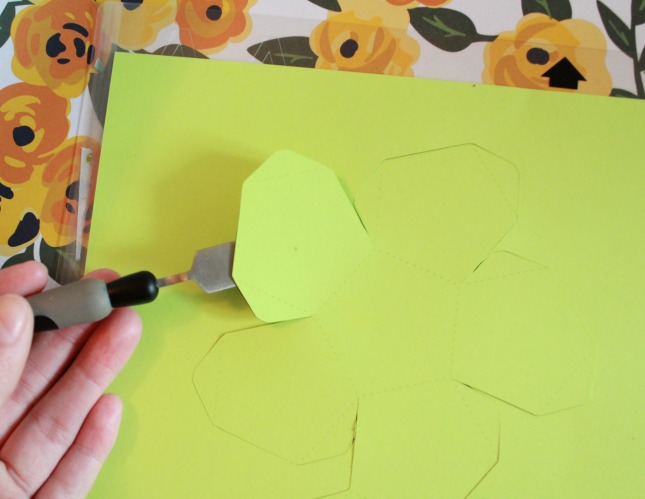
Carefully lift the planter 2D shape out with your spatula tool.
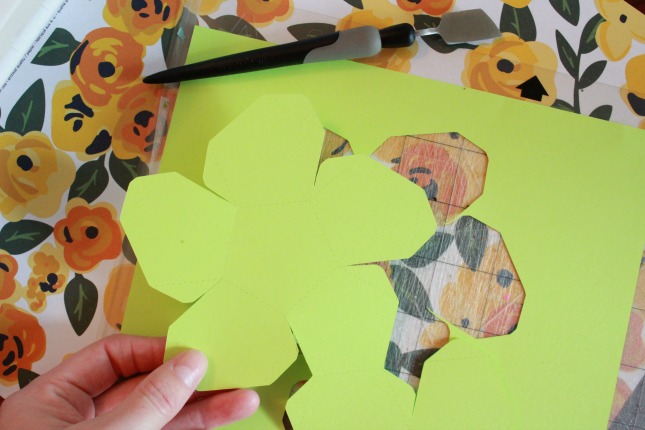
Here is what the design looks like when cut.
Step Three: Assemble Your Planters And Add Your Faux Plants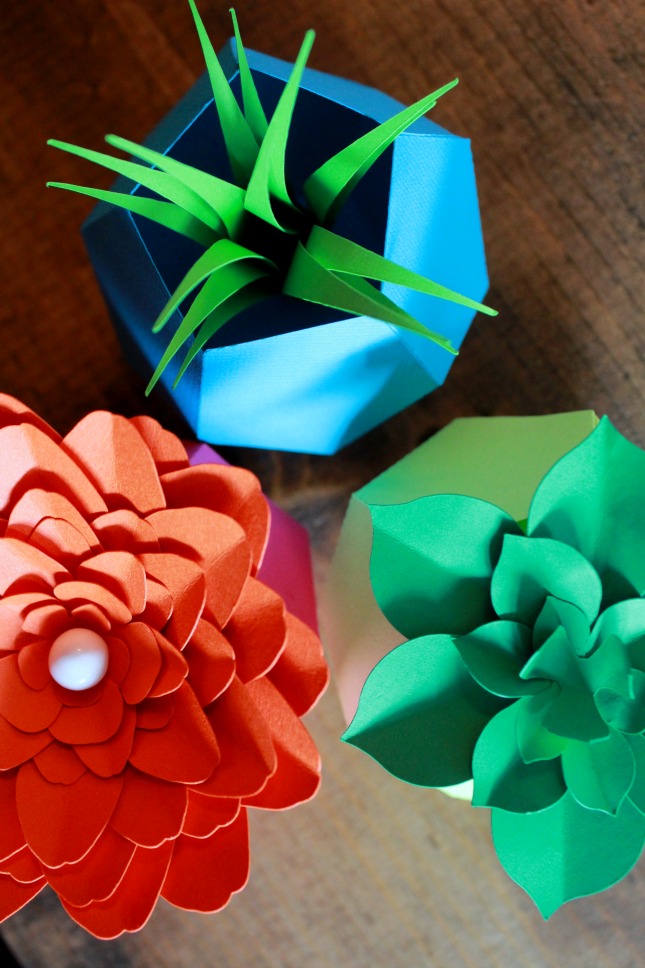
Simply fold all of your perforated pieces and start gluing each corresponding corner and edge to one another. It may seem complicated, but I promise it is very easy and comes together seamlessly like a perfect puzzle. I like to use a quick-dry tacky glue to adhere my sides together quickly.
One you are at the last ‘top’, cut off the top so that you have an opening like a vase.

Create some faux paper plants to add to your planters. I love how realistic these faux plants look. And the best part is, you can’t kill a paper plant . . . win!
The possibilities are endless with Silhouette ModelMaker™. The more I played with the software the more I realized how cool it was! This is a simple beginner tutorial, but it is possible to create very intricate and precise designs like city/street views, room layouts, car models, and so much more. Have fun and as always, happy crafting!
Kelly Wayment
March 29, 2017
I love these planters, Connie! That’s clever to simply cut the top flap off to leave it open instead of a closed shape. 🙂
Connie Wilson
March 30, 2017
Thank you so much Kelly 🙂
Judy Howell
June 29, 2017
How fun is this project!! I am new to Silhouette, but I already have purchased a Cameo and a Curio. I am currently on vacation, so although I am temporarily unable to use my machines, I am taking an hour here and there to learn all about them, so when I return home, I can jump right in! Thanks so much for making your tutorials so easy to understand. I look forward to many hours of crafting. — “Gramma Owl” in Washington State