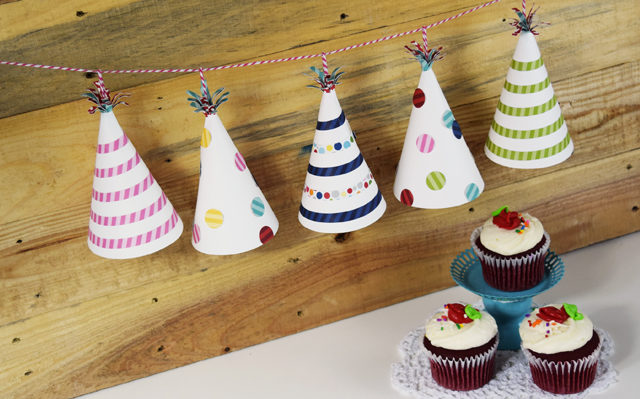
Who doesn’t love a party? I know I do. I created a party hat banner with my Silhouette CAMEO®. I love the versatility of this banner, and it is so easy to create with this cut file. It can be used for parties of all kinds: birthdays, graduations, good luck, and even farewell parties.
Gathering supplies for a fun project like this is something that I always look forward to. I love searching through pretty paper and finding the perfect supplies for my project. To make a party hat banner like mine—
You Will Need:
- Silhouette CAMEO® (or Silhouette Portrait®, or Silhouette Curio™)
- Silhouette Studio®
- White cardstock
- Patterned paper (or Silhouette Adhesive Cardstock)
- Glue or other adhesive (if you’re using Silhouette Adhesive Cardstock, you can skip this!)
- Bakers twine (I chose hot pink!)
Step One: Open Design in Silhouette Studio®
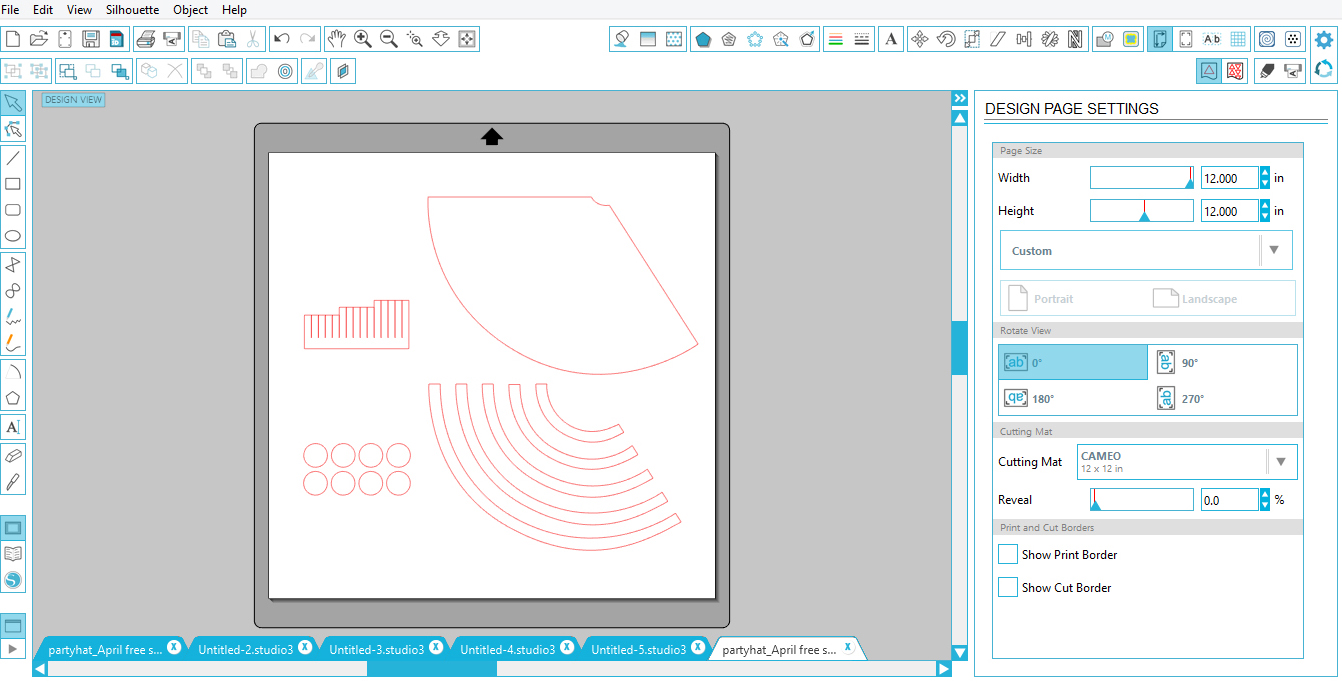
(1) Open the design file in Silhouette Studio®.
If you want bigger or smaller party hats, you can resize the design on your white workspace. When I did this, I left everything in the original size. This is the perfect size for the party hats to make an adorable banner!
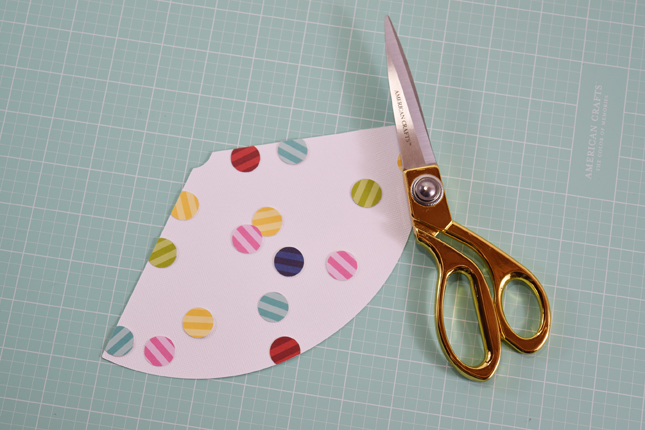
Step Two: Cut It
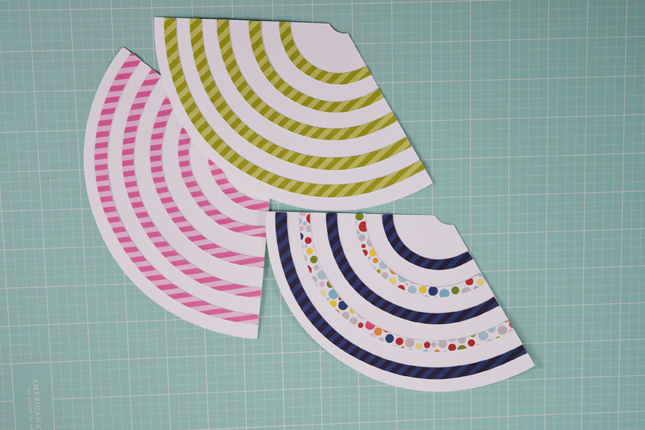
(1) Adhere your colored paper (or adhesive cardstock) to your cutting mat.
(2) Move shapes not being cut out off the white workspace and onto the gray holding area. (Only the stripes and dots should be on the active cut space, shown by the red bounding box below.)
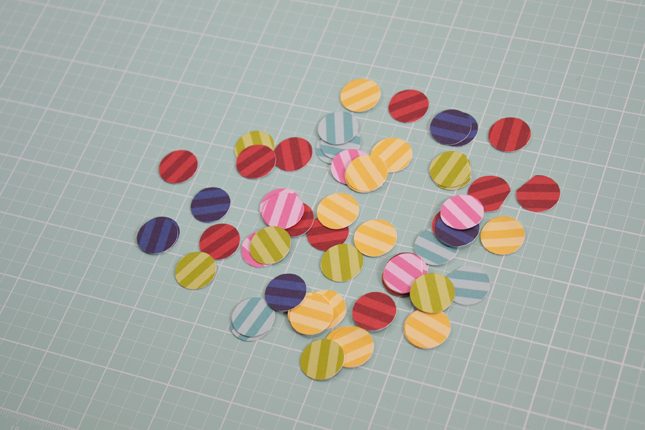
I may have gone a little overboard with the polka dots. Who doesn’t love polka dots?
(3) Repeat this process for your stripes and your fringe. Try fun combinations of paper and pattern to create different effects.
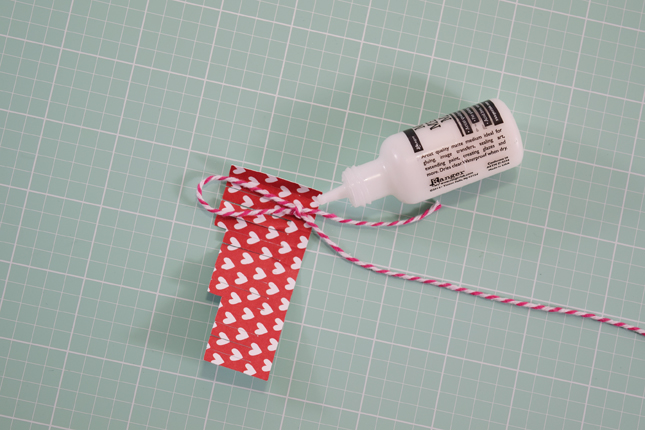
Step Three: Add Some Fringe
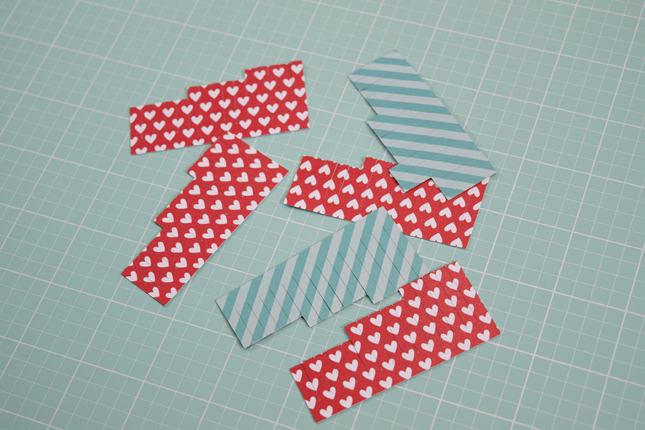
For the fringe at the top of the party hats I chose a piece of paper that had a fun pattern on both sides because both sides of the pattern would be showing.
Step Four: Make It Stick
When I adhered the stripes and polka dots to the base of the hat I did so with a strong liquid adhesive. I wanted to make sure that all the decorative pieces stayed attached to the hat when I assembled them.
If you’re using adhesive cardstock, you can skip the gluing part and get straight to the sticking part! All it takes is one kisscut and you’re ready to stick your stripes and polka dots on like giant, textured stickers.
A kisscut is what we call a cut that only affects the first layer of a lined media like heat transfer or, in this case, adhesive cardstock. The CAMEO and Portrait’s precise cutting ability makes cutting long stretches of lined media (large vinyl wall decals, anyone?) really easy. You can also use Curio to cut smaller pieces of lined media, like the adhesive cardstock.
And did you know that Silhouette cardstock also comes in double-sided adhesive as well? You can add embellishments, like glitter, without ever having to break out a glue stick. Nifty, right?
Step Five: Trim It
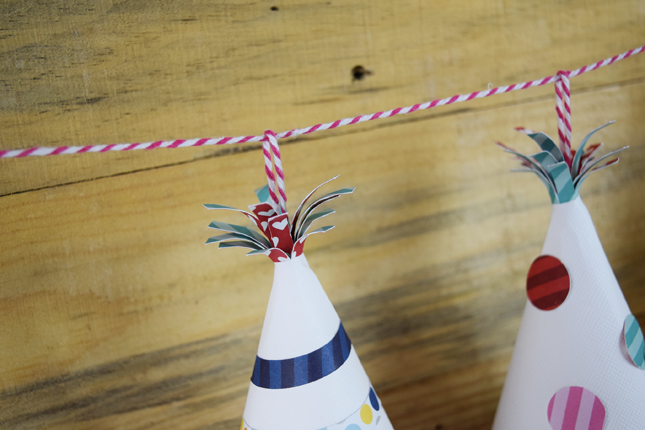
To hang the party hats into a banner shape I tied a knot in the end of the twine to make a loop (you’ll need to do this for each party hat you create, I created five).

Step Six: Glue It
Then, I glued the loop into the fringe of the twine. Once again, I used a strong liquid adhesive. You want to make sure that this loop is very secure because the party hat will be hanging from this loop. Once the adhesive is dry roll the paper around the knot tightly.
When the fringe is glued into the hat, it’s time to start assembling the party hats into a banner. This is the best part of this project. When the party hats are assembled with the loops in the fringe, you’re ready to put the banner together.
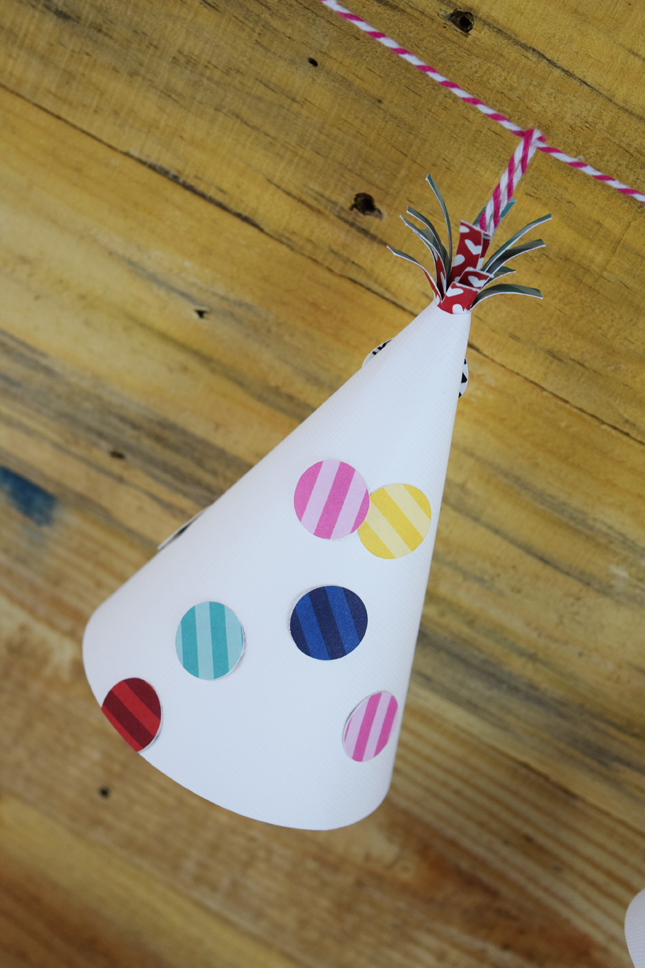
The finished banner is so colorful and happy. When you have the party hats put together on the banner, tousle the fringe a little bit.
Each party hat is unique with it’s own colors. I love how this project came together.

Next time you have a party, you’ll be ready with a party hat banner. Make sure to save this unique and versatile party hat banner for many parties to come.
Kelly Wayment
April 5, 2016
These are so cute! I love all the polka dots and stripes.
Alissa Lines
April 6, 2016
Super Cute! I love all of the vibrant colors! I also love that I can use some old scraps to make something so fun.
Annie W
April 6, 2016
Love how you used the free shape…it’s adorable!
Kelly@kammdesigns.com
April 7, 2016
Perfect timing as my grandson’s birthday is coming up soon. They’re so adorable! Thank you for sharing.