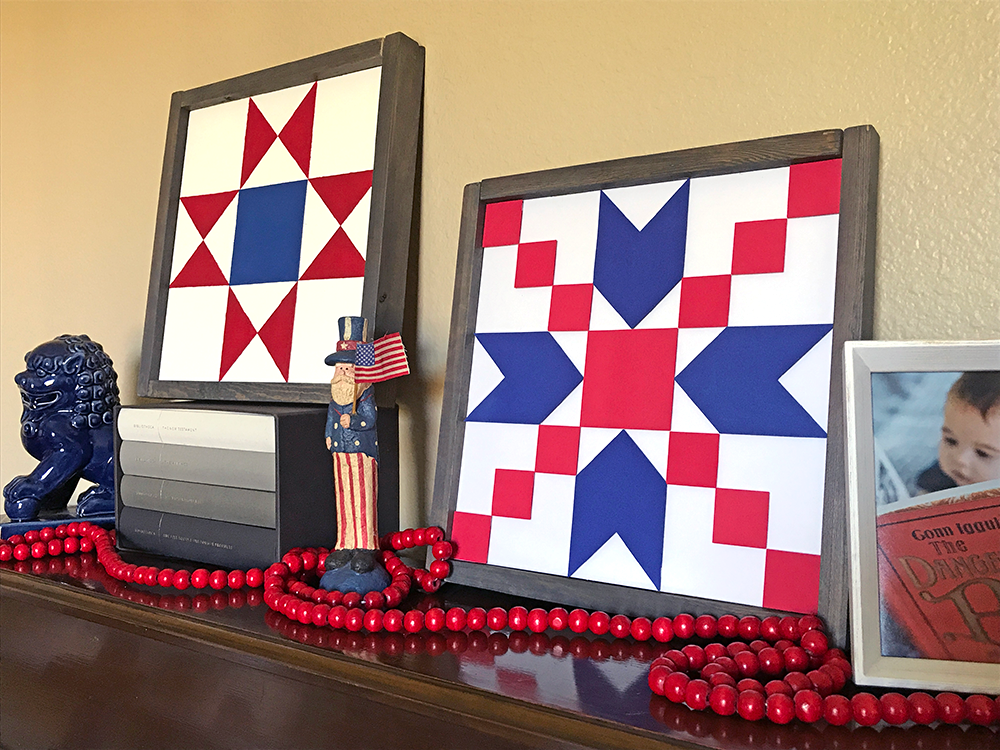
You guys, have you noticed wooden barn quilts taking over the world of home décor? They are absolutely gorgeous and, in my opinion, nothing looks more Americana! While I don’t have a barn to hang these beauties, I thought they would look just as great as indoor patriotic home décor. This tutorial shows you how to make them two ways: with paper (because I am a paper hoarder fanatic) and with paint.
First Way: Paper
You Will Need:
- Silhouette CAMEO® or Portrait®
- Cutting Mat
- One 12in x 12in cardstock in white
- One 12in x 12in craft (birch) plywood available at your local craft store
- Pencil
- Ruler
- Cardstock in red and blue
- Dimensional foam adhesives
- Permanent tape runner
- Wood glue
- Wood stain
- Clean rag/cloth for staining
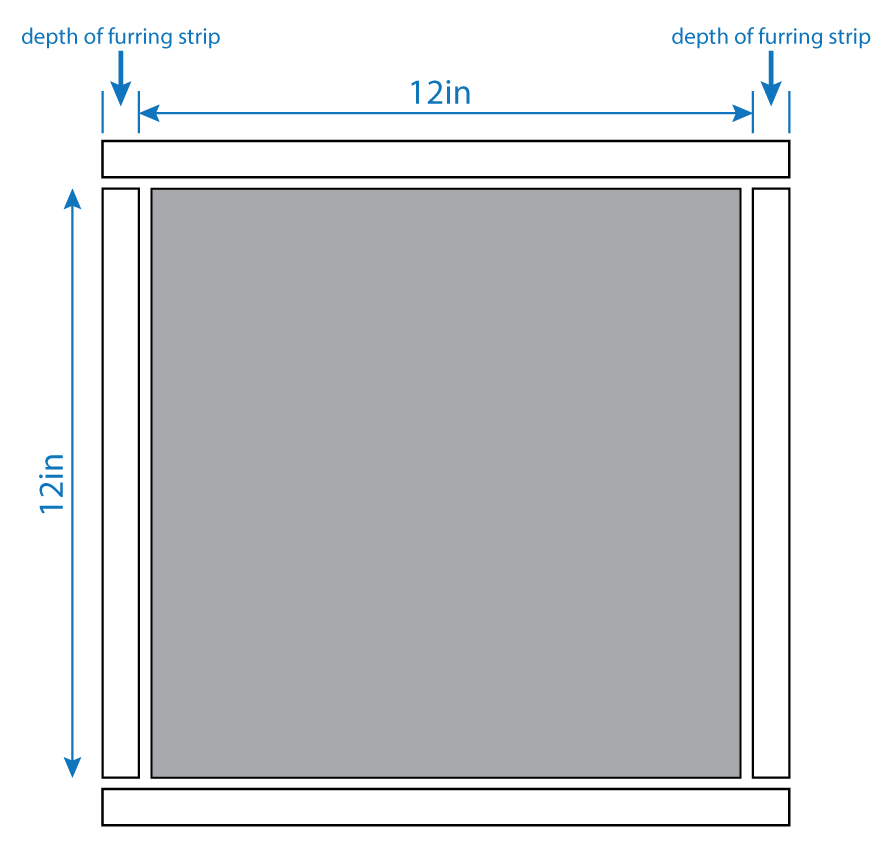
- Furring strips cut into four pieces. Two 12-inches-long pieces for the sides of the sign. The other pair will be 12-inches-long plus the depth of two furring strips for the top/bottom of the sign. See sketch below
Step one: Create your shapes in Silhouette Studio®
Barn quilt patterns have an even number of “blocks” across and down. I created mine using eight “blocks” with each block measuring 1.5in x 1.5in.
To create the barn quilt pattern seen here, create the following shapes:
- 1.5in square
- 3in square
- 3in x 4.5in arrow
- To create this shape, first start with a 3in x 4.5in rectangle.
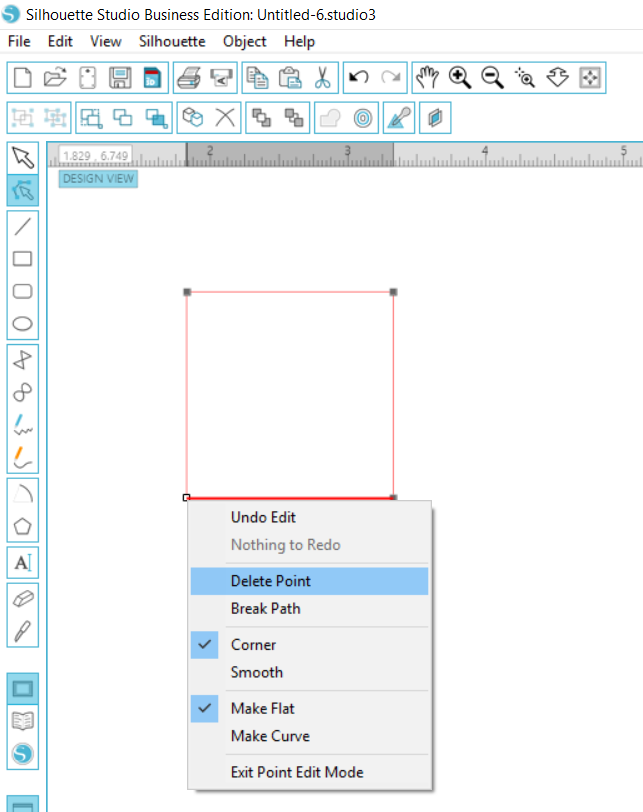
- Create a 1.5in triangle by taking a 1.5in square, right click and select Edit Points and delete one of the corner anchor points.
- Put one 1.5in triangle at the top corner of the rectangle and use the align function to make edges match the top and side edges of the rectangle.
- Mirror image the 1.5in triangle and set at the other top corner.
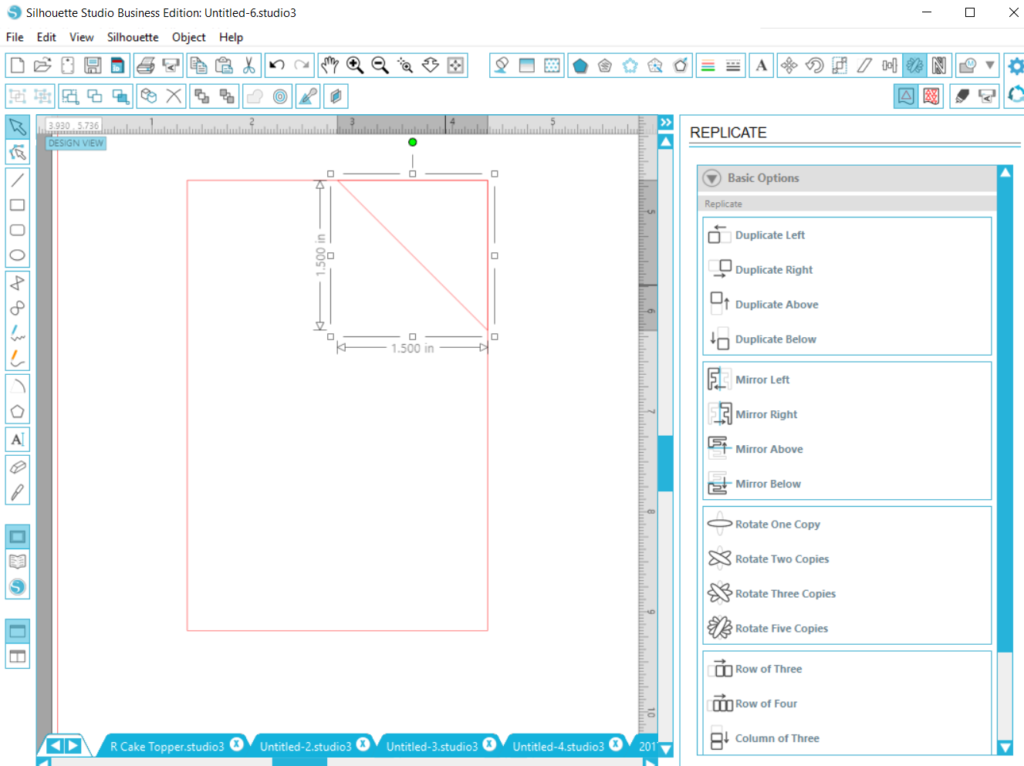
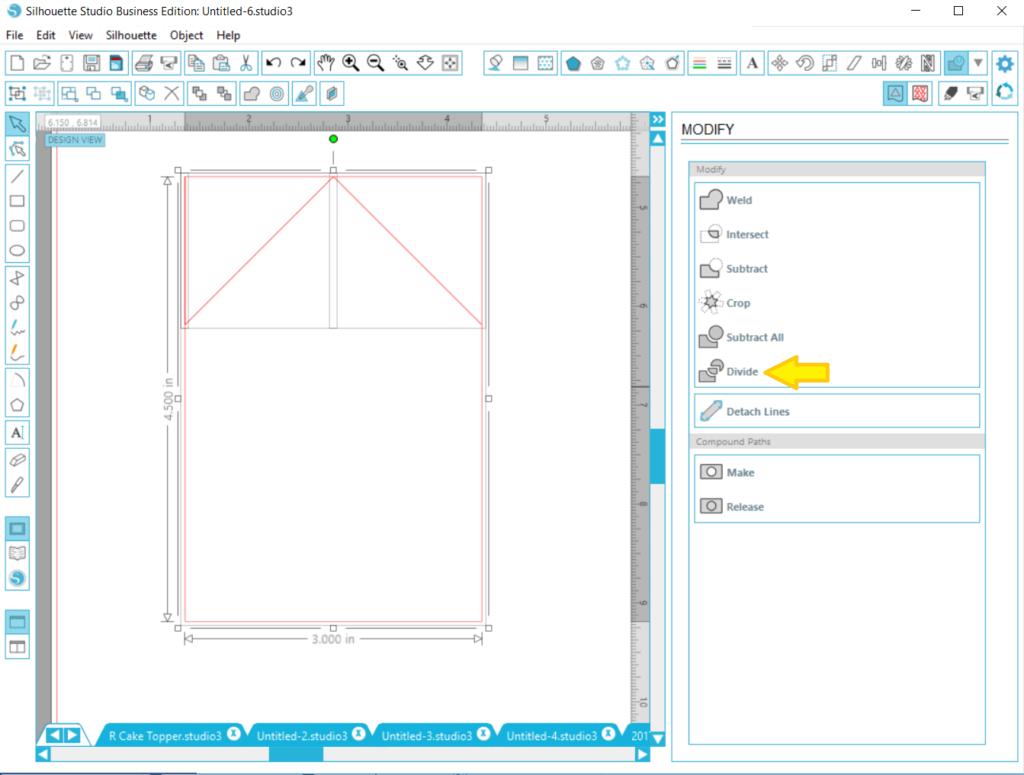
- With the two 1.5in triangles correctly aligned at the top of the rectangle, choose Divide in the Modify Window. This will “divide” all the pieces that overlap into individual pieces. After this step, simply delete the pieces you don’t need until you get the pointed arrow at the top of your rectangle.
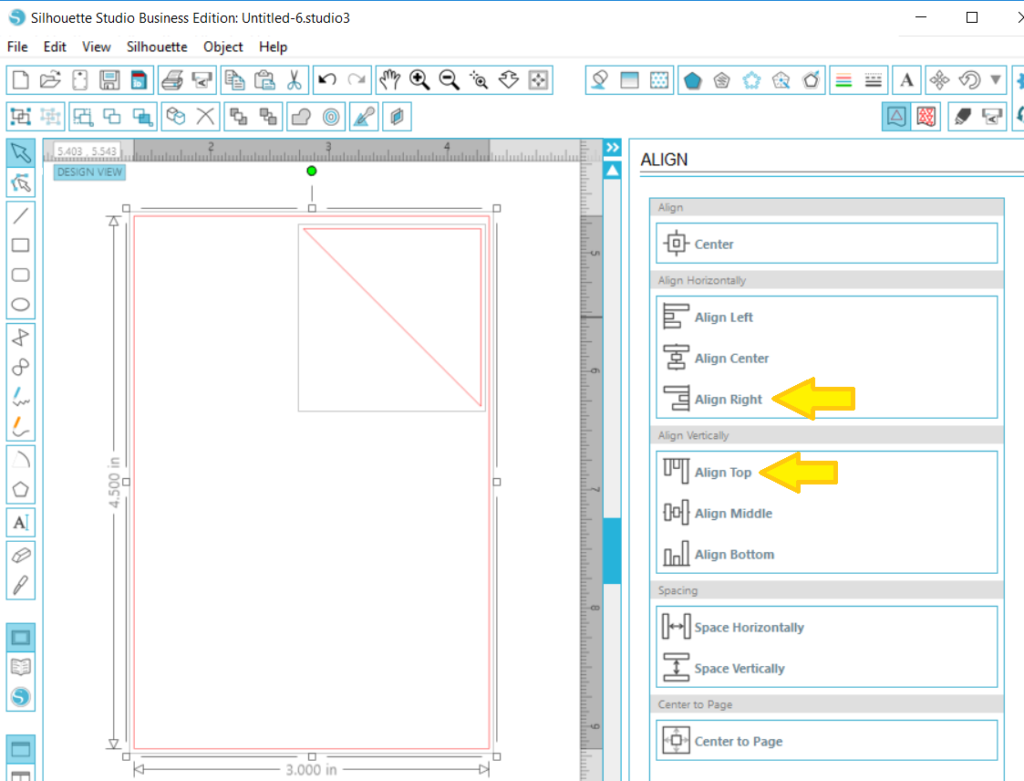
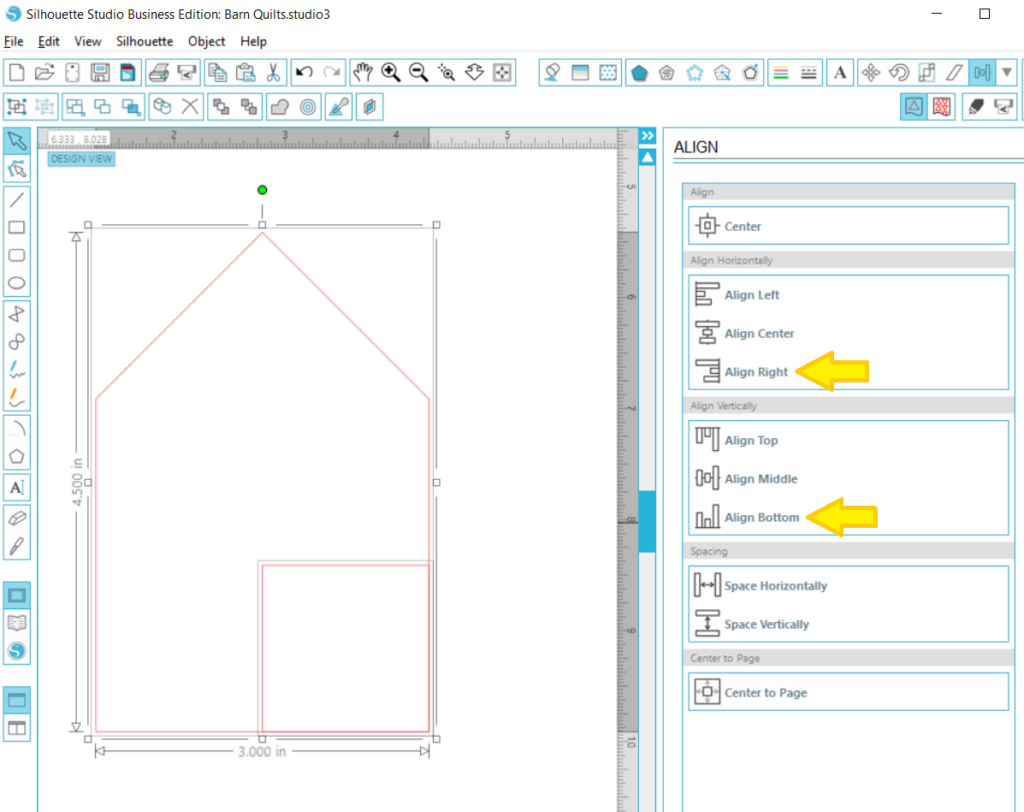
- Now, for the bottom of the rectangle, start by placing a 1.5in square at the bottom right corner of your rectangle. Again, use the Align Right and Align Bottom functions in the Align Window.
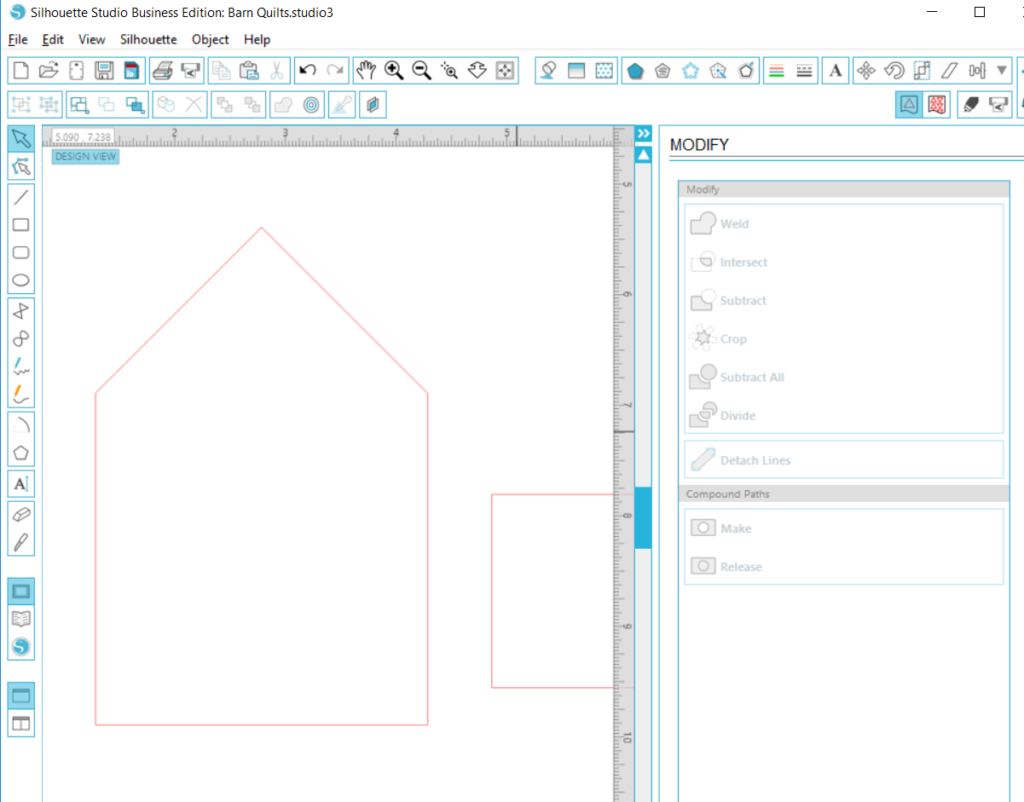
- Right click on your rectangle and choose Edit Points.
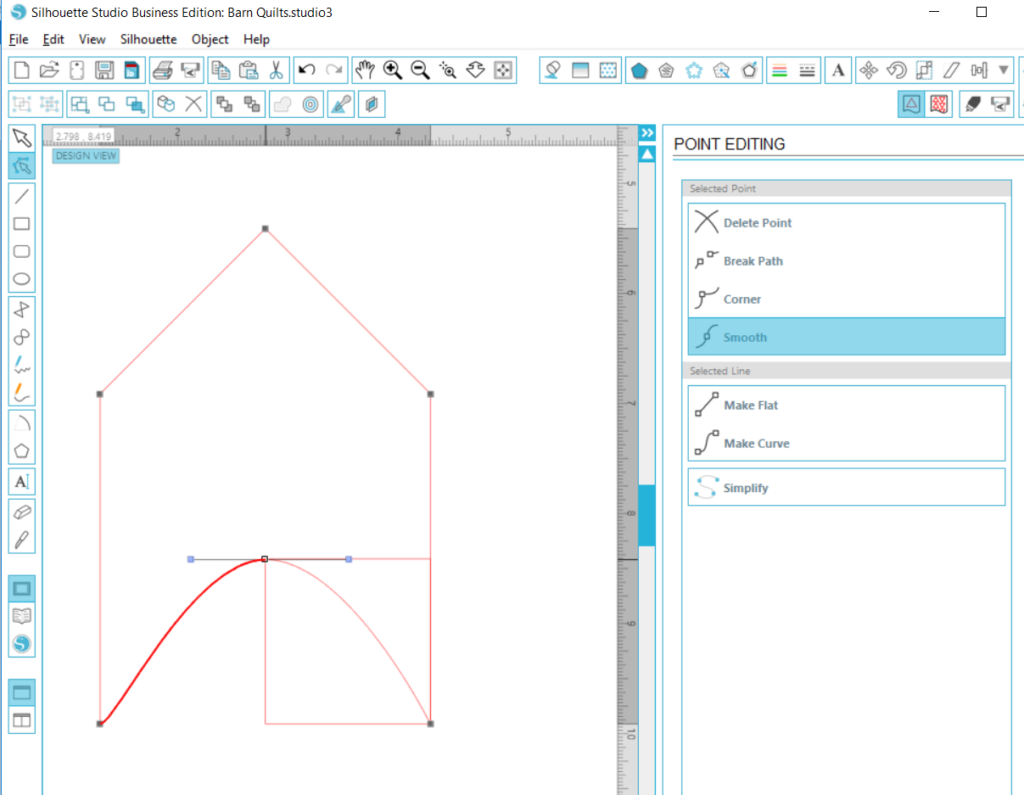
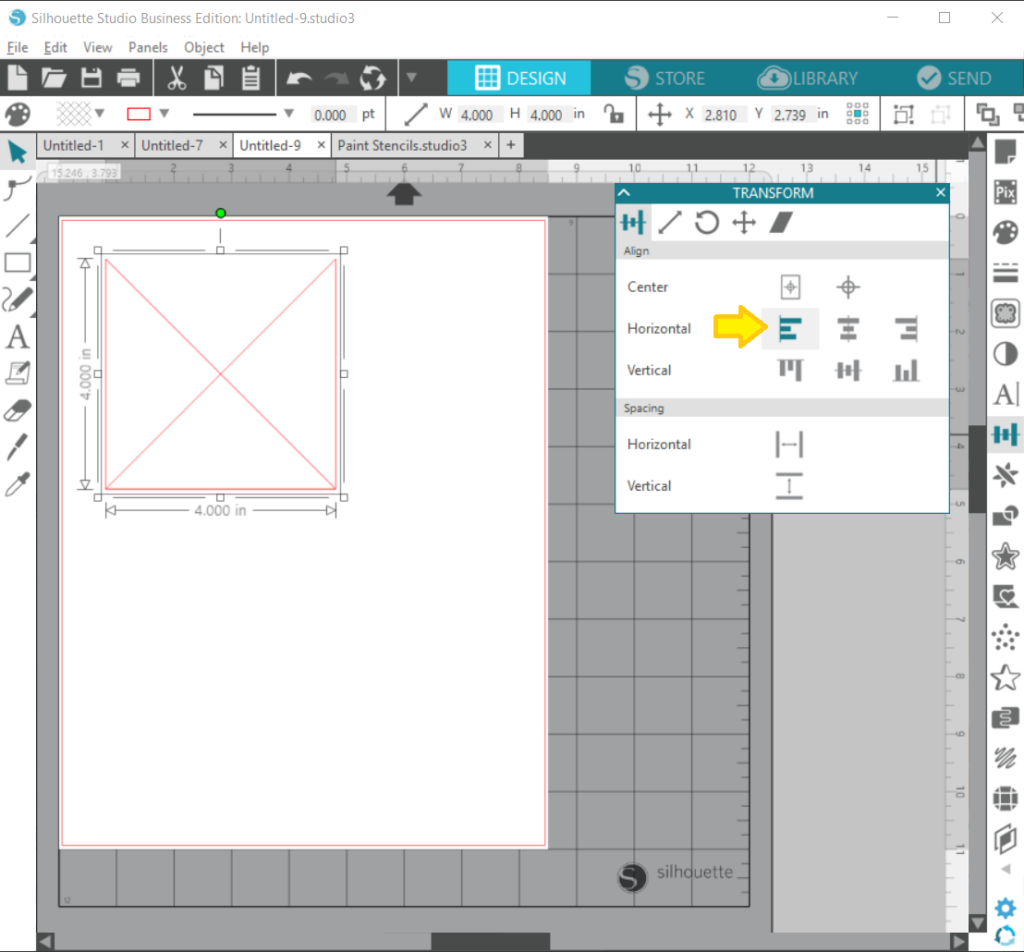
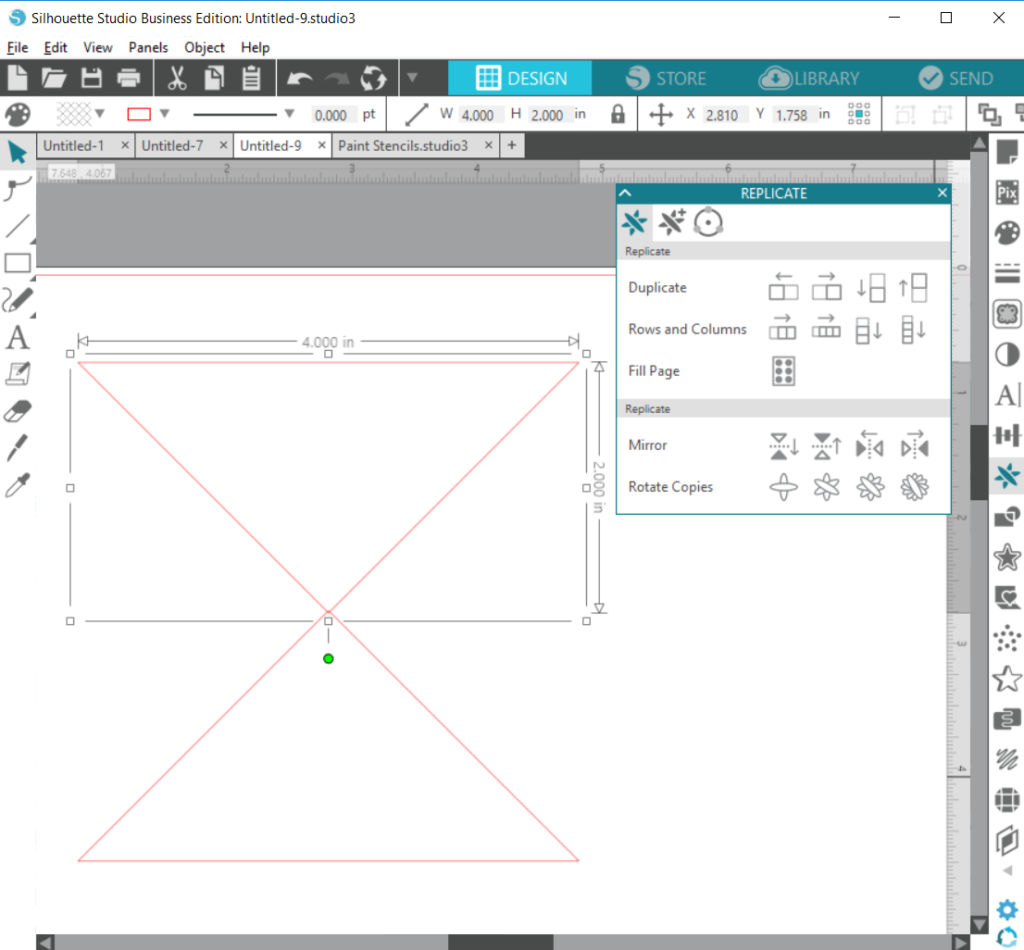
- Click and hold down where the bottom left of the 1.5in square meets the bottom of the rectangle (see yellow arrow on first screenshot) to add a (mid)point. While holding down your mouse, move this point to meet the top left of your 1.5in square (see yellow circle on first screenshot). You should now see a curve on the bottom of the rectangle (see second screenshot).

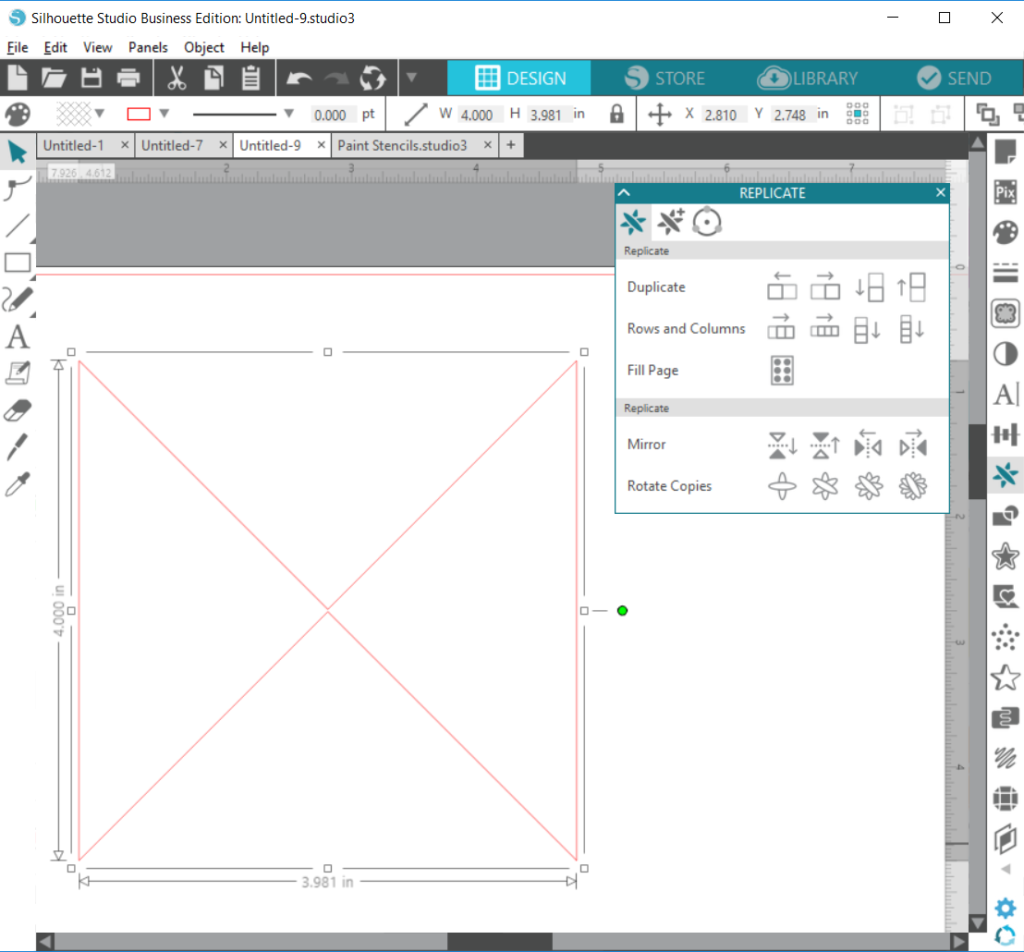
- Next, right click and choose Make Flat to remove the curvature.
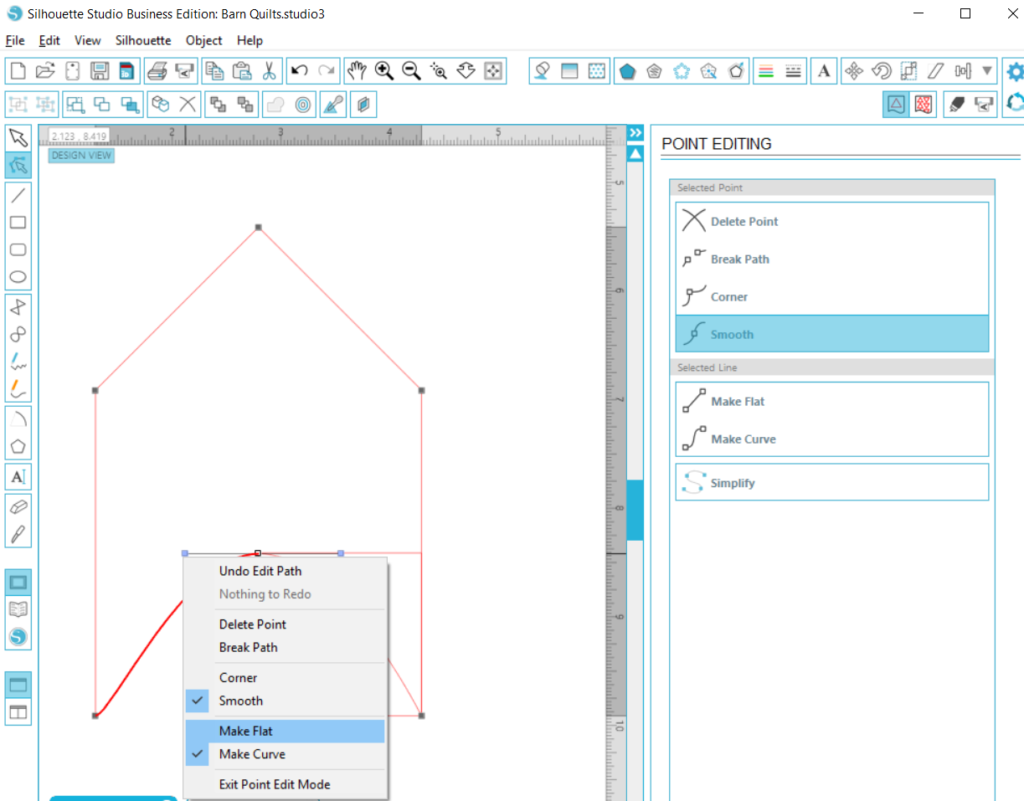
- You have successfully made the 3in x 4.5in arrow shape!
Step two: Cut
Cut your shapes on appropriately-colored cardstock. Make sure you have the correct number of shapes needed for each shape and color. For this particular quilt pattern, I used four 3in x 4.5in arrows, one 3in piece, and twelve 1.5in pieces.
Once cut, carefully peel from cutting mat so that paper doesn’t curl. If it does, no big deal: just gently curl it the other way and/or flatten it under something heavy like books.
Step three: Assemble
First, with a pencil and ruler, lightly create a grid of dots spaced one inch apart on your 12in x 12in white cardstock.
Then, use the permanent tape runner to adhere the 12in x 12in white cardstock to one of the 12in x 12in craft plywood. With clean hands/fingers, press down evenly to make sure there are no bubbles. This is the background of your barn quilt block.
Next, lay out your red and blue cardstock shapes to make sure you have all the pieces you need.
Lastly, put dimensional foam adhesives on the back of each piece and adhere it to the 12in x 12in white cardstock at the appropriate spot to match the quilt block design.
Step four: Frame
Rub stain onto your frame pieces with a rag/cloth. Follow instructions on the stain can. For my project, I applied two coats of stain.
Once you are happy with your stained frame pieces, glue them to your sign and let wood glue dry.
Second Way – Painted
You Will Need:
- Silhouette CAMEO® or Portrait®
- Cutting Mat
- Silhouette Stencil Material
- One 12in x 12in craft (birch) plywood available at your local craft store
- Pencil
- Ruler
- Acrylic paint in red, white, and blue
- Foam brushes
- Wood glue
- Wood stain
- Clean rag/cloth for staining
- Furring strips cut into four pieces. Two 12-inches-long pieces for the sides of the sign. The other pair will be 12-inches-long plus the depth of two furring strips for the top/bottom of the sign. See sketch shown in First Way – Paper.
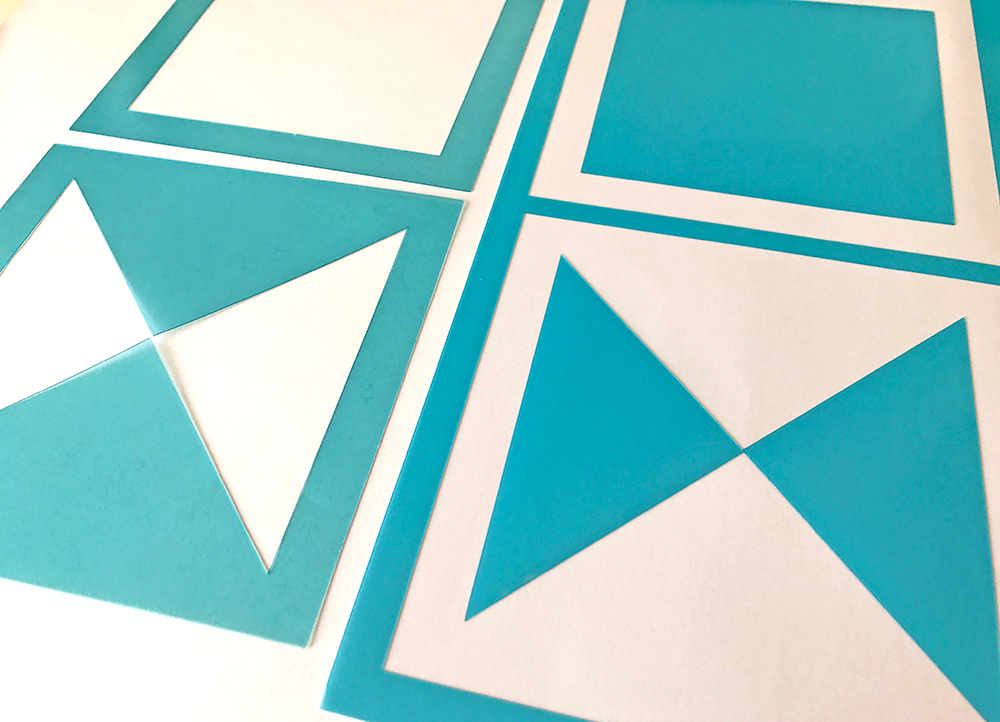
Step one: Create your stencils in Silhouette Studio®
Barn quilt patterns have an even number of “blocks” across and down. The one I created is called “Ohio Star” and it uses three “blocks” with each block measuring 4in x 4in.
To create the barn quilt pattern seen here, create the following two stencil shapes in Silhouette Studio ®:
4” square stencil:
- Create a 4in square.
- Go to Offset Window and select Offset. Next, enter 1in for Offset Distance, choose Sharp Corners, then click Apply.

Double triangle stencil:
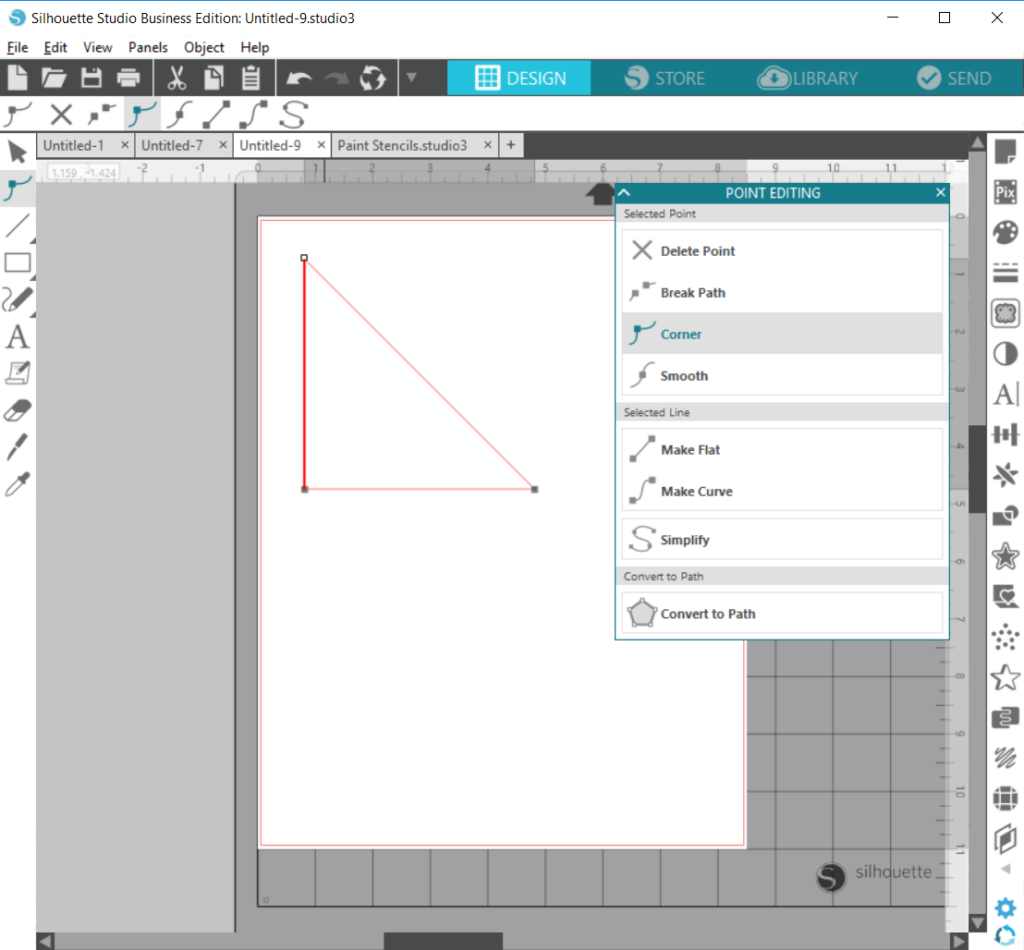
- Create a 4in square.
- Right click on the square, select Edit Points, and delete the top right anchor point. You should now have a triangle.
- Click on triangle, go to Replicate Window, and select Mirror Right.
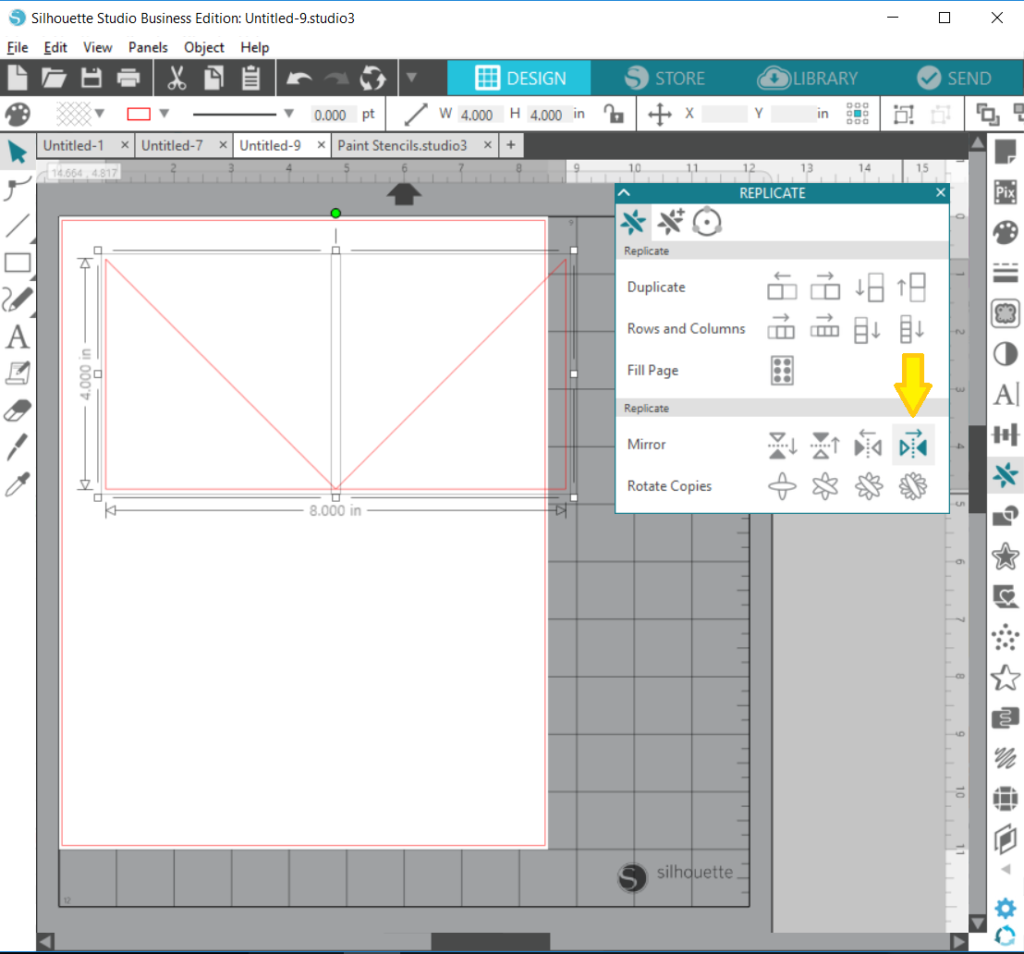
- Select both triangles and Align Left in the Transform Window. Now your two triangles should be overlapping.
- With both triangles selected, choose Intersect in the Modify Window to retain the overlapping bottom triangle.
- Then, replicate this triangle by Mirror Up.
- Click on the top triangle and nudge it down two times with the down arrow key so that the two triangles barely overlap.
- With both triangles selected, choose Weld in the Modify Window. Then, rotate the “bowtie” 90 degrees clockwise so that it is now sideways.
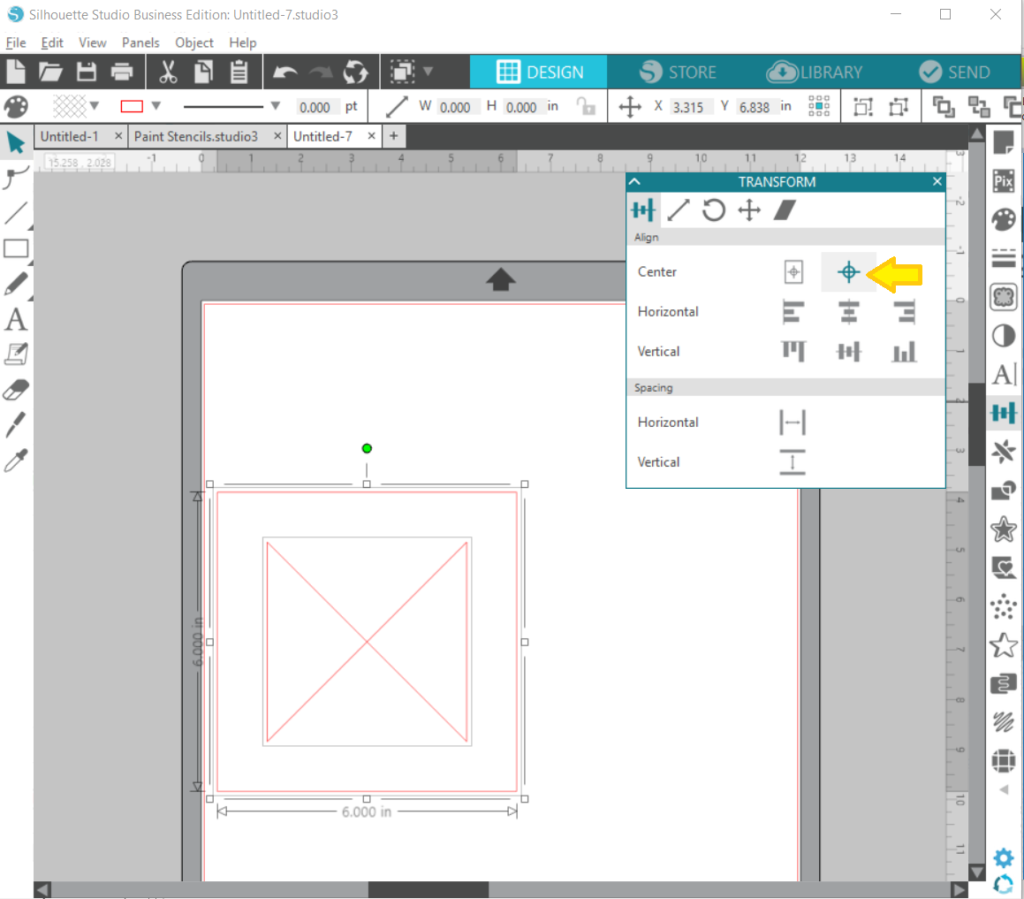
- Next, create a 6in square.
- Select all items and choose Center Selections in the Transform Window
Step two: Send to Silhouette
Luckily, both stencil pieces fit a 8.5in x 11in Stencil Material sheet. I try to maximize the material’s surface area so that I’m not wasting a lot of material. Send to Silhouette with the correct cut settings. TIP: I recommend Double Cut to ensure stencil material is completely cut through.
Step three: Setup and Paint
First, paint your entire 12in x 12in craft plywood surface with white paint and let dry. NOTE: You may need to paint more than once to achieve the coverage you want.
Once dried, use a pencil and ruler to lightly mark a grid pattern with 3in intervals across and down. This will help us know where to place the stencils.
Then, I used the double triangles stencil to paint the “3in blocks” (that are above, below, right of, and left of the middle “4in block”) in red and let dry.
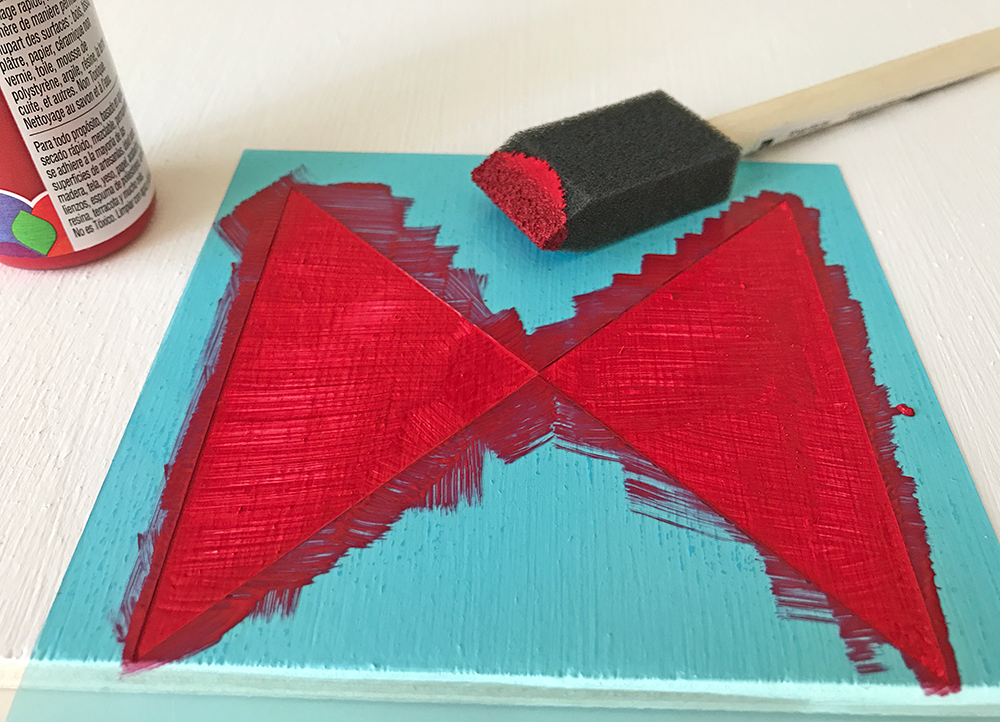
Lastly, set the 4in square quilt stencil in the middle and paint the inside with blue paint. Let dry.
Step four: Frame
See Step four from above (First Way – Paper).
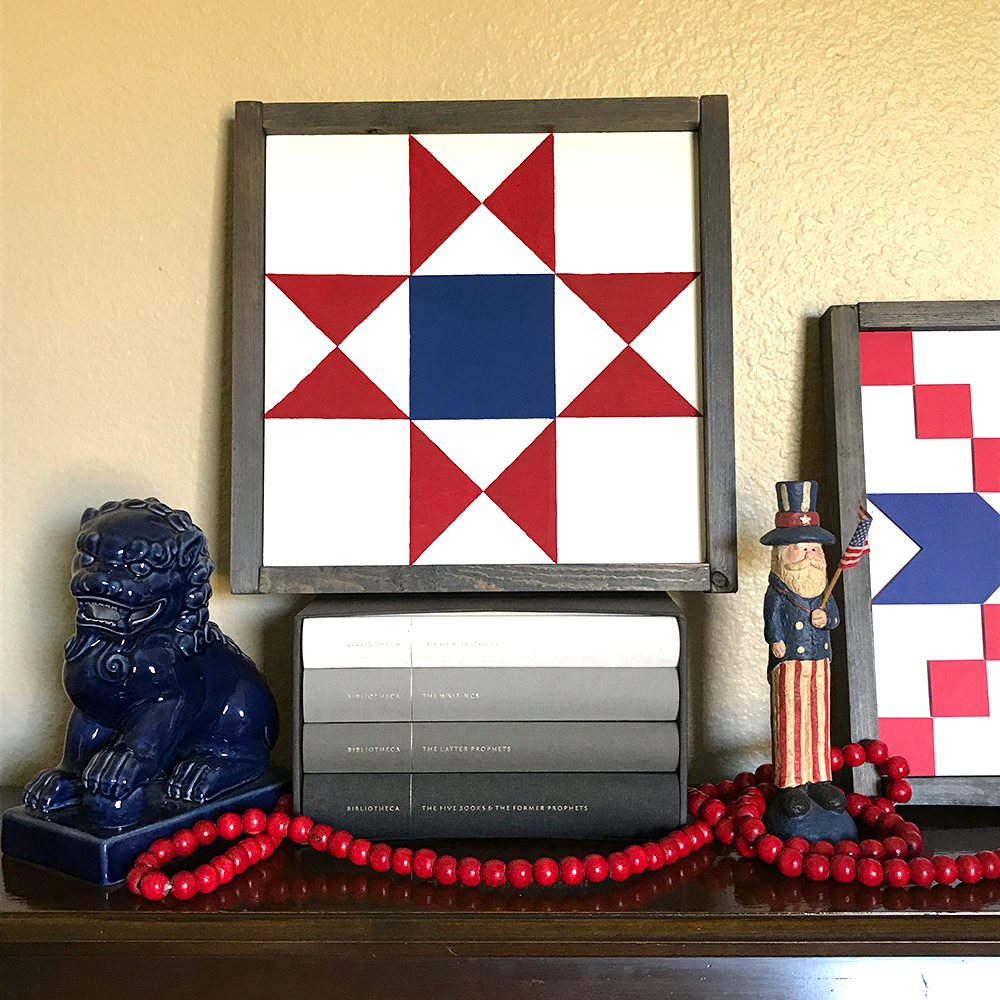
There you have it! Two different ways to create beautiful and patriotic home decor with the help of your Silhouette cutting machine! How are you decorating your home for the Fourth of July?