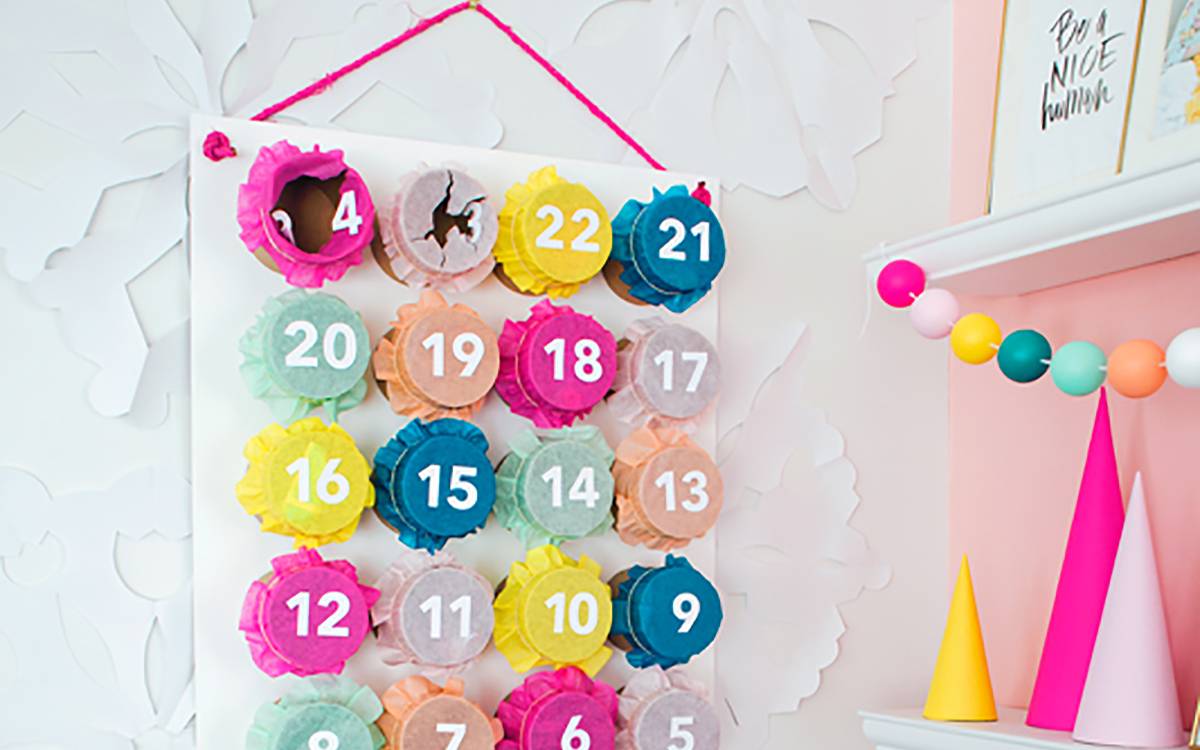
It’s probably too late to craft up this advent calendar goodness THIS year, but definitely pin it for NEXT Christmas! Or craft it up now, and your little ones can punch out more than one day, and then you’re all ready for next year! But I guarantee kiddos (and adults for that matter) will love punching out little treats and tiny knickknacks all December long!
Supplies Needed:
- Silhouette CAMEO® or Silhouette Portrait® or Silhouette Curio™
- Silhouette Cutting Mat
- Silhouette Blade
- Silhouette Studio®
- 12 x 12 Thick Kraft Paper
- White Card Stock
- Various Shades of Tissue Paper
- Rubber Bands
- Glue Gun
- Foam Board or Sheet of Wood
- Rope
- Drill
- Treats and Knickknacks
- Design ID #26759
Step One: Prep Your Design
Open Design ID #26759, and use only the cylinder and the circle for the bottom. You won’t need the lid of the box. I cut two boxes per sheet of paper. See the example below. 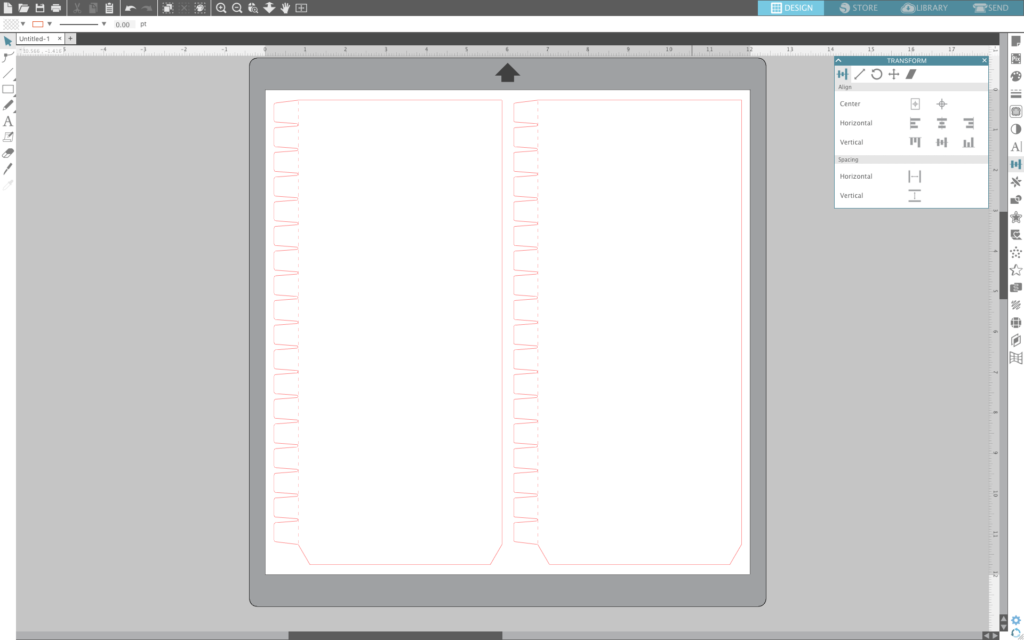
Step Two: Assemble The Boxes
Assemble the boxes by gluing the long tab to make the cylinder. Fold the short tabs in and glue them to the separate circle piece.
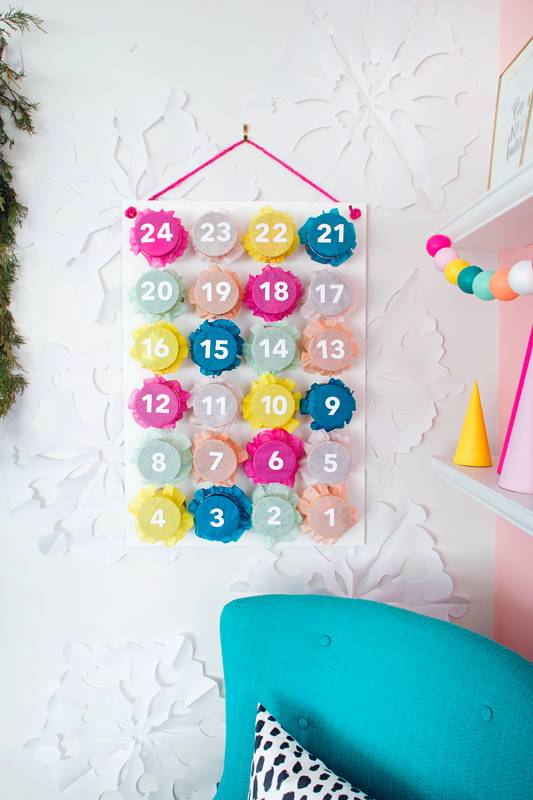
Step Three: Paint Your Back Piece
For the back of the advent calendar, I used a big sheet of wood and painted it white. But a simpler option would be white foam board. I just wanted my advent calendar to last years and years to come!
Step Four: Hang The Boxes
Using a hot glue gun, glue the boxes onto the board. To hang the board, I drilled two holes and painted some rope pink to match my color scheme.
Step Five: Add Tissue Paper
Cut round circles of tissue paper to go over the top of each box. You will attach the tissue paper circles over the boxes with a rubber band. But remember to fill each box with goodies before doing so!
Step Six: Cut Numbers
Cut numbers 1–24 using your Silhouette machine and lightly glue to the top of each tissue paper box.
Step Seven: Play Time
Hang the calendar and punch the holes! 
Our little babe has loved punching through a box each day this month so far. She even points to it during the day wanting extra punches. Sorry girl, only ONE punch a day! I also made the boxes big enough to not limit the treats inside. I was able to fit silly little knickknacks from the dollar store and BIG candy, like suckers—my baby’s favorite!